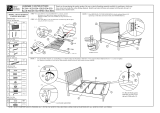
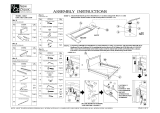
Pilaster Designs 678-60H allows for easy assembly of a queen-size headboard, footboard, and side rails. It includes all necessary hardware and detailed instructions for a straightforward setup process. The sturdy construction ensures durability, while the adjustable bottom leveler enables customization for optimal support. Please note that a Phillips screwdriver is required for assembly (not included).
Pilaster Designs 678-60H allows for easy assembly of a queen-size headboard, footboard, and side rails. It includes all necessary hardware and detailed instructions for a straightforward setup process. The sturdy construction ensures durability, while the adjustable bottom leveler enables customization for optimal support. Please note that a Phillips screwdriver is required for assembly (not included).


-
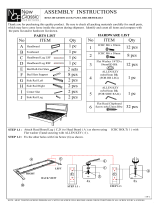
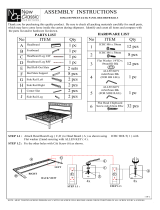
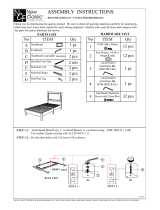
 1
1
-
 2
2


Pilaster Designs 678-60H allows for easy assembly of a queen-size headboard, footboard, and side rails. It includes all necessary hardware and detailed instructions for a straightforward setup process. The sturdy construction ensures durability, while the adjustable bottom leveler enables customization for optimal support. Please note that a Phillips screwdriver is required for assembly (not included).
Ask a question and I''ll find the answer in the document
Finding information in a document is now easier with AI
in other languages
Other documents
-
 New Classic FURNITURE Blue Ridge Assembly Instructions
-
Baxton Studio BBT6376 User manual
-
 New Classic FURNITURE GEMINI Installation guide
-
NCF B1562-100 User manual
-
NCF 315547 User manual
-
NCF 315533 User manual
-
 NCF 315543 User manual
-
NCF 315524 User manual
-
 New Classic FURNITURE GEMINI Installation guide
-
 New Classic FURNITURE Sapphire Installation guide


