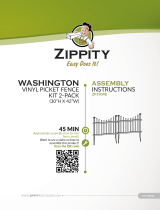
Zippity Keswick Vinyl Privacy Screen Kit Installation guide

Type
Installation guide

Zippity Keswick Vinyl Privacy Screen Kit is a quick and easy to assemble privacy solution for your backyard, patio, or garden. With its durable vinyl construction and stylish design, this kit is built to last and enhance the look of your outdoor space.

Each kit includes two 44 1/8”H x 42”W panels that can be easily connected to create a continuous privacy screen. The panels are made of high-quality vinyl that is weather-resistant and UV-protected, ensuring years of enjoyment.

Assembly is a breeze with the included instructions and takes approximately 60 minutes for two panels. The panels simply slide together and are secured with the provided screws. No special tools or skills are required.

WWW.ZIPPITY-OUTDOOR.COM
1
ASSEMBLY
INSTRUCTIONS ZP19060
WWW.ZIPPITY-OUTDOOR.COM
VER. 061422
ASSEMBLY
INSTRUCTIONS
ZP19060
KESWICK
VINYL PRIVACY
FENCE AND SCREEN


60 MIN
Approximate assembly me for 2 panels
Want to see a video on how to
assemble this product?
Scan the QR code
WWW.ZIPPITY-OUTDOOR.COM
2
ASSEMBLY
INSTRUCTIONS
ZP19060
kCheck the inside of the larger pieces in your box for other
materials packed inside.
k

k
unobstructed assembling.
k
components.
VISIT OUR WEBSITE FIRST,
SO WE CAN HELP YOU RIGHT AWAY!
Although great care has been taken to ensure proper packaging





parts.nychbrands.com

704-892-5222 / 877-234-6196
Customer service agents are available to take calls weekdays from 9am-
5pm EST. If you call outside of business hours, please leave a voicemail.

number ZP19060

stamped number on the inside of the box.

so
please give us a call at 704-892-5222 / 877-234-6196.


you will need to iniate the return from the
company you originally purchased from.
GENERAL
INFORMATION
MISSING
OR
DAMAGED
PARTS?
NEED
ASSEMBLY
HELP?
NEED TO
RETURN?
IMPORTANT
WWW.ZIPPITY-OUTDOOR.COM
3
ASSEMBLY
INSTRUCTIONS ZP19060
42 in
2 7/8 in
2 3/8 in
40 1/2 in
43 7/8 in
42 3/4 in
12 in
14
42 in
1
/
8
2 3/8 in
1. 32
WWW.ZIPPITY-OUTDOOR.COM
4
ASSEMBLY
INSTRUCTIONS
ZP19060
STEP 1:
LAY OUT MATERIALS
STEP 1.1
Check the inside of the larger
pieces in your box for other
aterials packed inside.
WWW.ZIPPITY-OUTDOOR.COM
5
ASSEMBLY
INSTRUCTIONS ZP19060
Middle Rail 

Right Post (2)

Board - Wide (6)

Board - Narrow (2)

Le Post (2)

End Rail 

Vercal Slat (20)

STEP 2:
LAY OUT MATERIALS
J
I
H
CA
E
FG
B
D
Ground Stake 

¾" Self-Drilling
Stainless Steel Screw
Zippity Joiner Clip    
K
Post Cap 
WWW.ZIPPITY-OUTDOOR.COM
6
ASSEMBLY
INSTRUCTIONS
ZP19060
STEP 4:
INSTALL BOARDS
STEP 4.1 1. (H)

2. (I) into the slot in the post.
3.  into the second

Preview
2
13
H
DI
STEP 3:
INSTALL GROUND STAKES
STEP 3.1
Preview
2
1
D
14 in
1. Insert (2) Ground Stakes (B)(D)
and the Right Post (E).
2. 

(K) 
on the posts.
K
B
E
WWW.ZIPPITY-OUTDOOR.COM
7
ASSEMBLY
INSTRUCTIONS ZP19060
1. (A) into the routed holes in the Middle
Rails (G).
2. (F)
3. 
STEP 2.2
2
13
Preview
G
A
F
STEP 5:
ASSEMBLE LATTICE TOP
STEP 5.1
NOTE: Middle rails will have picket holes on both sides.
STEP 6.1 1. 
2. 
holes in the post.
STEP 6:
ASSEMBLE PANELS
Preview
2
1
WWW.ZIPPITY-OUTDOOR.COM
8
ASSEMBLY
INSTRUCTIONS
ZP19060
1. , slide the routed

2. 
drilled holes in the right post.
STEP 6.2
Preview
NOTE: Ensure the boards and rails are inserted all the way
into the right post before driving the screws in.
2
1
STEP 7:
ASSEMBLE 
STEP 7.1 
WWW.ZIPPITY-OUTDOOR.COM
9
ASSEMBLY
INSTRUCTIONS ZP19060
1. 



posts.
2. 
push the panel
into the ground as
illustrated.
STEP 8.2
Step 7.2 is only to be completed if the ground is too hard.
1. L
illustrated.
2. 
3. 
gently hammer the post into the ground.
STEP 8:
INSTALL PANEL INTO GROUND
STEP 8.1 2
1
2
1
3
WWW.ZIPPITY-OUTDOOR.COM
10
ASSEMBLY
INSTRUCTIONS
ZP19060
STEP 9:
CONNECTING 
STEP 9.1
1. Install the Zippity Joiner Clips (J)
2. Install the Zippity Joiner Clips (J)
J
J
1
2
WWW.ZIPPITY-OUTDOOR.COM
11
ASSEMBLY
INSTRUCTIONS ZP19060
Insert the Post Caps (C)
STEP 10:
INSTALL POST CAPS
STEP 10.1
C
WWW.ZIPPITY-OUTDOOR.COM
12
ASSEMBLY
INSTRUCTIONS
ZP19060
WWW.ZIPPITY-OUTDOOR.COM
704-892-5222
877-234-6196
support@zippity-outdoor.com
6935 Reames Rd. Ste. K.
Charloe, NC 28216
  • Page 1 1
  • Page 2 2
  • Page 3 3
  • Page 4 4
  • Page 5 5
  • Page 6 6
  • Page 7 7
  • Page 8 8
  • Page 9 9
  • Page 10 10
  • Page 11 11
  • Page 12 12

Zippity Keswick Vinyl Privacy Screen Kit Installation guide

Type
Installation guide

Zippity Keswick Vinyl Privacy Screen Kit is a quick and easy to assemble privacy solution for your backyard, patio, or garden. With its durable vinyl construction and stylish design, this kit is built to last and enhance the look of your outdoor space.

Each kit includes two 44 1/8”H x 42”W panels that can be easily connected to create a continuous privacy screen. The panels are made of high-quality vinyl that is weather-resistant and UV-protected, ensuring years of enjoyment.

Assembly is a breeze with the included instructions and takes approximately 60 minutes for two panels. The panels simply slide together and are secured with the provided screws. No special tools or skills are required.

Ask a question and I''ll find the answer in the document

Finding information in a document is now easier with AI