Page is loading ...

INSTALLATION INSTRUCTIONS
Page 1 of 4
2007-2018 WRANGLER JK 2/4 DOOR CARGO ROOF RACK ACCESSORY MOUNT
PART #JK-7102
PARTS LIST:
2
Accessory Mounting Plate
2
195mm x 42mm x 6mm Mid Foam Strips
2
Left Accessory Tubes
2
100mm x 42mm x 6mm Short Foam Strips
2
Right Accessory Tubes
4
10mm x 30mm Hex Bolts
2
Step Pads
4
10mm Lock Washers
1
Driver/Left Front Mounting Bracket
4
10mm x 27mm OD x 3mm Flat Washers
1
Passenger/Right Front Mounting Bracket
4
8mm x 68mm Knob Bolts
1
Driver/Left Rear Mounting Bracket
8
8mm x 25mm Button Head Bolts
1
Passenger/Right Rear Mounting Bracket
8
8mm x 24mm OD x 2mm Flat Washers
2
Hardtop Spacer Plates
16
8mm x 16mm OD x1.6mm Flat Washers
2
278mm x 42mm x 6mm Long Foam Strips
12
8mm Nylon Lock Nuts
PROCEDURE:
REMOVE CONTENTS FROM BOX. VERIFY ALL PARTS ARE PRESENT. READ INSTRUCTIONS
CAREFULLY. ASSISTANCE IS REQUIRED. ROOF RACK IS REQUIRED FOR ATTACHMENT.
1. Select the Driver/Left Front Bracket. For hardtop models, attach (1) Long Foam Strip to the top of the
Bracket, (Figure 1). Repeat this Step to attach (1) Short Foam Strip to (1) Spacer Plate, Figure 2, and
(1) Mid Foam Strip to the Rear Bracket, Figure 3.
2. For hardtop models, from inside the cabin, temporarily remove the bolts attaching the roof to the
vehicle, (Figure 4).
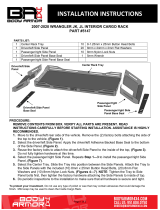
(2) Accessory
Mounting Plates
(2) Right
Accessory
Tubes
Passenger/Right
Rear Bracket
Passenger/Right
Front Bracket
Driver/Left
Front Bracket
Driver/Left
Rear Bracket
(2) Left
Accessory
Tubes
(2) Step Pads

INSTALLATION INSTRUCTIONS
Page 2 of 4
3. Lift the hardtop roof enough to slide the Driver/Left Brackets and Spacer Plate under the lip of the roof.
Line up the holes of the Brackets to the threaded holes in the roof used for the factory bolts, (Figure 5).
4. Reattach the roof, but do not tighten factory hardware.
5. Select (1) Step Pad, (1) Left Accessory Tube and (1) Right Accessory Tube. Attach the Tubes and Step
Pad to the Brackets with (2) 10mm Hex Bolts, (2) 10mm Lock Washers and (2) 10mm Flat Washers,
(Figure 6). Do not tighten hardware.
6. Locate the holes in the roof rack aligned with the Accessory Tube Slots, (Figure 7). Attach the Tubes to
the roof rack with (2) 8mm Knob Bolts, (4) 8mm x 24mm Flat Washers and (2) 8mm Nylon Lock Nuts,
(Figure 8). Do not tighten hardware.
7. Attach (1) Accessory Plate to the (2) Tubes with (4) 8mm Button Head Bolts, (8) 8mm x 16mm Flat
Washers and (4) 8mm Nylon Lock Nuts, (Figures 9 & 10). Do not tighten hardware.
8. Level and adjust the Accessory Mount assembly and tighten all hardware.
9. Repeat Steps 1—8 to attach an Accessory Mount Assembly to the Passenger/Right Side.
10. Do periodic inspections to the installation to make sure that all hardware is secure and tight.
To protect your investment, Do not use any type of polish or wax that may contain abrasives that could damage the
finish. Mild soap may be used to clean the Accessory Mount.
Driver/Left Side Installation Pictured
(Fig 1) For models with a hardtop, attach (1)
Long Foam Strip to the top of the Driver/Left
Front Bracket
(Fig 2) For models with a hardtop, attach
(1) Short Foam Strip to (1) Spacer Plate
(Fig 3) For models with a hardtop, attach (1) Mid
Foam Strip to the top of the Driver/Left Rear
Bracket

INSTALLATION INSTRUCTIONS
Page 3 of 4
Driver/Left Side Installation Pictured
(Fig 4) Temporarily remove the (6) bolts
attaching the hardtop roof to the
vehicle. Place bolts in a safe location
(Fig 5) Lift the hardtop and place the Driver/Left
Brackets and (1) Spacer Plate under the
window. Line up the holes in the brackets to
the holes in the roof used for the bolts
Driver/Left
Front Bracket
Spacer Plate
under the lip
of the roof
Driver/Left
Rear Bracket
(Fig 6) Attach (1) Left Accessory Tube,
(1) Right Accessory Tube and (1) Step
Pad to the Driver/Left Brackets
(2) 10mm Hex Bolts
(2) 10mm Lock Washers
(2) 10mm Flat Washers
(Fig 7) Attach the Accessory
Tubes to the holes in the roof rack,
(Passenger/Right rear shown)

INSTALLATION INSTRUCTIONS
Page 4 of 4
Passenger/right Side Installation Pictured
(Fig 10) Accessory Plate attached
to the front Accessory Tube
(Fig 8) Attach the top of the (2)
Accessory Tubes to the roof rack
(Fig 9) Attach the Accessory
Plate to the (2) Accessory Tubes
(2) 8mm Knob Bolts
(4) 8mm x 24mm Flat Washers
(2) 8mm Nylon Lock Nuts
(4) 8mm Hex Bolts
(8) 8mm x 16mm Flat Washers
(4) 8mm Nylon Lock Nuts
/


