Page is loading ...

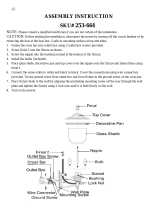
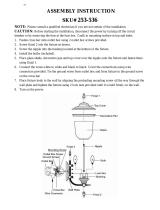
ASSEMBLY AND INSTALLATION
INSTRUCTIONS
NOTE: 1. Before installing, consult local electrical codes for wiring and grounding requirements.
2. READ AND SAVE THESE INSTRUCTIONS.
T0084
Outlet Box
House Grounding Wire
Wire Nut(E)
Ceiling Pan
Socket
Glass Panel (L)
Nipple (J)
Finial (K)
Cross Bar (A)
Green Grounding Screw(C)
Mounting Screw(B)
Bulb Type A Max.60W
(not included)
Lock Nut (G)
Parts:
Parts Number (5002MM)
Parts Number (9572CE)
Mounting Screw (B)
Green Grounding
Screw (C)
Wire Nut (E)
Glass Panel (L)
Cross Bar (A)
Ball Nut (F)
140324
Fixture Mounting Screw (D)
Fixture Mounting Screw (D)
Lock Nut (G)
Ball Nut (F)
Metal Frame
Parts Number (5006AA)
Washer (H)
Hex Nut (I)
Nipple (J)
Finial (K)
Hex Nut (I)
Washer (H)
Coupling
Fig. 1
Metal Frame
Clip
WARNING: Turn off the main power at circuit breaker before installing fixture.
AVERTISSEMENT: Coupez la source d’alimentation principale au panneau
central de disjoncteurs avant d’installer le luminaire.

140324
A: 13"
B: 8"
A
B
1. Attach the two fixture mounting screws to the holes on the cross bar, then secure them with two
lock nuts. Adjust the length of the fixture mounting screws if necessary.
2. Attach the cross bar to the outlet box by using two mounting screws.
3. Pull out the outlet wires and the house grounding wire from the outlet box. Make wire connections
using the wire nuts:
---The black wire from the fixture to the black wire from the power source.
---The white wire from the fixture to the white wire from the power source.
---Attach the fixture grounding wire to the cross bar with the green grounding screw. Then
connect it to the house grounding wire with the wire nut.
Carefully put the wires back into the outlet box.
4. Attach the ceiling pan to the ceiling by aligning fixture mounting screws on cross bar with holes on
ceiling pan. Slide fixture mounting screws through holes, secure them with two ball nuts.
5. Screw the nipple into the coupling, then secure it with a washer and hex nut.
6. Install bulbs (not included). See relamping label at socket area or packaging for maximum
allowed wattage.
7. Take a glass panel and gently place the glass panel into the metal frame in place, then pressing
the clips of the metal frame to secure the glass panel. (See Fig. 1) Repeat with other glass
panels.
8. Attach the metal frame to the ceiling pan, making sure the nipple feeds through center hole of
metal frame, then secure it with a finial.
9. Turn on the power at the main fuse or circuit breaker box.
/


