Page is loading ...

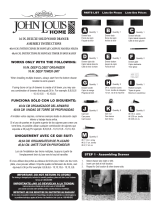
Quantity: 16
Wall Anchor / Anclaje de pared / Boulon d’ancrage
Quantity: 2
#4 3/4 in. / 1.9 cm / 19 mm
Quantity: 16
#8 1 1/2 in. / 3.81 cm / 38,1 mm
Quantity: 2
Barrel Nut
Tuerca Cilindrica
Écrous á Portée Cylindrique
Quantity: 2
Barrel Bolt
Perno Cilindrica
Boulbons Cylindric
Quantity: 4
#6 3/4 in. / 1.9 cm / 19,05 mm
PARTS LIST Lista De Piezas Liste Des Piéces
IMPORTANT: DO NOT RETURN TO STORE!
For missing or damaged parts, technical or assembly questions, please call John Louis Customer
Service at 1-800-480-6985
IMPORTANTE: ¡NO LO DEVUELVA A LA TIENDA!
Llame al servicio al cliente local de John Louis al 1-800-480-6985
para aclarar sus dudas sobre pérdidas, daños, asuntos écnicos y ensamblaje.
IMPORTANT: NE PAS RENVOYER OU RAPPORTER AU MAGASIN!
Si vous avez une question concernant l’assemblage, des piéces manquantes ou endommagées ou
un probléme technique, appelez le Service á la clientéle de John Louis au 1-800-480-6985.
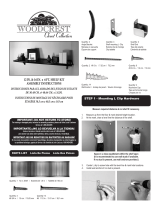
12IN. & 16IN. x 4FT. TOWER KIT
ASSEMBLY INSTRUCTIONS
INSTRUCCIONES PARA EL ARMADO DEL JUEGO DE
LA TORRE DE 30.48 CM. Y 60.64 CM. x 1.21M
INSTRUCTIONS DE MONTAGE DU NÉCESSAIRE DE
COLONNE 30,5cm x 40,5cm x 123cm
Quantity: 2
48 in. Tower Side
Lateral de 122 cm
Joues de Colonne de
1,220 mm
Quantity: 1
24 in. Tower Bottom
Base De Torre de 60.96 cm
Tablette Inferieure Collonne
de 609.6 mm
Quantity: 1
26.25 in. Tower Top
Superior De Torre 66.6 cm
Tablette Supérieure de
Collonne de 666.75 mm
Quantity: 2
24 in. Adjustable Shelf
Estante Reguable 60.96 cm
Étagéres Réglables 609 mm
Quantity: 2
Shelf mounting L- Clip
Estante clip de montaje
Clip tablette
Quantity: 4
Tower Bracket Hardware
Ménsula Para la Torre
Supports de Colonne
Quantity: 4
Mushroom Cap
Tapa en forma de hongo
Chapeau de vis
Quantity: 4
Cam Lock Nut
Tuerca Cilindrica
Boitiers Excentriques
Quantity: 4
Cam Bolt
Perno Pasador
Goujons D’Assemblage Rapide
Quantity: 8
Adjustable Shelf Pin
Vástago Para Estante Regulable
Goujons Pour Étagére Réglable
Quantity: 1
Allen wrench / Llave Allen / Clé Allen

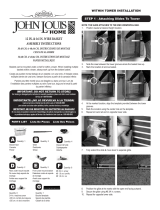
STEP 1 - Tower Assembly STEP 2 - Attaching Tower To Wall
1. Place tower sides down with grooves facing up.
2. Secure Cam Bolt into locations at bottom of tower sides.
3. Insert Cam Lock into Tower Bottom locations for each side.
4. Secure Tower Sides and Tower Bottom together by turning cam locks
clockwise to tighten.
5. Insert Barrel Nut into locations at top of tower sides.
6. Place Tower Top into notched position of tower sides.
7. Insert Barrel Bolt into location and tighten using supplied allen wrench
8. On the back of tower sides (The front of the tower is designated by the
nameplate on the tower bottom shelf), center tower bracket in space
between 1st & 2nd groove at top location
9. Center tower bracket between 2nd groove & bottom for bottom location.
10. Repeat for opposite side (2 per side).
11. Secure tower bracket using #6 3/4 in. screw.
1. Measure up from the oor & mark desired height location (Towers are typi-
cally placed at 84in. & 72in.).
2. Draw a 2ft. level line at your marked location (This represents the location
of the tower top).
You will space 2 L clips equidistant within the 24in. level line.
(It is recommended to use wall studs if available.
If no stud is present, use wall anchors provided.)
3. Center L clip to screw hole with the level line & mark hole locations.
4. Install wall anchors if no stud is present.
5. Secure L clip to the wall using # 8 1 1/2in. screws at hole locations.
6. Repeat for remaining L clip location.
7. Place tower onto L clip hardware.
8. Place level against tower side & plumb level tower.
9. Mark tower bracket hole locations.

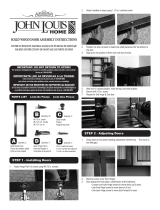
STEP 3 - Inserting Adjustable Shelves
1. Insert adjustable shelf pins into shelf ends.
2. Insert shelf into tower grooves.
3. Insert shelf upside down with the back of the shelf one groove higher than
the front to create an angled shoe shelf.
10. Remove Tower.
11. Install wall anchors if no stud is present.
12. Place tower onto L clip hardware.
13. Secure brackets to the wall using # 8 1 1/2in. screws at hole locations.
14. Secure tower to L clips using #4 3/4in. screws.
15. Insert mushroom caps into barrel nut holes.
PASO 1: Armado de la torre
1. Coloque los lados de la torre abajo con las ranuras hacia arriba.
2. Fije el perno de leva en la parte inferior de los lados de la torre.
3. Inserte el cerrojo de leva en las ubicaciones de la parte inferior de la torre
para cada lado.
4. Gire los cerrojos de leva hacia la derecha para apretarlos y jar los lados y
la parte inferior de la torre.
5. Inserte la tuerca de cilindro en las ubicaciones en la parte superior de los
lados de la torre.
6. Coloque la parte superior de la torre en las posiciones dentadas de los
lados de la torre.
7. Inserte los pernos de cilindro en las ubicaciones y apriételos con la llave
Allen que se proporciona.
/

