Page is loading ...

Measure required distance & cut shelf if necessary.
1. Measure up from the oor & mark desired height location.
2. At the mark, draw a level line the distance of the shelf.
Quantity: 4
#6 3/4 in. / 1.9 cm / 19,05 mm
Quantity: 14
#8 1 1/2 in. / 3.81 cm / 38,1 mm
Quantity: 2
Mushroom Cap
Tapa en forma de hongo
Chapeau de vis
Quantity: 14
Wall Anchor / Anclaje de pared / Boulon d’ancrage
Quantity: 2 #8 3 in. / 7.62 cm / 76,2 mm Quantity: 6
#4 3/4 in. / 1.9 cm / 19 mm
STEP 1 - Mounting L Clip Hardware
PARTS LIST Lista De Piezas Liste Des Piéces
IMPORTANT: DO NOT RETURN TO STORE!
For missing or damaged parts, technical or assembly questions, please call John Louis Customer
Service at 1-800-480-6985
IMPORTANTE: ¡NO LO DEVUELVA A LA TIENDA!
Llame al servicio al cliente local de John Louis al 1-800-480-6985
para aclarar sus dudas sobre pérdidas, daños, asuntos écnicos y ensamblaje.
IMPORTANT: NE PAS RENVOYER OU RAPPORTER AU MAGASIN!
Si vous avez une question concernant l’assemblage, des piéces manquantes ou endommagées ou
un probléme technique, appelez le Service á la clientéle de John Louis au 1-800-480-6985.
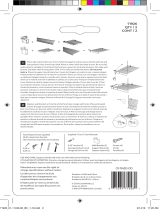
12 IN. & 16 IN. x 6 FT. SHELF KIT
ASSEMBLY INSTRUCTIONS
INSTRUCCIONES PARA EL ARMADO DEL JUEGO DE ESTANTE
DE 30.48 CM. & 40.64 CM. x 1.82M.
INSTRUCTIONS DE MONTAGE DU NÉCESSAIRE POUR
ÉTAGÈRE 30,5 cm x 40,5cm x 183cm
Quantity: 2
Angle Bracket
Ménsula en escuadra
Équerre de support
Quantity: 2
Shelf End
Tope del estante
Extrémité de tablette
Quantity: 4
Shelf mounting L- Clip
Estante clip de montaje
Clip tablette
Quantity: 1 72 in. Shelf / Estantes de 1,8 m / Tablette de 183 cm
Space 4 L clips equidistant within the shelf span
(It is recommended to use wall studs if available.
If no stud is present, use wall anchors provided.)
3. Center L clip to screw hole with the level line & mark hole locations.
4. Install wall anchors if no stud is present.

STEP 2 - Attaching Hardware To Side
Wall, Tower Side and/or Free Hanging
ATTACHING SHELF END TO SIDE WALL
1. Place shelf onto L clip hardware.
2. Place Shelf End hardware onto end of shelf.
5. Secure L clip to the wall using # 8 1 1/2in. screws at hole locations.
6. Repeat for remaining L clip locations.
3. Place level onto shelf & level shelf front to back.
4. Mark Shelf End hardware location.
5. Remove Shelf.
6. Place Shelf End hardware at marked location & mark screw hole locations.
7. Install wall anchors if no stud is present.
8. Secure Shelf to the wall using # 8 1 1/2in. screws at hole locations.
9. Repeat connection type process for opposite side.
ATTACHING SHELF END TO TOWER SIDE
1. Place shelf onto L clip hardware.
2. Place Shelf End hardware onto end of shelf.
3. Place level onto shelf & level shelf front to back.
4. Mark Shelf End hardware location.
5. Remove Shelf.
6. Place Shelf End hardware at marked location & mark screw hole locations.
7. Secure Shelf to the tower using # 6 3/4in. screws at hole locations.
8. Repeat connection type process for opposite side.
CREATING FREE HANGING SHELF (no side attachment)
1. Place shelf onto L clip hardware & place a level onto shelf.
2. Place angle bracket under shelf ush with wall & underside of front rail.
3. Level shelf front to back.

4. Insert #8 3in screw into angle bracket.
5. Screw part way into wall to mark bracket location
6. Unscrew & remove angle bracket.
7. Use wall anchor at mark if no stud is present.
8. Insert the screw tip into the anchor & rotate angle bracket into position.
9. Secure bracket using #8 3in. screw.
10. Repeat connection type process for opposite side.
STEP 3 - Attaching Shelf To Hardware
STEP 4 - Attaching Angle Brackets
1. Place shelf onto hardware.
2. Secure shelf using #4 3/4in. screws at all hardware locations.
1. Count over the number of slats for desired angle bracket position .
2. Place angle bracket into position
Ensure that the angle bracket is ush with the back wall and the underside
of the front shelf rail.
3. Insert #8 3in. screw into angle bracket.
4. Screw part way into wall to mark bracket location
5. Unscrew & remove bracket.
6. Use wall anchor at mark if no stud is present.
7. Insert the screw tip into the anchor & rotate angle bracket into position.
8. Secure bracket using #8 3in. screw.
9. Insert mushroom cap into angle bracket screw hole
10. Repeat for remaining angle bracket.
/