LEVOLOR 2 Custom Faux Wood Horizontal Blinds Installation guide

Type
Installation guide
Motorized Tilt Operation
Operación motorizada de inclinación
Inclinaison motorisée
Real Wood & Faux Wood Blinds
Persianas de madera real y madera de imitación
Stores en bois véritable et simili bois
INSTALLATION • OPERATION • CARE
INSTALACIÓN • FUNCIONAMIENTO • CUIDADO
INSTALLATION • FONCTIONNEMENT • ENTRETIEN
2Motorized Tilt Operation
WARNING: Keep all small parts, components and packaging away
from children as they pose a potential choking hazard which may
result in serious injury or death. Please reference all warning tags
and labels in the instructions and on the blind.
CHILD SAFETY
!
© 2022 LEVOLOR®
Window Blind Cord Can STRANGLE Your Child
Children can strangle in the loop above the cord bead.
Children can climb furniture to reach cords.
Move crib and furniture away.
Shorten cords to prevent reach.
Keep cords separateTwisted or knotted
cords can create a loop.
Keep all cords out of children’s reach.
Always wrap the cords around the cleats in a figure eight,
up high, out of reach of children.
WARNING
3Motorized Tilt Operation
CONTENTS
Getting Started
Window and Blind Terminology ..................................................................... 4
Components Included ....................................................................................5
Tools and Fasteners You May Need ................................................................ 6
Installation
Installation Overview ...................................................................................... 7
Inside Mount (IM) ....................................................................................... 7–9
Outside Mount (OM) ............................................................................... 10–12
Valance Installation ....................................................................................... 13
Hold-Down Brackets Installation .................................................................. 13
Operation
Remote Operation ..........................................................................................14
Battery Charging ............................................................................................14
Lift Operation ..................................................................................................14
Uninstall
Removing the Blind ....................................................................................... 15
Additional Information and Support
Cleaning Procedures ..................................................................................... 16
Warranty ........................................................................................................ 16
Customer Service Support ........................................................................... 16
For installation support, questions, warranty information or replacement parts,
visit us at www.LEVOLOR.com.
4Motorized Tilt Operation Home
WINDOW AND BLIND TERMINOLOGY
Thank you for purchasing LEVOLOR® Wood Blinds. With proper installation,
operation, and care, your new blinds will provide years of beauty and performance.
Please thoroughly review this instruction booklet before beginning installation.
If the installation brackets are mounted correctly, the rest of the installation process
follows easily. To prepare for this important first step, review the mounting types and
basic window terminology illustrated below.
MOUNTING TYPES AND WINDOW TERMINOLOGY
Outside Mount
Inside Mount
Molding
Head Jamb
Sill
Jamb Jamb
Inside Mount
Blind fits within
window opening.
Great for windows
with beautiful trim.
Window Components
Terminology
Collectively, the sill and
jambs are called the
“window casement”
or "frame".
Outside Mount
Blind mounts
outside window
opening.
Increased light
control and
privacy.
Outside Mount
Inside Mount
Molding
Head Jamb
Sill
Jamb Jamb
Outside Mount
Inside Mount
Molding
Head Jamb
Sill
Jamb Jamb
5Motorized Tilt Operation
Home
GETTING STARTED
COMPONENTS INCLUDED
Blind
Mounting Brackets
(L bracket only required
on outside mount)
Power AdapterMicro-USB
Charging Cable
Magnetic
Charging Adapter
Hex Head Screws
(2 per Bracket)
Hub
(optional)
Remote Control Kit
(optional)
AAA Battery
(2-Pack)
Standard
Remote Control
Remote Control
Holder
Valance and Clips
Battery and Clips
6Motorized Tilt Operation Home
GETTING STARTED
TOOLS AND FASTENERS YOU MAY NEED (not included)
The tools you will need for installing your blind will vary, depending on the installation
surface and mounting bracket type.
Tools typically used for installation include:
Metal Tape Measure
Safety Glasses
Drill with Bits
Ladder
Screwdrivers
(both flat and Phillips head)
Drywall Anchors
Level
14" Nutdriver
Pencil
!
CAUTION: Use drywall anchors (not provided) when mounting
into drywall. Failure to properly anchor blind could cause blind to fall,
possibly resulting in injury.
!
7Motorized Tilt Operation
Home
INSTALLATION
Confirm the blind for proper width and length.
If installing several sets of blinds, be sure to match them with the appropriate window.
Check the installation surface to ensure that you have suitable fasteners and tools.
Lay out and organize all parts and components.
INSTALLATION OVERVIEW
Installation Brackets
Your order will include the correct number of installation brackets
for your blind width, as shown in the table below.
Number of Brackets per Blind
Blind Width (inches) End Brackets Support Brackets
Up to 48 2 0
48 to 84 2 1
84 to 96 2 2
96 to 144 2 3
PAIR SHADE BEFORE INSTALLING
REMOTE CONTROL
Use the and + buttons to select the channel.
Use a paperclip to press and hold the
programming button inside the headrail for
about 2 seconds until the blind jogs once.
In the next 10 seconds, press and hold the stop
button on the remote until the blind jogs twice.
USING THE INMOTION APP
If you purchased a hub, download the LEVOLOR
InMotion app to get started.
Blind can be directly paired to app, but it is
recommended to pair to remote first.
INSIDE MOUNT (IM)BEFORE YOU BEGIN
Programming
Button
Inside Headrail
8Motorized Tilt Operation Home
INSTALLATION
INSIDE MOUNT (IM)
STEP 1: MARKING THE BRACKET LOCATIONS
Position the box brackets at each end of the headrail to confirm the dimension.
Depending on installation location, box brackets can be attached using the top,
back, or the side holes.
Position the center support bracket (if included) in the center, if using only one.
If more than one center support bracket is included, space them evenly along
the headrail.
Mark the location of the desired bracket mounting holes, two per bracket, making
sure they are square and equally spaced.
STEP 2: INSTALLING THE BRACKETS
Drill pilot holes using a 116" drill bit using pencil marks as a guide. Depending on the
installation location, box brackets can be attached using the top, back, or side holes.
While holding the brackets in place, secure the brackets using two screws per bracket.
Ensure all brackets are square with each other.
OR
Screws
(2 per bracket)
Screws
(2 per bracket)
Box bracket
Box
bracket
Center support
bracket(s)
(if included)
Box bracket
Center support
bracket(s)
(if included)
9Motorized Tilt Operation
Home
INSTALLATION
INSIDE MOUNT (IM)
STEP 3: BATTERY INSTALLATION
Attach battery clips to headrail as indicated by “Clip Here” stickers.
Snap battery pack into clips with the wire on the left side.
Connect battery to motor cable. Loop excess cords into clip on headrail.
STEP 4: INSTALLING THE BLIND
Align the headrail and valance with the brackets and slide the headrail straight back
into the brackets.
If the headrail can slide from side to side in the box brackets, use a flat-head
screwdriver to bend out the tabs on the ends of the headrail until it is snug.
If center support bracket(s) are included, hook the front edge of the headrail
into the channel on the bracket.
Lower the front of each box bracket and press until the locking tab clicks into place.
CAUTION: Be sure the brackets are properly engaged before
operating the blind. Failure to do so may result in the shade
falling and possible injury.
!
Finished battery installation shown
10 Motorized Tilt Operation Home
OUTSIDE MOUNT (OM)
STEP 1: MARKING THE BRACKET LOCATIONS
IMPORTANT: The brackets must be flush against a flat mounting surface. Do NOT
mount brackets on curved molding.
Position the box brackets at each end of the headrail
Position the center support bracket (if included) in the center if using only one. If more
than one center support bracket is included, space them evenly along the headrail.
Use a level to ensure all brackets are even and aligned. Mark the bracket mounting
hole locations, two per bracket, making sure they are square and equally spaced.
End
bracket
Center support bracket(s)
(if included)
PAIR SHADE BEFORE INSTALLING
REMOTE CONTROL
Use the and + buttons to select the channel.
Use a paperclip to press and hold the
programming button inside the headrail for
about 2 seconds until the blind jogs once.
In the next 10 seconds, press and hold the stop
button on the remote until the blind jogs twice.
USING THE INMOTION APP
If you purchased a hub, download the LEVOLOR
InMotion app to get started.
Blind can be directly paired to app, but it is
recommended to pair to remote first.
OUTSIDE MOUNT (OM)BEFORE YOU BEGIN
Programming
Button
Inside Headrail
INSTALLATION
11Motorized Tilt Operation
Home
INSTALLATION
STEP 2: INSTALLING THE BRACKETS
Drill pilot holes using a 116" drill bit using pencil marks as a guide.
While holding the brackets in place, secure the brackets using two screws per bracket.
Use a level to ensure all brackets are even and square with each other.
Drywall
Anchor
Box
bracket
Center support
bracket(s)
(if included)
Screws (2 per bracket)
OUTSIDE MOUNT (OM)
EXTENSION BRACKETS (optional)
Optional extension brackets offers clearance
for obstructions.
Outside mounting extension brackets will
provide 2–4" clearance between the headrail
and mounting surface. Assemble extension
bracket as shown.
Secure an extension bracket to each standard
mounting bracket.
SPACER BLOCKS (optional)
Outside mounting spacer blocks will provide
an additional 3
8" clearance as shown.
If spacers are used, longer screws may
be required to ensure a secure installation
(not provided).
CAUTION: Do not use more than one spacer block. Using more than one
spacer block could cause blind to fall resulting in possible injury.
!
12 Motorized Tilt Operation Home
INSTALLATION
STEP 4: INSTALLING THE BLIND
Align the headrail with the brackets and slide the headrail straight back into
the brackets.
If the headrail can slide from side to side in the box brackets, use a flat-head
screwdriver to bend out the tabs on the ends of the headrail until it is snug.
If center support bracket(s) are included, hook the front edge of the headrail into
the channel on the bracket.
Lower the front of each box bracket and press until the locking tab clicks into place.
CAUTION: Be sure the brackets are properly engaged before
operating the blind. Failure to do so may result in the shade
falling and possible injury.
!
OUTSIDE MOUNT (OM)
STEP 3: BATTERY INSTALLATION
Attach battery clips to headrail as indicated by “Clip Here” stickers.
Snap battery pack into clips with the wire on the left side.
Connect battery to motor cable. Loop excess cords into clip on headrail.
Finished battery installation shown
13Motorized Tilt Operation
Home
INSTALLATION
HOLD-DOWN BRACKETS INSTALLATION (optional)
Ideal for doors, hold-down brackets
prevent blind from swaying.
Assemble as shown to each side
of bottom rail.
Starter hole
Hold-down
pin
Inside Mount Outside Mount
VALANCE INSTALLATION
Locate the valance clip location
indicators on the backside of the
valance that read "Clip Here."
Insert the clips into the groove on the
backside of the valance. Rotate so
that the end marked "TOP" arrow is
pointing up.
For returns, insert L-shaped return
clip into the groove on the backside
of the valance return. Align and
insert the other end of the L-shaped
return clip into the groove on the
backside of the valance.
Align the clips with the slots on
the bottom of the headrail and
clip into place.
Return clip
(OM only) “Top” or
arrow end Valance clip
Return clip
(OM only)
Valance
Slots
14 Motorized Tilt Operation Home
OPERATION
LIFT OPERATION
NOTE: Lift control may be corded or cordless depending on what was selected
when ordering.
Corded Lift: To raise the blind, pull cord in toward the center of the blind to release
the lock; this allows you to raise and lower the blind. Once the blind is
at the desired height, pull the cord away from the center to lock into position.
Cordless Lift: To raise the blind, firmly press and hold the LEVOLOR button
located on the bottom rail and lift the blind to the desired height. Once the desired
position is reached, release grip on the button to lock blind in place.
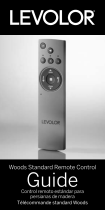
REMOTE OPERATION
Scan for remote guide.
BATTERY CHARGING
The rechargeable battery mounts
between the headrail and valance.
For easier access to the charging port,
a removable magnetic charging insert
has been installed during production.
Attach the magnetic charging adapter
to the micro-USB charging cable and
power adapter before connecting to
battery to charge.
For standard charging, remove the
magnetic charging insert from the
battery. Use the micro-USB charging
cable and power adapter to charge
battery.
Indicator light battery status:
– Low (red flash)
– Charging (green flash)
– Charged (green solid)
It is recommended to fully charge battery prior to first use.
Bottom
View
Remove for
standard
charging
15Motorized Tilt Operation
Home
REMOVING THE BLIND
Fully raise the blind. Remove valance from headrail.
Unplug battery from motor and remove from clips.
Unlock and lift the front clips of each end box bracket and slide the headrail
out of the brackets.
If center support brackets are used, lift the front of the headrail up to clear the
channel of the bracket and slide out forward.
Uninstall remaining brackets if necessary.
CAUTION: Hold blind firmly when removing. Failure to do so may result in
the blind falling and possible injury.
!
UNINSTALL
16 Motorized Tilt Operation Home
ADDITIONAL INFORMATION AND SUPPORT
Keep your LEVOLOR® Wood and Faux Wood blinds looking their best by periodically
wiping them with a soft cloth, a duster, or the brush attachment from a vacuum cleaner.
NOTICE: Avoid contact with window cleaning products. Improper cleaning may
void warranty.
DUSTING
Use a feather duster for regular cleaning.
FORCED AIR
Blow away dirt and debris using clean compressed air.
VACUUMING
Use a low suction vacuum with a brush-type cleaner attachment;
stroke lightly over the shade to clean.
SPOT-CLEANING/STAIN REMOVAL AT HOME
Faux Wood blinds only. You may use a soft, lightly dampened cloth to
clean your Faux Wood blinds.
CLEANING PROCEDURES
WARRANTY
For complete warranty information visit LEVOLOR.com or call Customer Service
at 1-800-LEVOLOR or 1-800-538-6567.
CONTACTING US
To contact LEVOLOR Customer Service regarding any questions or concerns
you may have about your new shades, you may reach us at: 1-800-LEVOLOR
(9:00 am – 6:00 pm EST).
www.LEVOLOR.com
ADDITIONAL PARTS AND SERVICES
Additional or replacement parts can be ordered, or shades can be repaired or
restrung through our repair center. Please contact LEVOLOR customer service
through www.LEVOLOR.com for a return authorization number.
Operación motorizada
de inclinación
Persianas de madera real y
madera de imitación
INSTALACIÓN • FUNCIONAMIENTO • CUIDADO
ADVERTENCIA: Mantenga todas las piezas pequeñas, los
componentes y el embalaje lejos de los niños ya que pueden
tragarlos, lo cual puede ocasionarles lesiones graves o la muerte.
Consulte todas las indicaciones y etiquetas de advertencia en las
instrucciones y en la persiana misma.
!
Solo para residentes en Canadá: para obtener más información sobre la
seguridad, llame al 1-866-662-0666 o visite www.canada.ca y busque
“blind cords” (cuerdas de persiana).
18
SEGURIDAD DE LOS NIÑOS
© 2022 LEVOLOR®
La cuerda de la persiana puede AHOGAR a su hijo
Los niños pueden estrangularse con el bucle que se forma por
encima del conjunto de cuerdas.
Los niños pueden subir por los muebles y alcanzar las cuerdas.
Aleje las cunas y los muebles.
Acorte las cuerdas para evitar el alcance de los niños.
Mantenga las cuerdas separadas, ya que al estar
torcidas o anudadas pueden crear un bucle
Mantenga todas las cuerdas fuera del alcance
de los niños.
Siempre ate las cuerdas alrededor de las abrazaderas en
forma de ocho, en lo alto y fuera del alcance de los niños.
ADVERTENCIA
Operación motorizada de inclinación
Operación motorizada de inclinación 19
CONTENIDO
Inicio
Terminología de ventanas y persianas ........................................................ 20
Componentes incluidos ................................................................................ 21
Herramientas y sujetadores que puede necesitar ......................................22
Instalación
Descripción general de la instalación ...........................................................23
Montaje interior (MI) .............................................................................. 23–25
Montaje exterior (ME) ............................................................................ 26–28
Fijación de la cenefa ......................................................................................29
Soportes de sujeción ....................................................................................29
Funcionamiento
Funcionamiento remoto................................................................................ 30
Carga de la batería ........................................................................................30
Operación de elevación ................................................................................. 30
Desinstalación
Extracción de las persianas .......................................................................... 31
Información adicional y asistencia
Limpieza y cuidado .......................................................................................32
Garantía .........................................................................................................32
Servicio de atención al cliente ......................................................................32
Para obtener soporte de instalación, preguntas, información de garantía o piezas de
repuesto, visítenos en www.LEVOLOR.com.
20 Operación motorizada de inclinación Home
Outside Mount
Inside Mount
Molding
Head Jamb
Sill
Jamb Jamb
Montaje interior
El tamaño de la
persiana se ajusta
al de la abertura
de la ventana.
Ideal para ventanas
con marcos elegantes.
Terminología de
los componentes
de una ventana
En su conjunto, el umbral
y las jambas se llaman
“batiente de la ventana”
o “marco”.
Montaje exterior
La persiana se
instala por fuera
de la abertura de
la ventana.
Mayor control
de la luz y
privacidad.
Outside Mount
Outside Mount
Inside Mount
Molding
Head Jamb
Sill
Jamb Jamb
Montaje exteriorMontaje interior
Moldura
Jamba superior
Jamba Jamba
Umbral
TERMINOLOGÍA DE VENTANAS Y PERSIANAS
Gracias por adquirir las persianas de madera LEVOLOR®. Con una instalación,
operación y cuidado adecuados, sus nuevas persianas le brindarán decoración y
funcionalidad por muchos años. Revise atentamente este folleto de instrucciones
antes de comenzar la instalación.
Si los soportes de montaje están instalados correctamente, el resto del proceso de
instalación se realiza fácilmente. Para prepararse para este primer e importante
paso, revise los tipos de montaje y la terminología básica de ventanas que se ilustra
a continuación.
TIPOS DE MONTAJE Y TERMINOLOGÍA DE VENTANAS
  • Page 1 1
  • Page 2 2
  • Page 3 3
  • Page 4 4
  • Page 5 5
  • Page 6 6
  • Page 7 7
  • Page 8 8
  • Page 9 9
  • Page 10 10
  • Page 11 11
  • Page 12 12
  • Page 13 13
  • Page 14 14
  • Page 15 15
  • Page 16 16
  • Page 17 17
  • Page 18 18
  • Page 19 19
  • Page 20 20
  • Page 21 21
  • Page 22 22
  • Page 23 23
  • Page 24 24
  • Page 25 25
  • Page 26 26
  • Page 27 27
  • Page 28 28
  • Page 29 29
  • Page 30 30
  • Page 31 31
  • Page 32 32
  • Page 33 33
  • Page 34 34
  • Page 35 35
  • Page 36 36
  • Page 37 37
  • Page 38 38
  • Page 39 39
  • Page 40 40
  • Page 41 41
  • Page 42 42
  • Page 43 43
  • Page 44 44
  • Page 45 45
  • Page 46 46
  • Page 47 47
  • Page 48 48

LEVOLOR 2 Custom Faux Wood Horizontal Blinds Installation guide

Type
Installation guide

Ask a question and I''ll find the answer in the document

Finding information in a document is now easier with AI