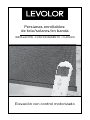
LEVOLOR Fabric Roller Shades Installation guide
- Type
- Installation guide
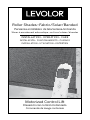
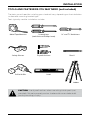
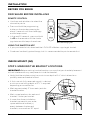
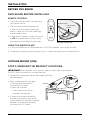
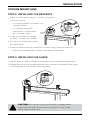
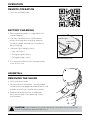
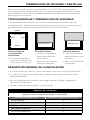
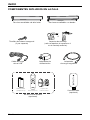
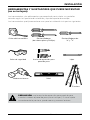
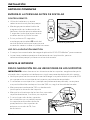
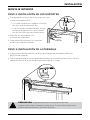
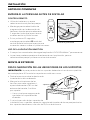
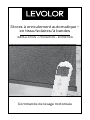
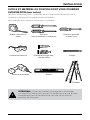
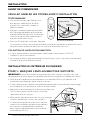
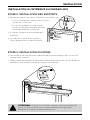
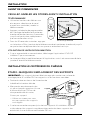
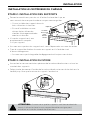
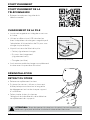
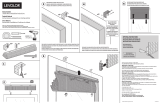
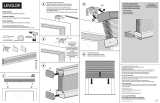
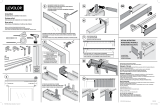
LEVOLOR Fabric Roller Shades provide convenient light control and privacy with their motorized operation. Using the included remote control or the LEVOLOR InMotion™ app, you can effortlessly adjust the shades to your desired position. The rechargeable battery ensures continuous operation, and the simple charging process with the magnetic charging adapter or micro-USB cable makes it easy to keep the shades powered.
LEVOLOR Fabric Roller Shades provide convenient light control and privacy with their motorized operation. Using the included remote control or the LEVOLOR InMotion™ app, you can effortlessly adjust the shades to your desired position. The rechargeable battery ensures continuous operation, and the simple charging process with the magnetic charging adapter or micro-USB cable makes it easy to keep the shades powered.


-
 1
1
-
 2
2
-
 3
3
-
 4
4
-
 5
5
-
 6
6
-
 7
7
-
 8
8
-
 9
9
-
 10
10
-
 11
11
-
 12
12
-
 13
13
-
 14
14
-
 15
15
-
 16
16
-
 17
17
-
 18
18
-
 19
19
-
 20
20
-
 21
21
-
 22
22
-
 23
23
-
 24
24
-
 25
25
-
 26
26
-
 27
27
-
 28
28
-
 29
29
-
 30
30
-
 31
31
-
 32
32
-
 33
33
-
 34
34
-
 35
35
-
 36
36


LEVOLOR Fabric Roller Shades Installation guide
- Type
- Installation guide
LEVOLOR Fabric Roller Shades provide convenient light control and privacy with their motorized operation. Using the included remote control or the LEVOLOR InMotion™ app, you can effortlessly adjust the shades to your desired position. The rechargeable battery ensures continuous operation, and the simple charging process with the magnetic charging adapter or micro-USB cable makes it easy to keep the shades powered.
Ask a question and I''ll find the answer in the document
Finding information in a document is now easier with AI
in other languages
Related papers
-
LEVOLOR Light Filtering Roman Shades Installation guide
-
LEVOLOR 2 Custom Faux Wood Horizontal Blinds Installation guide
-
 LEVOLOR Woods Standard User manual
-
LEVOLOR MON6 Operating instructions
-
 LEVOLOR 2025002 Installation guide
-
 LEVOLOR 1004445 Installation guide
-
 LEVOLOR LVVSCD3508445D Installation guide
-
LEVOLOR MARK1C Operating instructions
-
LEVOLOR RIV1 Operating instructions


Other documents
-
SelectBlinds neutral User manual
-
The Home Depot Faux Wood Blinds Installation guide
-
 SelectBlinds Refined Fabric Vertical Blinds User manual
-
ALTA Tilt User manual
-
 SelectBlinds Refined Fabric Vertical Blinds User manual
-
Select Blinds Honeycomb Shades User manual
-
SelectBlinds 2 Inch Cordless Faux Wood Blind User manual
-
SUN GLOW Roller Shade User manual
-
ALTA BandLift User manual
-
Somfy TL25 User guide

