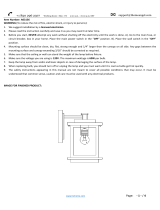
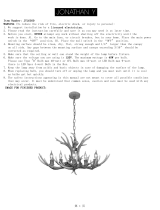
LNC A02251 is a versatile and stylish lighting fixture designed to enhance any room's ambiance. With its adjustable joints and carefully crafted cage, this lamp offers a unique blend of functionality and aesthetics. Experiment with different angles to direct light precisely where it's needed, creating a personalized lighting experience. Its compatibility with various bulb types and easy installation make it a suitable choice for both residential and commercial spaces.
LNC A02251 is a versatile and stylish lighting fixture designed to enhance any room's ambiance. With its adjustable joints and carefully crafted cage, this lamp offers a unique blend of functionality and aesthetics. Experiment with different angles to direct light precisely where it's needed, creating a personalized lighting experience. Its compatibility with various bulb types and easy installation make it a suitable choice for both residential and commercial spaces.


-
 1
1
-
 2
2
-
 3
3


LNC A02251 is a versatile and stylish lighting fixture designed to enhance any room's ambiance. With its adjustable joints and carefully crafted cage, this lamp offers a unique blend of functionality and aesthetics. Experiment with different angles to direct light precisely where it's needed, creating a personalized lighting experience. Its compatibility with various bulb types and easy installation make it a suitable choice for both residential and commercial spaces.
Ask a question and I''ll find the answer in the document
Finding information in a document is now easier with AI
Related papers
-
LNC A02231 Installation guide
-
-
-
-
-
-
-
-
-
Other documents
-
ROOMS TO GO 90622020 Assembly Instructions
-
Zevni Z-R7NEVAZ2-4696 Operating instructions
-
 LALUZ A03156 Installation guide
-
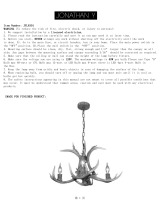
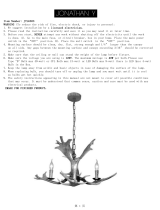 JONATHAN Y JYL6303A Operating instructions
-
 JONATHAN Y JYL6301B Operating instructions
-
 NEW WORLD DECOR YRBVYYLWS3611S6 Installation guide
-
 JONATHAN Y JYL6300A Operating instructions
-
Casablanca WHITMAN Owner's manual
-
 Hunter Fan 28482 Owner's manual
-
Casablanca ALESSANDRIA Owner's manual


