Page is loading ...

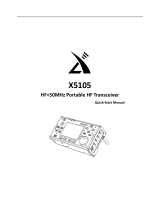
Xiegu Communication X5105
HF+50MHz Portable HF Transceiver©
Distributed Exclusively in the USA by MFJ Enterprises
Features:
High-Visibility 3.6- Inch LCD Screen
Built-in 3800-mAh high-capacity battery
Built-in SWR Bridge and ATU
All modes (USB/LSB/CW/AM/FM/Digital)
All Bands (160-M through 6-M)
General Coverage Receiver
1
st
-IF Signal Output for Spectrum Display
DSP-NR, Noise Blanker, Notch Filter
Memory Keyer with CW trainer
Speech-Processing Compressor
Firmware Download Upgradable
Multi-function Keypad Microphone
Built-in Desktop Stand

Xiegu X5105 QRP Transceiver
2
Packing List - Confirm that your transceiver package includes the following items:
[ ] X5105 Transceiver
[ ] Multi-Function Keypad Microphone and cord
[ ] Power Supply Cable
[ ] USB Data Cable
[ ] 3.5mm Plug
[ ] Warranty Card and Certificate
[ ] Instruction Manual
Introduction: The USA version of Xiegu’s X5105 Transceiver is distributed and backed exclusively by MFJ
Enterprises. This unique radio delivers an exceptionally wide range of operating features normally found only
in more-costly base-station radios. For example, the general-coverage receiver tunes continuously from the
AM broadcast band to 54 MHz. VFO tuning is velvet-smooth with a wide range of tuning rates – including
1-Hz steps for critical data reception. DX splits are easy using the VFO A/B function, and a wide-range RIT
with digital readout lets you scout adjacent frequencies in both directions. The X5105 transmits on 160
through 6 Meters (amateur bands only) with power output adjustable from 0.5 to 5.0 Watts. Operating modes
include USB/LSB, CW, FM, AM, plus digital transmissions (1.5-W carrier on AM). There’s also a built-in SWR
Bridge and Automatic Antenna Tuner (ATU) that will put you on the map from virtually any portable location
using improvised antenna systems.
When it comes to pulling weak DX signals out of the noise, the X5105’s “big-radio” features make all the
difference! There’s a built-in Pre-Amp and Attenuator, pulse-type Noise Blanker, Digital Noise Reduction
(DNR), Notch Filter, adjustable AGC-Rate (fast, slow, automatic, off), plus variable high and low pass audio
filters, built in speaker, and plenty of audio power to drive an external speaker. Serious CW operators will
appreciate the built-in multi-mode Automatic Keyer with three memory channels and CW-trainer. There’s
also built-in Speech Processing for added DX punch. The electret hand microphone features a multi-function
key-pad that places many of the radio’s advanced operating features right at your fingertips. Whether
operating indoors or out, the X5105’s large 3.6-inch high-visibility back-lit screen displays every aspect of
your radio’s operation with easy-to-read numerals, letters, and analog scales. And, even though the X5105 is
physically small, all operating controls are clearly marked and spaced apart to accommodate adult-sized
fingers!
Thanks to all these features, you can say goodbye to the tangled patch cables and add-on boxes that
normally accompanies QRP operation. There’s even a front-panel microphone and manual transmit switch
for operating “handy-talkie” mode. Best of all, the powerful 3800-mAh on-board battery pack delivers 6 to 8
hours of energy-independent portable operation between charges. The radio operates from any external
9-15 Volt 3-Amp dc supply, and a built-in smart-charger monitors battery condition. Even though it’s loaded
with special features, the X5105 measures just 6-5/8” wide x 3-5/8” high x 1-7/8” deep and weighs just 2.1
pounds with the battery included. Positive proof that remarkable things come in small packages!

Xiegu X5105 QRP Transceiver
3
SPECIFICATIONS
Receive Range: Continuous, 500kHz to 54MHz
Transmit Range: 160-M through 6-M (Amateur bands only)
Operating Mode: A1A(CW),A3E(AM),J3E(USB/LSB),F3E(FM)
Temperature Range: -10℃ ~ +60℃
Stability: First Hour, + 4ppm @25℃. After First Hour, 1ppm
Voltage: 13.8VDC ± 15%, (9–15 Vdc)
Current: Rx, 500 mA Peak, Tx, 2.5 A Peak
Battery: 3800 mAh @ 12Vdc
Dimensions: 6-5/8” W, 3-5/8” H, 1-7/8” D
Weight: 2.1 lbs.
Transmit Power Output
:
0.5 – 5.0 W PEP SSB/CW/FM (0.5-W increments)
AM: Low-level, Reverse-Amplitude Modulation (5-W Carrier, 1.5-W on voice peaks)
FM: Reactance Modulation, ±5kHz
Harmonics, Spurs: > -45dBc
AF Input: 200-10k (600-Ω microphone)
Receiver: Superhet, 1st IF: 70.455MHz, 2nd IF: 10.695MHz, 3rd IF: 455kHz(NFM only)
Rx Sensitivity:
(PRE=on,ATT=off,NB=off,NR=off,SSB/CW/AM = 10dB S/N,FM = 12dB SINAD)
Image Rejection: -70dB
IF Rejection: 60dB
Selectivity: SSB
:
-6dB @ 2.4 kHz, -60dB @ 4.6 kHz
CW
:
-6dB @ 500 Hz, -60dB @ 2 kHz
AM
:
-6dB @ 6 kHz, -60dB @ 25 kHz
FM
:
-6dB @ 12 kHz, -60dB @ 25 kHz
DSP Noise Reduction: AF DSP, variable
AF Output: 0.6W into 8Ω,≤10% THD
Firmware Version: V1_0_04 Build 014 March 21 2018
SSB/CW AM FM
1MHz-1.8MHz 0.35uV 10uV /
1.8MHz-28MHz 0.25uV 2uV /
28MHz-30MHz 0.25uV 2uV 0.35uV
50MHz-54MHz 0.25uV 2uV 0.35uV

Xiegu X5105 QRP Transceiver
4
EXTERNAL CONNECTIONS
INTERNAL BATTERY

Xiegu X5105 QRP Transceiver
5
The X5105 comes with a built-in 3800-mAh battery pack. When no external power source is connected to the
power jack, the battery supplies power to the radio. When a power source is connected, the radio senses the
external voltage and switches over to it.
Charging Procedure: You may listen to the X5105 while it is charge mode -- but avoid transmitting while
charging is taking place. The combined current required to simultaneously transmit and charge the Lithium
ion cells could exceed the capacity of the radio’s power-management components. To initiate a charge cycle
while the radio is operating:
Scroll to Menu-7, select [CHG] (charge), then select CHG ON (charger on).
To ensure a full charge, apply at least 13.5 volts from the external power source (normal charge range is
13.5–14.0 volts). Charging begins automatically and is monitored by the charge controller.
The maximum charge time required for a fully depleted battery is 12 to 15 hours. When the battery is fully
charged, the charge controller automatically terminates the charge cycle.
When your radio is turned off with external power connected, the battery automatically recharges, as needed,
to restore a full charge.
When battery power is nearly depleted, the battery symbol located at the upper right corner of the display
screen will appear to be “empty” . At this point, you should switch to an external supply or recharge the
battery right away. Note that during the recharge cycle, it is normal for the X5105 heatsink and case to
become slightly warm. Normal life span for the internal battery is about three years. Contact MFJ Enterprises
to order a replacement when you observe a significant drop in capacity or if the battery fails to hold a charge.
Note that routine battery replacement is not covered under warrantee.
IMPORTANT OPERATING WARNING: DO NOT abruptly disconnect the power supply when the X5105 is
connected to an external power source and the radio is transmitting. Doing so can damage the radio’s
power-management components. Also, avoid transmitting while simultaneously charging the battery.
IMPORTANT BATTERY WARNING: Lithium-ion batteries are widely used in electronic devices and the
technology is safe. However, in rare isolated cases, Lithium ion batteries have been known to fail internally
and overheat. Should such a failure occur involving the battery in your X5105, the radio’s enclosure would
likely become extremely hot to the touch. In this event, disconnect the radio’s external power source and
immediately remove the radio to a well-ventilated flame-resistant area. After the case cools down, contact
MFJ with a detailed description of the event and request specific handling instructions.

Xiegu X5105 QRP Transceiver
6
CONTROLS AND FUNCTONS
Front panel:
1. Power Button:
Press and hold for 1 second to turn the radio on or off.
2. Mode Button:
Step or scroll to change the radio’s operating mode: [LSB-USB-CW-CWR-NFM-AM]
3. PRE/ATT Button:
Step or scroll to select receiver sensitivity Range: [PRE=ON, ATT=ON, PRE/ATT=OFF]
4. RIT Button:
Press to toggle the RIT (receiver incremental tuning) function on or off.
5. NB Button:
Press to toggle the NB (noise blanker) function on or off.
6. MENU Button:
Press Menu to display menu selections and to step through available functions.
7. – 10. Multifunction-Menu Buttons:
Press to access a desired function (functions appear above each button on the screen).
11. Main Tuning Knob:
Tunes the X5105 VFO, also adjusts some menu parameters.
12. ATU Button:
Press momentarily to bring the ATU (automatic antenna tuner) on line.
Press and hold to activate the ATU’s automatic tuning cycle.
13. Po Button:
Press and rotate the VFO knob to set RF-Power Output level (0.5W-5W).
14. A/B Button:

Xiegu X5105 QRP Transceiver
7
Press to toggle between VFO-A and VFO-B.
15. (<) Button:
Press to shift VFO frequency step one decimal place to the left.
16. (
>
)Button:
Press to shift VFO frequency step one decimal place to the right.
17. V/M Button:
Press to toggle between VFO mode and MEMORY mode.
18. “UP” Button:
Step or toggle to select a higher-frequency band.
19. “DN” Button:
Step or toggle to select a lower-frequency band.
20. (
-
) Speaker Button:
Step or toggle to lower the volume setting.
21. (
+
) Speaker Button:
Step or toggle to select a higher volume setting.
22. PTT Button:
Press and hold to actuate transmit mode (MOX function).
23. LOCK Button:
Press to lock all control settings. Press and hold to release control lock.
Press and hold for several seconds to toggle the display backlight on or off.
Colored Status LEDs: (located above display screen)
A - T/R: Green LED = Receive Mode, RED LED = Transmit Mode
B – DATA: Flashes when data signals are present or a monitored channel is busy.
C – LINK: Illuminates when radio is connected to peripheral equipment.
FUNCTION MENU: The function menu has nine pages (M1-M9) with three or four soft-menu entries per
page. Refer to the expanded Function Menu section of the manual for detailed operating instructions:
M1 - A=B: Copy VFO A to B, SPL: VFO split-frequency, NR: Noise reduction level, NTH: Notch filter freq.
M2 - AGC: AGC time constant, FIL: Select IF filter, SRM: Scan in receive mode, SWR: Scan SWR (Tx)
M3 - M>V: Memory>VFO, MW: VFO>Memory, MC: Clear Memory, TAG: Add text label to memory
M4 - BK: CW Break-in, KEY: Manual or Auto, KSP: Set keyer speed in WPM
M5 - RE1: CW Mem-1, RE2: CW Mem-2, RE3: CW Mem-3, CSN: Add call to boot screen
M6 - SQL: Squelch, CMP: Transmit Processor, MTR: Select bar-graph Display, VLT: Volts or Battery%
M7 - CHG: Charger switch, MSL: Mic Select - (int/ext), IFO: IF output switch, VER: Firmware version
M8 - MDN: Digital modem, CAR: Carrier tracking, AFC: Frequency tracking
M9 – AFF: Digital AF filter, HPF: High-pass set, LPF: Low-pass set, SPK: Speaker/Phones audio level

Xiegu X5105 QRP Transceiver
8
Screen display information
LEFT-SIDE PANEL CONNECTIONS
1. Desk Stand Bracket: Swings down to prop radio upright on a table or desktop.
2. Antenna Connector: Accepts 50 Ω BNC-Male connector from antenna system
3. IF-Signal Output: Connects 1st-IF output to Xiegu XDT1 data terminal.
4. External Speaker/Phones: Accepts 3.5mm stereo plug (3 wire) for speaker or phones.
5. DC Power Connector: Accepts a standard 2.1 mm x 5.5 mm coaxial power plug, (+) center. Supply must
deliver at least 13.8-V @ 3-A to fully charge the battery.

Xiegu X5105 QRP Transceiver
9
RIGHT-SIDE PANEL CONNECTIONS:
1. ACC (Accessory) Jack: Accepts male 8-PIN micro-DIN. Interface to external PA or data controller.
2. KEY Jack: Accepts 3.5mm stereo male plug connected to manual or automatic key.
3. ATU Jack: Accepts 3.5-mm stereo male plug to provide control levels for external band switch.
4. CIV Interface: Accepts 3.5mm male stereo plug for serial-port interface (firmware updates, etc.)
5. Right bracket: Swings down to prop up radio on table or desk top.
6. MIC (microphone) Jack: Accepts X5105 microphone connector.
NOTE For best results on the 3.5mm Jacks use the included 3.5mm Stereo Plug to insure the plug
can fully plug in.
HANDHELD MICROPHONE:
1. Lock Button: Toggle to lock or unlock radio’s controls
2. PTT Button: Push to Transmit
3. Up/Down: Steps VFO frequency higher or lower.
4. Rx/Tx LED: Displays Receive/Transmit status.

Xiegu X5105 QRP Transceiver
10
5. Digital keypad: 1-10 Tone Encoder.
6. FIL Button: Toggle to change filter passband.
7. MODE Button: Toggle to change operating mode.
8. Mic Element: Opening for electret microphone element
9. F1/F2: Custom settings buttons.
10. MW: Memory Write button (store frequency).
11. V/M: Switch between VFO and stored frequency.
12. XFC Button: No function
13. CALL Button: Press and hold for Automatic Antenna Tuning (ATU)
BASIC OPERATION
The X5105 is firmware-driven, so familiarity with the operation of the various controls and with the menu
system is important. To make best use of these instructions, have your radio in hand and walk through each
function as you read along.
[ ] Power ON: Press and hold BOOT (power) button for 1-2 seconds. The radio will beep three ascending
tones* and the Xiegu logo will appear on screen. Then, in 2-3 seconds, the screen will change to the regular
operating display (freq., mode, etc.). Note that the radio’s CSN menu will allow you to personalize your radio
by adding your call and/or name to the power-on boot screen.
[ ] Power OFF: Press and hold BOOT (power) button for 2-3 seconds. The radio will beep three
descending tones and “BYE” will appear on the screen. In 2-3 seconds the screen will go dark, indicating the
radio is fully turned off.
[ ] Forced Reset: In the unlikely event the processor “locks up” or fails to respond to your commands, press
and hold Boot for 10 seconds. This will force a reset of the MCU and shut the radio down.
[ ] Band: Step through all US amateur bands by pressing the DN (down) or UP button located on top of the
radio on the righthand side. The menu is circular: 160M> 80M> 60M> 40M> 30M> 20M> 17M> 15M> 12M>
10M> 6M.
[ ] Mode: Step through choices using the MODE button to the left of the display screen. This menu is
circular: LSB> USB> CW> CWR(rev)> NBFM> AM. The X5105 offers a range of special features and
functions for each mode, all covered in detail in the expanded Function Menu section of the manual.
[ ] Volume: Change the sound level with buttons marked with a large and small speaker symbol located on
top of the radio, left side. A VOL bar-graph located below the S-meter scale displays the current AF level
from 0% to 100%. Note that the audio signal level routed to the AF-OUT line on the ACC (accessory) jack is
independent of the volume buttons. That level is set in the system menu.
[ ] Transmit Output Power: Press the Po button located above the VFO tuning knob. >TX POWER will
appear on the right side of the display with the output level displayed underneath it (example: 5.0W). To reset,
rotate the VFO encoder knob. Output level will change in 0.5-watt increments from 5.0-W to 0.5-W. Five
seconds following the adjustment, normal VFO tuning will be restored to the encoder.
Important Operating Note: Before transmitting into an antenna with unknown SWR, always reduce power
to the lowest level and engage the ATU (automatic antenna tuner).

Xiegu X5105 QRP Transceiver
11
[ ] VFO Operation: There are two ways to tune the X5105 VFO:
1. Use the VFO Knob and Step Keys: The current tuning step is highlighted on the frequency display,
and the Step Keys (< >) shifts the highlight left or right. Tuning steps are: 1 Hz > 10 Hz > 100 Hz >
1 kHz > 10 kHz > 100 kHz > 1 MHz > 10 MHz. Use larger steps for out-of-band general coverage
tuning or to change band segments. Use smaller steps to tune in discrete signals. The VFO knob’s
encoder changes frequency by 12 increments with each revolution.
2. You may also use the up (^) or down (v) keypad buttons on the microphone to shift the VFO by one
increment per click. These buttons are located immediately above the Rx/Tx LED.
[ ] ATU (Automatic Antenna Tuner): Press the ATU button once to engage the internal tuner -- the TUNE
icon will appear at the top of the screen. Then, press and hold the ATU button while watching the S-meter
display. When the bar-graph returns to 0 or stops moving, the tuning cycle is complete and the radio
automatically switches back to receive mode. To disengage the tuner, press ATU once and the TUNE icon
will disappear.
IMPORTANT WARNING: Always connect a load to the Antenna connector when testing the ATU or when
transmitting.
[ ] RIT (Receiver Incremental Tuning): This function changes the receiver frequency without changing the
transmit frequency. To enter the function, press RIT. The RIT icon will appear on the right side of the screen,
and the RIT offset in ± kHz will appear directly below it. Rotate the VFO knob to program set the desired
amount of offset. After 5 seconds, normal VFO operation is restored.
[ ] PRE/ATT (Preamp/Attenuator): Press to step through three choices: ATT (attenuator) > OFF (bypass)
> PRE (preamplifier). Note that the preamp is unnecessary on the lower HF-bands and may even cause
front-end overload when many strong signals are present.
[ ] Nose Blanker (NB): Press NB to toggle the noise banker on and off. NB is highly effective for
suppressing impulse noise generated by ignition systems, electric fences, etc. When on, the NB logo
appears next to the FIL (IF bandwidth) indicator. Turn this function off when not needed -- impulse blanker
may make strong adjacent-channel signals appear to splatter or distort. Note that DNR (digital noise
reduction) is more effective for reducing generalized atmospheric static and random electrical noise.
[ ] Data MODEM: The X5105 has a built-in receive modem for copying PSK31 (see Function Menu
section).
[ ] VFO-A/B: The X5105 features two independent VFOs. These may be set up for two in-band frequencies,
for frequencies on two different bands, and even for split operation using two different modes. Press the A/B
button (above tuning knob) to toggle between VFO-A and VFO-B. The VFO in use will be displayed at the
top-left of the screen as VFO-A or VFO-B.
To operate “split” in DX pileups, set receive frequency with VFO-A and transmit frequency with VFO-B. Then,
turn on the SPL (split) function on menu page-1 (M1 -> SPL). The radio will now switch automatically from
VFO-A to VFO-B when you transmit. Whenever split is on, the SPLT icon will appear on the screen next to
the AGC icon.
[ ] LOCK Button: The lock feature freezes all controls, protecting them from accidental change. Press
LOCK (small red button to the right of the display) to engage the function. A small Padlock icon will appear
to the left of the button on the display. Press LOCK again to disengage the lock.

Xiegu X5105 QRP Transceiver
12
[ ] Display Backlight: Press and hold the LOCK button for approximately 3 seconds to toggle the display
backlight on or off.
FUNCTION MENU: Many of the X5105’s advanced features are accessed via the Function Menu. Use this
section of the manual to “walk through” and become familiar with each one.
FUNCTION MENU PAGES: The Function Menu has nine pages (M1-M9), with three or four entries per page.
The current page number is displayed in a box at the lower-left corner of the display screen. To change the
page, press MENU and the page number will blink. Rotate the VFO encoder to select a new page number,
then press MENU again to lock it in. The menu is circular, stepping M1 to M9.
SOFT KEYS: The four buttons at the bottom of the display screen are called Soft Keys. Each one will be
labeled with a two or three letter designator appearing above it on the screen. Labels for the soft keys
change with each new page.
Menu Page-1 [M1]
[ ] A=B: Press to copy all parameters stored in VFO-A over to VFO-B. Parameters may include band,
frequency, operating mode, etc. After entry, the VFO-A or VFO-B settings may be modified, as needed.
[ ] SPL (Split): Press SPL to initiate automatic split-frequency operation. In this mode, you may tune around
using VFO-A, but when you transmit, the radio automatically switches to the settings you’ve retained in
VFO-B (an important DX operating aid).
[ ] NR (Digital Noise Reduction): This function activates and sets the radio’s digital noise-reduction level.
Press NR and the current NR-Level will appear on the display with a number from 0 and 10. Use the VFO
encoder knob to alter the noise reduction level. When set for 0, the NR circuit is off. When set between 1-10,
it is on. The NR status indicator appears on-screen to the right of the AGC icon.
To adjust, listen to incoming signals and rotate the VFO encoder for the most comfortable processing level.
Five seconds after your last entry, the encoder will revert back to normal VFO operation. Digital Noise
Reduction works well for general QRN, static crashes, splatter, powerline noise, etc. Setting 1 delivers
minimum processing, and 10 the maximum. Set to 0 to turn the function off. Note that NB impulse blanking
may work better for pulsed noises such as auto ignitions and electric fences.
[ ] NTH (Notch Filter): Used to reduce or eliminate unwanted carriers and noise bands. Press NTH to
engage. When set to 0, the filter is off and out of the circuit. When set from 1-100, it is on. Adjust the VFO
encoder to position the notch for minimum interference. Once set, normal VFO operation will be restored
after 5 seconds. The notch filter has no on-screen status icon but should be left off (0) unless needed.

Xiegu X5105 QRP Transceiver
13
Menu Page-2 [M2]:
[ ] AGC (Automatic Gain Control time constant): The time-constant menu is circular: Slow > Fast >
Automatic > Off. The AGC status icon appears on the display at mid-screen. Icons are AGC-S (slow),
AGC-F (fast), AGC-A (Automatic), and AGC— (Off). The last setting used is remembered when the radio is
turned on. It does not change with the mode unless you have selected AGC-A (automatic).
[ ] FIL (IF Filter Selection): Three IF filter bandwidths are available -- 0.5 kHz default for CW and CWR, 2.4
kHz default for USB/LSB, and 6.0 kHz default for AM (NBFM uses a different IF signal path). The filter menu
is circular.
Press FIL to deviate from the default setting (FIL changes work in receive mode only). For example, apply
2.4 kHz on CW to listen wide, or 6.0 on SSB for ESSB. You may also narrow the AM passband using 2.4 kHz.
However, during transmissions, the radio always reverts to the transmit default. The filter status indicator
appears on the right-hand side of the display (example: FIL-2.4k).
[ ] SRM (Scan Receive Mode): Press SRM and AF output shuts off while the receiver sweeps from below to
above the operating frequency, graphicly displaying band activity. Set Sweep Width by toggling the BW soft
key (wide, medium, narrow). The receiver continues scanning until you press MON to resume listening on
the center frequency, or press QUIT to terminate the scan function and resume normal operation.
[ ] SWR (Plot Antenna SWR). Disengage the ATU before making SWR readings. Connect the antenna or
load under test to the antenna jack and tune the VFO to the desired center frequency. Press SWR to start the
scan. The radio will switch to transmit mode and a graphic SWR display will appear on screen. The default
scan width is 100 kHz in 1-kHz steps ( 50 kHz of center). 1 kHz appears on screen to indicate the step
spacing. The center frequency is also displayed. One complete scan requires about 15 seconds.
Five Scan Width settings are available (from 100 kHz to 500 kHz). Each scan has 100 sampling points, so
the interval between samples automatically increases with the scan width (from 1 kHz to 5 kHz). To widen the
scan, press BW (bandwidth) and toggle through the five choices. With each new choice, the scan resets and
begins over. The radio will continue scanning until you press QUIT. Quit returns the radio to receive mode.
Note that SWR measurements may be limited to in-band frequencies -- the X5105 does not generate
transmit signals outside US ham bands.
Important Warning: When scanning SWR, always confirm that a workable antenna or reasonable load is
connected to the antenna jack.
Menu Page-3 [M3]
[ ] M>V (Recall Memory Channel to the VFO): This function recalls operating channels previously stored in
memory (the X5105 has 100 channels available). To access the memory bank, press M>V. A memory
channel icon will flash at the top of the display (CH-00). Scroll the VFO encoder clockwise to select the
channel number you wish to recall (example: CH-03), then press the YES soft-key to complete the transfer.
To escape an operation without completing it, select NO. The radio will return to normal operation. If there
are no saved channels in memory, a Memory Empty icon will appear on the soft-key line at the bottom of the
screen.
[ ] MW (Write VFO to a Memory Channel): To write a current operating setup into memory, press MW. The
channel status indicator will flash at the top of the display showing CH-00. Rotate the encoder clockwise until
a number appears with a E in front of it (E indicates the selected channel is empty). To load that channel,

Xiegu X5105 QRP Transceiver
14
press the YES soft key (or press NO to escape). The radio will store the entry and return to normal VFO
operation. Should you accidentally try to overwrite an occupied memory slot, the operation will abort and
switch the radio back to VFO operation. To write a new setup into a currently occupied memory channel, you
must first clear out the existing data. See MC (Memory Clear) below.
[ ] MC (Memory Clear): Press MC to bring up the Channel Select function on the display (CH-00). Next,
rotate the channel encoder to find the memory slot you wish to clear. Press YES to clear it, or NO to escape.
When completed, normal VFO operation will be restored.
[ ] Read a TAG: The TAG function labels memory channels for more convenient identification. To read an
existing TAG, go to MEMORY mode using M/V button (upper right-hand corner). Next, use VFO to scroll to
an occupied channel (CH-XX) that has been tagged. To read the TAG, select MENU page 3, then press the
TAG soft key. The soft-key will change to >TAG and the TAG will replace the frequency in the screen display.
Press TAG again to exit back to the operating frequency.
[ ] Write a TAG: Each TAG may be up to 9 characters long. To write a TAG, first select the channel you wish
to label and then go to MENU page 3. Next, press and hold TAG for 2-3 seconds. When you release it, the
radio’s text editor will come up on screen. Locate the blinking cursor in the upper-left corner and rotate the
VFO encoder to find your first character. When it appears, press ADD to lock it in. The cursor then
automatically shifts to the next character. To add a space between words, insert the thin space marker ( _ ).
The space marker is next to the ^ symbol in the character list. To make corrections or deletions, shift the
cursor using the < and > keys. Press DEL to delete characters. Once the message is complete, press SAVE
to load it into the memory. Press TAG again to exit.
Menu Page-4 [M4]
[ ] BK (break-in): The soft key toggles between BK ON and BK OFF. BK ON engages the transmitter to
send CW over the air. BK OFF allows you to practice sending or check CW memories without transmitting.
[ ] KEY: Manual = Straight Key (or external keyer), Auto-L = dash left-paddle, Auto-R = dash right-paddle.
[ ] KSP: (Keyer Speed). Press KSP to display current speed in WPM on screen. Rotate VFO to change
speed setting. Press KSP again to lock in new speed and return to VFO operation.
Practice Mode: To practice sending CW, first switch to BK OFF to disable the transmitter. Set KEY for the
type of key or paddle you are using -- and adjust sending speed using KSP. Finally, go to the System Menu
to adjust side-tone pitch (entry 03) and beep volume (entry 15) to your preference. ‘
Menu Page-5 [M5]
[ ] RE1-RE3 Playback: To call up an existing CW-memory file, Press RE1, RE2, or RE3.
[ ] RE1-RE3 Record: Press and Hold the desired channel key for 2-3 seconds. The screen and soft-key
labels will switch over to Text-Editor mode. Each memory channel holds up to 100 CW characters.
To begin entering your message, locate the blinking cursor in the upper-left corner of the screen. Next, rotate
the VFO encoder to bring up your first character (turn clockwise for capital letters, counter-clockwise to find
numbers). When the desired character appears, press ADD to lock it in. The cursor then automatically shifts
to the next character – use VFO to change it. To add a space between words or numbers, insert a thin space
marker __. The space marker follows the ^ in the character list. To make corrections, shift the cursor left or
right using the < or > keys. Press DEL to delete characters. Once the message is complete, press SAVE to

Xiegu X5105 QRP Transceiver
15
load it into the memory.
[ ] CSN: Use this file to personalize the boot screen that appears when the radio is turned on. It holds up to
13 characters for your name, call letters, etc. Press CSN to bring up the Text Editor and use the same
procedure outlined for the RE files to load your information.
Menu Page-6 [M6]
[ ] SQL (Squelch): Press SQL and SQL LEVEL appears on the right side of the screen with a number
between 0-10 directly below. 0 signals the Squelch is turned off. To turn it on, rotate VFO until the receiver
noise quiets. Press SQL again to resume normal operation. The squelch is normally reserved for FM, but
works on all modes. Be sure to set it to 0 when not in use.
[ ] CMP (Compressor): Press CMP to activate processing. When on, the > symbol appears next to the CMP
soft-key. Also, a COMP icon appears on the screen. Press CMP again to turn the processor off.
[ ] MTR (Meter): Toggles the bar-graph meter scale under the S-meter scale between PWR Meter
(percentage of transmit power) and SWR Meter (SWR Ratio).
[ ] VLT (Voltage): Press VLT to toggle between battery-charge percentage icon ( ) and supply voltage
reading at the upper right-hand corner of the screen.
Menu Page-7 [M7]
[ ] CHG (Charge): Press CHG to toggle the battery charging function on or off. We recommend leaving it off
if you plan to transmit.
[ ] MSL (Microphone Selector): Press to scroll through the three AF-input options: INT MIC = Front-Panel
Microphone, EXT MIC = Handheld Microphone, AUX LINE IN = Auxiliary Jack. This line is used by a data
modem or other external AF source. EXT MIC is the default.
[ ] IFO (IF Output Line): Toggle to enable or disable the IF Output line (used with broadband displays). IF-
Out Disable is the default setting.
[ ] VER (Version): Press VER to see the radio’s current firmware version.
Menu Page-8 [M8]
[ ] MDN (Data Modem): This function allows you to copy PSK-31 signals on the display screen without
using an external modem or computer. Place radio in SSB mode, then press MDN to access the modem
display screen. The graphic display shows PSK signals present in the receiver’s passband. Tune the VFO to
move the spectrum display up or down in frequency relative to the triangular decoding marker underneath.
When a PSK signal is centered on the triangular marker, the modem will lock onto it and begin streaming text
below the spectrum display. Three lines of on-screen copy shown. Tuning is very critical, so we recommend
using the AFC correction option to compensate for drift. PSK-31 signals are normally clustered around
3.580.150 MHz, 7.035.150 MHz, and 14.070.150 MHz.
[ ] CAR (Carrier): Phase method of frequency correction – alternative to AFC.
[ ] AFC (Automatic Frequency Control): Turn on AFC while monitoring PSK signals to ensure the decoder
remains locked in to the incoming signal.
Menu Page-9 [M9]

Xiegu X5105 QRP Transceiver
16
[ ] AFF (Audio Frequency Filter): Press AFF to toggle digital AF-filtering ON or OFF. When filter is engaged,
the > AFF soft-key marker appears along with HPF (High-Pass Filter) and LPF (Low-Pass Filter) markers.
[ ] HPF: Press to set low-frequency cutoff. AF HPF and cut-off frequency appear on screen. Adjustment
range is 100 to 1000 Hz. Rotate VFO to set the cut-off, press AF HPF again to exit.
[ ] LPF: Press to set the high-frequency cut-off. AF LPF and cut-off frequency appear on screen.
Adjustment range is 500 Hz to 3600 Hz. Rotate VFO to set the cut-off, press AF LPF again to exit.
[ ] SPK (Speaker): Press SPK to attenuate audio output for safe and comfortable listening levels when
using headphones. The >SPK soft-key label appears, and a headphone icon appears on the left side of the
screen. Press again to return to Speaker Mode (a loudspeaker icon will replace the headphone icon).
System Menu
Each X5105 is adjusted individually at the factory to ensure optimum performance, but you may access the
System Menu and fine-tune some of the parameters to preference. To enter System Menu, press and hold
MENU for 1-2 seconds. When you release, the screen will come up on the menu item last viewed. Look for
the number and item information at the top-left of the display. The set-value for each item will be prominently
displayed at mid-screen. Rotate the VFO encoder to alter set-value. Use the soft keys to navigate through
the System Menu and to enter set-value changes. Commands are listed below:
[ ] < : Step back to the previous Menu item
[ ] NO: Do not enter a newly selected value (escape)
[ ] YES: Overwrite the previous set-value with the new value
[ ] > : Step forward to next menu item.
# Menu Item Description Range Default
01 RF gain Receiver RF Gain 0-100% 65%
02 CW T/Rx Delay Time CW TX Delay 0-5000 mS 200 mS
03 CW Rx Side Tone CW Side Tone Pitch 50-1200 Hz 800 Hz
04 Tx AF Gain SSB SSB Mic Gain Setting 0-100% 80%
05 Tx AF Gain AM AM Mic Gain Setting 0-100% 60%
06 Tx AF Gain NFN NBFM Mic Gain Setting 0-100% 100%
07 Rx AF Gain SSB SSB Receiver AF Gain 10-100% 40%
08 RX AF Gain AM AM Receiver AF Gain 10-100% 40%
09 Rx AF Gain NFM NBFM Receiver AF Gain 10-100% 40%
10 LCD Backlight Level Screen Brightness 0-100% 80%
11 Ref Clock System Clock Reference Do Not Adjust! 26000000 Hz
12 NFM Tx IF NBFM TX Frequency Adj. ----- 10697000 Hz
13 Misc Option 0x59A03360 Do Not Reset! ----
14 Beep Volum Beep Volume Control ----- 15
15 Aux AFIN Volum ACC Port Input Volume ----- 7
16 Aux AFOUT Volum ACC Port Output Volume ----- 63
17 User Key F1 F1 Button Customize ---- TS-
18 User Key F2 F2 Button Customize ---- TS+
19 Ext MIC Bias External Mic Bias Setting Disable/Enable Enable

Xiegu X5105 QRP Transceiver
17
20 CTCSS Tone CTCSS Tone Frequency ---- 88.5 Hz
21 CTCSS (Tx only) Tone –Transmit only ---- Disable
22 Reset ALL Reset - Factory Parameters No/Yes No*
*Use Reset All only if a software glitch renders the radio unusable or to activate new firmware.
Don’t make any adjustments in the System Menu unless you feel technically competent to do so and
understand what the impact will be on normal operation. If you make gain changes, write down the original
setting first, then introduce new values in small increments. If you find that the FM carrier frequency is off
frequency use an accurate frequency counter and adjust 12 NFM Tx IF setting up or down by the amount of
the error.
60M OPERATION
When operating on the 60 Meter band you have to dial in the correct channel frequencies. It is recommended
that the channels be programmed into memory for convenient retrieval.
USB CW DATA
5330.5 5332.0 MHz
5346.5 5348.0 MHz
5357.0 5358.5 MHz
5371.5 5373.0 MHz
5403.5 5405.0 MHz
REMOTE BAND TRACKING
The X5105 Accessory Port (ACC) provides dc voltage levels to drive remotely controled band-switching
circuitry in RF amplifiers and other devices. The band-tracking voltage appears on the Band pin of the
connector (see ACC connector diagram on page-3).
Band Voltage Band Voltage
160-M 230 mV 17-M 1610 mV
80-M 460 mV 15-M 1840 mV
60-M 690 mV 12-M 2070 mV
40-M 920 mV 10-M 2300 mV
30-M 1150 mV 6-M 2530 mV
20-M 1380 mV ------ -----------
DATA COMMUNICATION
You may transmit as well as receive data using PSK-31 and other digital modes by connecting your
computer through a USB Radio Interface such as the MFJ-1204. Refer to the radio’s ACC jack diagram for
pin connections. Be sure to follow all instructions and operating suggestions in your USB interface manual
and operating software.
FIRMWARE UPDATES
[ ] To update your firmware, do not go to the cqxiegu website. Instead use the latest firmware download
available at https://www.mfjenterprises.com/SoftwareDownloads.php.
[ ] You’ll also need to download the TeraTerm freeware terminal emulator program to establish Com-Port

Xiegu X5105 QRP Transceiver
18
communication between your pc and the radio. Go to http://ttssh2.osdn.jp/ with a download the link in the
middle of the page.
Note that there are two sets of X5105 download instructions – one for firmware version V1_0_03 and older –
and one for V1_0_04 and newer. Check your current firmware version using Menu 7, VER. Both procedures
are outlined below.
UPDATING FIRMWARE FOR V1_0_03 AND OLDER
Terminal Program Setup using TeraTerm:’
[ ] Plug the radio’s programming cable into an open USB slot on your computer.
Note that there are two versions of the X5105 programming cable. The first version is a Prolific clone that
requires an older driver. This driver can be downloaded from the MFJ website. The newer version uses an
internal FTDI chip. Windows should locate it and download the driver automatically. If not, find it at
http://www.ftdichip.com/Drivers/VCP.htm Once installed, TeraTerm should list the assigned COM port unless
multiple serial devices are attached to the computer.
[ ] Plug the programming cable into the X5105 COM jack (or CI-V jack on older radios).
[ ] Open TeraTerm and go to “SETUP>Serial Port’’. Set up as follows:
[ ] Port: select the COM port assigned to the programming cable
[ ]Baud Rate: select 115200
[ ] Data: 8 bit (default)
[ ] Parity: None (default)
[ ] Stop: 1 bit (default)
[ ] Flow Control: None (default)
[ ] Click the OK button
Firmware Install:
[ ] Unplug power from the X5105. Press and Hold the VOL UP and VOL DN buttons as you plug the power
cable back in. Release both buttons.
[ ] Press the space bar on your computer keyboard. A menu should display on-screen.
[ ] Select “Update Application”.
IMPORTANT WARNING: Do Not Select “UPDATE BOOTLOADER!” If the original bootloader is erased,
the radio must be sent back to China for a complete firmware reinstall!
[ ] Go to File>Transfer>XMODEM>Send
[ ] Check Option 1K
[ ] Locate the firmware in the box at the top of the open window. Highlight and click Open.
A data transfer window will open and indicate the download’s progress. Once finished, the window will close
and the terminal program will say Trans finish! The X5105 will then switch to normal OFF mode.
[ ] Power up the X5105.
[ ] Press and hold the MENU button to switch into System Menu mode.

Xiegu X5105 QRP Transceiver
19
[ ] Use the < or > soft-keys to find System Menu entry 22, Reset All.
[ ] Turn the VFO knob to display YES, then press the Yes soft-key to reset the radio for the new firmware.
UPGRDING FIRMWARE VERSION V1_0_04 AND NEWER
Note -- once you’ve updated your radio to V1_0_04 firmware and newer, the old-version update instructions
will no longer apply.
Terminal Program Setup Using TeraTerm:
[ ] Plug in the programming cable to the computer.
Note that there are two versions of the X5105 program cable. The first is a Prolific clone that requires an old
version of the driver. It can be downloaded from the MFJ website. The newer version uses an internal FTDI
chip. Windows should locate it and download the driver automatically. If not, the driver is available at
http://www.ftdichip.com/Drivers/VCP.htm
Once installed, TeraTerm should list the assigned COM port unless multiple serial devices are attached to
the computer.
[ ] Plug the programming cable into the X5105 COM jack (CI-V jack on older radios).
[ ] Open TeraTerm and go to SETUP>Serial Port.
[ ] Port select the COM port assigned to the programming cable. Set up as follows:
[ ] Baud Rate: 115200
[ ] Data: 8 bit (default)
[ ] Parity: None (default)
[ ] Stop: 1 bit (default)
[ ] Flow Control: None (default)
[ ] Click the OK button
Firmware Install:
[ ] Unplug the power cable from the X5105. Press and hold VOL UP and VOL DN simultaneously and plug
the power cable back in. Release both buttons.
[ ] A message to cancel the upgrade will display – giving you a 10-second opportunity to halt the upgrade by
pressing either of the two VOL buttons (don’t press if you wish to continue the download).
[ ] After 10 seconds, the X5105 will automatically erase the old firmware from the radio. You must install the
new firmware at this point. No display will be shown on the computer.
[ ] Go to File>Transfer>XMODEM>Send
[ ] Check Option 1K
[ ] Locate the firmware in the box at the top of the open window. Highlight and click it open.
A data transfer window will open and indicate the download’s progress. Once finished the window will close
and the terminal program will display Trans finish! The X5105 will then switch to normal OFF mode.
[ ] Power the X5105 back up using the ON button.
[ ] Press and hold the MENU button to switch the radio into System Menu mode.
[ ] Use the < or > soft-key buttons to locate System Menu Entry 22 - Reset All.

Xiegu X5105 QRP Transceiver
20
[ ] Turn the VFO knob to display YES, and then press the Yes soft-menu key to reset the radio to the new
firmware.
24-MONTH MFJ WARRANTY:
If your X5105 was purchased from an authorized MFJ dealer -- or directly from MFJ -- and if you are the original owner,
we warrant that it shall be free from defects in material and workmanship for a period of 24 months from
date-of-purchase, subject to the following terms and conditions:
1. You must retain a dated proof-of-purchase (bill of sale, cancelled check, credit card or money order receipt, etc.)
describing the product to establish the validity of the warranty claim. In addition, the original copy or machine
reproduction of such proof shall be provided to MFJ at the time of warranty service. MFJ has discretion to deny warranty
service without dated proof-of-purchase. Evidence of alteration, erasure, or forgery shall be cause to void all warranty
terms immediately.
2. MFJ agrees to repair or replace, at its option and without charge to the original owner, any defective product covered
under this warranty, provided the product is returned postage prepaid to MFJ Enterprises, Inc. with a personal check,
cashiers check, or money order in the amount of $7.00 to cover postage and handling.
3. If the remedy is deemed to be customer serviceable, MFJ Enterprises, Inc. agrees to supply replacement parts free
upon request. A dated proof-of-purchase and a $5.00 personal check, cashiers check, or money order must be provided
to cover postage and handling for parts.
4. Under no circumstances shall MFJ Enterprises, Inc. be liable for consequential damages to persons or property
through use of this product. In addition, MFJ shall not be liable for repairing or replacing equipment bearing obvious
signs of misuse, mishandling, or unauthorized tampering.
5. MFJ Enterprises, Inc. will repair any out-of-warranty product provided the unit is shipped prepaid. All repaired units
will be shipped COD to the owner. Repair charges will be added to the COD fee unless other arrangements are made.
6. This warranty is given in lieu of any other warranty expressed or implied.
7. MFJ Enterprises, Inc. and its suppliers reserve the right to make changes or improvements in the design or
manufacture of this products without incurring any obligation to install such changes to products previously
manufactured.
8. All MFJ products to be serviced in-warranty or out-of-warranty should be addressed to MFJ Enterprises, Inc., 300
Industrial Park Road, Starkville, Mississippi 39759, USA and must be accompanied by a letter describing the problem in
detail along with a copy of a dated proof-of-purchase.
9. This Warranty does not cover replacement of batteries subject to deterioration as a function of normal in-service
use.
10. This warranty conveys specific rights, and you may also be entitled to other rights which may vary from state to
state.
/