Page is loading ...

G-CORE
V3 Manual
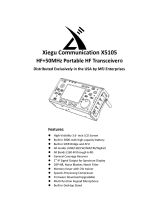
XIEGU
G1M
HF Four Band Portable SDR Transceiver
Kit
Operation Manual

2
Basic Features 3
Front Panel 4
Rear Panel 5
Connector Pin-Outs 6
External Power Connection 7-8
Menu & Features 9-10
LCD Display 11
Connection to PC 12
Band Voltage Data 13
Specifications 14
Packing List 15
In order to better experience the Rig, please read this manual carefully before use to fully
understand the operation of G1M.

3
The new G1M is a 5W portable QRP transceiver using SDR technology. Its A to D chip is a 16bit
and provides excellent performance. The newly added AM broadcast reception capability allows you
to listen to news broadcasts from around the world. The new 800Hz narrowband CW digital filter
makes CW reception a real pleasure.
Even as an entry-level portable SDR, the G1M SDR provides many advanced features which
make your operating experience more enjoyable.
Basic Features:
High performance 16 Bit SDR ADC
Spectrum display function
Added AM broadcast receiving mode
Added CW Trainer function (supports full insertion)
Adaptive speech noise reduction
HF General Coverage Receiver
Support for amateur data communications
Support for on-line computer control

4
1 Power switch / volume
○ Rotate the switch to turn the device on or off;
○ Rotate the knob to increase or decrease the
volume of the radio.
2 MIC interface
External mic interface.
3 Multi-function button
Menu functions for the screen.
4 LOCK Lock button
○ Light press this button to switch to the current
menu page;
○ Hold press the button for 2s to lock the button
operation.
5 Display screen
Hi-Res OLED Display screen
6 Frequency knob
○ Rotate this knob to change the current
frequency value;
○ Press in this knob to return from the current
selection.
1
2
3
4
5
6

5
7 Antenna interface
BNC Connector. Impedance 50Ω.
8 ACC interface
Output band voltage signal and PTT signal. See
below.
9 COMM interface
PC Communication interface / firmware upgrade
interface.
10 KEY interface
This interface is a 3.5mm stereo jack (3-pin) for
connecting manual or automatic telegraph keys.
11 SPK External speaker interface
This interface is a 3.5mm stereo jack (3 conductor)
for connecting external speakers.
12 DC IN external DC power interface
This interface is a 5.5*2.5mm DC power socket.
13 Grounding screw nut
Ground connection for equipment.
13
12
11
10
9
8
7

6
1、 MIC
Note: The MIC pin has a bias voltage and cannot
be shorted.
2、 COMM
3、 SPK
4、ACC
5、CW key lead connection method:
TXD
RXD
GND
MIC
PTT
GND

7
The G1M can use a 13.8V external DC power supply. The DC power supply requires a current load capacity of at
least 3A. The supplied power cord can be used to connect radio and DC power.
When connecting the DC power supply, please carefully connect according to the following figure to avoid the
polarity of the power supply being reversed.
The white core wire is connected to the positive pole of the power supply, and the metal shielded
wire is connected to the negative pole of the power supply.

8
When the G1M uses an external power supply, in order to prevent external interference from entering the radio
through the power line, please place a snap-on ferrite choke close to the DC plug. Loop the DC cord through the
choke a few times.
When using an external power supply, carefully check the polarity of the power cord to prevent
the polarity from being reversed.
The limited warranty of this radio does not include damage caused by an external power
connection error, or damage caused by abnormal power supply voltage.
The power cord wraps around
the ferrite core 2 turns.
As close as possible to the plug.

9
The G1M uses the multi-function menu for various functions. All functions are distributed in different
menu pages, and each menu has 5 function options.
The operation is as follows:
Light press IN the main tuning knob to switch to the four page menu.
The five multi-function buttons at the bottom of the screen correspond to the displayed function menu.
Main Knob
Multi-function Buttons

10
Momentarily press the "lock" button to switch the menu page.
Hold press the "lock" button to lock the button operation.
Menu
page
Button mode
Features
1
MD
B-
B+
TS
A/B
Light press
Mode switching
Band decrement
Band increment
Step selection
VFO switching
Hold press
Pre-amplifier
switch
Channel storage
Clear channel
Step back 1
selection
Frequency/channel
mode switching
2
KS
KM
IMB
QSK
CSN
Light press
Automatic key rate
setting
Auto key mode
setting
Iambic A/B select
QSK switch
To Set the boot-up Call
Sign
Hold press
/
CW Sidetone setting
Code ratio setting
QSK time setting
/
3
SCL
DIS
SPL
BP
/
Light press
Spectrum SCALE
setting
Display mode
selection
Different frequency
setting
System tone switch
/
Hold press
/
/
/
/
/

11
The G1M uses an OLED display screen that displays all status information for the user. It has
excellent visibility in outdoor sunlight.

12
Connection to a computer
The G1M can be connected to a computer and controlled with third-party software.
Connection cable method:
1. Install the driver for the data cable on the PC side.
2. Plug the data cable into the COMM port and connect the G1M to the computer.
3. Run the corresponding computer software.
When using software such as HRD, G1M must be in VFO mode
,
it cannot be in channel mode,
otherwise it will not be able to connect. Try the IC-7000 configuration for CAT control. Others
may work as well. Check Forum.

13
Computer Control Instruction
G1M uses the standard CIV instruction set. You can use the standard instructions of
this instruction set to remotely control the transceiver.
You can also configure the control instructions of other software to control the G1M.
Band Voltage Data
G1M's ACC port provides band data voltage for the four TX bands. The band data can control a
peripheral device to automatically switch the band of the G1M.. (such as the XPA-125B)
Band
Voltage
Band
Voltage
Band
Voltage
Band
Voltage
3.5MHz
460mV
7MHz
920mV
14MHz
1380mV
21MHz
1840mV
In the other frequency bands except the above four amateur bands, the band voltage is uniformly
outputted at a high level, 5V.

14
Specifications:
Receiving frequency:0.5~30MHz(Continuous)
Transmitting frequency: 3.5~4.0MHz
7.0~7.3MHz
14.0~14.35MHz
21.0~21.45MHz
Operating mode: SSB/CW/AM (AM Used only to receive broadcasts)
Receiving sensitivity: 0.45uV @12dB SINAD
Transmit power: 5W @13.8V DC
Spurious suppression: ≥45dB
Frequency stability: ±1.5ppm (30 minutes after turning on the power)
Audio output power: 0.5W
Operating Voltage: 12~15V DC
stand-by current: 0.5A @Max
Transmitting current: 2.5A @Max
Case size:: 97*40*155 (mm)

Packing List
15
Box Packing List:
G1M:1 PCS
Mic:1 pcs
POWER CABLE: 1pcs
User manual: 1pcs
Certificate: 1pcs
Warranty Card: 1pcs

16
Copyright 2018
Chongqing Xiegu Technology Co., Ltd. reserves all rights to this manual, and reproduction of any
part of this manual is prohibited without permission.
------------------------------------------------------------------------------------------------
V3.0
1010160206-C
/