Page is loading ...

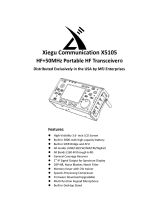
X5105
HF+50MHz Portable HF Transceiver
Quick-Start Manual

Important reminder:
Before attempting to operate your X5105,
please read this operating manual carefully.
Also, keep it handy for future reference.
Security considerations:
Never operate this radio during a thunderstorm!
Avoid submersing this radio in water.
Never operate this radio in violation of FCC rules.
Avoid skin contact with antenna surfaces!
Features:
High-Visibility 3.6- Inch LCD Screen
Built-in 3800-mAh high-capacity battery
Built-in SWR Bridge and ATU
All modes (USB/LSB/CW/AM/FM/Digital)
All Bands (160-M through 6-M)
General Coverage HF Receiver
1
st
-IF Signal Output for Spectrum Display
DSP-NR, Noise Blanker, Notch Filter
Memory Keyer with CW trainer
Speech-Processing Compressor
Variable-Width Passband Filtering
Multi-function Keypad Microphone
Built-in Desktop Stand
Ultra-Compact, Self-Contained Portable
Packing list:
Qty
① X5105...... ...... ...... ...... ...... ...... ...... 1
② Power supply cable........... ........... ......1
③
Hand microphone.............. ........... .....1
④ USB Cable........... ........... ........... .........1
⑤ Service card................. ........... ........... 1

INTRODUCTION
INTRODUCTIONINTRODUCTION
INTRODUCTION
Your new Xiegu X5105 is an ultra-portable multi-mode HF transceiver that delivers an
unusually wide range of operating features -- many normally only found on much larger
base-station radios. For example, it comes with a 3.6-inch high-visibility LCD screen
that displays a wide range of information covering virtually every aspect of the radio’s
operation. And, even though the X5105 is physically small, its operating controls have
been thoughtfully laid out with adult-sized fingers in mind!
The transmitter covers 160 through 6 Meters with power output adjustable from 0.5 to
5.0 Watts. Transmit and receive modes include USB/LSB, CW, FM, AM plus digital
inputs (1.5-W carrier on AM). You also get a built-in SWR Bridge plus a highly effective
Automatic Antenna Tuner (ATU) that allow you to operate almost anywhere using a
wide range of portable and fixed antenna systems.
The X5105 receiver is general coverage, tuning from the AM broadcast band through
30 MHz (plus 50-54 MHz). VFO tuning is velvet-smooth with 1-Hz resolution, and DX
splits are easy using the VFO A/B mode and receive incremental tuning (RIT). You’ll
also notice that weak-signal reception and adjacent channel interference are well
managed using a built-in Pre-Amp/Attenuator, pulse-type Noise Blanker, adjustable
DNR (Digital Noise Reduction), Notch Filter, variable AGC-Rate, and adjustable-width
Passband Filters. For serious CW operators, there’s a multi-mode Auto-Keyer complete
with memory channels and CW-trainer. For voice modes, you get a built-in Speech
Compression processor to add punch when working DX -- plus a sophisticated
multi-function key-pad microphone that places many of the radio’s most advanced
operating features right at your fingertips.
Also, you can say goodbye to tangled patch cables and the extra “boxes” that normally
accompany QRP operation because all the accessories you’ll ever need are built right
into the radio. There’s even a front-panel microphone and MOX switch for operating in
“speaker-phone” mode. Best of all, with its powerful 3800-mAh on-board battery pack,
you get up to 6-8 hours of energy-independent portable operation between charges
(the X5105 also operates from any regulated 9-15 Volt 3-Amp dc supply).
Even though it’s loaded with features, the X5105 is still extremely compact and light,
measuring 6-5/8” wide x 3-5/8” high x 1-7/8” deep, and weighing just 2.1 pounds.
Positive proof that remarkable things come in small packages!

SPECIFICATIONS
Receive Range: 500kHz to 30MHz, 50MHz to 54MHz
Transmit Range: 160-M through 6-M (Amateur bands only)
Operating Mode: A1A(CW),A3E(AM),J3E(USB/LSB),F3E(FM)
Temperature Range: -10℃ ~ +60℃
Stability: First Hour, + 4ppm @25℃. After First Hour, 1ppm
Voltage: 13.8VDC ± 15%, (9–15 Vdc)
Current: Rx, 500 mA Peak, Tx, 2.5 A Peak
Battery: 3800 mAh @ 12Vdc
Dimensions: 6-5/8” W, 3-5/8” H, 1-7/8” D
Weight: 2.1 lbs.
Transmit Power Output:0.5 – 5.0 W PEP SSB/CW/FM (0.5-W increments)
AM: Low-level Amplitude, 1.5-W Carrier
FM: Reactance Modulation, ±5kHz
Harmonics, Spurs: > -45dBc
AF Input: 200-10k (600-Ω microphone)
Receiver: Superhet, 1
st
IF: 70.455MHz, 2
nd
IF: 10.695MHz, 3
rd
IF: 455kHz(NFM only)
Sensitivity:
(PRE=on ATT=off NB=off NR=off SSB/CW/AM = 10dB S/N FM = 12dB SINAD)
Image Rejection: -70dB
IF Rejection: 60dB
Selectivity: SSB:-6dB @ 2.4 kHz, -60dB @ 4.6 kHz
CW:-6dB @ 500 Hz, -60dB @ 2 kHz
AM:-6dB @ 6 kHz, -60dB @ 25 kHz
FM:-6dB @ 12 kHz, -60dB @ 25 kHz
DSP Noise Reduction: AF DSP, variable
AF Output: 0.6W into 8Ω,≤10% THD
SSB/CW AM FM
1MHz-1.8MHz 0.35uV 10uV /
1.8MHz-28MHz
0.25uV 2uV /
28MHz-30MHz 0.25uV 2uV 0.35uV
50MHz-54MHz 0.25uV 2uV 0.35uV

EXTERNAL CONNECTIONS

INTERNAL BATTERY
The X5105 comes with a built-in 3800-mAh battery pack. When no external power source
is connected to the radio, the battery supplies power by default. When an external source
is connected, power-management circuitry switches to it automatically.
Charging Procedure:
1. In the menu, select the [CHG] option, then select CHG ON.
2. Adjust the external power source to between 13.5V-14.0V and connect it to the
X5105 power supply input. Charging will start automatically. You must apply at least
13.5 volts to ensure proper charger operation.
3. The maximum charge time for a fully depleted battery is about 10 hours. When the
battery is fully charged, power-management circuitry terminates the charging cycle.
When the radio’s battery power is nearly depleted, the battery symbol located at the
upper right corner of the display screen will appear “empty”: At this point, you
should switch to an external supply or recharge the battery. Note that during the recharge
cycle, it is normal for the X5105 case to become warm.
Normally, the life span for the internal battery is around 3 years. When there is a
significant drop in capacity or a charging failure, you may contact your dealer to obtain a
replacement. Replacement costs beyond the warranty period are not covered.
IMPORTANT OPERATING WARNING: When your X5105 is connected to an external
power source and the radio is in transmit mode, DO NOT disconnect the power supply.
Doing so can damage the radio’s power management IC chip.
IMPORTANT BATTERY WARNING: In the unlikely event the case of the X5015 becomes
extremely hot around the battery area, turn off power immediately and remove the
radio to a safe well-ventilated area! After confirming the safety of the situation, please
contact us for proper handling information.

CONTROLS AND FUNCTONS
Front panel:
① Power Button:
Press and hold for 1 second to turn the radio on or off.
② Mode Button:
Step or scroll to change the radio’s operating mode: [LSB-USB-CW-CWR-NFM-AM]
③ PRE/ATT Button:
Step or scroll to select sensitivity: [PRE=ON, ATT=ON, PRE/ATT=OFF]
④ RIT Button:
Press to toggle the RIT (receiver incremental tuning) function on or off.
⑤ NB Button:
Press to toggle the NB (noise blanker) function on or off.
⑥ MENU Button:
Press to switch the display to the Multifunction Menu.
⑦ - ⑩ Multifunction-Menu Buttons:
Press to access desired function (displayed above each button on the menu screen).
○
11 Main Tuning Knob:
Tunes the X5105 VFO, or adjusts menu parameters
menu parametersmenu parameters
menu parameters.
○
12 ATU Button:
Press momentarily to connect the ATU (automatic antenna tuner) to the antenna port.
Press and hold to activate the ATU’s automatic tuning cycle.

○
13 Po Button:
Press and rotate the VFO knob to set power output level (0.5W-5W).
○
14 A/B Button:
Toggles between VFO-A and VFO-B.
○
15 < Button:
Press to shift VFO frequency step one decimal point to the left.
○
16 > Button:
Press to shift VFO frequency step one decimal point to the right.
○
17 V/M Button:
Press to toggle between VFO mode and MEMORY mode.
○
18 Up Button:
Step or toggle to select a higher-frequency band.
○
19 DN Button:
Step or toggle to select a lower-frequency band.
○
20 (-) Button:
Step or toggle to lower-volume setting.
○
21 (+) Button:
Step or toggle to select a higher-volume setting.
○
22 PTT Button:
Press and hold to enter transmit mode (MOX function).
○
23 LOCK Button:
Press to lock all control settings. Press and hold to release control lock.
Press and hold for several seconds to toggle the display backlight on or off.
Colored Status LEDs: (located above display screen)
A - T/R: Green LED = Receive Mode, RED LED = Transmit Mode
B – DATA: When a data signal is present or the channel is busy, LED flashes.
C – LINK: When the radio is connected to peripheral equipment, LED is on.
Menus Corresponding to Multi-Function Buttons (below the screen)
Menu-1
A=B SPL NR NTH
Copy VFO-A to the
background
Turn Split On/Off Set Digital Noise
Reduction
Adjust Notch
Set Menu-2

AGC FIL SRM SWR
Set AGC Time
Constant
Select IF-Filter
Passband
Scan
Receive Mode
SWR Scan
Menu-3
M > V MW MC TAG
Move memory entry
to VFO
Store current
channel to memory
Clear Current
Channel
Use to “tag” current
channel with custom
ID. Press and hold to
activate edit feature.
Menu-4
BK KEY KSP -
CW insert function
on / off
Select manual or
auto-
keyer function
Set Keyer Speed -
Menu-5
RE1 RE2 RE3 CSN
Set CW Message-
1
Press and hold to
enter edit function.
Set CW message-2
Press and hold to
enter edit function.
Set CW message-3
Press and hold to
enter edit function.
Set up power-on CW
call sign – Press
and hold to edit
Menu-6
SQL CMP MTR VLT
Squelch function Speech compression
Display switch of
multi-function table
Power / voltage
display switching
Menu-7
CHG MSL IFO VER
Charging switch Built-in / external
MIC selection
IF output switch Firmware version
display

SCREEN DISPLAY
Screen display information
LEFT-SIDE PANEL CONNECTIONS:
① Desk Stand Bracket:
Swings down to prop radio up on a table or desktop.
② Antenna Connector:
Accepts 50 Ω BNC-Male connector from antenna system
③ IF-Signal Output:
Connects the 1st-IF output signal to Xiegu XDT1 data terminal or spectrum display.
④ External Speaker or Headphones:
Accepts 3.5mm stereo plug (3 wire) for external speaker or phones (4-16 Ω).

Important Warning: Always reduce volume setting before plugging in headphones or ear
buds. High volume setting could damage your headphones or impair your hearing!
⑤ DC Power Connector:
Accepts a standard 2.1 mm x 5.5 mm coaxial power plug, (+) center. Supply must deliver
13.8-V @ 3-A to operate radio and fully charge battery.
RIGHT-SIDE PANEL CONNECTIONS:
① ACC (Accessory) Jack: Accepts male 8-PIN micro-DIN connector. May interface with
external power amplifier, data controller, or computer for a variety of functions.
② KEY Jack:
Accepts 3.5mm stereo plug for use with manual or automatic keys.
③ ATU Jack:
Accepts 3.5-mm stereo plug, may be used to control external power amplifier.
④ CIV Interface:
Accepts 3.5mm stereo plug – may be used to connect with computer-aided control
system or interface with computer for firmware updates.
⑤ Right bracket:
Swings down to prop up radio on table or desk top.
⑥ MIC (microphone) Jack:
Jack accepts microphone connector.

HANDHELD MICROPHONE:
1. Lock Button: Toggle to lock or unlock radio’s controls
2. PTT Button: Push to Transmit
3. Up/Down: Tune VFO frequency higher or lower.
4. Rx/Tx LED: Displays Receive/Transmit status.
5. Digital keypad: 1-10 Tone Encoder.
6. FIL Button: Toggle to change filter passband.
7. MODE Button: Toggle to change operating mode.
8. LED: Not used.
9. F1/F2: Custom settings buttons.
10. MW: Memory Write button (store frequency).
11. V/M: Switch between VFO and stored frequency.
12. XFC Button: No function
13. CALL Button: Press and hold for Automatic Antenna Tuning (ATU)
/