Page is loading ...

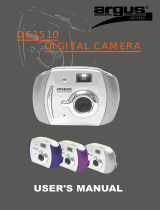
Argus DC- 2185
Digital Camera Quick Start Guide
Argus D C -2185 Digital Camera Quick Start Guide
Thank you for selecting the Argus DC-2185 Digital Camera! It is our goal t o
make your digital imaging experience the best that we can. If you ever get
stuck, have a question or simply need some advice about using your ne w
Argus DC-2185 digital camera please feel f r ee to visit our live technicians
at http://ww w .arguscamera.com/support.htm or call us
at 1-224-836-3400 (choose option 4).
ww w .arguscamera.com ww w .arguscamera.com
Getting to know your Argus DC -2185 Digital Camera
ww w .arguscamera.com ww w .arguscamera.com
Argu s Camer a Compan y
161 0 Colonia l Parkwa y
Inve r ness , I L 6006 7
ww w .arguscamera.co m
Using your new Argus DC- 2185 Digital Camera
is as easy as 1,2,3!
Getting Started with your new Argus DC-2185 Digital Camera
1. Remove the plastic p r otective covering f r om the LCD on the back of
the camera .
2. Open the battery door on the bottom of the camera and insert th r ee AA A
alkaline batteries – we r ecommend photo grade AAA batteries or othe r
brand-name long life batteries for best performance.
a. Please use high grade Alkaline, Photo Grade Alkaline or r echargeabl e
Alkaline batteries for your camera ’ s best performance .
b. Please do not leave batteries in your camera for an extended time
without use as they may cause damage to the camera .
c. W e r ecommend that you sto r e images only on your r emovable memor y
(SD/MMC) ca r d, however your new DC-2185 includes a small amount o f
built-in memory that will sto r e app r oximately eight images. If you decid e
to save any images di r ectly to the camera, please transfer photos save d
to the cameras inte r nal memory onto your computer befo r e r eplacin g
the batteries to avoid losing photos .
d. Photos saved to an SD/MMC ca r d a r e secu r e and will not be lost if th e
batteries a r e drained or r emoved .
3 . T u r n the camera on by p r essing the “ON/OFF” button for app r oximatel y
th r ee seconds. The camera will automatically shut o f f automatically after 6 0
seconds, however you can also shut it o f f by p r essing and holding th e
“ON/OFF” button for app r oximately th r ee seconds when the camera is on .
4. Frame your subject using either the optical or LCD viewfinde r . Always try t o
get as close as you can and be su r e the r e is enough light. If mo r e light i s
needed, please tu r n on the flash featu r e .
a. T u r n on the flash by holding the “Flash/Down” key – you will see th e
Flash icon on the LCD blink for a few seconds and then a Flash Symbo l
will appea r , p r ess “Flash/Down” again – the Auto Flash is now on. Th e
camera will then be in Auto Flash mode and the camera will adjust th e
light for the exposu r e automaticall y .
1 . The flash icon should NOT have a line th r ough it as that would
indicate the flash is in the o f f mode.
2. If the flash icon will not set to auto flash, your batteries may be lo w
and need to be r eplaced .
3 . The default for the flash is o f f. Each time you tu r n your camera on ,
you will need to r eset the flash to Auto Flash if needed .
b. Once the subject is framed and the lighting condition is set, p r ess th e
shutter button on the top of the camera. Please hold the camera stead y
for app r oximately th r ee seconds to ensu r e the best exposu r e .
c . T o r eview the image, p r ess the “P r eview” button .
d. T o r etu r n to the captu r e mode, p r ess the “P r eview” button again .
Other Important Features of your new Argus DC-2185
Digital Camera
1 . Internal Memory : Y our camera is equipped with 8MB of built in storag e
that is designed as starter memory only and can hold a few images (up to 8) .
W e st r ongly r ecommend that you pu r chase and use a SD/MMC memory ca r d
(elect r onic film!) to sto r e your images. The Argus DC-2185 can operate with
S D ca r ds ranging f r om 16MB up to as much as 512MB which will hold
hund r eds of images .
*Note : I f whe n insertin g a n S D o r MM C card , a forma t ico n ma y appea r , thi s mean s you r
mem o r y c ar d n e e d s t o b e f o rm att e d i n o rd e r t o w o r k wi t h t h i s c am e ra . P le a s e p re s s t h e sh ut te r
but t o n t o f or m a t th e S D car d .
2 . Self- T imer: Be in the pictu r e with your friends! The Argus DC-218 5
has a built-in 10 second self timer which can be accessed by p r essing th e
menu button “M” once, p r ess “M” a second time to sc r oll over to the sel f
timer icon, and then p r ess the shutter button down to confirm. The camer a
r esets to the self-timer o f f position once it has
been used .
3 . Rapid Fire and 3 photos taken in succession: Y our new Argus
DC-2185 camera lets you captu r e 3 images in quick succession. T o enter
th e Rapid Fi r e mode, p r ess the M/On/O f f button four times until you see th e
Rapid Fi r e icon (backwa r ds E). P r ess the shutter button and the camera
will captu r e 3 quick rapid fi r e images.

www.arguscamera.comwww.arguscamera.com
4. Changing Image Resolution: Your Argus DC-2185 camera can
capture images in 2.0 MP, 1MP and VGA modes! This is very important
for storage and usage considerations. If you want to take lots of images
on a very small SD card (32 or 64MB) then you may want to use VGA or
1MP resolution. These images will be fine for use on the computer
screen or in emails but will not be great for printing. If you plan to print
the images with the best possible quality, then consider using
2MP resolution.
To change the resolution, turn the camera on, select “M/On/o ff” and then
select “P review”. A little box will appear on the LCD with stars in it. You can
change the resolution / number of stars by scrolling up or down with the UP
or DOWN keys. To confirm, press “P review.”
*** = 2.0 Million Pixel resolution
** = 1 Million Pixel resolution
* = VGA (or 307K) resolution
5. Deletin g Picture s fro m Interna l Memory:
a. Press the “P review” button when the camera is on. Next select the
image you want to delete by scrolling with the UP or Down arrows.
When you are on the image that you want to delete, select the
Menu “M” button. You will see a “DEL LAST” icon, and you will be
given a chance to change your mind or to delete the image. If you
still want to delete the image, scroll to the “Y” mark using the UP or
Down arrows and then press the shutter button to delete.
Deletin g Al l Pictures :
b. Press the “P review” button when the camera is on. Next press the
menu button one time and you will see a “DEL ALL” icon along with
“Y” or “N” or scroll to the “Y” using the up or down arrow and
then use the shutter button to confirm.
6. Frequenc y: Your Argus DC-2185 camera can be used anywhere in the
world! However since artificial lighting frequencies vary in different
regions, you may want to set the correct frequency for the region to
avoid lines in your images during indoor shooting. You can change the
frequency by turning the camera on, press menu "M" button, press
preview button to enter the sub menu, then press menu button again
three times until you see a 50/60 on the LCD. Use the down arrow to
scroll to 50 for Europe and Asia or 60 for the Americas and rest of world.
Press the “P review” button to exit the menu.
Installing the Camera Drivers and Phot o Editing Software
BEFORE YOU PLUG THE CAMERA INTO THE PC, PLEASE INSTALL THE
CAMERA DRIVERS FROM THE ENCLOSED DISK – DO THIS FIRST TO AVOID
POTENTIAL CONFLICTS OR SYSTEM HANG-UPS .
You must install camera drivers before your new digital camera can talk to the
PC. Drivers are the equivalent of instructions for the PC on how to talk to
the camera.
1. Open your CD door, and insert the included CD (Argus DC-2185 Digital
Camera CD).
2. Close the CD door and the CD should start Auto Install.
a. If Auto install does not begin in 45 seconds, go to Start / My
Computer and click on the DC-2185 CD drive. When the folder
opens, click on Setup.
3. The Argus Install menu will appear on your screen, scroll down to the
button that indicates “Install Camera Drivers”, and click on the button.
Follow the setup steps to install.
4. Should you want to install the fun and helpful accompanying free Editing
Software from ArcSoft, scroll to the Photo Impression button, click on the
button and follow the setup steps to install the programs.
Transferring Your Images to Your PC
You must use an editing program to view, manipulate and share your
digital images. The Argus DC-2185 includes an easy-to-use but
very powerful application from ArcSof t
®
called Photo Impression .
®
Howeve r, you can use any editing program to download the image s
from your new Argus DC-2185. Simply look for the Argus Camer a
name under Digital Cameras and Scanners in the application .
Using ArcSoft ’s Photo Impression to Transfer and Edit your image s
1. First, ensure your camera is in Mass Storage Device Mode (default when
camera is shipped and will remain so unless you use the camera as a web
camera). To ensure that the camera is MS mode, turn the camera on,
press the menu “M” button, press the “P review” button, then press the
“M” button twice. You should see an icon with USB plus a little hard
drive icon on your LCD. This will indicate MS mode. If the LCD displays
a little web camera, use the down arrow to scroll to the hard drive icon
to enter Mass Storage Mode.
2. Be sure you have installed the Photo Impression application before
you proceed.
3. Locate and launch the Photo Impression software icon on your desktop
and launch the program.
4. When Photo Impression has launched
yo
u
wil
l
se
e
an image-editing tray
on your screen. On the lower right
corner, select
the “From Folder”
button
. The menu will change, and
an option button “Browse” will
appear
; click that button and move the scroll bar up until you see My
Computer. Select My Computer and you should see a Removable Disk.
Within Removable Disk, you see will a folder called “DCIM” and inside
is another folder called “100Image”. Select this folder and click on OK.
.
5. A sub menu will appear on top of your imaging software desktop
providing options for downloading – select one image or all images and
click download.
6. The images will be transferred to the Photo Impression Album and
display at the bottom of your work space as icons.
7. Double click on the image you wish to view or edit and then let your
creativity begin.
The following are some additional tips about how best to use your Argus
DC-2185 camera:
- Always try to be close to your subject when capturing a photo.
- If using the flash feature, the optimal range for exposure is to have your
subject less than five feet away.
- When taking a photo, try not to pose the subject, spontaneous, action
or fun scenes always produce the best images!
- Do not try to do extreme close ups with the Argus DC-2185 – the
camera is optimized for a range of 3 feet to infinity, without flash.
- The Argus DC-2185 is best used for viewing images on the PC,
printing 3” x 5” pictures, emailing images for including small images in
presentations, greeting cards and calendars.
Advanced Features and Settings
1. Using the Argus DC-2185 as
a Web camera
Your new Argus DC-2185 camera can also double as a plug-and-play device
allowing you to participate in live video conferences over the web. To use
the camera for Web Video:
a. Install the camera drivers on the enclosed disk.
b. Turn the camera on, select menu “Menu/ON/OFF”, select “P review” and
then select “Menu/ON/OFF” again to enter the sub menu. Click
“Menu/ON/OFF” twice until you see “USB” displayed on the LCD and
then using the down arrow, scroll until you see a web camera icon
displayed on the LCD and click Preview to exit and confirm.
c. Now plug the enclosed USB cable to the camera and then into a USB
port on your computer (it is best not to use a USB port replicator).
d. On your computer, select “My Computer” and you will see the Argus
2185 camera displayed as a drive. Double click on the icon and the
camera will become active.
2. Using the Argus DC-2185 to record short video clips
Your new Argus DC-2185 camera can also double as a neat little PC video
camera, which is great for taking short videos for use on your PC. To use the
camera for PC Video:
a. Make sure you have first installed the enclosed software.
b. To enter the Video Clip mode, turn the camera on, pressing
“Menu/ON/OFF” button 3 times displays the video camera icon. Press the
shutter button to select. Then you will see the flash icon with the letters
" AVI" on the bottom left of the LCD. You are now ready to
capture short video clips. The short video clips will last approximately 1
minute, then stop automatically, if you want to make another short video
clip, you need to repeat the above operation. Please remember, video
clips require a lot of storage even for short clips, so if you plan to take
extended video clips, please ensure that you have a large size SD card
inserted.
c. To take videos, simply use the shutter button to turn the video camera
on and off.
d. After the camera has powered on, press “Menu/ON/OFF” and then
press “P review” to enter a sub-menu. Then, by pressing “Menu/ON/OFF” ,
you can switch to different sub-menus. When entering into a sub-menu,
use “UP” or “DOWN” to make changes. At last, press “P review” to
validate your choice and exit.
We hope you enjoy your new Argus DC-2185 Digital Camera for
many years to come. If you should have any questions or require further
assistance on how to use the Argus DC-2185 camera please visit us at
www.arguscamera.com and select support. We offer free telephone
support, live on-line chats, frequently asked questions and answers and
overnight email responses.
Also, please visit us at www.arguscamera.com for other fun digital imaging
products and news and updates on coming products from Argus Camera.
Thank You for Selecting Argus Digital Cameras!
/