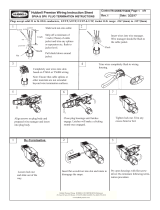
Page is loading ...

Rev.
Control No.
Hubbell Premise Wiring Instruction Sheet
®
Date:
Page of
HWS77710301 1 2
A 7/10/12
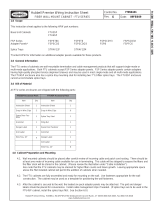
GROUNDING AND BONDING JUMPERS
Note: Always reference your guiding standard or consult your local code for compliance when installing
grounding and bonding devices
All HPW grounding and bonding jumpers contain this warning
label on both ends to protect the grounding and bonding network.
Do not remove
Figure 1 (ground wire)
12-24 or M6 thread
forming screws
1. REMOVE SURFACE FINISH FROM EQUIPMENT TO BE GROUNDED TO EXPOSE BARE
METAL. A DRILL ATTACHMENT WITH A WIRE CUTTING WHEEL WORKS WELL FOR
THIS APPLICATION (HPW PART NUMBER: HGBWB2)
2. CLEAN THE SURFACE OF THE COMPRESSION LUG WITH AN ABRASIVE PAD
(HPW PART NUMBER: HGB24AP)
3. APPLY PENETROX TO THE ENTIRE BOTTOM SURFACE OF THE COMPRESSION LUG.
4. ATTACH THE COMPRESSION LUG TO THE EQUIPMENT, AS SHOWN, USING THE
SUPPLIED HARDWARE.
APPLY 35 IN-LBS OF TORQUE TO SECURE THE COMPRESSION LUG PROPERLY.

Hubbell Premise Wiring, HUBBELL INCORPORATED (Delaware)
14 Lord's Hill Rd, Stonington CT 06378 (800) 626-0005, Fax (860) 535-8328
www.hubbell-premise.com
Control No. Page of
Rev. Date:
HWS77710301 2 2
A 7/10/12
Hubbell Premise Wiring, HUBBELL INCORPORATED (Delaware)
23 Clara Dr Suite 103 Mystic, CT 06355 (800) 626-0005, Fax (860) 535-8328
www.hubbell-premise.com
Figure 2 (Busbar)
Hex bolt
Belville washer
fl at washer
hex nut
fl at washer
1. CLEAN BARE COPPER BUSBARS WITH A WIRE BRUSH TO REMOVE OXIDATION.
CLEAN TIN PLATED BUSBARS WITH AN ABRASIVE PAD.
2. CLEAN THE SURFACE OF THE COMPRESSION LUG WITH AN ABRASIVE PAD
3. APPLY PENETROX TO THE ENTIRE BOTTOM SURFACE OF THE COMPRESSION LUG.
4. ATTACH THE COMPRESSION LUG TO THE BUSBAR, AS SHOWN, USING THE SUPPLIED
HARDWARE.
APPLY 7 FT-LBS OF TORQUE TO SECURE THE COMPRESSION LUG PROPERLY.
Note: The Belleville washers are used to ensure proper torque is maintained in the event of thermal cycling
(non climate controlled areas).
/


