Page is loading ...

Control No. Page of
Rev. Date:
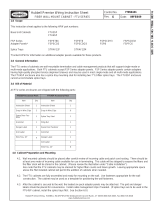
®Hubbell Premise Wiring Instruction Sheet
Hubbell Premise Wiring, HUBBELL INCORPORATED (Delaware)
14 Lord's Hill Rd, Stonington CT 06378 (800) 626-0005, Fax (860) 535-8328
www.hubbell-premise.com
Control No. Page of
Rev. Date:
12-PORT SURFACE MOUNT BOX
HWS77205101 1 2
1 8/29/19
HWS77205101 2 2
1 8/29/19
This instruction sheet is applicable to the following Catalog Numbers:
Package Contents:
Installation Instructions:
1. Remove cover from box by inserting a screwdriver into the cover release slots.
See Figure 1.
Figure 1
HSB12xx
Qty Description Qty Description
1 Surface Mount Box 4 Surface Mounting Screws (6-20 x 1-1/4" self tapping)
2Cable Ties, 4" 4NEMA Box Mounting Screws (6-32 x 3/4" self tapping)
2 Paper Face Plate Label 2 Security Screws (6-32 x 3/4" Flat head)
2 Clear Plastic Label Cover 2 Double Sided Tape, 4.5"
2. 12 Port Surface Box is compatible with MT6, MT7 and MT8 Raceway. If using
Raceway, cut the edges of the appropriate knockout with a utility knife and remove.
Align
4. Route cables through openings in the rear of surface mount box. Using supplied
cable ties, secure cables to the strain relief anchor points. See Figure 4.
6. Terminate individual jacks and modules utilizing the supplied instructions sheets.
Insert terminated jacks or Snap-Fit modules into base unit by
securing jack between the posts under the latch. See Figure 6.
7. Snap cover onto base unit. Secure cover with supplied security screw.
See Figure 7.
8. Insertfaceplatepaperandclearplasticcoverintoboxidenticationlabel
slots. Optionally, laser printable adhesive port labels can be used to
identify each port. See Figure 8.
Figure 6
Figure 8
Plastic Covers
Face
Plate
Papers
BoxIdentication
Label Slots
5. Foropticalbercableinstallation,allowenoughslacktostore1meterofber
cableaftertermination.Terminateberusinginstructionsheetsprovidedwith
berproductandrouteexcessberaroundstoragepostsinbasetomaintain
proper bend radius. See Figure 5.
3. Mount box to solid surface with provided self tapping screws. For NEMA
electrical box installation, align base mounting holes with holes in electrical box
and secure with supplied mounting screws. See Figure 3.
Important: Maintain atness when mounting base to mounting surface,
NEMA box, etc.
Figure 2
Raceway
knockouts
Figure 4
Cable
Ties
Base
Cable Ties
Figure 5
Figure 7
Base
Cover
Security Screw
Figure 3
Raceway
Surface Mount
and NEMA
Screw
NEMA
Electrical
Box Screw
Rack
Mounting
Holes
NEMA
Electrical
Box Screw
Surface Mount
and NEMA
Screw
Surface Mount
and NEMA
Screw
Hubbell Premise Wiring, HUBBELL INCORPORATED (Delaware)
23 Clara Dr Mystic, CT 06355 (800) 626-0005, Fax (860) 535-8328
www.hubbell-premise.com
xx designates color
/