Xerox 230 LP Installation guide

Category
Networking
Type
Installation guide

Xerox 230 LP is a versatile printer that seamlessly integrates with your network through its embedded Web Server. It empowers you to effortlessly check print queue status, submit print jobs, and perform routine maintenance tasks right from your desktop. The user-friendly CentreWare® Internet Services portal allows for remote system administration with ease, enhancing your overall printing experience.

Xerox 230 LP is a versatile printer that seamlessly integrates with your network through its embedded Web Server. It empowers you to effortlessly check print queue status, submit print jobs, and perform routine maintenance tasks right from your desktop. The user-friendly CentreWare® Internet Services portal allows for remote system administration with ease, enhancing your overall printing experience.

7+('2&80(17&203$1<

DC230LP CentreWare
®
Internet Services Quick Install
Page 1 of 4
This installation procedure assumes that you
know how to navigate through the menu system
on the DC230LP Control Panel. Refer to the
quick reference card,
Using the Menu System,
(701P96834) for assistance.
1. Connect the DC230LP to your network
outlet or cable.
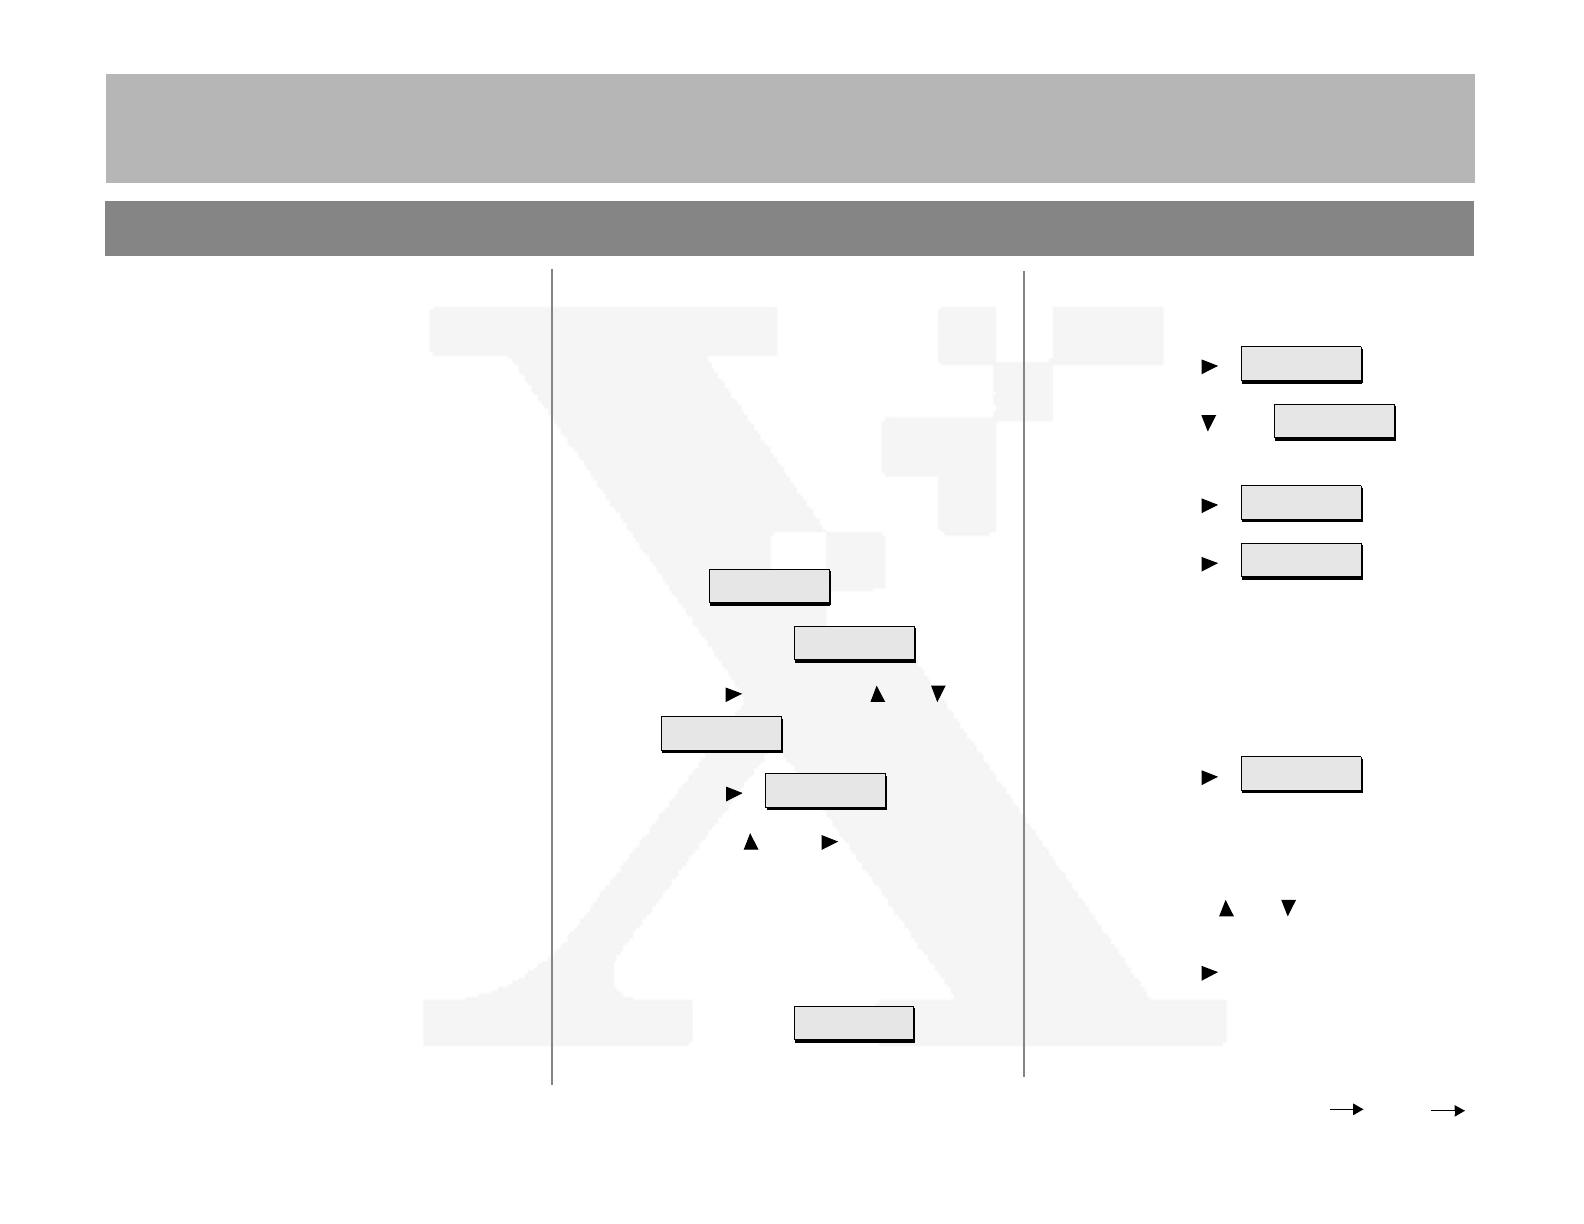
2. Access the System Administration menus:
a)
Press [Online] to take the printer off
line. displays.
b)
Press [Menu]. displays.
c)
Press [], then press [] or [] until
displays.
d)
Press []. displays.
e)
Use the [] and [] keys to enter
[2222].
Note: 2222 is the factory default password and
may be changed to suit your needs. Refer to the
DC230LP System Administration Guide,
Network Installation and Troubleshooting
.
f)
Press [Enter]. displays.
Printer Off Line
Main Menu
>
System
Administration
>
Enter Password
>
System Admin
>
3. Access the TCP/IP menus:
a)
Press []. displays.
b)
Press [] until
displays.
c)
Press []. displays.
d)
Press []. and the
current setting displays.
Note: If TCP/IP has been configured on the
DC230LP, skip to step 10.
4. IP Address Setup (skip this step if using
RARP):
a)
Press []. displays.
Note: Use zeros to supplement each address
segment if fewer than 3 digits are used; e.g.,
13.252.25.08 = 013.252.025.008.
b)
Use the [] or [] key to enter the
first digit of the IP Address.
c)
Press [] to move to the next digit.
Repeat this procedure to enter the
entire IP Address.
Port Setup
>
Network Setup
>
TCP/IP
>
IP Address
(current entry)
>
IP Address =
(current entry) *
Over
The Xerox DC230LP contains an embedded
Web Server. CentreWare Internet Services con-
tains tools within the Web Page that allows
users to check the status of the queue, submit
print ready files as print jobs, and perform rou-
tine maintenance checks.
In addition, after Internet Services is enabled,
machine network configuration and setup can be
accomplished from the System Administrator’s
desktop (password required).
Before Installation:
Record the following information for use during
setup at the DC230LP:
TCP/IP Address:_________________________
Gateway Address:_______________________
Subnet Address:_________________________
Broadcast Address:______________________
Host Name:_____________________________
A minimum configuration of Microsoft Internet
Explorer
®
4.x or higher, or Netscape Navigator
®
3.x or higher should be used. Other browsers
may work, but may not produce expected
results.
For assistance, contact your local Xerox Customer Support Center:
USA: 1-800-821-2797 Canada: 1-800-939-3769
7+('2&80(17&203$1<

DC230LP CentreWare
®
Internet Services Quick Install
Page 2 of 4
b)
Press [] until the current setting
displays .
Note: Use zeros to supplement each address
segment if fewer than 3 digits are used; e.g.,
13.252.25.08 = 013.252.025.008.
c)
Use the [] or [] key to select the
first digit in the Gateway Address.
d)
Press [] to move to the next digit.
Repeat this procedure to enter the
entire Gateway Address.
e)
Press [Enter]. **SAVED** displays
momentarily, followed by
.
7. Enter the Subnet Mask:
a)
Press [] until the current setting
displays .
b)
Press []. displays.
c)
Use the [] or [] key to select the
first digit of the Subnet Mask for your
network.
Default Gateway =
(current entry)
Default Gateway
(your entry)
>
Subnet Mask
(current entry)
>
Subnet Mask =
(current entry)
d)
Press [] to move to the next digit.
Repeat procedure to enter the entire
Subnet Mask.
e)
Press [Enter]. **SAVED** displays
momentarily, followed by
.
8. Enter the Broadcast Address:
Note: Broadcast Address is where all the host
elements are set to either zero (0) or one (1).
a)
Press [] until the current setting
displays .
b)
Press []. displays.
c)
Use the [] or [] key to select the
first digit in the Broadcast Address.
d)
Press [] to move to the next digit.
Repeat procedure to enter the entire
Broadcast Address.
e)
Press [Enter]. **SAVED** displays
momentarily, followed by
.
Subnet Mask
(your entry)
>
Broadcast Addr
(current entry)
>
Broadcast Addr =
(current entry)
Broadcast Addr
(your entry)
>
d)
Press [Enter]. **SAVED** displays
momentarily, followed by
.
5. RARP Setup:
Note: If you used a static IP Address, leave the
RARP setting at
Disabled
.
a)
To change the RARP setting, press
[] until the current setting displays
.
b)
Press []. displays.
c)
Press []. displays.
d)
Press [Enter]. **SAVED** displays
momentarily, followed by
.
6. Enter the Gateway Address:
a)
Press [] until the current setting
displays .
IP Address
(your entry)
>
RARP
(current entry)
>
RARP =
(current entry) *
RARP =
(opposite setting)
RARP
(your entry)
>
Default Gateway
(current entry)
>
7+('2&80(17&203$1<

DC230LP CentreWare
®
Internet Services Quick Install
Page 3 of 4
9. Enter the Printer (Host) Name:
a)
Press [] until the current setting
displays .
b)
Press []. displays.
c)
Press [] repeatedly until the cursor
reaches the last character. A tone
sounds indicating when the last
character has been reached.
d)
Press [] repeatedly to delete the
current entry.
e)
Use the [] or [] key to select the
first character in the Printer Name.
f)
Press [] to move to the next charac-
ter. Repeat this procedure to enter the
entire Printer Name.
g)
Press [Enter]. **SAVED** displays
momentarily, followed by
.
Printer Name
(current entry)
>
Printer Name =
(current entry)
Printer Name
(your entry)
>
12.Check the settings on the Configuration
Report against those entered to be sure
they are correct.
13.At a client workstation on the network,
open the Internet Browser.
14.In the URL field, enter http:// followed
by the IP address of your DC230LP. For
example: if the IP address is 127.0.0.1, the
URL is: http://127.0.0.1.
15.Refer to the CentreWare
®
manual,
Getting Started with Internet Services,
for
additional information.
Additional information on the network installation
can be found in the
DC230LP System Adminis-
tration Guide, Network Installation and Trouble-
shooting.
10.Enable HTTP:
a)
Press [] to return to .
b)
Press [] until
displays.
c)
Press []. displays.
d)
Press []. displays.
e)
Press [] until
displays.
f)
Press [Enter]. **SAVED** is
displayed momentarily, followed by
.
11. Save all the settings:
a)
Press [Online].
displays.
b)
Press [Enter].
displays. The DC230LP will reboot,
save the settings entered, and print a
Configuration Report in approximately
3 minutes.
TCP/IP
>
HTTP
>
Enablement
(current entry)
>
Enablement =
(current entry) *
Enablement
Enabled
Enablement
Enabled
>
Reset Required
Press ENTER key
Warming Up
Please Wait . . .
>
7+('2&80(17&203$1<

DC230LP CentreWare
®
Internet Services Quick Install
Page 4 of 4
©1998 Xerox Corporation
701P98458 Version 1.0, 5-98
  • Page 1 1
  • Page 2 2
  • Page 3 3
  • Page 4 4

Xerox 230 LP Installation guide

Category
Networking
Type
Installation guide

Xerox 230 LP is a versatile printer that seamlessly integrates with your network through its embedded Web Server. It empowers you to effortlessly check print queue status, submit print jobs, and perform routine maintenance tasks right from your desktop. The user-friendly CentreWare® Internet Services portal allows for remote system administration with ease, enhancing your overall printing experience.

Ask a question and I''ll find the answer in the document

Finding information in a document is now easier with AI