Page is loading ...

Page 1 of 2
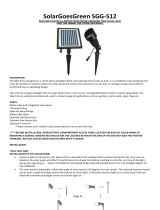
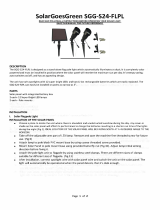
SolarGoesGreen SGG-FL12W-Extreme
READ AND FOLLOW ALL INSTRUCTIONS BEFORE OPERATING YOUR SOLAR LIGHT.
SAVE THIS MANUAL FOR FUTURE REFERENCE.
DESCRIPTION
The SolarGoesGreen solar SMD-LED flood light is the premier choice for indoor or outdoor solar lighting. The versatility of
the SolarGoesGreen SGG-FL12W-Extreme makes it the best choice for use in gardens, parks, warehouses, garages, driveways,
signs, yards, farms, horse riding arenas and businesses. The SolarGoesGreen solar LED security flood light is easily installed.
The battery is protected by an auto-detection circuit maximizing the brightness of the lamp and allowing the light to operate
longer as the battery charge declines.
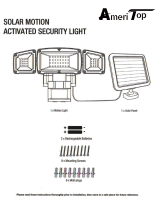
PARTS
2 each 20W hinged Solar Panel
1 each 30 SMD-LED Light with 11.1V Lithium Ion battery
1 each RF Wireless Remote Control
1 each external PIR motion sensor
1 each Allen wrench
1 each Ground Stake for Solar Panel
2 each Wall Mount for Solar Panel
2 each Flat Bar Stock
Mounting Screws
INSTALLATION
1) INSTALLATION OF SOLAR PANEL
a) GROUND STAKE*
For optimum performance, the solar panel must be facing the southern horizon and positioned at a 45 degree angle
using the ground mount stake provided.
b) WALL MOUNT*
Using the flat bar stock provided, lay the solar panels on a flat surface and straighten
hinged solar panel by screws provided
Note pre-drilled 3 holes on each short side of solar panel
Observe there are also 3 holes on side of wall mount hardware.
Push wall mount to flush with edge of solar panel outside edge as illustrated by images.
Use 3 screws (provided in hardware pack) and attach wall mount to solar panel
Place solar panel onto wall or flat surface and mark eight mounting holes through the
wall mount onto wall or flat surface.
Drill holes into wall or flat surface as marked above.
Remove wall mounts from solar panel for next easy installation.
Place wall mount bracket on wall or flat surface and attach with screws provided in
hardware pack.
Reattach the solar panel on the installed wall mounts.
2) INSTALLATION OF LIGHT
Mount the light to customer supplied pole or attach it on the wall using mounting screws provided.
Connect lamp wire to solar panel connector.
Located on the lamp housing, switch the power button to the ON position. Lamp will light up (flash on then off) and shut
down after several seconds. Please note the lamp is off when the Power button switch is sunken and the lamp is ON when
the button switch is in the popped up position.
To test operation of unit, completely shield the face of solar panel by laying it face down on a flat surface or cover the panel
with thick black cloth. The lamp will turn ON after several seconds.
After completing the above, the remote control functionality can now be used to manage the unit’s brightness and working
time independently. Please note the remote control only operates light function when the switch is set to the "ON" power
position on light.

Page 2 of 2
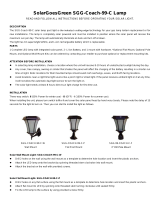
REMOTE CONTROL Use
Dimmer and timer function.
Dimmer Options: 10%, 30%, 50%, 70%, 100%
Timer Options: 2 Hours, 4 Hours, 6 Hours, 8 Hours, 10 Hours
Press the corresponding button for desired working mode.
Selected working mode remains unchanged until new mode is selected or power switch
is turned to off position.If the light is turned OFF by remote control, lamp must be turned
ON again by remote control or by resetting the power switch to the OFF position.
Doing so returns the unit to Factory Default settings.
NOTE: When lamp is set by remote control, light will have a flash to hint selected mode is set
successfully.
PIR Motion Sensor Use
Locate PIR lead wire from lamp body, unscrew waterproof cover.
Connect PIR wire to lamp connector.
Turn the button “OFF” on remote control (See pic) then lamp auto switches to PIR motion mode.
The brightness of PIR motion is 100% brightness.
Upon detection of movement, the PIR sensor, will automatically light and will operate continuously and remain on.
The light will remain on up to 35 seconds after motion leaves the detection zone.
OPERATION
ln the Dusk to Dawn mode (no remote control and no PIR motion), the lamp will turn on automatically at dusk and off at
dawn. The factory default setting when the ON position is selected and no Remote Control used is fixed for 4 hours at 100%
brightness then automatically switches to 50%. If the light operates without remote control, lamp keeps this working mode
all the time.
NOTES
Charge the battery for at least 24 hours before first use. The battery only charges when the power switch located on
lamp housing is in the ON position. The ON position is demonstrated when the Power button is Popped Up.
Solar panel cannot be placed in shade and must be put placed where it can receive maximum unobstructed direct
sunlight.
BATTERY REPLACEMENT
If lamp begins to illuminate dimly or last a shorter length of time, and the hours of sunlight per day are in excess
of 8-10 hours per day, you should replace the rechargeable lithium ion battery using the following steps:
1) Remove 4 screws from the back of the light head. Carefully separate back cover from the lamp body. Set aside.
2) Disconnect battery quick connector plug. Replace with a new battery and join battery connector plug and
remount in reverse steps as done above.
3) Replace battery cover onto body housing. BEFORE securing screws into body, make sure rubber sealing gasket
is not “pinched” in sealing grove. Failure to secure correctly will allow moisture into the unit voiding warranty.
4) Be sure and recycle your old battery and do not discard in trash.
NOTE: Battery may be obtained by contacting your retailer
WARNING:
1) Do it carefully to prevent wires from being damaged.
2) Be sure that battery polarities are correct. Wrong polarity is dangerous.
3) Do not dispose of old battery. It should be recycled.
www.SolarGoesGreen.com
/