Page is loading ...

Page 1 of 3
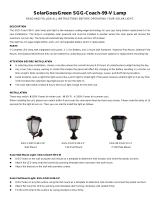
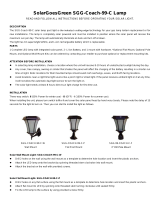
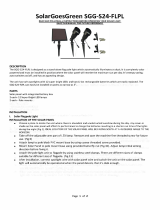
SolarGoesGreen SGG-S12
READ AND FOLLOW ALL INSTRUCTIONS BEFORE OPERATING YOUR SOLAR LIGHT.
SAVE THIS MANUAL FOR FUTURE REFERENCE.
DESCRIPTION
The SGG-S12 is designed as a stand-alone spotlight which automatically illuminates at dusk. It is completely solar powered and
must be installed in position where the solar panel will receive the maximum sun per day. It’s energy-saving, auto switches
on/off and has an appealing design.
The unit has a single spotlight with 12 super bright LED’s, and a Li-ion rechargeable battery which is easily replaceable. The
SGG-S12 can easily be installed and used in a broad range of applications such as; gardens, yards, walls, signs, flags etc.
PARTS
Battery Box and integrated solar panel
LED lamp fitting
Spike for lamp fittings
Battery Box Spike
Optional Flat Mount Kits
Optional Pole Mount Kits
Optional 9’ wire kit
*Please contact your retailer to purchase optional mount and wire kits.
**** BEFORE INSTALLATION, OPEN BATTERY COMPARTMENT ACCESS PANEL LOCATED ON BACK OF SOLAR PANEL BY
REMOVING 4 SCREWS. REMOVE RED INSULATOR TAB LOCATED BETWEEN THE END OF THE BATTERY AND THE POSITIVE
TERMINAL. REPLACE ACCESS DOOR AND SECURRE WITH 4 SCREWS.
INSTALLATION
I Solar Spot Light
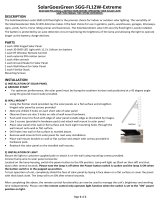
INSTALLATION OF THE SOLAR PANEL
Choose a place to locate the unit where there is abundant and unobstructed sunshine during the day. Any cover or
shade on the solar panel will affect its performance to charge the battery resulting in a shorter run time of the light
during the night (Fig.1). IDEAL LOCATION OF THE SOLAR PANEL WILL BE FACING SOUTH AT A 45 DEGREE ANGLE TO
THE HORIZON.
The solar panel is adjustable. Adjust the angle of solar panel to 45 degrees for best results. The selected location should
not be near a night time light source like a porch or street light. If the panel receives light on it at any time it will not
allow the automatic day/night sensor to turn the light on.
Fig.1

Page 2 of 3
INSTALLATION OF LIGHT
Spike it into soft ground. Adjust lamp aiming direction before installation(Fig.2)
After installation, connect Spot light wire with Solar panel wire (optional wire kit for longer use) and switch the unit to
the ON position located on the back of solar panel. The light will automatically be operational when the panel detects
that it’s dark enough.
II Solar Flat Mount Light (OPTIONAL USE)
INSTALLATION OF THE SOLAR PANEL
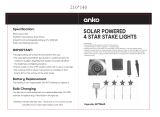
Drill 4 holes (dia. 8mm) on any flat surface using the flat wall mount as a template to determine hole location. (Fig.3)
Fix wall mount to solar panel by using provided butterfly nut (Fig.4)
Fix the solar panel to the surface by using provided screws(Fig.5)
The solar panel is adjustable. Adjust the angle of solar panel to 45 degrees for best results. The installation location
must be located to capture the most possible sunshine during the day. IDEAL LOCATION OF THE SOLAR PANEL WILL BE
FACING SOUTH AT A 45 DEGREE ANGLE TO THE HORIZON.
INSTALLATION OF LIGHT
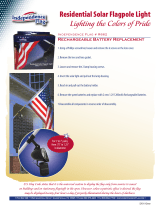
Drill 3 holes(dia. 8mm) on an appropriate flat surface using lamp flat mount base as template to determine hole
location.(Fig.6)
Fix wall mount to lamp by using provided nut (Fig.7)
Fix the lamp unit to the surface by using provided screws and anchors. (Fig.8). Adjust lamp initial aiming direction
before installation.
After installation, connect Spot light wire with Solar panel wire (optional wire kit for longer use) and switch the unit on
the back of the solar panel. The light will automatically be operational when the panel detects that it’s dark enough.
III Solar Flag Pole Light (OPTIONAL USE)
Take off the connection part of LED lamp(Fig.9)
Fix lamp to pole mount base by using screws provided.
Fig.4
Fig.7
Fig.3
Drill holes following to
this unit
Fig.5
Fig.6
Drill holes following to this
unit
Fig.8

Page 3 of 3
Mount Solar Panel to pole mount base using provided butterfly nut (Fig.10).Adjust lamp initial aiming
direction before fixing it.
Fix the pole light unit to flag pole by using stainless steel clamps. There are different sizes of clamps suitable
for different size of flag pole. (Fig.11)
After installation, connect Spot light wire with Solar panel wire and switch the unit on the solar panel. The
light will automatically be operational when the panel detects that it’s dark enough.
NOTES AND TROUBLESHOOTING
If there is not enough sunlight on the solar panel, the unit may not charge, please ensure that the unit is
placed in a position where there is at least 8-10 hours of sunlight a day.
If there is too much ambient light, the unit will not activate as it will assume that it is not dark enough.
Please keep the solar panel clean by wiping it once every few months with a damp cloth or paper towel.
Don’t use strong detergents or acid based cleaners.
Rainy and cloudy conditions over continuous days will also affect the charging ability of the light.
PLEASE NOTE THIS UNIT CHARGES IN THE ON POSITION. (--) LINE DEPRESSED INTO PANEL
IF LIGHT WILL NOT ILLUMINATE AFTER 2 SUNNY DAYS, UNPLUG LIGHT FROM SOLAR PANEL, LEAVE
PANELSWITCH IN ON POSITION AND CONTINUE TO CHARGE LIGHT.
REATTACH LIGHT AND RESUME OPERATION AS NORMAL. IF LIGHT STILL WILL NOT WORK, REPLACE
BATTERY.
BATTERY REPLACEMENT
The battery is 3.7V 2000mAh Li-ion rechargeable battery which is easily replaceable.
If the battery begins to illuminate dimly or for short durations of time and you know that it has had sufficient
sunlight on the panel in order to charge, you should replace the battery in the following way:
1. Unscrew the battery cover on the back of solar panel box and take off the old battery carefully without
damaging the cables.
2. Replace the new battery and remount the unit.
WARNING – Polarity is very important. Switching polarity on the unit is dangerous and will destroy
the unit.
UPC 850901003163
www.solarGoesGreen.com
Fig.9
Fig.10
Fig.11
/