Page is loading ...

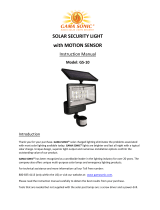
SOLAR TRIPLE HEAD
MOTION ACTIVATED LIGHT
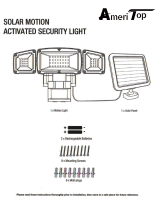
6 x Wall plugs
6 x Mounting screws
1 x rechargeable lithium-ion battery
(pre-installed)
ASSEMBLY & INSTALLATION
Please read these instructions thoroughly prior to installation, then store in a safe place for future reference.
If at any time you are unclear about this product, or require further assistance please do not hesitate to contact our trained professionals
operating the customer support line at 1-888-478-6435 (English/French/Spanish language services, USA and Canada only), from Monday to Friday,
8:30 am to 5:00 pm Eastern Standard Time or email us at [email protected].
Sunforce Products Inc.
9015 Avon # 2017, Montreal, Quebec, Canada H4X 2G8
1 x Solar panel
1 x Motion light
15 ft Wire

2
CARE & MAINTENANCE
• From time to time, ensure the plug between the solar panel and light is securely connected.
• It is advisable to adjust the angle of the solar panel to optimize the exposure of the sun during the
winter months.
• The solar panel should be cleaned with a damp cotton cloth on a regular basis. This will ensure optimal
performance and battery charging. Periodically, utilize the same technique to clean the lenses of the
motion light.
• Never let any abrasive material come into contact with the solar panel.
INSTALLATION
Ensure your solar panel is placed so that its exposure
to the sun is optimized. Be aware of objects such
as trees or property overhangs that may impede the
panel’s ability to generate a charge. The angle of the
solar panel can be adjusted utilizing the pivot point
where the panel attaches to the bracket. This allows
you to maximize sun exposure.
Optional: Use a power drill (not included) to create
the holes on your chosen mounting surface.
Use 4 of the included wall plugs and screws to
fasten the solar panel to the surface.
Insert the two remaining screws and wall
plugs into the surface, leaving 3.2 mm
(1/8 in) of space between the screw heads
and the wall. Place the motion light’s
mounting bracket onto the screw heads (1).
Lock the bracket into place by shifting it
horizontally (2).
Place the mounting bracket template (refer
to template shown below or use provided
insert) over the desired mounting surface.
Mark the screw hole locations indicated by
the symbol.
Use a power drill (not included) to drill the
holes on your chosen mounting surface.
MOUNTING BRACKET TEMPLATE INSTRUCTIONS
1. Cut out the template or use the provided insert.
2. Mark the screw hole locations ( X ) using a pencil or drill.
3. Drill holes in the marked locations.
• Your motion light is not a toy. Keep it out of reach from small children.
• Your motion light and solar panel are both weather-resistant.
• You can mount your motion light indoors, but your solar panel must be installed outdoors to receive light
from the sun.
• If using a step ladder, you may require a second person to help install the solar motion light.
• Prior to installation, lay out all components and check against the part list section in this manual.
• Never look directly into the solar motion light when illuminated.
SAFETY INFORMATION
When replacing the battery, be sure to:
• Use a rechargeable battery only.
• Match the replacement battery specications with the battery that has been removed.
• Observe the correct polarity (+ and -) when installing the replacement battery.
Refer to page 3, step 9 for further details.
BATTERY REPLACEMENT INSTRUCTIONS
WARRANTY
PRODUCT FEATURES
This product is covered under a one year limited warranty. Sunforce Products Inc. warrants to the original
purchaser that this product is free from defects in materials and workmanship for the period of one year from
date of purchase. The included battery is not covered under this warranty.
Proof of purchase including date, and explanation of complaint is required for warranty service.
• Super bright 110 white LEDs
• Adjustable motion sensor
• Adjustable time and distance settings
• Solar panel with 15 ft wire
1.4 in
NOTE: Recommended tools:
Power drill or screwdriver
Screw type: Phillips #2
2
1
1.4 in

3
Connect the wire from the solar panel into the socket
located under the light xture. Your solar motion light will
now begin to charge.
Once the motion light is installed, the side lamp
heads can be adjusted independently in a variety
of ways for optimal lighting coverage.
This screw can be tightened to secure
the positioning of the side lamp heads.
Do not over-torque this screw as this
action can damage the plastic joint.
The battery is located in the battery housing behind the
light xture. Select the OFF position on the light prior to
opening the battery housing. Remove the two screws to
reveal the battery.
When replacing the battery, observe the correct polarity
and match the battery specications with the battery you
have removed. Use a rechargeable battery only.
!
DISTANCE: Controls the
distance of the range of
motion detection: low (L),
medium (M) or high (H).

FREQUENTLY ASKED QUESTIONS
1. Where should the solar panel be mounted?
2. Does the solar panel require direct sun to charge?
3. Can additional or extended cable wire for the solar panel be
purchased?
4. Why does the solar motion light appear to “strobe” or ash?
5. Will decorative or street lights have an effect on the motion
sensor’s ability to operate?
6. What type of battery does my solar motion light require to operate?
1. Mount your solar panel in a position that will enable the most amount of light to be absorbed (refer to Step 1 on page 2). In the Northern
Hemisphere this is usually south facing.
2. The solar panel will charge the internal batteries in direct and indirect light. For best results, try to optimize your solar panel’s sun exposure.
3. At this point there are no extensions available for the cable that connects the light to the solar panel. Any additions to the cable will void
the warranty.
4. A rapidly ashing light is caused by undercharged batteries. Turn the solar motion light’s switch to the “OFF” position and charge for two full
sunny days to bring the batteries to full charge. After two days, return the switch to the “AUTO” position.
5. Yes, the sensor of the solar motion light is light-sensitive. For nighttime usage, ensure no other light activates the motion sensor.
6. Your solar motion light requires the use of one rechareable 3.7 V Li-ion battery.
MADE IN CHINA
4
SAMUSML82130_091219
/