Solar Goes Green SGG-S24-CW Operating instructions
- Type
- Operating instructions
This manual is also suitable for
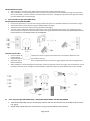
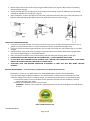
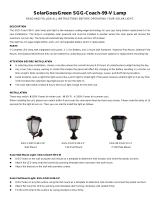
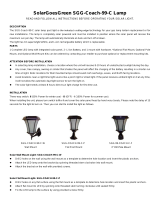
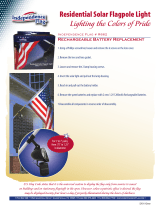
Solar Goes Green SGG-S24-CW is a solar-powered spotlight with 12 super bright LEDs. It is designed to be used outdoors and can be installed in a variety of locations, including gardens, yards, walls, signs, and flags. The spotlight has two Li-ion rechargeable batteries which are easily replaced. It also has an adjustable solar panel and can be set to automatically turn on at dusk and off at dawn. The spotlight is weather-resistant and can withstand rain and snow. It is also easy to install and comes with all the necessary hardware.
Solar Goes Green SGG-S24-CW is a solar-powered spotlight with 12 super bright LEDs. It is designed to be used outdoors and can be installed in a variety of locations, including gardens, yards, walls, signs, and flags. The spotlight has two Li-ion rechargeable batteries which are easily replaced. It also has an adjustable solar panel and can be set to automatically turn on at dusk and off at dawn. The spotlight is weather-resistant and can withstand rain and snow. It is also easy to install and comes with all the necessary hardware.


-
 1
1
-
 2
2
-
 3
3


Solar Goes Green SGG-S24-CW Operating instructions
- Type
- Operating instructions
- This manual is also suitable for
Solar Goes Green SGG-S24-CW is a solar-powered spotlight with 12 super bright LEDs. It is designed to be used outdoors and can be installed in a variety of locations, including gardens, yards, walls, signs, and flags. The spotlight has two Li-ion rechargeable batteries which are easily replaced. It also has an adjustable solar panel and can be set to automatically turn on at dusk and off at dawn. The spotlight is weather-resistant and can withstand rain and snow. It is also easy to install and comes with all the necessary hardware.
Ask a question and I''ll find the answer in the document
Finding information in a document is now easier with AI
Related papers
-
 Solar Goes Green SGG-S12-WW Operating instructions
-
 Solar Goes Green SGG-COACH-99-C-P Operating instructions
-
 Solar Goes Green SGG-COACH-99-C-P Operating instructions
-
 Solar Goes Green SGG-S24-FLPL Operating instructions
-
 Solar Goes Green SGG-F108-2T Installation guide
-
 Solar Goes Green SGG-FL12W-EXTREME User manual
-
 Solar Goes Green SGG-PIR-28 Installation guide


Other documents
-
Kmart 42654773 User manual
-
-
-
 ANKO 42778660 Owner's manual
-
-
-
Kmart 42777304 User manual
-
 Lumabase 73830 Operating instructions
-
 Independence Flag R662 User manual
-
Sunnydaze Decor Sunnydaze Solar Powered Rock Lights - Outdoor LED Landscape Spotlight - Decorative Set of 4 Garden Path Lights - Natural Rock Appearance - Light Up Your Patio, Porch, Yard or Walkway User guide


