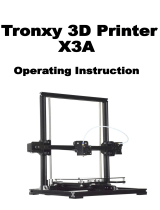
SainSmart Creality Ender-3 V2 3D Printer User manual

Category
3D printers
Type
User manual

This manual is also suitable for

USER MANUAL
CREALITY ENDER-3 V2 3D PRINTER
V1.0 Jul 2020
01
Contents
I. Welcome
II. NOTICES
III. Printer Components
IV. Parts Identification
V. ASSEMBLY
VI. CONTROLING THE PRINTER
VII. PREPARING FOR USE
VIII. PRINTING YOUR OWN MODELS - SLICERS
IX. MAINTENANCE
X. PROBLEM SOLVING
02
04
06
07
09
19
23
29
31
38
......................................................................................................................................
.....................................................................................................................................
................................................................................................................
................................................................................................................................
...............................................................................................
..........................................................................................................
...................................................................
.......................................................................................................................
...............................................................................................................
.................................................................................................................
02
I. Welcome
Thank you for purchasing the Creality Ender 3 V2 3D Printer from SainSmart.
This Ender-3 V2 3D Printer User Guide is designed to aid Ender-3 V2 users in the assembly and use of their new printer and to help
in getting started with 3D Printing. Even if you are familiar with 3D printing technology, we still recommend that you read through this
user manual, as there is a lot of important information about the Ender-3 V2 for you to get a better 3D printing experience.
Support:
● Documentation like this user manual, help guide etc. can be found on https://docs.sainsmart.com/
● For technical support, please email us at [email protected].
● Help and support is also available from our Facebook group. (SainSmart 3D Printing User Group)
Scan QR code
to join the group
03
Basic Specifications
Model
Print Size
Printing Method
Number of Nozzles
Recommended Layer Thickness
Stock Nozzle Diameter
XY Axis Precision
Filament Diameter
File Format
Connectivity
Compatible Slicers
Power Specification
Total Power
Build Plate Temperature
Nozzle Temperature
Resume Printing
Filament Sensor
Dual Z-axis Screws
Language
Operating System
Print Speed
Ender-3 V2
220 x 220 x 250mm. (Build Plate size 235 x 235mm)
FDM (Fused Deposition Modelling)
1
0.1mm - 0.4mm
0.4mm
±0.2mm
Φ1.75mm
.gcode (see your slicer software for supported model formats)
Micro SD Card / USB
Cura, 3D Creator Slicer, Repetier-Host, Simplify3D and more
Input: AC 115/230V 50/60Hz Output: DC 24V
350W
≤100°C
≤250°C
Yes after Manual pause or Power failure
No
No
English / Chinese
Marlin. Slicers are available for Windows XP/Vista/7/10/Mac OS/Linux
≤180mm/s, Normally operation is 30-60mm/s.
04
II. NOTICES
Please read all the instructions in the manual and familiarize yourself with the Ender-3 V2 3D Printer User Manual before setting-up
and using your 3D printer
PLEASE FOLLOW ALL THE SAFETY WARNINGS AND NOTICES.
Failure to comply with the warnings and instructions may result in individual injury, inferior results and printer damage.
1. Work Environment and Safety
Keep your workplace tidy. Do not operate the 3D Printer in the presence of flammable liquids, gas or dust.
The printer should be placed out of the reach of children or pets.
Only operate your 3D printer in room temperatures of 5-30 with an ambient humidity between 20%-70%
2. Electrical Safety
● Always use a properly grounded outlet and the cable provided to prevent damage to your printer.
● Please unplug the 3D Printer if it will not be in use for a while.
● Do not use outdoors, indoor use only.
● Always keep the printer in a dry environment and out of direct sunlight.
● Do not use the 3D Printer during thunderstorms.
3. Personal Safety
● Do keep your hair, clothing and gloves away from moving parts.
● Do not operate the 3D Printer while you are tired or under the influence of drugs, alcohol or medication.
● Parts of the 3D printer will get very hot during use, Do not touch the nozzle, hot end assembly or the build plate when the printer
is warming up, printing or cooling down.
● Ensure you keep others, especially children and pets away from the printer.
05
4. CAUTION!
● Do not leave the 3D Printer unattended.
● Do not make any modifications to the printer other than any approved SainSmart upgrades.
● When removing a model be careful not to use excessive force.
● The 3D printer must only be operated in a well ventilated area, noxious gasses can be released.
● Do not exceed the maximum print temperature of your printer or the filament you are using.
● When loading or unloading filament make sure the printer nozzle is well clear of the build plate (>50mm).
5. Filament and storage
● Follow any recommendations of your filament manufacturer.
Do not use your printer to make anything that will come into contact with food unless specifically allowed by the filament manufacturer.
● Filament should be stored in clean and dry conditions. Filaments will absorb moisture and degrade over time if not kept dry.
● Do not open the filament from it’s sealed package until it is needed.
06
III. Printer Components
1
1
2
3
4
5
6
7
8
9
2
3
4
5
6
7
8
9
10
11
12
13
14
17
18
19
20
21
22
23
15 16
X and E-axis Assembly
X-axis Limit Switch
Printing Platform with Glass Bed and clips.
Y-axis belt Tensioner
Tool Box
Nozzle Assembly
Filament Spool Holder
Z-axis Roller Bracket Assembly
10
11
12
13
14
15
16
17
19
20
21
22
23
18
X-axis belt Tensioner
Screen
Rotary and press Switch
Machine Base
Power Supply
Voltage Selector
Y-axis Limit Switch
Y-axis Motor
Extruder Knob
E-axis Motor
X-axis Motor
Coupling
Z-axis Limit Switch
Z-axis Motor
Power Switch and Socket
07
IV. Parts Identification
1
2
3
4
5 6 7 8
Printer Base x 1 Display Assembly x 1 Nozzle Assembly x 1
9
10 11
Z-axis Profile
(left) x 1
Z-axis Profile
(right) x 1
Gantry Profile x 1
12
X-axis Profile x 1
13
Lead Screw x 1
Z-axis Roller Bracket
Assembly
X-axis Tensioner x 1 Z-axis Motor Assembly x 1
Z-axis Limit Switch
Assembly x 1
XE-axis Assembly x 1
08
14
Filament Holder
Upright x 1
15
Filament Holder
Pipe and Nut x 1
16
2020 Profile
Cover x 2
17
Drive Belt x 1
18
Metal
Scraper x 1
19
Diagonal
Cutters x 1
20
Cable Tie x 1
21
Needle x 1
22
SD Card and
Card Reader x 1
23
Bowden Tube
Connector x 2
24
Power
Cable x 1
34
Extruder
Knob x 1
35
Hexagon Socket
Countersunk Head
Screw (black)
M4X14 x 1
36
Nozzle x 1
25
Wrenches and
Screwdrivers x 1
30
M5T Nut x 2
31
Hexagon Socket
Head Spring Washer
Combination Screw
M5X45 x 5
32
Hexagon Socket
Flat Round Head
Spring Washer
Combination
33
Filament x 1
26
Joint Claw x 2
27
Hexagon Socket
Flat Round Head
Screw M5X8 x 2
28
Hexagon Socket
Countersunk Head
Screw M4X18 x 2
29
Hexagon Socket
Head Spring Washer
Combination Screw
Please make sure all the above parts are included. If you are missing any part or have any questions, please email us at
09
V. ASSEMBLY
1. Install Z-axis Limit Switch Assembly and Z-axis Profiles
Short
1
1
Printer Base x 1
9
9
10
10
Z-axis Profile
(left) x 1
Z-axis Profile
(right) x 1
7
7
31
31
Hexagon Socket
Head Spring Washer
Combination Screw
M5X45 x 5
Z-axis Limit Switch
Assembly x 1
● Slide the Z axis limit switch onto the Z-axis Profile (left) as in the picture above and
loosely tighten. Then use four M5X45 screw to fix the Z-axis profiles to the base.
● Slide the Z axis limit switch down until it touches the base profile and tighten the bolts.
10
2. Install Z-axis Motor Assembly and Lead Screw
● Attach the motor to the profile using two M4x18 screws it needs to be secure but do
not over tighten.
● Slide the lead screw into the top of the coupler and tighten the set screw to clamp it
securely in place.
6
6
28
28
Hexagon Socket
Countersunk Head
Screw M4X18 x 2
13
13
Lead Screw x 1
Z-axis Motor
Assembly x 1
11
3. Install Pneumatic Joint, XE-axis Assembly and Drive Belt
8
8
12
12
X-axis
Profile x 1
XE-axis
Assembly x 1
Install the drive belt
around the pulley.
23
23
Bowden Tube
Connector x 2
32
32
Hexagon Socket
Flat Round Head
Spring Washer
Combination
17
Drive Belt x 1
25
25
Wrenches and
Screwdrivers x 1
17
● Tighten the Bowden tube connector firmly into the Extruder using an open-end wrench.
● Align the bolt head on the XE-Axis Assembly into the hole on the X Axis profile.
● Secure the XE-axis Assembly to the X-Axis Profile with two M4X16 screws. (Insert the
Allen key through the holes on the outer plate).
● Install the Drive belt round the pulley inside the XE-axis Assembly with the toothed side
round the pulley as shown above.
12
4. Install Nozzle Assembly, Z-axis Roller Bracket Assembly
3
3
Nozzle Assembly x 1
32
32
Hexagon Socket
Flat Round Head
Spring Washer
Combination
4
4
Z-axis Roller Bracket
Assembly
● Make sure the drive belt is in the profile slot and slide the Nozzle assembly onto the profile
as shown above.
● Attach the Z-Axis Roller Bracket Assembly to the profile, aligning the bolt head into the
hole on the profile and using the M4x16 screw into the threaded hole in the profile.
Back View
13
5. Install X-axis Tensioner and Connect the Drive Belt
35
35
Hexagon Socket
Countersunk Head
Screw (black)
M4X14 x 1
32
32
Hexagon Socket
Flat Round Head
Spring Washer
Combination
5
5
X-axis Tensioner x 1
Drive Belt
copper sleeve
Installation Illustration Completed installation
Tensioner
block
Tensioner block
X-axis tensioner base
Tensioning
Knob
Back View
● Undo the tensioning knob and remove the tensioner block.
● Thread the drive belt around the pulley making sure it has not twisted and push the pulley back into the
tensioner base making the alignment is as shown in the picture above.
● Screw the tensioning knob back into place by couple of turns.
● Attach the Tensioner base to the profile Z Axis Roller Bracket assembly with a M4X16 screw on one side
and the countersunk screw (in the Tensioner block bag) on the other, both these screws use the same
threaded hole in the profile.
● Secure the ends of the drive belt by sliding the belt into the slots in the Nozzle assembly as in the picture
above.
14
6. Install the Z-axis Gantry Assembly and Adjust X-axis and Y-axis Drive Belt Tension
Assembled Part After Step 5
Assembled Part After Step 2
Back
Front
● Turn the X-axis and Y-axis tensioner
knobs to adjust the belt tension.
● The belts should be taught but not over-
tight or too slack. When you press down
the drive belt, you should feel some
spring in the belt.
● If the belts are too lose they can slip
during printing ruining the result.
● If the belts are too tight they will over
stress the pulleys and motors or even
break.
● Place the lower V rollers into the grooves on the outside of the Z profiles.
● Locate the lead screw in the Brass nut on the XE Assembly and turn by hand to
screw the gantry down while guiding the other V rollers into the Z profile grooves.
● Adjust the tension of the X and Y axes drive belts as shown above.
15
7. Install the Gantry Profile and Display Assembly
● Secure the Gantry profile onto the upper end of the gantry with four hexagon socket head
cap screws M5x25 and tighten securely:
● Unclip the display from the bracket, slacken the screws pre-installed on the bracket and
insert the T nuts into the base profile.
● Tighten the bolts making sure the T nuts are turning to engage with the base profile.
● The display can be moved forwards and backwards to suit your preference then tighten
the bolts.
● Connect the ribbon cable to the display screen and clip it back onto the bracket.
2
2
Display Assembly x 1
11
11
29
29
Hexagon Socket
Head Spring Washer
Combination Screw
Gantry Profile x 1
Connect the display
screen Assembly
16
8. Install Filament Holder, Gantry Cover and Extruder Knob
27
14
15
30
16
34
14
Filament Holder
Upright x 1
15
Filament Holder
Pipe and Nut x 1
16
2020 Profile
Cover x 2
34
Extruder
Knob x 1
30
M5T Nut x 2
27
Hexagon Socket
Flat Round Head
Screw M5X8 x 2
● Insert the M5X8 bolts through the holes on the Filament holder upright and loosely attach the T nuts.
● Align the T Nuts in the top profile groove (The flat side faces towards the back of the printer) and
tighten the nuts, the T nuts will turn in the grove as it tightens.
● Attach the filament holder and secure with the plastic nut.
● Place the extruder knob onto the top of the extruder motor shaft and push the profile covers in on
both sides of the top profile.
17
9. Connect the Bowden Tube to the Extruder
● Press the collar on the extruder Pneumatic Connector in to the fitting and hold.
● Press the Bowden tube into the connector firmly until it goes no further.
● Release the collar.
● Clip the Connector spacer between the collar and the body of the connector to lock in place.
26
Joint Claw x 2
Bowden Tube
18
10. Electrical Connections
X, E, Z-axis motor port
X, Z-axis limit switch
Z-axis motor port
Z轴电机接口
Z-axis limit switch
Z轴限位开关
24
X
z
X
E
24
Power Cable x 1
● Select the correct input voltage
to match your local supply
(115/230V)
● Damage can occur if the
voltage is set incorrectly.
● Connect the power cord and
set the power switch to 1 to
turn it on.
● Do not unplug or connect any
cables when the machine is
turned on.
Caution
19
VI. CONTROLING THE PRINTER
1. Display and Controls
At the base of the screen there is a single knob, this has two functions:
1. As the knob is rotated it will move, highlighting whatever option is selected at the time.
2. The knob is also a switch, by Tapping it once, you will go into the menu option that is
highlighted at the time the button is pressed.
At the bottom of the screen is a status bar which displays the current and target temperature
for the nozzle and bed temperatures,
Print speed override value and the current distance of the Z axis above the home position.
From the main screen four options are available:
Print
This allows you to select a file from the SD card to print. Once selected, the file is loaded and
the print starts while displaying print details and progress.
Prepare
This menu allows you a number of options to get your printer ready for printing, such as manually moving the axes, auto homing the
printer (returning the Nozzle to the starting position for any print), preheating the bed and nozzle to preset values, putting the printer
in cooldown mode and selecting the display language.
Control
This allows manual selection of the fan speed, nozzle and bed temperatures and the changing of some of the default values for
motion and temperatures.
Info
Shows some information such as the current firmware version.
Each menu or submenu has a Back option at the top, to return to the previous menu Highlight this and Tap.
  • Page 1 1
  • Page 2 2
  • Page 3 3
  • Page 4 4
  • Page 5 5
  • Page 6 6
  • Page 7 7
  • Page 8 8
  • Page 9 9
  • Page 10 10
  • Page 11 11
  • Page 12 12
  • Page 13 13
  • Page 14 14
  • Page 15 15
  • Page 16 16
  • Page 17 17
  • Page 18 18
  • Page 19 19
  • Page 20 20
  • Page 21 21
  • Page 22 22
  • Page 23 23
  • Page 24 24
  • Page 25 25
  • Page 26 26
  • Page 27 27
  • Page 28 28
  • Page 29 29
  • Page 30 30
  • Page 31 31
  • Page 32 32
  • Page 33 33
  • Page 34 34
  • Page 35 35
  • Page 36 36
  • Page 37 37
  • Page 38 38
  • Page 39 39
  • Page 40 40
  • Page 41 41

SainSmart Creality Ender-3 V2 3D Printer User manual

Category
3D printers
Type
User manual
This manual is also suitable for

Ask a question and I''ll find the answer in the document

Finding information in a document is now easier with AI