Page is loading ...

Installation & User Guide
Auralex® Acoustics, Inc.
1-800-959-3343 | 317-842-2600 | Auralex.com
9955 Westpoint Drive, Suite 101, Indianapolis IN USA 46256
Studiofoam®
1314-615.Studiofoam (Polybag) User Guide (01/13/2020 - 10:21 AM)
EZ-Stick Pro™
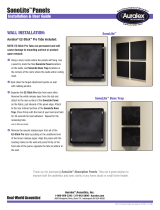
Clean attachment points on the wall surface with Isopropyl alcohol (avoid household cleaners), wipe
gently and let dry. Separate the EZ-Stick Pro Tabs from each other. Remove one of the paper release
liners from the strip. Apply the tabs with very strong, uniform pressure (heel of hand) for 30 seconds on
the rear of the panel near the outside edges, orient vertically for maximum holding strength. Remove
the second paper release liner from the backside of the tab, position the panel with the target location
on the wall and again press with very strong pressure for 30 seconds at each attachment location.
Use 4 tabs for a 2’ x 2’ Studiofoam panel.
NOTE: EZ-Stick Pro Tabs are pressure sensitive, the greater the applied pressure, the better
the adhesion. Adhesive failure could occur if proper installation procedure is not followed.
Cleaning the wall surface and the use of very firm, uniform pressure (heel of hand) when
applying the tabs to Studiofoam is critical!
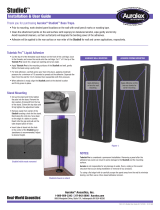
Thank you for purchasing Studiofoam® high performance acoustical absorption treatment that can easily be mounted to walls & ceilings.
• Prior to mounting, mark desired panel locations on the wall with small pencil marks or masking tape.
• If you need to cut your Studiofoam, use a straightedge and an electric carving knife. Don’t force the knife; let the blades do the work.
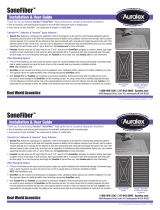
EZ-Stick Pro™ Tabs shown
Other Mounting Options
• Tubetak Pro™ and Foamtak™ adhesives can also be used.
Visit Auralex.com for more information.
• T-Pins or Finish Nails can be used to tack the panels in place for a quick installation with
minimal wall damage. Sometimes larger nails or panel movement can cause the Studiofoam
to tear, so this is usually best as a temporary installation method.
NOTES:
• EZ-Stick Pro Tabs may not adhere well to some vinyl wallpapers. Apply to surfaces above 50˚ F (10˚ C). Adhesive could soften and lose
adhesion above 105˚ F (40˚ C). EZ-Stick Pro Tabs are considered permanent and will damage the wall surface when removed.
• Both Tubetak Pro and Foamtak are considered a permanent installation. Removing the panel after the adhesive has cured can result in some
damage to the Studiofoam and the mounting surface. Try using a sharp knife to carefully separate the panel from the adhesive to minimize
tearing. Use a citrus based adhesive remover to clean the adhesive from the wall. Auralex is not responsible for any damage to walls, the
ceiling or the overall structure that occurs during installation or removal of our products.
Typical Tubetak Pro™
application pattern
Tubetak Pro™ application
for difficult to adhere
to surfaces
Adhesive failure could occur if proper
installation procedure is not followed.
Cleaning the wall surface and the use
of very firm, uniform pressure when
applying the tabs to Studiofoam and
to the wall is critical!
Apply very firm, uniform pressure
for 30 seconds in order to ensure the
EZ-Stick™ Pro Tabs properly adhere to
the Studiofoam. Not using adequate pressure will cause the
EZ-Stick Pro Tabs to fail.
FINAL APPLICATION AFTER APPLYING FIRM PRESSURE
INITIAL APPLICATION (Without Applying Firm Pressure)
ADHESIVE
ADHESIVE
CAUTION:
FINAL APPLICATION AFTER APPLYING FIRM PRESSURE
INITIAL APPLICATION (Without Applying Firm Pressure)
ADHESIVE
ADHESIVE
/
