Page is loading ...

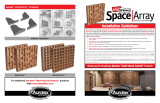
Thank you for purchasing pArtScience™ AudioTile™ 24 piece set—the next generation of acoustical treatments from
Auralex
®
Acoustics. Varying thickness built into each patent-pending AudioTile delivers excellent broadband
absorption, while the tessellated forms allow a unique means of blending absorption, diffusion, and reflection for
optimum acoustical performance.
AudioTile Features Include:
H Maximum Broadband Absorption: Absorption coefficient of 0.81 @ 125 Hz. Maximum NRC = 1.00 to 1.05
depending on installation
H Varying Thickness: Foam thickness varies from 1” to 4” to provide effective absorption at a wide range of
frequencies
H Unlimited Tessellation Design Patterns: Allows a unique means of blending absorption,
diffusion and reflection
H Easy Installation: Mount using Foamtak™ spray adhesive, Tubetak Pro™ liquid adhesive
and/or Temp•Tabs™ Studiofoam
®
mounting kits
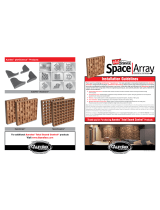
This installation guide includes general recommendations and installation procedures for seven possible designs you can create
from this 24 piece box of AudioTile. To see additional design ideas, visit the AudioTile design gallery at Auralex.com. Should you
have any questions about the installation of your pArtScience AudioTile System, feel free to contact an Auralex Application
Specialist via email at appsupport@auralex.com or call 1-800-95-WEDGE. For best results, fill out a Personalized Room
Analysis Form (http://www.auralex.com/pcf/) before calling so the application specialist can properly assist you.
Thank you for purchasing Auralex
®
Total Sound Control
®
products!
Installation Guidelines
834-406 | Rev. 1 | 060606 EDL
Installation pictured here
requires multiple sets.

*Visit Auralex.com to view other exciting AudioTile designs you can build using the same components!
After applying adhesive, place AudioTile in the
appropriate location according to any one of the design
layout templates shown.
➊
6 each
A
This box contains 24 AudioTiles. Carefully remove each tile from the box and sort into four separate piles
according to their unique shapes, as shown:
INSTALLATION GUIDE*
➋
CAUTION
Before applying adhesive, build the design on the floor
first to get an idea of placement.
Foamtak
™
Spray Adhesive Tubetak Pro
™
Liquid Adhesive TEMP•Tabs
™
Mounting Kit
B
6 each
C
6 each
D
6 each
➌
For best results, turn the spray
nozzle counter clockwise until it
stops at the “L” position.
Requires standard-size caulk gun. TEMP•Tabs are a temporary Studiofoam
mounting solution designed for easy
installation and maximum flexibility.
Requires standard-size caulk gun.
TIP
Practice spraying on a piece of cardboard
before attempting to spray the AudioTiles.
TIP
Use any of the design layout templates shown or create your own
one-of-a-kind design.
Apply adhesive (sold separately) to the back of an AudioTile
according to the specific adhesives instructions:


Here are just some of the cool designs you can build with this 24 piece set of AudioTile
™
Shockwave
™
.
One 24 piece set effectively
treats up to one 8’ x 10’
wall or ceiling.
Visit Auralex.com for more AudioTile™ design ideas and additional
Auralex
®
Total Sound Control
®
products.
AudioTile™ ShockWave™ | Design Ideas
/

