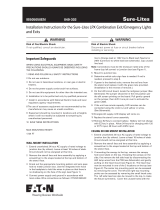
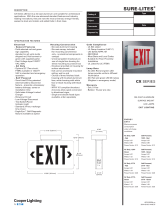
Lithonia Lighting EXG and EXR LED Exit Sign Installation guide
- Type
- Installation guide

INSTALLATION INSTRUCTIONS FOR EMERGENCY LED EXIT SIGN
WALL MOUNT INSTALLATION
1. Remove EXIT stencil from housing, set aside.
2. Drill or knock out appropriate knockouts on back plate to fit junction box mounting points.
3. Drill or knock out center hole in back plate for EXIT supply wire leads.
4. Route EXIT input wires through center hole of the back plate and make wiring connection. For 120V, use black and white
wires and for 277V, use red and white wires.
5. Secure back plate to junction box (hardware not included).
6. Connect battery (EL models only).
7. Remove proper Chevron(s) as required and repl
ace EXIT stencil onto housing.
8. Apply continuous AC power and press “TEST” button to check operation.(See operation (battery back-up) for testing
procedures)
CEILING OR END MOUNT INSTALLATION
1. Remove EXIT stencil from housing, set aside.
2. Place screws (provided) in holes on the canopy.
3. Remove the desired mounting hole plug located on the
frame of the sign. For ceiling mount, hole plug will be
located on the top of the housing. For wall mount, hole
plug will be located on the side of the housing.
4. Place canopy tab through the mounting hole of the
housing until the flat portion of the canopy is touching the
housing frame. Lock the canopy into place by sliding the
canopy, without turning, toward smaller
end of the
mounting hole until the tab is fully engaged and locked
into place. Once canopy is in the locked position there will
not be any side-to-side movement of the canopy.
5. Route EXIT input wires through canopy and through metal
mounting plate.
6. Make wiring connection. For 120V, use black and white
wires and for 277V, use red and white wires. WARNING:
Properly insulate the unused lead with a wire nut
(provided) or other approved means.
7. Push wire connections into the J-Box. Secure mounting
plate to junction box (hardware not included).
8. Secure the canopy to the steel mounting plate with
screws installed in step 2.
9. Remove proper chevron(s) as required. When
removing
chevrons it may be helpful to remove the color diffuser
panel to allow easier access to the chevrons. If removing
color diffuser panel it is important to remember to reinstall
the diffuser panel, securing with diffuser retention caps
once chevron(s) have been removed.
10. Connect battery only after continuous AC power can be
provided to the unit.
11. Secure face plate(s) to the housing.
12. Apply continuous AC power and press “TEST” button to
check operation.(See operation (battery back-up) for
testing procedures)
POWER SUPPLY
PC BOARD
POWER SUPPLY
PC BOARD
WIRING DIAGRAMS:
AC ONLY
BATTERY BACKUP
BAT
Recommended 4"
standard junction
box

OPERATION (BATTERY BACKUP)
1. Apply AC power to the unit. The LED indicator will be RED.
2. After the battery has been left to charge for 24 hours, test the unit by pushing the switch. The LED indicator turns
OFF and the LED board stays ON.
3. When the switch is released, the LED indicator turns back to RED and the LED board stays ON.
MAINTENANCE
IMPORTANT CODE COMPLIANCE INFORMATION
Caution: Always turn off AC power to the equipment before servicing. Servicing should be performed only
by a qualified service technician. Use only MANUFACTURER
supplied replacement parts.
BATTERY : The battery supplied with the EL model requires no maintenance. However, it should be tested periodically
and repl
aced when it no longer operates the connect
In accordance with NFPA 101, documented testing of your emergency lighting system must be tested monthly for a
minimum of 30 seconds and annually for 90 minutes. Refer to your local codes for any additional requirements that
may apply.
ed sign for the duration of a 30-second or 90-minute
test. The battery supplied in this sign has a life expectancy of 5 years when used in a normal ambient
tempe rature of 72° F.
PART # EMCSA00803 (REV A)
SAVE THESE INSTRUCTIONS
Lithonia Emergency
One Lithonia Way, Conyers GA 30012
Phone: 800-334-8694 Fax: 770-981-8141
www.lithonia.com
-
 1
1
-
 2
2
Lithonia Lighting EXG and EXR LED Exit Sign Installation guide
- Type
- Installation guide
Ask a question and I''ll find the answer in the document
Finding information in a document is now easier with AI
Related papers
-
Lithonia Lighting ECC G M6 Installation guide
-
Lithonia Lighting EXRG EL M6 Installation guide
-
Lithonia Lighting EXR LED EL M6 Installation guide
-
Lithonia Lighting LHQMLEDGM6 Installation guide
-
Lithonia Lighting Solo Installation guide
-
Lithonia Lighting LQM S W 3 G 120/277 EL N SD M6 Specification
-
Lithonia Lighting LHXC Installation guide
-
Lithonia Lighting IB 632 MVH Installation guide
-
Lithonia Lighting ELM2 LED M12 Installation guide
-
Lithonia Lighting 446143 Installation guide
Other documents
-
RAB Lighting EXIT34-RG Operating instructions
-
GE current IND625 User manual
-
GE current IND625 User manual
-
RAB ECOMBO34 Operating instructions
-
Cooper Lighting CAX Series User manual
-
 Sure-Lites LPXC25 Operating instructions
-
All-Pro APX7R Dimensions Guide
-
Lightolier LLC2 User manual
-
 Sure-Lites CX71SD Dimensions Guide
-
Chloride 55 Series Install Instructions


