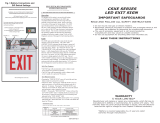
Lithonia Lighting EXR LED EL M6 Installation guide

Type
Installation guide

Lithonia Lighting EXR LED EL M6 is a versatile and reliable emergency exit sign that provides clear guidance during power outages or emergencies. It features long-lasting LED lamps with a lifespan of up to 10 years, ensuring dependable illumination when you need it most. With its compact and sleek design, the EXR LED EL M6 seamlessly blends into any environment while meeting safety standards. Its durable construction and easy installation make it an ideal choice for commercial, industrial, and institutional applications.

Lithonia Lighting EXR LED EL M6 is a versatile and reliable emergency exit sign that provides clear guidance during power outages or emergencies. It features long-lasting LED lamps with a lifespan of up to 10 years, ensuring dependable illumination when you need it most. With its compact and sleek design, the EXR LED EL M6 seamlessly blends into any environment while meeting safety standards. Its durable construction and easy installation make it an ideal choice for commercial, industrial, and institutional applications.

LQM
L.E.D. Exit Sign
US Patent No. 5,611,163, 5,739,639 and 5,526,251
US Patent No. 5,954,423, 5,988,825, 6,152,581, 6,502,044,
D495,751, and D383,501
Canada Patent No. 2,204,218. Other Patents Pending.
READ AND FOLLOW ALL SAFETY INSTRUCTIONS
Save these instructions and deliver to owner after installation.
WARNING: FAILURE TO FOLLOW THESE INSTRUCTIONS AND WARNINGS MAY
RESULT IN DEATH, SERIOUS INJURY OR SIGNIFICANT PROPERTY DAMAGE – For your
protection, read and follow these warnings and instructions carefully before installing or main-
taining this equipment. These instructions do not attempt to cover all installation and mainte-
nance situations. If you do not understand these instructions or additional information is re-
quired, contact Lithonia Lighting or your local Lithonia Lighting distributor.
WARNING: RISK OF ELECTRIC SHOCK – NEVER CONNECT TO, DISCONNECT
FROM OR SERVICE WHILE EQUIPMENT IS ENERGIZED.
WARNING: RISK OF FIRE – Lamps are hot. Keep combustibles material away from
hot parts. Observe lamp manufacturers warnings, recommendations and restrictions on lamp
operation and maintenance. Make sure lamps are correctly installed.
WARNING: DO NOT USE ABRASIVE MATERIALS, OR OTHER SOLVENTS. USE
OF THESE SUBSTANCES MAY DAMAGE FIXTURE, WHICH MAY RESULT IN PERSONAL
INJURY.
Before wiring to power supply, turn off electricity at fuse or circuit breaker.
Disconnect A.C. power and unplug battery before servicing.
Consult your local building code for approved wiring and installation.
Do not use outdoors.
Do not let power supply cord touch hot surfaces.
Do not mount near gas or electric heater.
Do not install a damaged fixture.
This product must be installed in accordance with the applicable installation codes and
ordinances.
Proper grounding is required to ensure personal safety. (WHERE APPLICABLE)
All service shall be performed by qualified service personnel. This product must be
installed and maintained in accordance with the applicable installation codes by a
person familiar with the construction and operation of the product and the hazards
involved.
Equipment should be mounted in locations and at heights where it will not readily be
subjected to tampering by unauthorized personnel.
The use of accessory equipment not recommended by the manufacturer may cause an
unsafe condition.
Do not use this equipment for other than intended use.
SAVE THESE INSTRUCTIONS
L.E.D. LETRERO DE SALIDA
LEA Y SIGA TODAS LAS INSTRUCCIONES DE SEGURIDAD
Guarde estas instrucciones y entreguesela al dueño despues de
la instalacion.
ADVERTENCIA: INCUMPLIMIENTO EN SEGUIR ESTAS INSTRUCCIONES Y
ADVERTENCIAS PUEDE RESULTAR EN LA MUERTE, LESIONES GRAVE O DAÑO
SIGNIFICANTE A LA PROPIEDAD – Para su protección, lea y siga estas instrucciones y
advertencias con mucho cuidado antes de instalar o proveer mantenimiento a este equipo. Estas
instrucciones no procuran cubrir todas situaciones de instalación y mantenimiento. Si usted no
comprende estas instrucciones o requiere información adicional, contacte Lithonia Lighting o su
distribuidor de Lithonia Lighting.
ADVERTENCIA: RIESGO DE DESCARGA ELECTRICA - NUNCA CONECTE A O
DESCONECTE DEL SERVICIO O PROVEE MANTENIMIENTO MIENTRAS EL EQUIPO ESTE
PRENDIDO.
ADVERTENCIA: RIESGO DE FUEGO – Lámparas están caliente. Mantenga
materia combustibles lejos de las piezas calientes. Observe las advertencias del fabricante de
la lámpara, recomendaciones y restricciones en la operación de lámpara y mantenimiento.
Asegúrese que las lámparas estén instaladas correctamente.
ADVERTENCIA: NO UTILICE MATERIAS ABRASIVAS, NI OTROS SOLVENTES.
EL USO DE ESTAS SUSTANCIAS PUEDEN DAÑAR EL LUMINARIO Y CAUSAR LESION
PERSONAL
.
Antes alambrarlo al suministro eléctrico, apague la electricidad en la caja de fusibles o
cortacircuitos.
Desconecte corriente C.A. y desenchufe la batería antes de proveerle servicio.
Consulte su código de construcción local para métodos de alambrado e instalación
aprobados.
No use al aire libre.
No permita que el cordón eléctrico toque superficies calientes.
No monte cerca de calentador de gas o eléctricos.
No instale un luminario dañado.
Este producto debe ser instalado de acuerdo con los códigos aplicables de instalación y
las ordenanzas locales.
Método apropiado para poner a tierra es requerido para asegurar la seguridad personal.
(DONDE APLICABLE).
Todo servicio será realizado por personal calificado del servicio. Este producto debe ser
instalado y debe ser mantenido de acuerdo con los códigos aplicables de instalación por
una persona familiarizada con la construcción y la operación del producto y los peligros
implicados.
Equipo debe ser montado en ubicaciones y a alturas donde no será fácilmente sujeto a
manipulación por personal no autorizado.
El uso de equipo accesorio no recomendado por el manufacturero puede causar una
condición peligrosa.
No utilice este equipo de otra manera que el uso destinado.
GUARDE ESTAS INSTRUCCIONES
Mounting Bracket
Soporte de la Caja Electrica
Canopy
Capota
Circuit Board
Tablero de Circuito
Back Cover
Cuvierta Tracera
Cam Locking Pin
Clavija de Seguridad
Sign Panel
Panel del Aviso
Battery
la Bateria
EL N and WRS only
PCB Cover
La Cubierta del Tablero
de circuitos
Faceplate
Cuvierta Delantera
Housing
Caja
Mounting Hole Cover
Cuvierta Lateral
Directional Chevrons
Flechas Direccionales
Ø Rotate bracket to desired alignment position and tighten
screws. Be careful not to over-tighten screws, as this
may cause misalignment of canopy to mounting surface.
Ø Gire parentesis a la posicion descada del alignment y
apriete. Tener cuidado de no apretar mucho los tornillos,
esto puede causar un desaliniamiento de la montura y la
supeficie de montar.
Ø Connect provided jumper leads to AC input in J-Box.
Using keyhole slots insert screws through bracket.
Ø Conecte los cables dados a input de CA dentro de caja
electrica. Conecte los alambres a la entrada de la C.A.
en la caja J. Usando ranuras de ojo la cerradura meten
los tornillos por parentesis.
Ø Place canopy over mounting bracket.
Ø Coloque la capota sobre el parentesis que monta.
Ø Dress leads through Housing wire channel. Snap
housing onto canopy. Insert proper input wires into
corresponding pushnut to connect power to unit.
Ø Pase los cables por el canal en la caja. Asgure la caja a
la capota. Meta alambres apropiados en el pushnut
corresponiente para conectar el poder del equipo.
Ø Snap cam-lock pin into retaining hooks. Rotate handle
of locking pin up to lock.
Ø Asegure la clavija de seguridad a los ganchos. Gire la
manija de cerrar hasta que cierre.
Ø Snap Faceplate onto housing.
Ø Asegure la cuvierta delantera a la caja.
TOP/SIDE MOUNT
INSTALACION PARA ENCIMA O DE LADO
1 2
4
5
3
6
Ø To remove directional chevrons; remove
colored sign panel and push chevron from
rear of panel.
Ø Para quitar las flechas direccionales quite
el panel de color del aviso y empuje la
flecha por detras de la cuvierta delantera.
Ø To remove back cover press in and
release latches and snaps.
Ø Para quitar la cuvierta tracera apriete y
suelte los ganchos.
Ø To remove canopy, remove cam-lock pin,
squeeze snaps and push out.
Ø Para quitar capota, apriete ganchos y
enpuje afuera.
Ø Dress leads through center knockout in Back
Cover. Fasten Back Cover to J-Box. Snap
Housing onto Back Cover.
120 or 277 V - Connect input leads to Circuit Board
leads using provided pushnuts. See wiring
diagrams.
Ø
Pase los cables por la apertura central en la
cuvierta tracera. Asegure la cuvierta tracera a la
caja. Asegure la caja a la cuvierta tracera.
120 or 277V - Conecte cables de input a los cables
del Tablero de Circuito usando los connectadores
dados. Vea esquema del cableado.
Ø Power PCB cover should always be installed as shown
except in mounting configurations where the back
cover is installed on the reverse side.
Ø La Cubierta de TCI de poder siempre se debe insalar
como mostrada menos a montar configuraciones
donde la cubierta de espalda se instala enel lado
inverso.
Ø On Emergency units with a battery, plug battery
connector onto the circuit board to complete installation
after continuous power has been applied.
Ø En equipo de Emergencia con una bateria, tape el
conector de bateria en el tablero de circuitos para
competar la instalacion despues de que se haya
aplicado la energia continua.
GENERAL INFORMATION
INFORMACION GENERAL
NOTE: Allow battery to charge 24 hours before initial testing, and
168 hours to fully charge battery.
NOTA: Deje que la bateria se carge 24 horas antes de probar por primera vez y 168 horas para completamente cargar la bateria.
BATTERY REPLACEMENT: Remove A.C. power from unit. Remove battery from housing location and unplug from circuit board. Replace battery
only with manufacturer's recommended replacement. Install replacement battery and reconnect on Circuit Board .
REMPLASO DE LA BATERIA: Corte la corriente CA del equipo. Quite la bateria de la localizacion de la cubierta y desenchfela del tablero de
circuito. Substituya la bateria solamente por el reemplaza recomendado del fabricante. Instale la bateria del reemplazo y vuelva a conectar en el
tablero de circuito.
CAUTION: Prolonged absence of AC power could cause battery damage.
PRECAUCION: La prolongada falta de alimentación de CA batería podría causar daños.
Clearing a Failure Indication:
A failure indication may be cleared manually by pressing the manual test
switch. This will clear the failure indication provided the failed component
has been corrected.
Despejando una Indicación de Falla:
Una indicación de falla puede ser despejada manualmente apretando
el interruptor manual de prueba. Esto despejara la indicación de falla
si el componente con la falla ha sido corregido.
Manual Test Initiation:
Important Note:
The self-diagnostics option performs tests to satisfy local codes in most
areas. A 30 second test of the batteries, lamp and charger circuit may be
manually initiated with a sufficiently charged battery by pressing the
manual test switch. The manual test will not actuate any flashing option.
Iniciación de la Prueba Manual:
Nota importante:
La opción auto-diagnóstica realiza las pruebas necesarias para
satisfacer los códigos locales en la mayoría de las áreas. Una prueba
de 30 segundos de las baterías, lámpara y circuito cargador puede
ser iniciada manualmente con una batería suficientemente cargada
apretando el interruptor manual de prueba. La puebra del manual
no activarà el interfaz la alarma de inciendo de opciones
audiblesque contellean (SDFIFA).
Fire Alarm Operation (SDFIFA option):
When fire alarm system (24 VDC) is engaged the lamps will flash
approximately once per second.
For FA or FI operation See Figure A.
Operación de Alarma de Incendios (Opción de SDFIFA):
Cuándo el sistema de alarma de incendio (24 VDC) esta activada las
lámparas parpadean aproximadamente una vez por segundo. Para
operación FA o FI Vea Figura A.
Self-Diagnostics
Status Indicator Chart
Gráfico de Indicador de Estatus
Shift Yellow switch to the left for FI operation
Shift Yellow switch to the right for FA operation
Cambio de la posicion el interuptor amarillo a la posición
izquierda para la opción FI
Cambio de la posición el interuptor amarillo a la posición
derecha para la opción FA
INSPECTION AND MAINTENANCE (EL N ONLY)
INSPECTION ET ENTRETIEN (Solemente de EL N)
NOTE: Emergency lighting systems should be tested in accordance to NFPA 101 or as
often as local codes require, to ascertain that all components are operational.
NOTA: Sistemas de Iluminacion de Emergencia se deben probar con la frequencia requerida
por codigos locales, o por lo menos cada tres meses para asegurarse que todas las partes
esten funcionando.
Figure A
FI
FA
WIRING DIAGRAM
ESQUEMA DEL CABLEADO
EMCSA00754
Rev D
ACUITY BRANDS LIGHTING, INC., ONE LITHONIA WAY, CONYERS, GEORGIA 30012,
Tel: 800-334-8694
Acuity Brands Lighting de México, S. de R.L. de C.V., Av. La Silla No. 7711, Parque
Industrial la Silla, Gpe., Nvo León, C.P, Tel: 52 81 8318 0460
www.lithonia.com
MADE IN CHINA
ESPECIFICACIONES ELECTRICAS
Consulte la etiqueta de marcado adherida al luminario.
WIRING DIAGRAM
(LQM SD90 AND LQM WRS ONLY)
ESQUEMA DEL CABLEADO
(LQM SD90 y LQM WRS SÓLO)
Bateria (Solamente EL)
Battery (EL Only)
LED Circuit Board
Tablero de Circuito
Power Supply
Orange: 277V
Ready Light (EL ONLY)
Test Switch (EL Only)
Luz Ready
Boton de Prueba
Black: 120V
White: Neutral
Blanco:
Negro:
Naranja:
Linea
FI harness
24V DC
Blue
Red/white
Common
Bateria (Solamente EL)
Battery (EL Only)
LED Circuit Board
Tablero de Circuito
Power Supply
Ready Light (EL ONLY)
Test Switch (EL Only)
Luz Ready
Boton de Prueba
Black: 120-277V
White: Neutral
Blanco:
Negro:
Linea
FI harness
24V DC
Blue
Red/white
Common
  • Page 1 1
  • Page 2 2
  • Page 3 3
  • Page 4 4
  • Page 5 5
  • Page 6 6

Lithonia Lighting EXR LED EL M6 Installation guide

Type
Installation guide

Lithonia Lighting EXR LED EL M6 is a versatile and reliable emergency exit sign that provides clear guidance during power outages or emergencies. It features long-lasting LED lamps with a lifespan of up to 10 years, ensuring dependable illumination when you need it most. With its compact and sleek design, the EXR LED EL M6 seamlessly blends into any environment while meeting safety standards. Its durable construction and easy installation make it an ideal choice for commercial, industrial, and institutional applications.

Ask a question and I''ll find the answer in the document

Finding information in a document is now easier with AI