Page is loading ...

Assembly Book
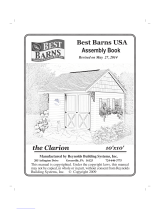
Sentry Buildings
Revised April 15, 2022
the Pinewood 14'x28' Building
This manual is copyrighted. Under the copyright laws, this manual
may not be copied, in whole or in part, without consent from
RBS Holdings, LLC © Copyright 2022
Manufactured by RBS Holdings, LLC
205 Arlington Drive Greenville, PA 16125

You will need to rent (6) six sections of scaffolding to safely install the second floor material.
Use safety harnesses when on the scaffolding. Consider hiring a professional roofer to install
the shingles or metal roof. They have the knowledge and equipment to do the job properly.
IMPORTANT INFORMATION ABOUT YOUR KIT
*
Tools
Required:
! Hand or Circular Saw !Level !Phillips Screwdriver
!Cordless Drill !Measuring Tape !Framing Square
!Caulking Gun !8' & 10' Ladder(s) !Hammer
!Safetyglasses: Always wear safety glasses when cutting or nailing!
!* Scaffolding
Building Permits: Check with your local HOA or building code office for any requirements,
restrictions or permits necessary for construction.
Foundation: By owner. Refer to next page for foundation suggestions and size.
What's Included: Our package includes pre-cut materials for the 2nd floor roof gables, roof
trusses and gable trim. Two (2) 24" x 36" single hung windows with screen and pre-built barn
doors with transom windows and hardware are included. This material is delivered, curb side in
covered van, on a 4'x7' pallet. See back page for material list. The nails and hardware necessary
to construct the lower walls are packed in the top of the pallet. The other materials on the pallet
will not be used until the first floor walls and loft floor are completed.
Framing lumber for the first floor walls and loft floor, exterior siding, loft flooring, roof sheathing
and a 32" pre-hung six panel steel door with lock will be delivered by a local supplier. This will
be a separate delivery and you will be notified before that delivery takes place. Material is listed
on the back pages. Someone will need to sign for both deliveries. Check quantities and report any
storage within 5 days.
Owner Supplied: Roof shingles, metal roof edge, felt and ventilation accessories. See back page
for quantity needed. Paint for siding and trim. Overhead garage door, lumber needed to frame
rough openings for windows and or doors not included in our kit.
Assembly Help: Monday thru Friday 800-245-1577 8:00 to 5:00 ET
Weekend - after hours 724-866-4357
email to: questions@barnkits.com (normal business hours)
Care of product prior to assembly: Do no expose lumber and sheet goods to inclement weather.
Assembly should begin promptly to prevent the twisting of lumber. Notify our company within
30 days of any damage or missing items for full replacement.
Building Tips: Follow the assembly Steps in sequence. Skipping steps will result in components
not fitting properly. The nails, hardware and header material needed to assemble the lower walls
and loft floor are packaged on the top of pallet 'A'. The other materials on the pallet will not be
used until the first floor walls and loft floor are completed.

1. Cut (3) three 2x4-8' boards into 2' long blocks.
2. Butt (2) two 4x4-10' timbers and (1) one 4x4-8' timber
together to make a 28' runner. Secure the 4x4s together
with the 2' long 2x4 blocks and 16d galvanized nails.
3. Assemble (3) more 28' runners.
2x6-12' & 16' Joist Headers
*
Do Not make the foundation larger than 14' x 28'. Check local building codes, the construction
may have to change. Depending on your intended use a cement slab may be more appropriate.
6. Cut (23) twenty three 2x6-16' floor joist to 13'-9". The cutoffs will be used for solid blocking
Treated lumber may be thicker than 1-1/2". Take this into account when cutting the length of
floor joists. Shorten joist measurements if necessary to obtain 14'-0" building width.
7. Install (10) ten floor joists between the 12' joist headers. Secure with 16d galv. deck nails.
Suggested Constructing Details for Heavy Duty Floor System
2x4-2' Blocks
2x6-12' Joist Header
13'-9" Long 2x6' Floor Joist
8. Use (2) two 16' joist headers and (13) thirteen joists to assemble a 16' x 14' floor section.
9. Install this floor section next to the 12' section' and nail the floor section together 16d
galvanized nails.
12' Floor Section
*Space equality apart or if storing a car or heavy tractor,
locate runners under the tires.
4. Cut (2) two 2x6-12' boards to 12' -0".
Layout for 16" on center joist spacing.
'X' marks where floor joist will be placed.
5. Cut (2) two 2x6-16' boards to 16' -0".
Layout for 16" on center joist spacing.
X
16"15-1/4" 16"
XXX
XXXX

Material Breakdown for Wood Floor
3 ea. Treated Boards 2x4 - 8' 4 ea. 4x4 Treated Runners 8'
3 ea. Treated Boards 2x6 - 12' 8 ea. 4x4 Treated Runners 10'
26 ea. Treated Boards 2x6 - 16' 10 lb. Screw Floor Nails 8d
13 ea. Plywood Sheathing 3/4"-4x8 10 lb. Galv Deck Nails 16d
10. Cut leftover 2x6 boards to length
and install between the floor joist
over the center 4x4 runners.
Stagger the 2x6 blocks to make it
easier to nail the block between
the joist.
4x4
11. It is important that the floor be level and square. Measure the
floor diagonally (corner to corner). Then measure the opposite
corners; these measurements will be the same (31' 3-5/8")
when the floor is square. Toenail frame to the 4x4 runners.
Stagger Solid Blocking
over Center Runners
Constructing Details for Floor System continued
12. Cut 4x8 flooring, where necessary, and install the flooring with 8d galvanized
nails spaced 8" apart.
4x8
4x8
4x8
4x8
4x4
2x8
2x4

Stud Spacing
XX
X X
X
X
X
X
Step 1 Assemble (2) Two 8' Back Wall Frames
3. Repeat to build another 96" long wall frames.
4. Set frames aside.
Treated Bottom Plate
1. Cut, if necessary, (2) two 2x4-8' (one will be treated) to a length of 96". Position the
boards together and indicate with 'X' marks where the wall studs will be located.
96"Top Wall Plate
96" Treated Bottom Plate
24"
23-1/4" 24"
The length of pre-cut wall studs will vary from 92-1/4" to
93" depending on your locality.
Pre-cut 2x4
Wall Studs
2. Install (5) five pre-cut wall studs between the top and bottom plates.
Nail the treated bottom plate to each wall stud with (2) two 16d
galvanized deck nails. Use (2) two 10d coated sinker nails per stud to
secure the top plate.

Stud Spacing
XX
X X
X
X
X
X
Step 2 Assemble (2) Two 8' Frames w/ Window Openings
5. Repeat to build another 96" long wall frame.
6. Set frames aside.
Treated Bottom Plate
1. Cut, if necessary, (2) two 2x4-8' (one will be treated) to a length of 96". Position the
boards together and indicate with 'X' marks where the wall studs will be located.
96"Top Wall Plate
96" Treated Bottom Plate
24"
23-1/4" 26"
2. Install (5) five pre-cut wall studs between the top and bottom plates. Nail the
treated bottom plate to each wall stud with (2) two 16d galvanized deck nails.
Use (2) two 10d coated sinker nails per stud to secure the top plate.
Pre-cut 2x4
Wall Studs
3. Cut, from a pre-cut wall stud, (2) two 2x4 to a length of 24-1/2". Save the cutoffs.
4. Position the 24-1/2" boards at the heights indicated above. Nail these 2x4s between the wall studs
to create a window opening. Use 10d sinkers.
36"
42"

Stud Spacing
XX
X
X
X
X
XX
Step 3 Assemble 12' Back Wall Frame
Treated Bottom Plate
1. Cut, if necessary, (2) two 2x4-12' (one will be treated) to a length of 144". Position the
boards together and indicate with 'X' marks where the wall studs will be located.
144"Top Wall Plate
144" Treated Bottom Plate
24"
23-1/4" 24"
2. Install (7) seven pre-cut wall studs between the top and bottom plates.
Nail the treated bottom plate to each wall stud with (2) two 16d
galvanized deck nails. Use (2) two 10d coated sinker nails per stud to
secure the top plate.
Pre-cut 2x4
Wall Studs

X
X
XX
XX
XX
X
X
XX
SS
XX
XX
Step 4 Assemble 12' Front Door Wall Frame
4. Install the 37-1/2" long 2x6 door header on the header supports. Nail to studs
with 10d sinkers.
5. From 2x4 cutoffs cut (3) three blocks to fit between header and top 2x4 plate.
Install with 10d sinkers.
1. Trim, if necessary, (2) two 2x4-12' boards (one will be treated) to a length of 144". Position
the boards together and indicate with 'X' marks where the wall studs will be located. Mark an
'S' on bottom plate where the door header supports will be located. See drawing below.
2. Install (8) eight pre-cut studs, over the 'X' marks, between the wall plates. Use 10d sinkers on
top plate and 16d galv. nails on bottom plate.
3. Cut (2) two pre-cut wall studs to a length of 80-1/2" and install over 'S' marks as header supports.
Nail to studs with (10) ten 10d sinkers. Save cutoffs.
2x6 Door Header
80-1/2" Header
Support
Treated
Bottom Plate
Cut 2x4s to Fit
Pre-cut Wall Stud
Header
51-3/4"
23-1/4"
24"
51-3/4"
23-1/4" 24"

If 2x4-14' boards are not available 16' long 2x4 will be substituted.
2. Locate (2) two 7-1/4" x 48" OSB. Apply
wood glue to both sides of each OSB filler
with a brush and install in the center of
the 2x8 boards. Nail together using 10d
coated sinkers. Use (12) twelve nails
spaced evenly on each side. OSB should
be 1-1/2" from end of boards.
XX
XX
1. Cut (2) two 2x4-14' (one will be treated) to a length of 161". Position the boards together
and indicate with 'X' marks where the wall studs will be located.
Step 5 Assemble a 13'-5" Long End Wall Frame
Treated Bottom Plate
Pre-cut 2x4
Wall Studs
2. Install (9) nine pre-cut wall studs between the top and bottom plates. Nail the treated
bottom plate to each wall stud with (2) two 16d galvanized deck nails. Use (2) two 10d
coated sinker nails per stud to secure the top plate.
Step 6 Assemble Door Header
161" Top Wall Plate
161" Treated Plate
7-3/4"
X
X
X
X
X
X
X
X
X
X
X
X
24" 24" 24" 24" 24" 24"
X
X
Stud Spacing
99" Long 2x8
48" OSB Filler
GLUE
1. Cut (2) two 10' long 2x8 boards to a length of 99".
99" Long 2x6
OSB 1-1/2"
from End

X
X
X
X
SS
X
X
X
X
X
X
X
X
Step 7 Assemble a 13'-5" Long End Wall Door Frame
2x8 Door Header
2x4 Header
Support Studs
cut to 82"
2x4-13'-5" Treated
Bottom Plate
2x4-13'-5" Top Plate
1. Cut (2) two 2x4-14' (one will be treated) to a length of 161". Position the boards together
and indicate with 'X' marks where the wall studs will be located and an 'S' where the door
header support studs will be located. See drawing below.
2. Assemble the front wall frame using the wall plates cut above and install (6) six pre-cut wall
studs over the 'X' marks.
3. Cut (2) two pre-cut studs to a length of 82". Install over 'S' marks as header supports using
(10) ten 10d sinkers. Install the 2x8 header by toe-nailing the ends to the adjacent studs with
10d sinkers.
4. From 2x4 cutoffs left over from previous steps cut (5) five blocks to fit between header and
top 2x4 plate. Install with 10d sinkers.
2x4 Header Blocking
Treated
Regular
96" Door Opening
99" Door Header
15"
2x8 Door Header
14-1/2" 15"
14-1/2"

Step 8 Install Wall Frames & 2x4 Tie Plates
2. Erect the 13'-5" long wall frame without
door opening on the end of the floor and
butted to 8' wall frame. Secure frames
together at the corner using (4) four 10d
sinkers.
13'-5" Wall Frame
5. Erect all remaining frames. Nail frames to the floor using 16d galv. nails (or concrete anchor
bolts, not included) 24" on center. Do not nail 2x4s to floor in door openings.
The 13'-5" long wall frames are positioned between 8' side walls.
4. Install 8' long wall frame with window opening.
Brace center frames with pre-cut studs.
13' - 5" Wall Frame
1. Erect a 8' long wall frame on the back side of the floor. .IMPORTANT make sure frames are
square and plumb.
3. Butt a 12' long wall frame to 8' frame.
Secure together using (8) eight 10d sinkers
(stagger nails on each side of the studs).
8' Long 2x4
Cut to Fit
6. Cut if necessary 14' long 2x4s and install as tie plates on both end 14' walls. Use 10d sinkers
space 16" apart to secure tie plates.
14' Long 2x4
Tie Plate
7. Install (2) two 2x4-10' boards on back wall frames. Butt these against the 14' long tie plate on
end wall without door. Cut a 2x4-8' board to finish. Use 10d sinkers. Repeat on front wall.
12' Wall Frame
10' Long 2x4
10' Long 2x4
8' Wall Frame

36" 36-1/2"
BR FL FR BL
Step 9 Install Siding
LAP Edge
Front Wall
End Wall
3. Install (3) three full width siding panels.
4. Install the siding marked 'BR'.
1. Select (2) 4x8 siding panels and cut panels to the widths shown below.
Mark the panels as shown below so they can be identified later.
Panel 'BL' Panel 'BR'
7. Install siding panel 'FL' with the 'cut' edge flush
with the siding of the front wall.
8. Locate (2) two 13" x 48" siding panels. Install
siding above the door opening with bottom edge
3/4" below door header. If necessary cut top
flush with other siding panels.
9. Install the remaining siding panel on the wall
frame.
10. Cut and remove 2x4 plate that extends across
both door openings. Save the 2x4s, it will be
used in a later step.
Cut & remove 2x4 Plate
Siding 3/4"
Below Header
Panel
'FL' Panel
'FR'
Cut Edge
Cut Edge
5 . Install (7) seven siding panels on front
wall. Start with 'LAP' edge flush with
faceofendwallsiding.Cutandremove
siding that extends over the door and
window openings.
6. Install (7) seven siding panels on the
back wall.
2. Install siding panel 'BL' with the 'cut' edge flush with the wall stud of the back wall. Install
all siding with 6d galvanized nails spaced 8" apart.
If a siding panel has a damaged edge, install this edge at a corner where it will be
covered with corner trim.
If installing building on concrete slab, install siding flush with the bottom plate. For
wood floor, extend siding 3/4" below bottom plate.

2. Repeat to install 2x8 joist header on the front wall.
3. Mark for joist spacing on the back wall. The first space will be 11-3/4" measuring from
inside the end wall frame. Important: Mark the 'X' mark on the right side of the lines.
2 Rows 10d
Sinker
4. Mark for joist spacing on the front wall panel. Important: Mark the 'X' mark on the left side
of the lines on the front wall header so the floor joist will be parallel when installed.
5. Repeat to install joist headers on the opposite end of the building.
Step 10 Install 2x8 Joist Headers on Back Walls
1. Cut a 12' long 2x8 board to 139". Install this 2x8 to the 8' back wall panel, against the 13'-5"
end wall without door opening. Install the 2x8 flush with the top of the 2x4 tie plate. Secure
with (2) two rows of 10d sinker nails spaced 4" apart across the top 2x4 plate. Also nail the
2x8 to each wall stud with one 10d sinker. See detail below.
View of 16' Back wall from Inside
11-3/4"
16"
139" Long 2x8
Joist Header
16" 16" 16"
13'-5" End Wall Without Door Opening
10d Sinker Nail
2x8 Joist Header

161" Long 2x8
3. Cut (8) eight 2x8 to 158" and install between the
2x8 joist headers. Secure with 1-1/2" hanger nails.
4. Install floor joist to the opposite end of the building.
1. Install joist hangers, on all 2x8 joist headers, over the 'X' marks,
flush with the bottom of the 2x8s. Use 1-1/2" hanger nails.
Joist Hanger
Step 11 Install 2x8 Floor Joist
2. Cut a 2x8-14' to 161" and install to the end of the 2x8 joist headerswith (3) three 10d sinkers.
161" Long 2x8
If 2x8-14' boards are not available 16' long 2x8 will be substituted.
158" Long 2x8

Step 13 Install Trim on End Walls
1. Cut (3) three 5/8" thick sheets into (2) two 48"x48" pieces. Cut (1) one sheet into (2)
24"x96" pieces. Cut (1) one sheet into (2) two 24"x48" pieces. The remaining piece is not
used.
2. Cut and install (2) two 1x4 -96"
trim boards. Install trim flush
with siding on the front and back
walls. Cut trim flush with he
bottom of the siding.
3. Repeat to install trim to the
opposite end wall panel.
straight edge
Step 12 Install Loft Flooring
14' End Wall
Front
Wall
1x4 Corner Trim
IMPORTANT: Trim Must Be Installed Before Installing Roof Gables!
1. Install (2) two 84" long 1x4 trim boards flush with the top of the loft flooring. Install
all trim using 6d galvanized box nails spaced 12" apart.
1x4 Trim
1-1/2" x 10" Filler
Depending on the pre-cut stud length and if the siding extends below the bottom plate,
you may have a space between the top of the siding and the loft floor. If necessary tack
nail or glue 1-1/2" x 10" fillers, included in the kit, to prevent the 1x4 trim from tipping
when nailing the trim. Space fillers 12" apart.
48" x 96"
48" x 96"
48" x 96"
24" x 96"
48" x 96"
48" x 96"
48" x 96"
24" x 96"
48" x 48"
48" x 48"
48" x 48"
24" x 48"
48" x 48"
48" x 48"
48" x 48"
24" x 48"
2. Install sheets, per layout,
flush with the 2x4 wall plates.
Secure the flooring with 8d
galvanized spiral nails spaced
12" apart.
3. Locate (2) two 3-1/2" x 48"
plywood filler strips. Install
these on top of wall frames
between loft floors.
48" Filler Strip

14' End Wall
DETAIL 'D'
Step 14A Assemble Gable Frame
1. Cut a 16' long 2x4 to a length of 14'-2".
2. Gather (2) 62-1/8" long and (2) 69-7/8" long 2x4s. Place blue marked ends of 69-7/8" 2x4s
together at the ridge. Position 62-1/8" boards as shown below. Set the 14'-2" long 2x4 on edge
and nearest to 14' end wall. The gable frame when complete will be 2" wider than loft floor.
3. Check the frame for squareness. Measure from the knee to the corner of the 14'-2" long 2x4.
Measure again from opposite knee. The measurements should be the same, see Detail 'C'.
4. It is important that both gables and the trusses are built the same. Temporarily tack 1x4 blocks,
included in the kit, to the loft flooring around the gable frame members, see above. The blocks
measure 8"-12" long and may have angled ends.
5. Screw the 2x4 plate to the truss leg with (2) two 2-1/2" deck screws on each end. See Detail 'D'.
DETAIL 'C'
1x4 Block
69-7/8" Long 2x4
62-1/8" Long 2x4
Position This 2x4 on Edge. See Detail 'D'
62-1/8" Long 2x4
14'-2" Long 2x4
83-3/8" Overall Height
162-5/8" (+ or -)
14'-2" Long 2x4
62-1/8"
Long 2x4
Blue Ends
Together

36"
Stud
Step 14B Assemble Gable Frame continued
6. Install pre-cut gable studs inside the gable frame. Use a framing square to make sure the studs
are plumb and fit tight to the top 2x4 top frame and bottom plate. Use 3-1/2" x 8" OSB gussets
to temporally secure the tops of the gable studs until the siding is applied. Use 6d common
nails. Secure the stud to the bottom 2x4 plate using (2) two 10d sinker nails. See Detail 'E'.
DETAIL 'E'
62-5/8"
Stud
70-5/8"
Stud
78"
Stud
3-1/2" x 8" Gusset
Framing Square
3-1/2" x 8" Gusset
3-1/2" x 8" Gusset
7. Attach 36" gable stud
using a 2-1/2" long screw.
8. Flip frame over and move the frame to the
opposite loft area. Position the gable so
the bottom of the gable is facing towards
the 14' end wall. This will make the gable
easier to install after the siding is applied.
9. Repeat steps 1 to 7 to assemble another
gable frame. Do not remove 1x4 blocks
from floor. They will be needed for a later
step.

12" x 44-1/2" siding panel
Siding may not
be flush with 2x4 frame.
Step 15 Install Siding on Gable Frame
1. Select the first gable frame assembled and position
the gable frame so the wood gussets are facing
towards the floor.
2. The bottom 2x4 plate prevents the gable from laying
flat on the floor. Locate 65" long 2x4s that have a
1x3 board attached. These boards will be used later
when installing the roof overhang. Place these 2x4s
with the 2x4 resting on the floor. Resting the gable
frame on these boards will make it easier to install
the siding.
3. Install a 12" x 44-1/2" siding panel that has a 'tongue' edge. Install the siding with
the cut edge flush with the side of the gable frame and extending 3/4" below the
frame. Use 6d galvanized nails spaced 8" apart.
2x4 with 1x3 Attached
4. Install a 48" x 76-1/2" siding next.
The bottom edge should extend 3/4"
below the bottom frame
5. Install a 4'x7' center siding panel.
Cut the siding that extends past
the gable frame.
Siding Extends 3/4" Below Frame
6. Install the last two
siding panels.
7. Repeat steps to install
siding on the other gable
frame.

1. Install (2) two 2x4-12' boards on the end wall to prevent
the gable from falling off during installation. Install (2) two
more 2x4-12 boards to brace the vertical 2x4 in place. Be-
fore installing the vertical 2x4s attach (2) two 2x4 blocks
to the back of the 2x4s. See Detail 'F'. This will create the
proper spacing to set the gable over the lower wall.
2x4 Block
2x4 Stake
2x4-12' Brace
2x4-12' Vertical Boards
2x4-12'
Step 16 Install Gable
2x4-12' Brace
2x4-Block
DETAIL 'F'
4. Nail bottom edge of siding to 1x4 trim with
6d galvanized nails spaced 12" apart.
5. Erect gable on the opposite end.
Siding Extends Over
Trim. Paint edge
2. Erect the gable on the end wall with the gable siding extending over the trim on the end wall.
Center the gable so the bottom 2x4 extends 1" past the flooring on both sides. Nail to floor,
between each gable stud, using 10d sinkers.
3. Remove the 2x4s used to brace the lower walls and use them to brace the gable.
2x4 Gable Plate
Extends 1" Past Floor
2x4 Block
Brace Gable with Pre-cut Studs

Step 17 Assemble 2x6 Roof Trusses
3. Turn truss over and apply gussets to the other side. Set truss aside.
4. Assemble (12) twelve more trusses. Remove 2x4 blocks from floor.
Step 18 Install 2x6 Truss Plates
1. Install a 10' long 2x6 board on back wall against back of a gable frame. The 2x6 should be
installed aligned with edge of the flooring. Use (2) two rows of 10d sinkers spaced 16" apart.
Install another 10' long 2x6 board and then an 8' long 2x6. Cut last board to fit.
2. Repeat on front wall.
1. Lay truss parts inside the 1x4 blocks used around gable frames. One end of the 70-3/8" long
2x6 boards have a blue mark. Place these ends together at the ridge. Move (2) two 1x4 blocks
to the bottom of the truss legs to keep these from moving.
2. Secure the 2x6 boards together using pre-cut gussets. Install the larger gussets at the knee of
the trusses. Apply wood glue with a brush between the gussets and the 2x6 boards. Secure
gussets with (3) three rows of 6d common nails spaced 6" apart.
70-3/8" Long 2x6
62-1/8" Long 2x6
Move 1x4 Block
1x4 Block
Larger Gusset
GLUE
/