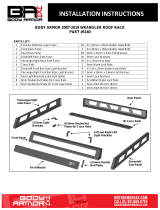
EC1 MODULAR BULL BAR
2019-2023 FORD RANGER
www.tacautoparts.com Page 2 of 6 6/3/19 (DP)
Tow Hook equipped vehicles:
a. Remove the plastic cover attached to the tow hook, (Figure 1). Next, remove the tow hook from
the bottom of the frame, (Figures 2—4). On models with steel skid plate, temporarily remove skid
plate, (Figure 3).
b. Proceed to Step 3.
Vehicles without tow hooks:
c. Cut out the lower section of the indented area in both sides of the plastic bumper insert to clear the
Brackets as pictured, (Figure 5). NOTE: Hold the Frame Mounting Bracket up to the back of the
bumper to determine area to remove to clear Bracket. IMPORTANT: Make several small cuts for
best fit.
d. Insert the Mounting Brackets through the openings in the bumper to check for clearance around
Brackets and hardware. Trim the plastic as required to clear the Brackets.
3. Select the driver/left Frame Mounting Bracket, (Figure 6). Hold the Bracket up to the bottom of the frame.
Line up the holes in the Bracket with the (2) mounting bolt holes for the tow hook. Attach the Bracket to the
threaded holes in the frame with (2) 12mm x 45mm Hex bolts, (2) 12mm Lock Washers and (2) 12mm x
37mm Large Flat Washers, (Figures 6 & 7). IMPORTANT: Models with steel skid plate, attach (1) Skid
Plate Bracket to the rear mounting Bolt, (Figure 6). Leave hardware loose. Repeat this Step to attach the
passenger/right Frame Bracket and Skid Plate Bracket if equipped.
4. Select the driver side Bull Bar Upright and the Top Cross Bar. Attach the Black Rubber Self-Adhesive Top
Seal between the Upright and Top Cross Bar, (Figure 9). Bolt through the Top Cross Bar, Self-Adhesive
Top Seal and Upright using (2) 10mm x 25mm Hex Bolts, (4) 10mm x 20mm Flat Washers, (2) 10mm Lock
Washers and (2) 10mm Hex Nuts, (Figure 9). Do not fully tighten hardware.
5. Select the Center Cross Bar. Attach the Black Rubber Self-Adhesive Center Seal between the Upright and
the Center Cross bar, (Figure 9). Bolt through the Center Cross Bar, Self-Adhesive Center Seal, and
Upright with (2) 10mm x 25mm Hex Bolts, (4) 10mm x 20mm Flat Washers, (2) 10mm Lock Washers and
(2) 10mm Hex Nuts, (Figure 9). Do not fully tighten hardware.
6. Repeat Steps 4 & 5 to attach the passenger side Bull Bar Upright to the Top Cross Bar and Center Cross
Bar. Place assembled Bull Bar face down on a clean flat surface and fully tighten top and center cross bar
to upright hardware only at this time.
7. Relocation of front license plate may be necessary.
a. Attach the License Plate Bracket to bottom of Center Cross Bar with (2) 6mm Button Head Bolts, (4)
6mm Flat Washers, (2) 6mm Lock Washers and (2) 6mm Hex Nuts, (Figure 10).
b. Attach license plate to Bracket with (2) 6mm Button Head Combo Bolts, (Figure 10).
8. LED light installation, (optional-light available separately).
a. Start at the driver/left side of the vehicle. Select (1) Light Bar “L” Bracket. Attach the Bracket to the slot
in the back of the Center Cross Bar with (1) 8mm x 25mm Hex Bolt, (2) 8mm Flat Washers, (1) 8mm
Lock Washer and (1) 8mm Hex Nut, (Figure 11). NOTE: Check for clearance between the Hex Bolt
and the bottom of the Light. If necessary, insert the Hex Bolts down through the Brackets then through
slots in the Cross Bar. Leave hardware loose at this time.
b. Repeat the previous Step to attach the passenger/right Light Bracket.
c. If needed, use the included (2) 8mm x 16mm Hex Bolts, (2) 8mm Lock Washers and (2) 8mm Flat
Washers to attach the LED light bar to the Brackets, (Figure 11).
d. Follow light manufacturer’s instructions to properly wire the light bar to the electrical system.
e. Proceed to Step 10.
9. Center Screen Fill Panel Installation, (cannot be installed with LED light).
a. Select (1) “L” Light Bar Bracket. Attach the Bracket to the outside of the tab on the Center Screen Fill
Panel with (1) 8mm x 25mm Hex Bolt, (2) 8mm Flat Washers, (1) 8mm Lock Washer and (1) 8mm Hex
Nut, (Figure 12). NOTE: Insert the Hex Bolt through the tab on the Panel and out through the Bracket.
Repeat to attach the remaining Bracket to the other end of the Fill Panel. Leave hardware loose.
b. Attach the Fill Panel with Brackets to the slots in the back of the Center Cross Bar with (2) 8mm x
25mm Hex Bolts, (4) 8mm 24mm Flat Washers, (2) 8mm Lock Washers and (2) 8mm Hex Nuts,
(Figure 12). NOTE: Insert the Hex Bolts up through the bottom of the Cross Bar.
c. Push the Fill Panel up tight against the inside of the opening and fully tighten hardware.