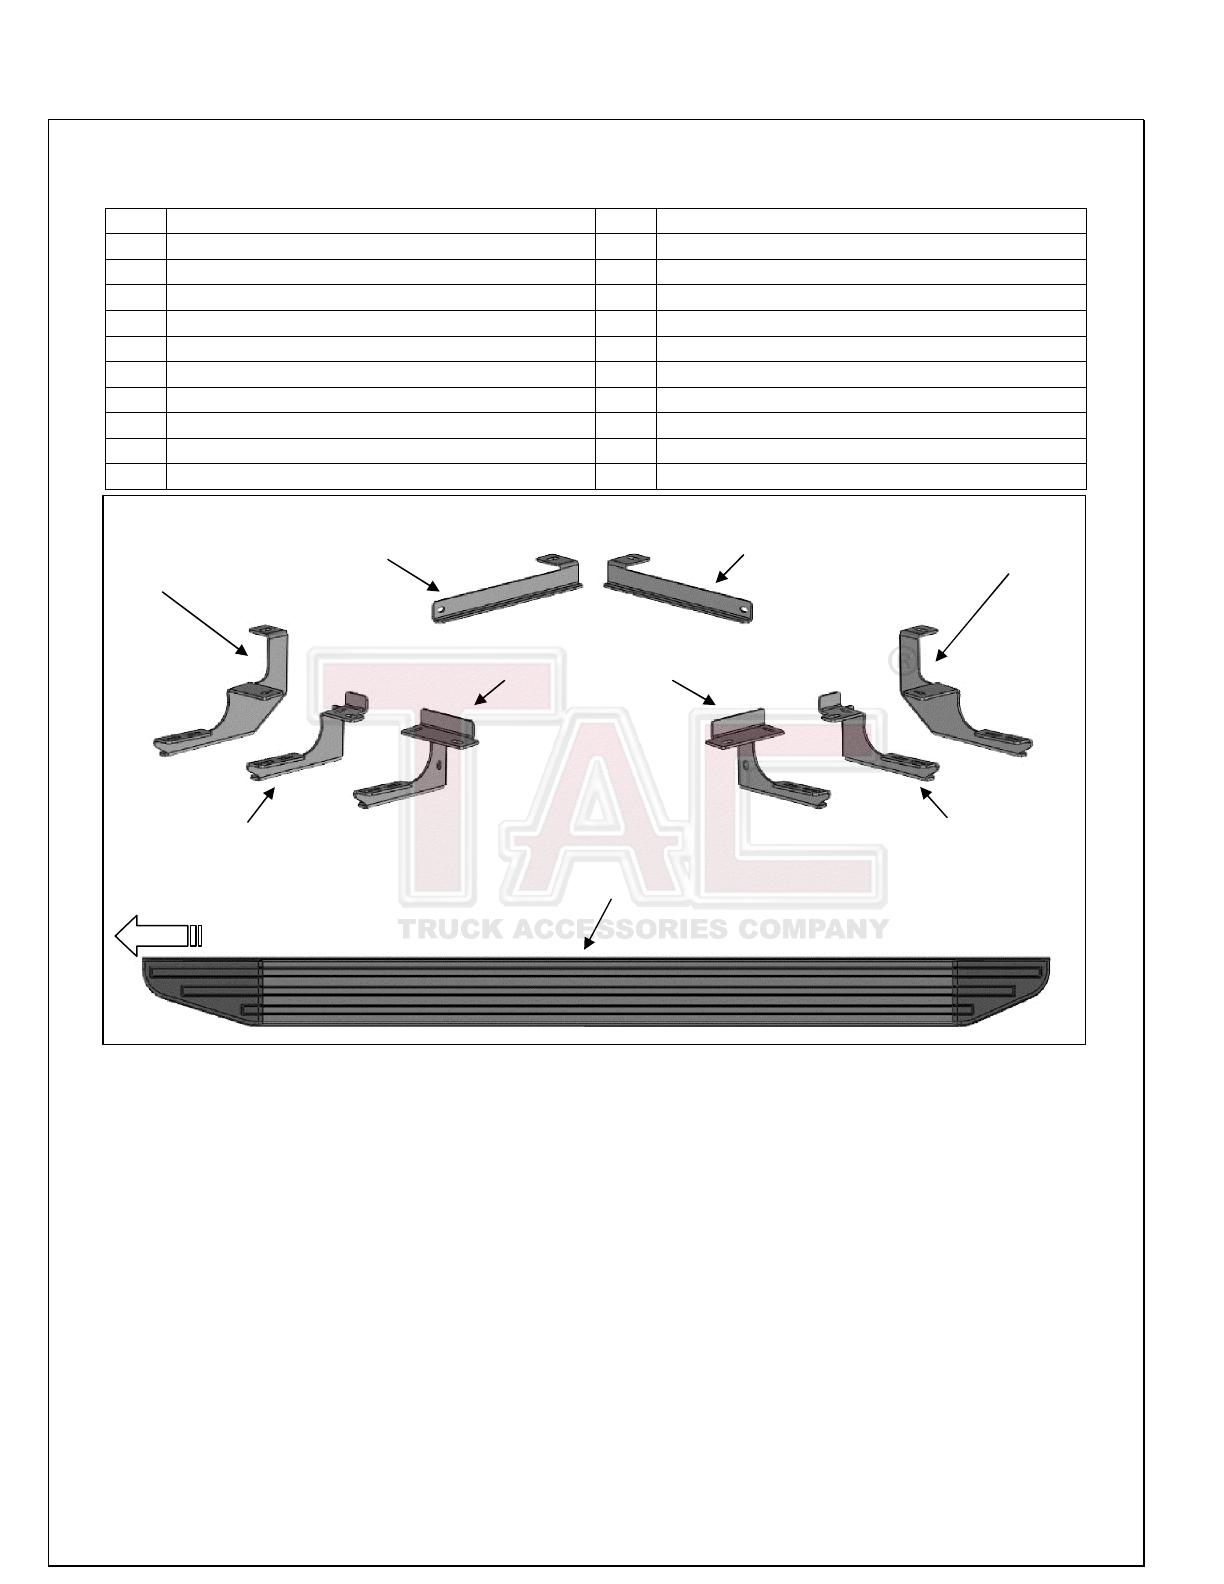
VIEWPOINT RUNNING BOARD
2020-2022 KIA TELLURIDE
www.tacautoparts.com Page 1 of 5 4/23/20 (AL)
PARTS LIST:
1 Driver/Left Running Board 8 10mm Plastic Retainers
1 Passenger/Left Running Board 8 10mm x 30mm OD x 2.5mm Flat Washers
1 Driver/Left Front Mounting Bracket 8 10mm Nylon Lock Nuts
1 Passenger/Right Front Mounting Bracket 2 8-1.25mm x 25mm Hex Bolts
1 Driver/Left Front Support Bracket 4 8mm x 24mm OD x 2mm Flat Washers
1 Passenger/Right Front Support Bracket 2 8mm Lock Washers
1 Driver/Left Center Mounting Bracket 2 8-1.25mm Hex Nuts
1 Passenger/Right Center Mounting Bracket 12 6-1.0mm x 20mm T-Bolts
1 Driver/Left Rear Mounting Bracket 16 6mm x 18 OD x 1.6mm Flat Washers
1 Passenger/Right Rear Mounting Bracket 16 6mm Lock Washers
8 10-1.5mm x 40mm Bolt Plates 16 6mm Hex Nuts
PROCEDURE:
1. REMOVE CONTENTS FROM BOX. VERIFY ALL PARTS ARE PRESENT. READ INSTRUCTIONS
CAREFULLY BEFORE STARTING INSTALLATION. CUTTING IS REQUIRED TO INSTALL.
2. Remove the cover panels on the bottom of the vehicle.
3. Locate the Driver/Left mounting location and remove the factory round rubber plug in the bottom of the
outer rocker panel, (Figure 1).
4. Select (1) 10mm Bolt Plate. Insert the Bolt Plate into the hole. Thread (1) 10mm Plastic Retainer to the
Bolt Plate to hold it in place, (Figure 2).
5. Select the Driver/Left Front Mounting Bracket. Attach the Mounting Bracket to the Bolt Plate with (1)
10mm Flat Washer and (1) 10mm Nylon Lock Nut, (Figure 2). Attach the Bracket to the stud with (1)
6mm Flat Washer, (1) 6mm Lock Washer and (1) 6mm Hex Nut. Do not tighten hardware.
6. Locate the inner hole behind the Driver/Left Front Mounting Bracket. Repeat Step 4 to insert (1) 10mm
Bolt Plate, (Figure 4).
7. Select the Driver/Left Support Bracket. Attach the Support Bracket to the Bolt Plate in the inner hole
with (1) 10mm Flat Washer and (1) 10mm Nylon Lock Nut, (Figure 5). Attach the Support Bracket to
the Mounting Bracket with (1) 8mm Hex Bolt, (2) 8mm Flat Washers, (1) 8mm Lock Washer and (1)
8mm Hex Nut, (Figures 6 & 7). Do not tighten hardware.
Driver/Left
Rear Bracket
Driver/Left
Running Board
Front
Passenger/Right
Rear Bracket
Passenger/Right
Front Bracket
Passenger/Right
Center Bracket
Driver/Left
Center Bracket
Driver/Left
Front Bracket
Passenger/Right
Support Bracket
Driver/Left
Support Bracket


