TMI Products 1988-98 Chevy Truck Extended Cab Headliner Installation guide
- Type
- Installation guide

TOOLS NEEDED FOR INSTALL:
1. T50 Torque Wrench
2. Phillips Screwdriver
3. Prying Tool
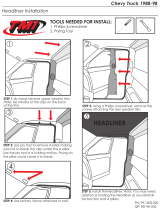
STEP 1: By hand, remove upper window trim.
Note: be mindful of the clips on the back
of the trim.
STEP 2: Use screwdriver to remove access
tab and remove seat belt cover with torque
wrench.
STEP 3: Use torque wrench to remove bit
from the top of the seat belt.
STEP 4: Remove ash tray from armrest. Use
Phillips screwdriver to remove the two screws
in the ash tray compartment.
PN: 99-8316-000
QP: RW-WI-007
Chevy Truck Extended Cab 1988-98
Headliner Installation

STEP 8: Use pry tool to remove A pillar. Be mindful
of the clips on the backside. Use pry tool in a
twisting motion.
STEP 5: Use pry tool to pry off the top part of the
arm rest. Note: Be mindful of the clips underneath.
STEP 6: Use a Phillips screwdriver to unscrew
and remove the side panels.
STEP 9: Install TMI Headliner. Note: You may need
assistance holding the Headliner as you reinstall
factory trim and pillars.
HEADLINER
STEP 7: By hand, remove top trim.
Note: Be mindful of the clips on back of trim.
PN: 99-8316-000
QP: RW-WI-007
-
 1
1
-
 2
2
TMI Products 1988-98 Chevy Truck Extended Cab Headliner Installation guide
- Type
- Installation guide
Ask a question and I''ll find the answer in the document
Finding information in a document is now easier with AI
Related papers
-
 TMI Products 1988-98 Chevy Truck Headliner Installation guide
-
 TMI Products 55-57 Chevy Sedan Headliner Installation guide
-
 TMI Products 55-57 Chevy Hardtop Headliner Installation guide
-
 TMI Products 55-57 Chevy Sedan Rear Seat Installation guide
-
 TMI Products 55-57 Chevy Hardtop Rear Seat Installation guide
-
 TMI Products 55-57 Chevy Hardtop Rear Seat Installation guide
-
 TMI Products Camaro 1-Piece Headliner Installation guide
-
 TMI Products 1964-72 Mustang One-Piece Headliner Installation guide
Other documents
-
Hyundai Coupe (2003-2008) Workshop Manual
-
Audi 80-90 B3 (1986-1991) User manual
-
Mopar 82212500 User manual
-
KIA Sorento User's Manual & Installation Instructions
-
Volkswagen Golf 2015, Golf Variant 2015 User manual
-
Havis-Shields Kwik-Kit KK-100-05 User manual
-
BrandMotion 1008-6509 Installation guide
-
Havis-Shields Kwik-Kit KK-100-05 User manual
-
Havis-Shields KK-120-03 User manual
-
Terex PT100G Forestry User manual


