Page is loading ...

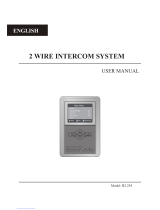
2 WIRE INTERCOM SYSTEM
USER MANUAL
DT-ENG-27TD7-V1
ENGLISH
Monitor ...
Manual Monitor
Intercom
User Setup
Close
About
i
Main Menu
1
2
3
4

1
1. Parts and Functions
Monitor ...
Manual Monitor
Intercom
User Setup
Close
About
i
Main Menu
1
2
3
4
Indicator
Digital TFT LCD Screen
UNLOCK Button
TALK/MON Button
MENU Button
Microphone
Speaker
Connection Port
Mounting Hook
1 2 3 4 5 6
ON
DIPS
L1
BT1
BT2
EH
GND
VD
L2
Mounting Hook
LCD screen Display the visitors' image
Indicator Show the working status of monitor
Unlock button Press to release the door
Talk/Mon button Press to communicate hands free with visitor
Press to view the outdoor condition in standby mode
Menu button Press twice to open the menu shortcuts.
Microphone Receive voice from the user
Mounting hook Use to hang up the monitor
Connection port Bus terminal
Speaker Send out vioce from the visitor
Key functions

2
2. Monitor Mounting
145~160 cm
1. Use the screws to x the Mounting Bracket on the mounting box.(tting accesories
includes a Bracket (Two pieces of 4X25 screws are needed for fastening the
Mounting Bracket), Special 2 wire cables to connect with Monitor)
2. Wire the system correctly(see the later connection chapter) then hang the Monitor
on the Mounting Bracket rmly.
3. Main Menu
1. Touch the screen anywhere on monitor in standby mode, the date/time page will be
showed. (the date/time page will be closed in 1 minute if no operation)
2. Touch the screen again, main menu page will be showed as follows.
Main Menu
About
i
Monitor ...
Manual Monitor
Intercom
User Setup
Close
22/04/2011 Fri.
11 : 44 AM

DS-1 00:23
3
Monitor Select
Exit Home
Camera 1 ...
Camera 2 ...
Camera 3 ...
Camera 4 ...
Monitor Time Set ...
5. Intercom Function
Touch Intercom item on main menu page,there are
three items:Intercom Call...,Inner Call ...,Direct Call
Guard Unit...
Exit Home
Intercom
Intercom Call ...
Inner Call ...
Direct Call Guard Unit ...
4. Basic Door Release Operation
1. Press CALL button on outdoor station, the
Monitor rings, at the same time, the screen
displays the visitors' image.
2. Press TALK/MON Button on monitor or touch
icon on screen, you can communicate hands
free with the visitor for 90 seconds.After nishing
communication,press TALK/MON button again
or touch icon to end the communication. If nobody answers the phone, the
screen will be turned off automatically after 30 seconds.
3. During talking state, Press UNLOCK Button or touch or icon to open the
corresponding door for the visitor.
4. When the monitor is in standby mode, press TALK/MON Button(or touch
Monitor ... item on main menu page), The screen can display the view of outside.
If multi door stations are installed, touch icon to get into the camera switch
mode(or direct touch Manual Monitor item on main menu page). You can
touch camera 1/2/3/4 to monitor the door station or CCTV camera you want.See
the following diagrams.(Press TALK/MON button again touch icon to end
monitoring.)
DS-1 00:23

4
1. Intercom Call: User in one apartment can call
other apartments in the system. the namelist will
be created automatically by the system. Touch a
name you want on the screen, then touch icon
to dial.(Note:1. touch icon again to redial.
2.The DIP switches code of each monitor must set
different.)
2. Inner Call: If multi slave monitors are installed in the same apartment, select Inner
Call, all the other Monitors will ring at the same time, whichever Monitor answers
the call, conversation is started.and the other monitors will stop ringing at the same
time.(note:the DIP switches setting of all monitors must be same. )
3. Direct Dial Guard unit: A Monitor can be assigned as Guard Unit Monitor; when
the Guard Unit Monitor answers the call, conversation with the guard person is
started..
Exit Calling Next Page
Intercom Call
[ 00 ] Jim. Zhang
[ 01 ] Calo. Liu
[ 02 ] Jacko. Zhang
[ 03 ] Philips. Chen
[ 04 ] Hebe. Zhang
[ 05 ] Tony. Li
6. Basic Setup Instructions
Ring Tone Settings
Touch User Setup item on main menu page to enter setup page.Touch Door Station Call
Tone, Inercom Call Tone or DoorBell Tone item, There are 12 pieces ring tones can be
selected.touch a ring tone you want, then touch icon to save and exit.(touch icon
to cancel the setting and return last page, touch icon to get into main menu page)
Door Station Call Tone
:set the ring tone calling from outdoor station.
Intercom Tone
:set the ring tone calling from other apartments.
DoorBell tone
:set the ring tone calling from door bell.
Exit Home
User Setup (1)
Door Station Call Tone ...
Intercom Call Tone ...
DoorBell Tone ...
Clock ...
Next Page
Cancel Home Save&Exit
Door Station Call Tone
1 Carmen 5 Sonatine 9 Do Re Me
2 Ding Dong 6 Edelweiss 10 Happy Birthday
3 Rain 7 Going Home 11 Jingle Bells
4 For Alice 8 Congratulation 12 Telephone Ring
Selected: 06

5
7. Date and Time Setting
Touch User Setup item on main menu page to enter
setup page, touch
Clock...
item. a digital keypad
will be showed on screen, input date and time by
touching the digital keypad,use * key to select the
setting item. After nish, touch icon to save and
exit.(touch icon to cancel the setting and return
last page.)
Cancel Save&Exit
Clock
2010 - 12 - 28 15 : 00
1 2 3
4 5 6
7 8 9
*
0 #
8. Monitor Time settig
Touch Manual Monitor item on main menu page
to get into camera switch mode, select
Monitor Time
Set...
item. touch ▲ / ▼ icon to increase / decrease
the value; After nish, touch icon to save and
exit.(touch icon to cancel the setting and return
last page, touch icon to get into main menu page) Cancel Home Save&Exit
Monitor Time Select
Current : 01min
Ring Volume and Night Ring Volume Setting
You can set a ring volume for day time and night
time individually, 6:00 AM~18:00 PM is the day
time and 18:00 PM~6:00 AM is the night time by
default,if you don't want to be disturbed at night,you
can set the night ring volume to 0.
Touch User Setup item on main menu page to
enter setup page,then touch
Next Page
item to enter
User Setup 2 page, select
Ring Volume Setting
or
Night Ring Volume
item. then touch ▲ / ▼ icon to
increase / decrease the value; After finish, touch
icon to save and exit.(touch icon to cancel the
setting and return last page, touch icon to get into
main menu page)
Cancel Home Save&Exit
Ring Volume
Current : 05
Exit Home
User Setup (2)
Ring Volume ...
Night Ring Volume ...
TPC Congure ...
Restore to default ...
Last Page

9. Restore to Default
Touch User Setup item on main menu page to enter setup page,then touch Next Page
item to enter User Setup 2 page, touch
Restore to default
item ,a message will be asked
to confirm the restore operation. If touch icon ,All settings will be restored to
default, if you don't want to restore, touch icon to cancel the operation.(Note that the
restore to default operation will not change the time setting and the datas.)
A Monitor can be assigned as Guard Unit Monitor; when the Guard Unit Monitor
answers the call, conversation with the guard person is started..
The code number of 8004 is used to set the monitor as a guard unit monitor and 8005 is
used to cancel this function.
Exit Home
User Setup (2)
Ring Volume ...
Night Ring Volume ...
TPC Congure ...
Restore to default ...
Last Page
Cancel OK
Restore to Default
Are you sure to
Restore all to default?
6
10. Monitor Parameter Setting
Main Menu
About
i
Monitor ...
Manual Monitor
Intercom
User Setup
Close
Exit
H/W : DT14-CT a1.3
S/W: V17.11.418.00
Local addr: ---
Unlock timing: ---
Unlock2 select: -
Video standard: -
Language: ---
Exit Home
Input Code Number:[- - - -]
123
456
789
*
0 #
1.Touch item
on main menu page.
2.Touch the screen
anywhere and hold for
2s.
3.A digital keypad
will be showed.
How to enter the installation setting page
How to set the monitor as a Guard Monitor

How to set the monitor panel on
In default mode,when receive a calling,the master and slave monitors will ring at the
same time,and just the master monitor can display the image while the slave monitors
can not.But the settings can be changed,you can set the master monitor and all the slave
monitors to panel on at the same time when receiving a call, just input the code number
of 8006 on each slave monitor.
1
2
3
4
1
2
3
4
1
2
3
4
1
2
3
4
How to set the slave monitor address
Maximum 4 monitors can be connected in one apartment,one master monitor together
with 3 slave monitors, so you should set the address correctly.(note:must have one
monitor to be set as master monitor)
The code of 8000 is used to set the master monitor.
The code of 8001 is used to set the rst slave monitor .
The code of 8002 is used to set the second slave monitor .
The code of 8003 is used to set the third slave monitor .
Note:touch * button to cancel the input,touch # to save the settings.
The system offers two methods of date and time.
The code number of 8008 is used to set the date format as month/date/year
The code number of 8009 is used to set the date format as date/month/year
The code number of 8012 is used to set the time format as 12 hour system
The code number of 8013 is used to set the time format as 24 hour system
.How to set date and time format
7

The unlock time can be changed by yourself at any time.it can be set from 1 to 9 seconds.
The code number from 8021 to 8029 are used to set the unlock time to 1~ 9 seconds.
Unlock time:
How to set the menu language
The monitor can support multi languages and it is so simple and fast, just input the
corresponding language code on monitor.The language code number are as follows:
8101: English
8102: French
8103: Spanish
8104: Italian
8105: German
8106: Dutch
8107: Portuguese
8108: S-Chinese
8109: T-Chinese
8110: Greek
8111: Turkish
8112: Polish
8113: Russian
8114: Slovakia
8115: Hungray
8116: Czech
Note:the monitor can only support 4 types of languages.English,French,Spanish and
German are default.But you can customize any 4 languages by yourself.The language
which is unavailable will be set to English in default.
How to set the unlock parameter
There are two unlock modes: 1.power-on- to-unlock type:unlock mode=0(by default)
2.power-off-to-unlock:unlock mode=1.
The code number of 8010 is used to set the unlock mode to 0
The code number of 8011 is used to set the unlock mode to 1
Unlock mode:
8

11. Screen and Volume Adjustment
During monitoring or talking, touch icon,the
ADJUST MENU
will be displayed.
Touch and select the adjustment item you want; touch / icon to decrease / increase
the value.
1. The first item is Scene mode selection: Total 4
screen modes can be selected in sequence:
Normal,
User, Soft
and
Bright.
Whenever you modify
Brightness
or
colour, Scene
item will be set to
User
mode automatically.
2. The
Brightness
and
Colour
item is for the image
quality setting, adjust the value to get the best
image you like.
3. The
Ratio
item is for screen display adjustment,you can set to 16:9 or 4:3.
4. The
Talk Volume
item is for talking volume adjustment.
5. Note that all the modications will be performed immediately after the operation.
Touch icon to exit the adjust page.
Exit IncDec
Scene Normal
Bright 6
Color 6
Ratio 16:9
Talk Volume 2
12. Specication
●
●Power●supply●for●indoor●monitor:●● ● DC●24V●
●
●Power●consumption:● ●● Standby15mA;●Working●400mA
●
●Monitor●screen:● ● 7●Inch●digital●color●LCD
●
●Display●Resolutions:● ● 800*3(R,●G,●B)●x●480●pixels
●
●Video●signal:● ● 1Vp-p,●75Ω,●CCIR●standard
●
●Wiring:● ● 2●wires,●non-polarity
●
●Dimension:● ● 125(H)×225(W)×23(D)mm
9

Note
10

The design and specifications can be changed without notice to the user. Right to
interpret and copyright of this manual are preserved.
DT-ENG-27TD7-V1
/