Page is loading ...

DX471-TD7
2 WIRE HOME WiFi/IP SYSTEM
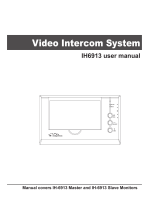
7" COLOR WiFi/IP MONITOR
DX-471 Video Door System
WIFI/IP/ 2-wire Series
Installation and User Manual
www.intelligenthomeonline.com
Image Recording Touch Screen Monitor

PRECAUTIONS
● Read this manual through before using the product
● Slots or openings in the back of the monitor, are provided for ventilation
and to ensure reliable operation of the video monitor or equipment and
to protect if from overheating. These openings must not be blocked or
covered. The monitor should never be placed near or over a radiator or
heat register and should not be placed in a built-in installation such as a
bookcase unless proper ventilation is provided
● All parts should be protected from violence vibration. And not allow be
impacting, knocking and dropping
● For clean the LCD screen, using hands or wet cloth is forbidden
● Please do the cleanness with soft cotton cloth, please do not use the
organic or chemical clean impregnate. If necessary, please use pure
water or dilute soap water to clean the dust
● Image distortion may occur if the video door phone is mounted too close
● Please keep away the video door monitor from wet, high temperature,
dust, and caustic and oxidation gas in order to avoid any unpredictable
damage
● Do NOT open the device in any condition, call the administrator for help
if there is any problem or malfunction happens

Contents
1.Parts and Functions ............................................1
2.Mounting .............................................................2
3.Main Menu ..........................................................3
4. Answering a Call ................................................5
5. Zoom Pan&Tilt. ..................................................6
6.Manual Monitoring ..............................................6
7.Call Another Room or Apartment (Intercom) . .....8
8.View Call Records ...............................................10
9.Operating a Light .................................................11
10.Don’t Disturb Function ......................................12
11.Divert Call ..........................................................13
12.Settings .............................................................14
Enter settings ................................................................14
Ring tone settings . ..........................................................15
General settings .............................................................15
Installer settings .............................................................19
13. How It Works ...................................................22
Wireless Settings.............................................................23
14. Door Entry App .................................................28
15.Specications ....................................................32

-1-
1. Parts and Functions
Touch Screen
Talk/Mon Button Unlock Button
Speaker
Power/Don’t Disturb Indicator
Microphone
Connection Port
L1 L2
SW+SW-RINGGNDPOW
1 2 3 4 5 6
ON DIP
Speaker To listen the visitors
Talk/Mon button
Press for handsfree communication with visitors
Press to view the doorbell in standby mode
LCD screen Display the visitors' image
Power/Don’t Disturb
Power status
Don’t disturb status
Microphone To talk to visitors
Unlock button Press to release the lock
Connection port Bus terminal. DIP switches to set monitor's address
Key Functions
SD Card Slot, WIFI Adaptor

-2-
2. Mounting
145~160 cm
The unit
2 wire cable
Mounting screws
Mounting bracket
Mounting box
The installation height is suggested to 145~160cm
1. Use screws to fasten the mounting bracket to the wall with mounting box
2. Connect 2 wire cable to the green connector
3. Hung the unit onto the mounting bracket
L1 L2
SW+SW-RINGGNDPOW
1 2 3 4 5 6
ON DIP
SD
USB-Wi-Fi adaptor
Terminals Description
SW+,SW-: Extra Door Bell
button connection port
Ring,GND: Extra Ringer
connection port
POW,GND: 12~16V extra power
connection port
DIP switches: Set the address of
monitor
•
DIP 1~DIP5: User Code
setting
•
DIP6: End of line switch
L1,L2: Bus line terminal

-3-
3. Main Menu
When you power-up a monitor for the first time, give it 20 sec to boot. Touch screen will be
not responsive whilst booting. When Power LED stopped flashing- booting has been
finished. Touch Unlock button, or touch anywhere on the screen of monitor in
standby and Main menu will appear as follows:
Light
Touch to turn On the
light connected via
RLC Interface
Wi-Fi status
Touch to enter
Wireless setting
options
SIP cong
Touch it to enter SIP
cong interface
Intercom
Touch it to enter intercom
function
Monitor
Touch to view the outdoor
Function Status
Call Record
Touch to see calling in / calling
out records or missed calls
Settings
Touch to enter setup
Close
Touch to turn off the screen
Call Scene
Touch to activate Don’t
disturb, Divert call functions
Shortcut to Door Stations
and other Monitors
Current date and time
Touch to enter the date
and time settings
Status bar
Icon Meaning Description
Missed call
Displays when there are missed calls
Touch to review the missed calls - shortcut
Don’t disturb activated
Displays when function is activated
Touch to enter Call Scene page - shortcut
Call transfer
SIP server connection active
andcongured
Touch to enter SIP server information page
- shortcut
SIP server connection disabled
SIP server connection active but
not connected

-4-
Displays which door station
is calling
Shows status of talking, unlocking
etc.
Displays talking time
5 direction button:
Zoom, Pan&Tilt
While Talking with a Door Station
00:10 Door Station1
Note: The 5 direction operation only available with Fisheye Door Station
Red, while recording
Icon Meaning Description
WiFi connection active but not
connected
Touch to enter WiFi setting interface - shortcut
WiFi connection disabled
WiFi connection active and
congured

-5-
4. Answering a Call
1. Touch to answer the call
Touch again to end the call
2. If necessary, during the call, touch to
display audio/video adjustment icons
3. Touch to record image/ video
manually
4. Touch icons to adjust the
parameters you want
Adjust the image colour
Adjust the image brightness
Adjust the volume
5. Touch to open the door lock
Opened lock icon will be
displayed on a screen briefly to
indicate that the door lock has
been released
00:10 Door Station1
00:10 Door Station1
00:10 Door Station1
5
3
6

-6-
5. Zoom Pan&Tilt
1. Touch to activate zoom pan&tilt
function
If want to see greater details of visitors,move to the desired position by
touching
on the screen to view the image in Zoom Pan&Tilt mode
00:10 Door Station1
6. Manual Monitoring
1. Touch to display all cameras
connected to your system
Touch to select Door Station/s or CCTV cameras if installed for manual monitoring
function even when nobody rung the bell

-7-
2. Touch to activate desired
camera
3. Touch “>” (to display in
sequence) all other cameras
4. Touch to return to the
previous page
5.Touchtoactivatespecied
camera - shortcut
6. If camera belongs to the
Door Station, touch to activate
Audio if needed
Touch again to return to
previous page
00:10 Door Station 2

-8-
7. Call Another Room or Apartment (Intercom)
1. Touch to display available
Intercom options
2. Touch Intercom by Namelist:
to a specific room only
3. Touch to call to a desired
room
Intercom Namelist
Inner Call
Guard Station
Input Numbers
Intercom
It is possible to communicate with another monitor if multiple monitors installed
in House system or with another apartment in Apartments system
Namelist
Kitchen
Bedroom
Garden Office
Kids Play Room
Namelist
The call is in progress
00:15
KITCHEN

-9-
4. Touch to Intercom with another
room via Inner Call: all other
monitors will ring
5. Touch to Intercom with Guard
Station- concierge (apartments
system only)
Intercom Namelist
Inner Call
Guard Station
Input Numbers
Intercom
Intercom Namelist
Inner Call
Guard Station
Input Numbers
Intercom
6. If there is no Namelist created, you
can call other monitors in the system
directly by numbers: you must know
the address of monitor which you
planning to call
Intercom Namelist
Inner Call
Guard Station
Input Numbers
Intercom

-10-
Note: Call from Door Station has a priority and will cancel Intercom call in progress
7. Type in numbers, then OK. For
example 02 will call the monitor with
Address (User Code) 2
02
_
8. View Call Records
Power indicator turned red and flashing- there are some
missed calls
1. Touch Call Record to see all
records. These records include missed
calls, incoming calls, outgoing calls
and playback
2. Touch to show missed calls
Outgoing
Playback
Missed
Incoming
[2017/09/16 09:50] Door Station 1
[2017/09/16 11:25] Door Station 1
[2017/09/17 13:50] Door Station 2
[2017/09/17 18:37] Door Station 1
[2017/09/18 08:52] Door Station 2
Missed call list:
Calling date&time
Calling source

-11-
9. Operating a Light
This function is available only when actual security light is connected with an
additional RLC Interface
1. Touch to operate
the light. It will be
turned off after 60s
automatically
3. Touch to scroll to a next image
4. Touch to delete the image
100 images from Door Station will be automatically recorded on internal memory
[2017/09/16 09:50] Door Station 1
1/223

-12-
10. Do Not Disturb Function
Do Not Disturb function will set the monitor to not react to door station or other
monitors calls
1. Touch Call Scene
2. Touch to set Don’t disturb mode:
Don’t Disturb 8H or
Don’t Disturb Always
Notes:
* Power indicator turns from green to red, to indicate that the Don’t Disturb function has
been activated
* This function will perform immediately and the status bar on
the
M
ain
M
enu page
will show
this icon:
Call Scene Normal
Don’t
Disturb 8H
Don’t
Disturb Always
Divert Call If No Answer
Divert Call Always
Call Scene
Don’t Disturb 8H: No
calling from door station or other monitors for 8 hours
Don’t
Disturb Always: No
calling from door station or other monitors until the function
is allowed

-13-
2. Touch to set the divert call mode:
Divert Call If No Answer or
Divert Call Always
Note:
* To divert the call to a smart phone via Sip sever, settings are needed
* This function will perform immediately and the status bar on the Main Menu page
will show
icon
Call Scene
Normal
Don’t
Disturb 8H
Don’t
Disturb Always
Divert Call If No Answer
Divert Call Always
Call Scene
11. Divert Call
The call from door station can be diverted to your smart phone. This function
should be supported by Wi-Fi or SIP network
1. Touch Call Scene
Divert Call If No Answer: When Door Station called and
call is not answered
within 30s, the system will divert the call to a smart phone
Divert Call Always:
When Door Station called, call diverts to smart phone immediately

-14-
12. Settings
1. Touch to enter Setting
2. Touch icons for desired customisation, choosing amongst:
Ring volume [04]
Door1 calling tune [01]
Door2 calling tune [01]
Door3 calling tune [01]
Door4 calling tune [01]
Setting
Call Tune
General
Installer
Wireless
About
Ring volume -Door1 calling tune -Door2 calling tune -Door3 calling tune -Door4 calling tune
-Doorbell calling tune -Intercom calling tune -Inner Call calling tune -Guard Call calling tune
Date and time -Language -Monitor time -Shortcut setting -SD card -Restore to default
Current address -Intercom enable -FW upgrade -System setting
Wi-Fiswitch-WLANsetting-Wirelessdeviceregist-IP/Smartphoneregist-SIPcong
All kind of device information
Call Tune
General
Installer
Wireless
About
Enter setting page

-15-
1. Select Call Tune
2. Select door bell and change the
tune
1. Select General
Ring volume [04]
Door1 calling tune [01]
Door2 calling tune [01]
Door3 calling tune [01]
Door4 calling tune [01]
Date and time
Language [000]
Monitor time [300]
Shortcut setting
SD card
Setting
Setting
Call Tune
General
Installer
Wireless
About
Call Tune
General
Installer
Wireless
About
Ring Tone Settings
General Settings
If system has more that one Door Bell the ring tones can be set individually to
distinguish different calling sources. There are 22 tones to choose from
This section contains the general settings and device information
Ring volume: adjust the ring volume
Door1/2/3/4 calling tune: call tone for Door Stations 1/2/3/4
Door Bell calling tune: call tone for additional Bell button if installed
Intercom calling tune: call tone for Intercom function
Inner Call calling tune: call tone for Intercom function
Guard Call calling tune: call tone for the Guard Intercom
Scroll to next page

-16-
Date and Time Settings
Changing the Display Language
Date mode: 2 display mode: month/date/year and date/month/year
Time mode: 2 display mode: HOUR_12 and HOUR_24
Date: touch to set the date
Time: touch to set the time
Time zone: touch to set the time zone in your country
Time auto update: Disable: to set time manually. Enable: to synchronise the system
time
Thecurrentdateandtimecanbemodiedhere
1. Select Date and Time
2. Touch to select the item you want to change
1. Select Language
2.Selectlanguageandthenconrm
Here you can change language
Date and time
Language
Monitor time
Shortcut setting
SD card
Date and time
Language
Monitor time
Shortcut setting
SD card
Date mode: MM_DD_YYYY
Time mode: HOUR_12
Date: xxxx_xx_xx
Time: xx:xx
[000]English
[001]French
[002]German
[003]Spanish
Setting
Setting
Date time set
Language
Call Tune
General
Installer
Wireless
About
Call Tune
General
Installer
Wireless
About
General
General
*If the target language is not found on the page, touch > icon to scroll to a next page

-17-
Monitoring Time Settings
Shortcut Settings
1. Select Monitoring time
2.Selectthe timeyouwant,andthenconrm
The monitoring time can be changed at any time. It’s available to set 30s, 60s,
90s, 120s, 150s, 180s, 210s, 240s, 270s, 300s
* 30s is the default
There are 4 shortcuts appearing on the Home page. Here is how to set,
change or remove those shortcuts
1. Select Shortcut Setting
2. Select Shortcut 1 to make changes
3. Select Monitor list to add Door station to a shortcut
4. Or you can remove shortcut completely
There is no Confirm to perform. Touch Back button to leave the page
Date and time
Language
Monitor time
Shortcut setting
SD card
Date and time
Language
Monitor time
Shortcut setting
SD card
30(s)
60(s)
90(s)
120(s)
150(s)
Setting
Setting
Monitor time select
Call Tune
General
Installer
Wireless
About
Call Tune
General
Installer
Wireless
About
General
Remove
shortcut Monitor
list Namelist
Inner Call
Guard Station
Shortcut set
ShortcutSet1
ShortcutSet2
ShortcutSet3
ShortcutSet4
/