Page is loading ...

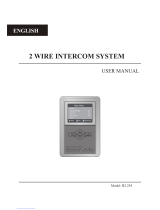
FTDEV1M USER MANUAL(EN)
2-Wire Video Intercom System
Read this manual carefully before using the product, and keep it well for future use.

-2-
Introduction
The monitor is designed with 3.9 inch screen, it provides a resolution of
800x480 pixels with high quality image display. The touch sensitive button
makes the operation more easily.
Parts and Function
L1,L2:
Bus terminal
SW+,SW-:
Door bell call button
connection port
DIP switches:
Total 6 bits can be
congured.
Bit1~Bit5:
Used to User Code
setting.
Bit6:
Set to ON if the monitor is at
the end of the line or works with
DBC4S. Otherwise, set to OFF.
Terminal Description
Microphone
LCD Screen
Unlock Button
Talk/Mon Button
Power Indicator
Don't Disturb Indicator
Speaker
Message Indicator
Connection Port
Mounting Hook
1 2 3
ON DIP
4 5 6
Touch Button
L1
SW+
SW-
L2
DIP
1 2 3
ON DIP
4 5 6
1 2 3
ON DIP
4 5 6

-3-
About Main Menu
The main menu is your starting point
for using all the applications on your
monitor. You can customize your
main menu to display applications,
logos, and languages.
Touch the screen on the right
“1,2,3,4” of any one can enter the
home page, the home menu page
will be shown as follows:
Basic Operation Instruction
Answering a Door Call
• Press
CALL
button on door station.The monitor rings,and the visitor’s image
will be seen on screen.If nobody answers the call,the screen will turn off in
30 seconds automatically.
Unit Mounting
Accessory contents:
Accessories include a Bracket, two 4X25 screws (use to fasten the Mounting Bracket),
2 wire connectors (use to connect with Monitor).
Installation steps:
Installation height for indoor monitor usually is 145~160cm(refer to sketch map).
Wire the cable correctly(see the later connection chapter) then hang the Monitor on
the Mounting Bracket rmly.
145~160 cm

-4-
Intercom Function
Intercom function can be initiated by any moni-
tor when multi monitors are installed.
When the monitor is in standby mode, Touch
the screen on the right “1,2,3,4” of any one
can enter the home page, the home menu
page,there are three items:
Intercom
Call...
,
Inner Call ...
,
Call Guard Unit...
• When the monitor is in standby mode, press
TALK/MON
Button
(
or touch
Monitor ...
item on main menu page
)
, the screen can display the view of
outside. If multi door stations are installed, touch icon,and then touch
or icon to get into the camera switch mode. You can touch Door/Cam-
era 1/2/3/4 to monitor the door station or CCTV camera you want.See the
following diagrams.(Touch icon to end monitoring.)
DS-1 00:30
• Press
TALK/MON
Button on moni-
tor, you can communicate with the
visitor for 90 seconds.After finishing
communication,press
TALK/MON
but-
ton again to end the communication.
• During talking state, Press
UNLOCK
Button to open the corresponding door
for the visitor.
Intercom Call
: User in one apartment can call
other apartments in the system. the namelist
will be created automatically by the system.
Touch a name you want on the screen, then
touch Dial icon to dial.(Note:The DIP switches
code of each monitor must set different.)
Inner Call
: If multi slave monitors are installed
in the same apartment, select Inner Call, all the other Monitors will ring at the
same time, whichever Monitor answers the call, conversation is started.and
the other monitors will stop ringing at the same time.(note:the DIP switches
setting of all monitors must be same. )

-5-
Basic Setup Instruction
Ring Tone Setting
Select and touch
Setup
item on
main menu page,and then select
Ring Tune
to enter setup page.
Select
DS
,
Intercom
or
Door Bell
item, There are 12 pieces ring tones
can be selected.Use
Inc/Dec
button
to select last/next ring tone, press
Exit
button to save and exit.
DS:
set the ring tone calling from
outdoor station.
Intercom:
set the ring tone calling
from other apartments.
Door Bell:
set the ring tone calling
from door bell.
Ring Tune
Ring Volume
Monitor Time
Exit
Call Guard unit
: A Monitor can be assigned as Guard Unit Monitor; when the
Guard Unit Monitor answers the call, conversation with the guard person is
started.
Other Function:
1.
Call Transfer
function:Touch
Call Transfer
item on main menu page to
enter call transfer page,and then you can select the item you want.
2.
Light
function:Touch
Light
item on main menu page to enter light func-
tion page,and then you can select the item you want.
3.
Playback
function:Touch
Playback
item on main menu page to enter
playback function page,and then you can select the item you want.
Inc
Dec
Exit
Current: 01
Tune Select
Ring Volume Setting
Select and touch
Setup
on
main menu page, then select
Ring
Volume...
item, the setting range is
0~9. Use
/
button to increase
/ decrease the value, press
Exit
but-
ton to save and return last page.
Current: 3
Adjust Value

-6-
Language
Restore
H/W: a1.2
S/W: 00.01.00
Addr: 00.01
Video STD: AUTO
Menu Language Setting
Maximum 16 languages can be sup-
ported by the monitor.
On main menu page, select
0
About
->
Language
.The languages that
the monitor supported will be dis-
played, and the current language will
beshown“√”.
Screen Setting
During monitoring or talking state,
press
Adjust
button,the adjust
menu will be displayed.
There are 3 adjustment items can be
selected:
Therstitemis
Scene
mode se-
lection: Total 3 screen modes can be
selected in sequence:
Normal
,
Bright
and
Soft
.
The
Brightness
item is for the
image quality setting, adjust the value
to get the best image you like.
The
Volume
item is for the talk
volume setting.
Current: 30
Adjust Value
Monitor Time Setting
Select and touch
Setup
on main
menu page, then select
Monitor
Time...
item. Use
/
button to
increase / decrease the value, press
Exit
button to save and return last
page.
DS-1 00:30
DS-1 00:30

-7-
Installation Setting
Enter Installation Setup Page
Step1:
Touch
About
on main menu page ,then press
UNLOCK
button
and hold for 2s enter
Installer Setup
page.
Step2:
Input 4 digits number according to the information.
• Notethatallthemodicationswillbedoneimmediatelyaftertheoperation.
Press
button to quit the adjust page.
Restore to Default
On main menu page, select
About->Restore
. If touch icon ,All set-
tings will be restored to default, if you don't want to restore, touch icon to
cancel the operation.(Note that the restore to default operation will not change
the time setting and the datas.)
Language
Restore
H/W: a1.2
S/W: 00.01.00
Addr: 00.01
Video STD: AUTO
Inc
Dec
Installer Setup
[0000]
Press unlock to exit !
Next
Confirm
Step1 Step2

-8-
How to set the monitor panel on
In default mode,when receive a calling,the master and slave monitors will
ring at the same time,and just the master monitor can display the image while
the slave monitors can not.But the settings can be changed,you can set the
master monitor and all the slave monitors to panel on at the same time when
receiving a call, just input the code number of 8006 on each slave monitor.
Press call button
on door station
When reveiving calling,all monitors can display the image at the same time
Master monitor #1st slave monitor #2nd slave monitor #3rd slave monitor
The setting items are as followings:
[8000]:Master 0 [8001]~[8003]:Slaver 1~3
[8004]:Guard unit [8005]:Not guard unit
[8006]:Panel on as slaver called [8007]:Panel off as slaver called
[8014]:Unlock menu on [8015]:Unlock menu off
[9006]:Simpliedversion [9007]:Full-featuredversion
How to set the monitor as a Guard Monitor
A Monitor can be assigned as Guard Unit Monitor; when the Guard Unit Moni-
tor answers the call, conversation with the guard person is started.
The code number of 8004 is used to set the monitor as a Guard Unit Monitor
and 8005 is used to cancel this function. (Not Guard Unit is default setting.)
How to set the slave monitor address
Maximum 4 monitors can be connected in one apartment,one master moni-
tor together with 3 slave monitors, so you should set the address correctly.
(note:must have one monitor to be set as master monitor)
The code of 8000 is used to set the master monitor(by default).
Thecodeof8001isusedtosettherstslavemonitor.
The code of 8002 is used to set the second slave monitor .
The code of 8003 is used to set the third slave monitor .

-9-
How to set the main menu version
There are two main menu version to choose for the monitor:Full-featured ver-
sionandSimpliedversion(bydefault).
Thecodeof9006isusedtosetthesimpliedversionmainmenu(bydefault).
The code of 9007 is used to set the full-featured version main menu.
DS-1 00:30
How to set 2 locks control
The monitor can be set to control 2 locks while you should set the unlock
menu item to “on “ state.
The code number of 8015 is used to set the unlock menu off (by default) that
it can only control one lock.
The code number of 8014 is used to set the unlock menu on that it can control
two locks.
Note:
1. During talking or monitoring state, press
UNLOCK
button,two unlock icons will be
shown. Select the item you want, and then
it will release the corresponding door(The
code number of 8014 is used to set the un-
lock menu on).
2. Note that the restore to default operation
will not change the parameters setting.
Specication:
• Power Supply: DC 20-28V
• Power Consumption: Standby 0.286W; Working status 3.224W
• Monitor Screen: 3.9 inch digital color TFT
• Display Resolutions: 800(R, G, B) x 480 pixels
• VideoSignal: 1Vp-p,75Ω,CCIRstandard
• Wiring: 2 wires, non-polarity
• Dimension: 138(H)×138(W)×19(D)mm

-10-
Precautions
1) All components should be protected from violence vibration. And not allow
to be impacted, knocked and dropped.
2) Please do the cleanness with soft cotton cloth, please do not use the or-
ganic impregnant or chemical clean agent. If necessary, please use a little
pure water or dilute soap water to clean the dust.
3) Image distortion may occur if the video monitor is mounted too close to
magneticelde.g.Microwaves,TV,computeretc.
4) Please keep away the monitor from wet, high temperature, dust, caustic
and oxidation gas in order to avoid any unpredictable damage.
5) Must use the right adaptor which is supplied by the manufacturer or ap-
proved by the manufacturer.
6) Pay attention to the high voltage inside the products, please refer service
onlytoatrainedandqualiedprofessional.

-11-
Note

interpret and copyright of this manual are preserved.
FTDEV1M 20140115
/