Page is loading ...

Installation manual
Video intercom
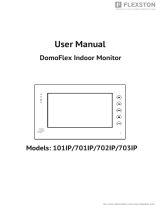
User monitor NVE-M200
Guard monitor NVE-GM200
Version 1.0
Version 1.0

Video intercom Novus – Installation manual NVS-G200, NVS-GM200
All rights reserved. © AAT SYSTEMY BEZPIECZEŃSTWA sp. z o.o.
Page 2 of 26
TABLE OF CONTENTS
1 TECHNICAL SPECIFICATIONS ..................................................................................................................... 5
2 PACKING CONTENTS ................................................................................................................................. 5
2.1 INDOOR MONITOR NVE-M200 ......................................................................................................................... 5
2.2 GUARD UNIT NVE-GM200 .............................................................................................................................. 5
3 NAME AND FUNCTIONS OF EACH PART .................................................................................................... 6
3.1 USER MONITOR .............................................................................................................................................. 6
3.2 GUARD MONITOR ............................................................................................................................................ 7
4 CONNECTION DIAGRAM ........................................................................................................................... 8
4.1 SYSTEM LAYOUT ............................................................................................................................................. 8
4.2 WIRING DIAGRAM .......................................................................................................................................... 8
5 INSTALLATION .......................................................................................................................................... 9
5.1 INDOOR MONITOR ........................................................................................................................................... 9
5.2 GUARD MONITOR .......................................................................................................................................... 10
6 OPERATION DESCRIPTION ...................................................................................................................... 10
6.1 MAIN SCREEN .............................................................................................................................................. 10
6.2 ICON DEFINITION .......................................................................................................................................... 11
6.3 CALL FUNCTION ............................................................................................................................................ 11
6.3.1 Visitor Call From Block Panel or Entrance Panel ............................................................................. 11
6.3.2 Visitor Call From Indoor Panel ........................................................................................................ 12
6.3.3 Contacts .......................................................................................................................................... 12
6.3.4 Call Records .................................................................................................................................... 13
6.3.5 General settings .............................................................................................................................. 13
6.3.6 Intercom.......................................................................................................................................... 15
6.4 MESSAGE FUNCTION ..................................................................................................................................... 16
6.5 MONITOR FUNCTION ..................................................................................................................................... 17
6.6 ALARM FUNCTION ......................................................................................................................................... 18
6.6.1 Alarm functions of guard unit ......................................................................................................... 19
6.7 PICTURE REVIEW ........................................................................................................................................... 19
6.8 MAIN SETTING PAGE ..................................................................................................................................... 20
6.8.1 Engineering Setting ......................................................................................................................... 21
6.9 ELEVATOR FUNCTION ..................................................................................................................................... 23
7 WEB CLIENT OPERATION ........................................................................................................................ 24
7.1 LOGIN THE CLIENT ......................................................................................................................................... 24
7.2 LOCAL CONFIGURATION PAGE ......................................................................................................................... 24
7.3 USER MANAGEMENT PAGE ............................................................................................................................. 25
7.4 MAINTENANCE PAGE ..................................................................................................................................... 25

Video intercom Novus – Installation manual NVS-G200, NVS-GM200
All rights reserved. © AAT SYSTEMY BEZPIECZEŃSTWA sp. z o.o.
Page 3 of 26
THE PRODUCT MEETS THE REQUIREMENTS CONTAINED IN THE
FOLLOWING DIRECTIVES:
Directive 2014/53/EU of the European Parliament and of the Council of 16 April 2014 on
the harmonisation of the laws of the Member States relating to the making available on the
market of radio equipment and repealing Directive 1999/5/EC Text with EEA relevance.
Directive 2014/30/EU of the European Parliament and of the Council of 26 February 2014 on the
harmonisation of the laws of the Member States relating to electromagnetic compatibility (recast)
Text with EEA relevance.
Directive 2014/35/EU of the European Parliament and of the Council of 26 February 2014 on the
harmonisation of the laws of the Member States relating to the making available on the market of
electrical equipment designed for use within certain voltage limits Text with EEA relevance.
Directive 2012/19/EU of the European Parliament and of the Council of 4 July
2012 on waste electrical and electronic equipment (WEEE) Text with EEA
relevance
Directive 2011/65/EU of the European Parliament and of the Council of 8 June
2011 on the restriction of the use of certain hazardous substances in electrical and
electronic equipment Text with EEA relevance
Information
The device, as a part of professional intercom system used for surveillance and control, is not
designed for self-installation in households by individuals without technical knowledge
WARNING!
PRIOR TO UNDERTAKING ANY ACTION THAT IS NOT DESCRIBED FOR THE GIVEN PRODUCT IN
USER’S MANUAL AND OTHER DOCUMENTS DELIVERED WITH THE PRODUCT, OR IF IT DOES
NOT ARISE FROM THE USUAL APPLICATION OF THE PRODUCT, MANUFACTURER MUST BE
CONTACTED UNDER THE RIGOR OF EXCLUDING THE MANUFACTURER’S RESPONSIBILITY FOR
THE RESULTS OF SUCH AN ACTION.
WARNING!
THE KNOWLEDGE OF THIS MANUAL IS AN INDESPENSIBLE CONDITION OF A PROPER DEVICE
OPERATION. YOU ARE KINDLY REQUSTED TO FAMILIRIZE YOURSELF WITH THE MANUAL
PRIOR TO INSTALLATION AND FURTHER DEVICE OPERATION.
WARNING!
USER IS NOT ALLOWED TO DISASSEMBLE THE CASING AS THERE ARE NO USER -SERVICEABLE
PARTS INSIDE THIS UNIT. ONLY AUTHORIZED SERVICE PERSONNEL MAY OPEN THE UNIT
INSTALLATION AND SERVICING SHOULD ONLY BE DONE BY QUALIFIED SERVICE PERSONNEL
AND SHOULD CONFORM TO ALL LOCAL REGULATIONS

Video intercom Novus – Installation manual NVS-G200, NVS-GM200
All rights reserved. © AAT SYSTEMY BEZPIECZEŃSTWA sp. z o.o.
Page 4 of 26
IMPORTANT SAFEGUARDS AND WARNINGS:
1. Prior to undertaking any action please consult the following manual and read all the
safety and operating instructions before starting the device.
2. Please keep this manual for the lifespan of the device in case referring to the contents
of this manual is necessary;
3. All the safety precautions referred to in this manual should be strictly followed, as
they have a direct influence on user’s safety and durability and reliability of the device;
4. All actions conducted by the servicemen and users must be accomplished in
accordance with the user’s manual;
5. The device should be disconnected from power sources during maintenance
procedures;
6. Usage of additional devices and components neither provided nor recommended by
the producer is forbidden;
7. Mounting the device on unstable surface or using not recommended mounts is
forbidden.
8. Improperly mounted device may cause a fatal accident or may be seriously damaged
itself. Device must be mounted by qualified personnel with proper authorization, in
accordance with this user’s manual;
9. Device should be supplied only from a power sources whose parameters are in
accordance with those specified by the producer in the device’s technical datasheet.
Therefore, it is forbidden to supply the device from a power sources with unknown
parameters, unstable or not meeting producer’s requirements;
10. Signal and power cables should be placed in a way excluding the possibility of
damaging them by accident. Special attention must be paid to cables getting from the
device and connecting the power supply;
11. Electric installation supplying the device should be designed to meet the specifications
given by the producer in such a way that overloading is impossible;
12. User cannot repair or upgrade the equipment himself. All maintenance actions and
repairs should be conducted only by qualified service personnel;
13. Unplug the device from the power source immediately and contact the proper
maintenance department when the following occurs:
• Damages to the power cord or to the plug itself;
• Liquids getting inside the device or exposure to strong mechanical shock;
• Device behaves in a way not described in the manual and all adjustments
approved by the
• manufacturer and possible to apply by user himself, seem not to have any effect;
• Device is damaged;
• Atypical behaviour of the device components may be seen (heard).
14. In necessity of repairs attention to using only original replacement parts (with their
parameters in accordance with those specified by the producer) should be paid. Non-
licensed service and non-genuine replacement parts may cause fire or electrocution;
15. After maintenance activities tests should be run to ensure proper operation of all the
functional components of the device.

Video intercom Novus – Installation manual NVS-G200, NVS-GM200
All rights reserved. © AAT SYSTEMY BEZPIECZEŃSTWA sp. z o.o.
Page 5 of 26
1 Technical Specifications
• 7” capacitive touch screen monitor,800*480 resolution
• Support zone alarm function
• Support the second door panel function
• Video coding: H.264
• Network Connection: Ethernet (POE)
• Operating Voltage: 18V (POE)
• Operating current: 300 mA (max: 500 mA, stand-by: 180 mA)
• Operation temperature: -10~55 ℃
• Operating system: Linux
• Inner flash memory(Inner storage: 100pcs pictures; Monitor support SD card)
• Dimensions(mm): Indoor monitor:210(W) x 140(H) x 20(D)
Guard unit:326.3(W) x 206(H) x 56.2(D)
2 Packing Contents
2.1 Indoor monitor NVE-M200
2.2 Guard unit NVE-GM200

Video intercom Novus – Installation manual NVS-G200, NVS-GM200
All rights reserved. © AAT SYSTEMY BEZPIECZEŃSTWA sp. z o.o.
Page 6 of 26
3 Name And Functions Of Each Part
3.1 User monitor
NO.
Part Name
Description
1
Power Indicator
White led when power on
2
Message Indicator
White led flashes when have unread message/call
3
Alarm Indicator
White led flashes when have alarm
4
Screen
7 inch digital TFT LCD
5
Microphone
Receive voice from the user
6
Micro SD Card Slot
Socket for micro SD card
7
Connection Port
Interface for sensor
8
Connection Port
Interface for doorbell
9
DC Power
15~20V(1A) DC power supply,
12 V in case the door panel will not be used
10
RJ45 Connector
Interface for RJ45
11
Video Input
Interface for door panel NVE-VDB200
12
Speaker
Built in, volume adjustable

Video intercom Novus – Installation manual NVS-G200, NVS-GM200
All rights reserved. © AAT SYSTEMY BEZPIECZEŃSTWA sp. z o.o.
Page 7 of 26
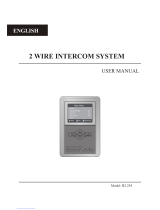
3.2 Guard monitor
NO.
Part Name
Description
1
Handset
Voice communication
2
RJ11 Connector
Interface for helical line
3
Power Indicator
Red led when power on
4
Screen
7 inch digital TFT LCD
5
Speaker
Built in, volume adjustable
6
Door Release Button
Press button for releasing door lock
7
RJ45 Connector
Interface for RJ45
8
DC Power
12~20 V (1A) DC power supply

Video intercom Novus – Installation manual NVS-G200, NVS-GM200
All rights reserved. © AAT SYSTEMY BEZPIECZEŃSTWA sp. z o.o.
Page 8 of 26
4 Connection Diagram
4.1 System Layout
Remark:
• The distance between other devices (indoor monitor, door panel, network switch,
guard unit, and POE Switch) and POE Switch is limited to 70 meters.
• The system supports up to 98 buildings.
• The system supports up to 32 IP cameras.
• One room supports up to 3 monitors.
• The address of other devices can be successfully set only after the first block panel
(5digit:01801, 6digit:019001) in the system is set.
4.2 Wiring Diagram
is the interface for alarm sensors. ALM1, ALM2, ALM3, and ALM4 are
interfaces that respectively connect alarm sensors of different zones.

Video intercom Novus – Installation manual NVS-G200, NVS-GM200
All rights reserved. © AAT SYSTEMY BEZPIECZEŃSTWA sp. z o.o.
Page 9 of 26
5 Installation
5.1 Indoor monitor
Remark:
Dimensions (mm): wall bracket: 140(W) x 87(H)
Monitor installation location
Standard monitor installation height is about 1,500mm where screen center is at eye level; in this
case, wall-hanging metal center is 1,450mm above ground level.
Wiring and installation of indoor monitor
1. Remove mounting bracket behind monitor and fix it on the wall with screw;
2. Pull the cable out and connect the system according to 4.2 wiring diagram;
3. Hang the monitor on the mounting bracket;
Max. 20 m

Video intercom Novus – Installation manual NVS-G200, NVS-GM200
All rights reserved. © AAT SYSTEMY BEZPIECZEŃSTWA sp. z o.o.
Page 10 of 26
5.2 Guard monitor
Wiring and installation of guard
1) Place the guard unit on a level desktop;
2) Fix the bracket on the behind of the monitor with screw;
3) Pull the cable out and connect the system according to 4.2 wiring diagram.
6 Operation Description
Remark:
The address of monitor can be successfully set only after the first Block panel (5 digital 01801
or 6 digit: 019001) in the system is set.
6.1 Main Screen
Touch the screen anywhere in standby mode, the main page will be shown as follows:
It will show corresponding functions when pressing each icon on main screen.

Video intercom Novus – Installation manual NVS-G200, NVS-GM200
All rights reserved. © AAT SYSTEMY BEZPIECZEŃSTWA sp. z o.o.
Page 11 of 26
6.2 Icon Definition
Enter the call menu
Enter the message menu
Enter the monitor menu
Alarm management
Picture storage
Enter the setting menu
No network indicator
[do not disturb] mode
indicator
Set the monitor for
leaving or presence
mode(default
password: 9999)
Emergency call to the guard
Remark:
• The guard unit doesn't have emergency call or leaving mode.
• Set the monitor for leaving mode can active alarm setting.
• There are two states of alarm. is presence mode for disarm,and is leaving
mode for alarm.
• The four zones are a combination of delay and instant, if the alarm is triggered and input
password, the main page icon would change to presence mode;
• The four zones are a combination of delay/instant/24h instant and bypass, if the delay or
instant alarm is triggered and input the password, the main page icon would change to
presence mode; if the 24h instant alarm is triggered and input the password, the main page
icon would be leaving mode.
• The combination of bypass is used to maintain alarm sensor, it will not be triggered.
6.3 Call Function
6.3.1 Visitor Call From Block Panel or Entrance Panel
When door panel calls in, the visitor’s image will be shown on the master monitor screen and
you can press the icon to talk with the visitor. The talking and ringtone volume can be
adjusted.

Video intercom Novus – Installation manual NVS-G200, NVS-GM200
All rights reserved. © AAT SYSTEMY BEZPIECZEŃSTWA sp. z o.o.
Page 12 of 26
Icon Definition
Capture a picture
Adjust ringtone volume
Mute
Release the door lock
Talk
Terminate the talk
6.3.2 Visitor Call From Indoor Panel
When a visitor uses indoor panel call in, the visitor’s image will be shown on the master
monitor screen and you can press the icon to talk with the visitor. You can press the
icon to release the door lock. If you do not connect with indoor panel, you can use the
doorbell to call monitor.
6.3.3 Contacts
Press the [call] icon on main screen and the screen will enter the call page:
• In the call page, you can press the [Contacts] icon to review the contacts and click the
contact you want to call.
• You can also press the "+" icon in the upper right corner of the screen to enter the

Video intercom Novus – Installation manual NVS-G200, NVS-GM200
All rights reserved. © AAT SYSTEMY BEZPIECZEŃSTWA sp. z o.o.
Page 13 of 26
name list page, select the contact you want to add and press the “return” icon to
confirm and return to the add contact page.
6.3.4 Call Records
In the call page, you can press the [Records] icon to review the call records. You can also
enable “Missed” by the checkbox to review missed calls.
Press to review the voice message from visitor.
Press to review the picture automatically captured.
Press to call back.
Remark:
• Long press a call records for 2s; you can delete the call record or delete all records.
• Pictures and voice messages are linked to call records, support 100pcs max.
6.3.5 General settings
In the call page, you can press the [Setting] icon to enter the setting page.

Video intercom Novus – Installation manual NVS-G200, NVS-GM200
All rights reserved. © AAT SYSTEMY BEZPIECZEŃSTWA sp. z o.o.
Page 14 of 26
In this page, you can
• Enable/disable the mute function( the guard unit doesn't support this function);
• Enable/disable the Intercom function; when you disable the intercom function, other
monitors are not able to call this monitor (except guard unit and door keeper; the
guard unit doesn't support this function);
• Select the mode of leaving voice message: immediately/timeout/ off ( the guard unit
doesn't support this function) ;
• Select the melody for Intercom ring tone/Block door ring tone/Indoor ring
tone/Doorbell ring tone/Guard unit ring tone/Ring back tone;
• Adjust the talking and ringtone volume.

Video intercom Novus – Installation manual NVS-G200, NVS-GM200
All rights reserved. © AAT SYSTEMY BEZPIECZEŃSTWA sp. z o.o.
Page 15 of 26
6.3.6 Intercom
In the call page, you can input the intercom address of the monitor you want to call and then
press [Call] icon to start the call. When call in, it will show as below:
Building number
Apartment number
Dial
The same building
5 digit address
-
001
001 or 01 or 1
-
012
012 or 12
6 digit address
-
0101
0101 or 101
-
1122
1122
Different building
5 digit address
10
13
10013
2
8
02008 or 2008
6 digit address
10
0116
010116 or 10116
2
0101
020101 or 20101
Remark:
• Do not support intercom in the same apartment.

Video intercom Novus – Installation manual NVS-G200, NVS-GM200
All rights reserved. © AAT SYSTEMY BEZPIECZEŃSTWA sp. z o.o.
Page 16 of 26
6.4 Message Function
Press the [Message] icon on main screen and the screen will enter the message page:
• You can press the [Inbox] icon to review the received message; you can also
delete, forward and reply messages.
• You can press the [Outbox] icon to review the messages that have been sent, you
can also delete, forward and reply messages.
• You can press the [New] icon to edit message, input the intercom address of the
monitor you want to send and edit the content and then press icon to send
the message.

Video intercom Novus – Installation manual NVS-G200, NVS-GM200
All rights reserved. © AAT SYSTEMY BEZPIECZEŃSTWA sp. z o.o.
Page 17 of 26
There are four rules for the guard unit to send message:
5 digits address
6 address
Building
number
Apartment
number
Dial
Building
number
Apartment
number
Dial
To one
apartment
1
1
01001
1
0101
010101
To multiple
apartments
5
1
2
15
05001,
05002,
05015,
5
5
6
0101,
0102,
0506,
050101,
050102,
060506
To whole
building
20
-
20
20
-
20
To everybody
-
-
99
-
-
99
Remark:
• Ordinary users only support single send message; guard unit can support group messages.
• When the monitoring received a new message, there will be a prompt tone.
• Long press the message for 2s, you can delete all messages.
6.5 Monitor Function
Press the [Monitor] icon on main screen, select the door panel/camera or indoor panel you
want to monitor and then enter the monitoring mode (support up to 19 block panels/32
cameras and 1 indoor panel).

Video intercom Novus – Installation manual NVS-G200, NVS-GM200
All rights reserved. © AAT SYSTEMY BEZPIECZEŃSTWA sp. z o.o.
Page 18 of 26
Remark:
• Indoor monitor can only show the connected Building’s door panel; Guard unit can show the
all Buildings’ door panel.
• The talk function will be disabled under monitor mode.
• The monitor shows only authorized cameras.
6.6 Alarm Function
Indoor monitor
When the alarm is triggered, the monitor will buzzer at the same time; you can enter the
alarm password and press the icon to turn off the alarm (default password: 9999).
Press the [Alarm] icon on main screen and enter the password (default password: 9999), the
screen will be shown as follows:
• In [Zones] page, you can review the status of alarms at each zone.
• In [Alarm logs] page, you can review the alarm records.
• In [Factory setup] page, you can restore monitor to factory settings.
• In [Siren duration] page, you can set the duration of the siren (1~99min).
• In [Alarm password] page, you can set the alarm password.
• In [Zone setting] page, you can :

Video intercom Novus – Installation manual NVS-G200, NVS-GM200
All rights reserved. © AAT SYSTEMY BEZPIECZEŃSTWA sp. z o.o.
Page 19 of 26
• Set the zone name (default name: Zone1;Zone2;Zone3;Zone4);
• Set the type of sensor (Gas/Smoke/Water/Magnetic/Pir/Custom Type);
• Set the trigger type of the sensor (Instant/Delay/24h Instant/ByPass);
• Set the alarm delay time (1~99s);
• Set the alarm activation delay time (1~99s);
• Set the alarm mode (NO/NC);
Remark:
• The indoor monitor can store up to 100 alarm information.
6.6.1 Alarm functions of guard unit
When the monitor receives the alarm; the guard unit will buzzer at the same time, you can
press the icon to turn off the alarm.
Press the [Alarm] icon on main screen, the screen will be shown as follows:
• In [Alarm logs] page, you can review the alarm records.
• In [Siren duration] page, you can set the duration of the siren.
Remark:
• The guard unit can store up to 1000 alarm information.
6.7 Picture Review
Press the [Storage] icon on main screen, you can press the corresponding list directly to
review the picture. You can also delete the picture or press / icon to review the

Video intercom Novus – Installation manual NVS-G200, NVS-GM200
All rights reserved. © AAT SYSTEMY BEZPIECZEŃSTWA sp. z o.o.
Page 20 of 26
picture.
Remark:
• In the storage page, you can only review the manually captured pictures.
• Long press a picture for 2s, you can delete the picture or delete all pictures.
•
6.8 Main Setting Page
Press the [setting] icon on main screen and the screen will enter the main setting page.
• In [Common] setting page, you can enable/disable the touch tone function, change
the user name and set the language of the monitor, you can also review the user
manual,and you can choose to start clean mode to avoid operation when cleaning.
(note: if you change the name in monitor, it will be effective in 24 hours)
• In [Reset] setting page, you can format micro SD card, restore monitor to factory
settings and restart monitor.
• In [Unlock Password] setting page, you can set your own unlock password (the
password is 4 digits, the 4 digits cannot be completely consistent or continuous; the
guard unit doesn't support this function).
• In [About] setting page, you can review the Software version/Building No. /Room No.
and Extension NO.
/