Page is loading ...

YEStation User's Guide for
Windows-Based Terminals
Models 2xx7 with XPe
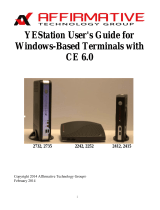
27x7 22x7 24x7
Copyright 2014 Affirmative Technology Group
®
www.affirmativetg.com
February 2014

ii

YEStation Limited Warranty
General Terms and Conditions
LIMITED PRODUCT WARRANTY. Affirmative Technology Group warrants that the YEStation Hardware
Product shall be free from defects in materials and workmanship that arise under proper and normal use and
service for three years from the date of purchase. A warranty extension of two years is available at extra cost, if
obtained at the time of the original YEStation purchase. In the event that the YEStation Hardware Product fails
to comply with the warranty set forth above, Affirmative Technology Group will repair or replace the Product.
Note: Advanced Replacement for warranted units is only available for user sites in the United States and Canada.
SOFTWARE WARRANTY. Affirmative Technology Group warrants that, for a period of ninety (90) days
from the date of purchase by the End User, its Software Products shall conform to its published specifications
under normal usage. AFFIRMATIVE TECHNOLOGY GROUP DOES NOT WARRANT THAT THE
OPERATION OF THE SOFTWARE WILL BE UNINTERRUPTED OR ERROR FREE, OR THAT ALL
SOFTWARE DEFECTS WILL BE CORRECTED. In the event that a Software Product fails to comply with the
warranty set forth above, Affirmative Technology Group will replace the product. End User must, however,
return all copies of the Software, along with proof of purchase, to Affirmative Technology Group within 90 days
from the Software purchase date.
WARRANTY LIMITATIONS. End User’s sole remedy under any Warranty provided by Affirmative
Technology Group shall be limited to the replacement or repair of the Product or, at Affirmative Technology
Group’ sole discretion, a refund of the purchase price. AFFIRMATIVE TECHNOLOGY GROUP GRANTS NO
WARRANTY, EXPRESS OR IMPLIED, OTHER THAN THE WARRANTIES STATED ABOVE.
EXPRESSLY EXCLUDED ARE THE IMPLIED WARRANTIES OF MERCHANTIBILITY AND FITNESS
FOR A PARTICULAR PURPOSE. IN NO EVENT SHALL AFFIRMATIVE TECHNOLOGY GROUP BE
LIABLE FOR SPECIAL, INCIDENTAL, OR CONSEQUENTIAL DAMAGES, INSTALLATION COSTS,
LOST REVENUE OR PROFITS, OR ANY OTHER COSTS INCURRED AS A RESULT OF THE USE OF
ANY AFFIRMATIVE TECHNOLOGY GROUP PRODUCT, WHETHER OR NOT USED IN ACCORDANCE
WITH INSTRUCTIONS.
WARRANTY PROCEDURE. Affirmative Technology Group will replace or repair any defective, undamaged
units for which a Return Material Authorization number (RMA#) has been obtained from the Technical Support
Department. (Contact 855-437-1220 or 602-437-1220 or support@affirmativetg.com
)
iii

Copyright and Trademarks
Copyright Notice
This manual, as well as the software described in it, is furnished under license. No part of this publication may be
reproduced, transmitted, stored in a retrieval system, or translated into any human or computer language, in any
form or by any means, electronic, mechanical, magnetic, optical, chemical, manual, or otherwise, without the
prior written permission of the copyright owner.
Note: Information in this document is subject to change without notice.
Trademarks Notice
YEStation
®
is a registered trademark of Affirmative Technology Group
®
Microsoft
®
is a registered trademark of Microsoft
®
Corporation.
Windows
®
is a registered trademark of Microsoft
®
Corporation.
ICA
®
is a registered trademark of Citrix
®
Systems Inc.
MetaFrame
®
is a trademark of Citrix
®
Systems Inc.
Adobe®, the Adobe logo, Acrobat®, the Acrobat logo, and Acrobat Reader are trademarks or registered
trademarks of Adobe Systems Incorporated.
Ericom
®
and PowerTerm
®
are registered trademarks of Ericom
®
Software Ltd.
Other company and brand, product and service names are trademarks or registered trademarks of their
respective holders.
iv

Table of Contents
Installing Your Terminal..................................................................................................1
Mounting.............................................................................................................................................................. 1
Cabling and Indicators ......................................................................................................................................... 2
241x ................................................................................................................................................................. 2
273x ................................................................................................................................................................. 2
Power On and Boot Up ........................................................................................................................................ 3
Shutdown ............................................................................................................................................................. 3
XPe LIMITATIONS (Read this Section).........................................................................5
Configuring Terminal Properties....................................................................................7
Control Panel........................................................................................................................................................ 8
Administrator Control Center .............................................................................................................................. 8
General............................................................................................................................................................. 9
ControlPanel .................................................................................................................................................... 9
Auto Login ................................................................................................................................................ 10
Users ..................................................................................................................................................... 10
Add ................................................................................................................................................... 11
Properties .......................................................................................................................................... 13
Reset Password ................................................................................................................................. 14
Automatic Log On ............................................................................................................................ 14
EWF Manager ........................................................................................................................................... 14
Security...................................................................................................................................................... 16
RAM Disk ................................................................................................................................................. 17
Outlook Express Maintenance................................................................................................................... 17
FTP Upgrade ............................................................................................................................................. 17
USB Port.................................................................................................................................................... 18
USB Clone/Restore ................................................................................................................................... 19
Configuring PowerTerm Sessions .................................................................................21
Configuring a New Session................................................................................................................................ 21
Display Session Configuration ...................................................................................................................... 22
Terminal Setup .......................................................................................................................................... 24
General .................................................................................................................................................. 25
Keyboard............................................................................................................................................... 27
Printer.................................................................................................................................................... 27
Colors.................................................................................................................................................... 29
Preferences ............................................................................................................................................ 29
Printer Session Configuration........................................................................................................................ 31
Terminal Setup .......................................................................................................................................... 31
General .................................................................................................................................................. 32
Printer.................................................................................................................................................... 33
Preferences ............................................................................................................................................ 34
Modifying or Cloning an Existing 5250 Display Session.................................................................................. 35
Autostarting a Session........................................................................................................................................ 35
Autostarting Powerterm Sessions in a Specific Order ................................................................................... 35
v

vi
Cloning a 2xx7 YEStation XPe Image...........................................................................41
Requirements ..................................................................................................................................................... 41
Network Cloning................................................................................................................................................ 42
eProManager.................................................................................................................................................. 42
Capture........................................................................................................................................................... 42
Restoration..................................................................................................................................................... 45
FTP Update................................................................................................................................................ 45
Reseal ........................................................................................................................................................ 47
Local Cloning..................................................................................................................................................... 49
Capture........................................................................................................................................................... 49
Restoring........................................................................................................................................................ 51
Supporting Your YEStation...........................................................................................53

Installing Your Terminal
Installing Your Terminal
22x7 and 23x7 terminals are no longer in production, and their physical characteristics are not discussed in
the manual. However, their user interfaces and firmware capabilities are very similar to those of the 2417 and
27x7 terminals—identical for most software-dependent functions—so this manual is still pertinent for these
older terminals. Please contact Affirmative Technical Support if you have any questions about the slight
operational differences.
Your terminal has no internal fan, and relies on natural airflow for cooling. When you mount it, make sure to
keep as many ventilation holes, as possible, unobstructed.
DO NOT USE any AC-DC adapter other than the one provided with the terminal or acquired from
Affirmative Technology Group or its distributors.
Mounting
Horizontal mounting will obstruct the airflow required to cool the terminal. These terminals can either be
mounted vertically on a flat surface, using the provided stands as shown in the picture on the front cover of this
manual, or on the rear of LCD monitors using optional VESA mounting plates as shown here. Such a plate can
be attached to most of the current crop of LCD monitors, as shown in the following figure.
VESA Mounting Plate on a 17” LCD Monitor
1

Installing Your Terminal
241x Mounted on an LCD Monitor
273x Mounted on an LCD Monitor
Cabling and Indicators
241x
Please make all cable connections before turning on the power. The 241x has the following controls and ports:
Power Switch (front)
USB (two front and three rear)
DVI-I (rear)
RJ-45 LAN (rear)
Printer Parallel (rear)
Serial (two rear)
Earphone Output (rear)
Microphone Input (rear)
16V DC Power (rear)
Kensington Lock (knockout in left rear)
There are three LED indicator lights:
Power. The translucent Power button serves as the Power indicator. This indicator turns blue when the
terminal is powered up.
Network Connection. This amber indicator at the upper right corner of the RJ-45 Ethernet connector is on
when there is a good physical connection to the Local Area Network.
Network Activity. This green indicator at the upper left corner of the RJ-45 Ethernet connector flashes to
indicate LAN activity.
273x
Please make all cable connections before turning on the power. The 273x has the following controls and ports:
Power Switch (front)
USB (two front and three rear)
DVI-I (rear)
2

Installing Your Terminal
VGA (r
ear)
RJ-45 LAN (rear)
Serial (two rear)
Audio Output (rear)
Earphones Output (front
Microphone Input (fear)
16V DC Power (rear)
Optional PCI-e or Two Additional Serial (rear)
Kensington Lock (knockout in left rear)
There are four LED indicator lights:
Power. The translucent Power button serves as the Power indicator. This indicator is faint amber when AC
power is connected at the rear connector, and turns green when the terminal is powered up.
Network Connection. This amber indicator at the upper right corner of the RJ-45 Ethernet connector is on
when there is a good physical connection to the Local Area Network.
Network Activity. This green indicator at the upper left corner of the RJ-45 Ethernet connector flashes to
indicate LAN activity.
Flash Memory Activity. This green indicator flashes when there is read or write activity to the flash
memory.
Power On and Boot Up
These terminals can be powered on in two ways:
Locally by pushing on the Power switch on the terminal.
Remotely using eProManager remote central management software and the Wake on LAN capability of the
terminals.
In either case, the process is:
1. Turn on the terminal after all rear panel connections have been made.
2. The translucent Power button will change from faint orange to light green.
3. You will briefly see the message Starting System. Please Wait … on a black screen.
4. After several seconds, you will see the Windows XP Embedded startup screens which look very much like
your desktop Windows XP startup screens.
Note: If you wish to access the terminal BIOS, press F2 at the beginning of the bootup cycle.
Shutdown
These terminals should be shut down gracefully in typical Windows XP fashion by going to Start>Turn Off
Computer.
3

Installing Your Terminal
4
THIS PAGE INTENTIONALLY BLANK

XPe Limitations
XPe LIMITATIONS (Read this
Section)
Your terminal is pre-configured with the Windows XPe (XP Embedded) operating system and a minimal set of
applications. If you are familiar with Windows XP on your desktop or laptop PC, you are familiar with Windows
XPe. In general, you can install the same applications or peripherals on this terminal as you can on Windows XP,
subject to memory and I/O port restrictions. However, primarily due to the limited amount of flash memory for
program storage, THERE ARE SOME LIMITATIONS.
XPe uses a utility called EWF (Enhanced Write Filter) Utility to control write access to the flash memory. If
Write Protect is enabled, configuration changes can be made and new applications or peripheral drivers can
be installed, but these modifications will not be saved after a reboot unless a special operation is executed,
before the computer is turned off, to save them in non-volatile memory. This operation is called Write Filter
Commit, and you can learn more about it at Configuring Terminal Properties|Administrator Control
Center|Control Panel|EWF Manager. This protects your terminal from viruses, malware, and user games. If
Write Protect is disabled, changes, new applications, and bad stuff will automatically be saved in flash. XPe
users are separated into two classes: computer administrator, and limited; limited users cannot execute any
operation from the EWF Utility. So remember that changes made by limited users or Internet hackers will
not survive a reboot unless Write Protect has been disabled by a user with computer administrator privileges.
XPe is designed for a minimal memory footprint. It is possible to generate an XPe configuration that has the
same full, rich feature set as XP Professional, but this would then require, for installation, the same large
amount of non-volatile storage space that is required for XP Professional. In your PC, you have many
Gigabytes of non-volatile storage on a hard disk; in your XPe terminal, you have 256-4,096 Megabytes of
non-volatile flash storage to hold the XPe operating system and your choice of applications.
When the software image is first created for an XPe terminal product, the developer chooses from a laundry
list of XP features, trying to anticipate which ones are most likely to be required by the bulk of the terminal
users. This restricted feature set is probably most likely to be noticed in the Windows Control Panel; you will
see many, but not all, of the standard XP control utilities. Furthermore, within each utility you will probably
not find all of the configuration parameters that you would find in XP. See Configuring Terminal
Properties|Control Panel for information on the typical Control Panel.
As mentioned above, you can generally install and run the same applications on your XPe terminal that can
be installed on an XP PC, if there is enough volatile and non-volatile memory. But be aware that some
applications assume the availability of standard XP modules that may not have been included in your XPe
set. For instance, some applications require the Visual Basic Run Time Library, which is not included in the
YEStation XPe module set. Therefore, these applications might install on the terminal, but they will not run.
Unlike XP, which allows the installation or removal of some XP features in the field, XPe modules must be
configured at build time; they cannot be added or removed in the field.
5

XPe Limitations
6
If you are using Remote Desktop Protocol to access a Terminal Server, there is a further distinction between
computer administrator rights and limited user rights. A limited user cannot store Terminal Server license
information in the Registry, but a computer administrator can store such information. Hence a limited user
using local rights cannot open an RDP session unless a computer administrator has already obtained a
Terminal Server license for the terminal. See Configuring Terminal Properties|Administrator Control
Center|Control Panel|EWF Manager.for more information on this subject.
This user guide will assume that the user or administrator is familiar with XP administration and/or use as
encountered on a PC. Therefore, this document will concentrate on those aspects of XPe which are significantly
different from XP Professional.

Configuring Terminal Properties
Configuring Terminal Properties
Almost all of your terminal properties are configured from the Start window, but several require the use of the
Affirmative Technology Group remote central manager, eProManager.
Start Window
Configuration changes and printer additions are initially stored in RAM. In order for these changes to be written
permanently into non-volatile flash memory, thereby surviving a reboot, Write Protect must be disabled for the
flash, or a Commit operation must be executed. See Administrator Control Center|Control Panel|EWF Manager
for an explanation of the EWF (Enhanced Write Filter) utility, which provides Write Protect control.
Printers and Faxes provides the usual set of Windows printer configuration capabilities, allowing you to add a
local or network printer as well as configure existing printers. No more will be said about it here.
7

Configuring Terminal Properties
Control Panel
Most terminal properties are configured in Control Panel.
Control Panel
As you can see, the YEStation build of XPe does not include all of the configuration utilities available in XP.
This is generally the case in XPe, since each build is custom built to minimize memory footprint based upon
expected customer usage. Also some utilities may not have all of the property parameters available in XP.
Administrator Control Center
Several properties are configured in Administrator Control Center, which is reached from Start>All
Programs>Administrator Control Center. You will first see the Login dialog box.
Administrator Control Center Dialog Box
The default password is “guest”, but you can change that here by clicking on the Change button and following
the dialog box. This same password is also used for the EWF Manager Utility
. When you enter the correct
password and click on Login, you will see the Administrator Control Center Properties-General window.
8

Configuring Terminal Properties
General
Administrator Control Center General Properties
Several of these general properties merit discussion.
Product ID. The last twelve characters are a permutation of the MAC address.
Software Version. This information is useful when seeking technical support from Affirmative Technology
Group.
RAM Size. This is the remaining RAM after the Z drive has been allocated. See Control Panel|RAM Disk
for more information..
ROM Size. This is the approximate size of the flash memory. In the above example, the installed
CompactFlash is 512MB.
Client Name. This is the “friendly” network name seen by remote central management software and any
network administration software. Enter a name that is meaningful to your network administrator.
ControlPanel
You must be in the administrator group to access any of the utilities in ControlPanel. Several important
configuration utilities are accessed from this window.
Administrator Control Center ControlPanel
9

Configuring Terminal Properties
These utilities are separate from
the standard Control Panel because their significance typically calls for the extra
security provided by the password login and restriction to administrators.
Note: If you make any changes using any of these five utilities, you will see the following information box when
you OK out of Administrator Control Center.
Commit Information Box
If you want to save the changes into flash memory for use after the next reboot, be sure to click on Yes. See EWF
Manager for more information on writing into flash.
Auto Login
Despite the restrictive title, this utility also provides extended control of user accounts.
Users
Default User Accounts
New users can be added here or in Control Panel>User Accounts. But several user properties can only be
controlled from this utility. These properties are better illustrated if several users have already been added, as
shown in the following dialog box.
10

Configuring Terminal Properties
Additional User Accounts
Users must enter…. Check this box if you want user password control. But this control only exists for users
that have been assigned passwords, and you can only assign passwords here in User Accounts. You can do
this in one of two ways:
o Add a new account here (click on Add and follow the Wizard) and define a password in the Wizard.
o Add password control to an existing user by highlighting that user in the user list, clicking on Reset
Password, and entering the password in the resulting dialog box. Note: You cannot change the password
for the current user, despite the instructions to press Ctrl+Alt+Del.
Users for this computer. This box contains a list of all the defined users. Administrator and Guest are
default users; the rest have been added.
Add.
Click on this button to launch the Add New User Wizard. You will be led through three dialog boxes.
Add New User Dialog Box #1
Enter a User Name. This name will automatically be entered into Full Name, but the Full Name can be changed
if you wish. The Full Name is the name you will see when you boot the terminal and arrive at the iconed Logon
11

Configuring Terminal Properties
screen. If y
ou want to enter some information about this user for future administrative clarification, enter it in the
Description field.
Add New User Dialog Box #2
Enter and confirm a password if desired. If you want this user to auto logon (see Automatic Log On), you must
enter a password.
Add New User Dialog Box #3
Here is the interesting stuff. If you add a user through Control Panel>User Accounts, you have only two
selections for the type of user, computer administrator (shown here as Administrators) and limited user (shown
here as Restricted user or Users). But here you have additional options of Guests and Standard user (or Power
Users). You also see several other options if you select the Other radio button and access the drop-down list as
shown in the above dialog box, but they are holdovers from another world and have little or no use here.
12

Configuring Terminal Properties
Properties
Click on this button to change the properties of an existing account. You can access two dialog boxes.
User General Properties Dialog Box
You can see that this dialog is a duplicate of the first dialog box encountered when adding a user.
User Group Membership Properties Dialog Box
This dialog is a duplicate of the final dialog box encountered when adding a user.
13

Configuring Terminal Properties
Reset Password
Click on this button to change the password for the highlighted user.
Reset User Password Dialog Box
This dialog is a duplicate of the second dialog box encountered when adding a user.
Automatic Log On
You can designate one user to be automatically logged on when you boot the terminal. To do this:
1. Highlight the desired user in the Users list.
2. De-select the Users must enter… box.
3. Click on OK or Apply. You will see the following dialog box.
Auto Logon Dialog Box
4. Enter the information for the user. You can change the user name here if you wish. Note: You can enter a
user name that is not in the User list, but the terminal will do strange, undesirable things on boot up.
5. Click on OK.
EWF Manager
Enhanced Write Filter (EWF) may be the most visible difference between XPe and XP, at least from an
administrator’s point of view. Flash memory (the c drive) is treated as a protected volume, and the protection
must be disabled or a specific action must be taken in order to commit software, file, and configuration changes
to flash. EWF is the utility that controls flash protection.
There are several reasons why you may want to write into flash memory.
You have transferred files into your 2xx7 and want to save them for future use after a Power Off or reboot.
You have made configuration changes, such as those made via Control Panel, and want to retain them after a
reboot.
14
/


