Page is loading ...

THANK YOU
We appreciate the trust and confidence you have placed in Hampton Bay through the purchase of this gazebo. We strive to
continually create quality products designed to enhance your home. Visit us online to see our full line of products available for your
home improvement needs. Thank you for choosing Hampton Bay!
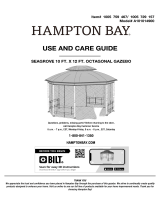
Item #1000 000 000
Model #SY21020501A-C
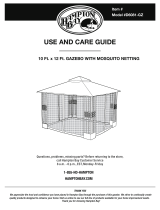
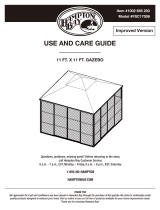
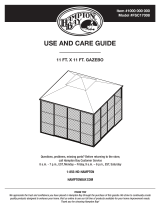
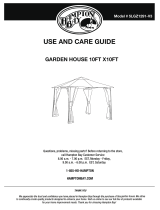
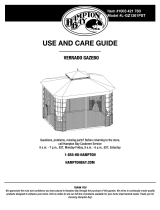
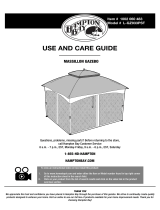
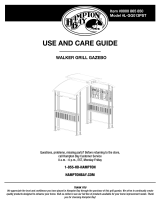
USE AND CARE GUIDE
10.5’ X 10.5’ SOFT TOP GAZEBO
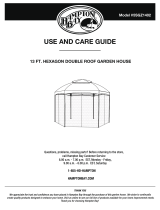
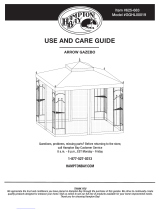
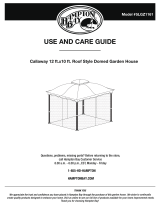
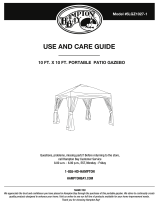
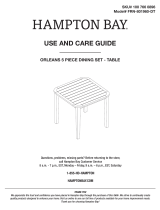
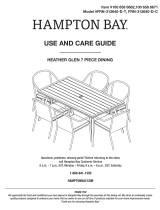
Questions, problems, missing parts? Before returning to the store,
call Hampton Bay Customer Service
8 a.m. – 7 p.m., EST, Monday – Friday, 9 a.m. – 6 p.m., EST, Saturday
1-800-841-1350
HAMPTONBAY.COM

2
Table of Contents
Table of Contents .......................................................... 2
Safety Information ......................................................... 2
Warranty ......................................................................... 3
What is Covered ......................................................... 3
What is Not Covered .................................................. 3
Pre-assembly ................................................................. 4
Planning Assembly .................................................... 4
Hardware Included ..................................................... 4
Package Contents ...................................................... 5
Assembly ....................................................................... 6
Care and Cleaning ...................................................... 10
Safety Information
SAVE THESE INSTRUCTIONS
READ ALL INSTRUCTIONS BEFORE
USE
To reduce the risk of injury, read the following safety
instructions before assembling and using the gazebo:
1. This product is intended for outdoor use only.
2. The product should be assembled on a flat stable
surface.
3. Do not assemble the gazebo on unstable surfaces.
4. Ensure the location and clearance of your gazebo is
acceptable.
5. The gazebo must be anchored with stake into the
ground for added safety. It is recommended that it
should not be permanently attached to a concrete
floor or platform.
6. Arrange the necessary manpower when assembling
or moving the product.
7. Some parts may contain sharp edges. Wear
protective gloves and glasses if necessary.
8. Keep children and pets away while setting up the
gazebo.
9. Check all nuts and bolts periodically for tightness.
When required, tighten them again.
10. Repairing and replacing parts should be done by a
qualified technician.
11. The gazebo is intended for decorative and shade
purposes only, and is not designed to withstand
harsh weather, including high winds, rain and snow.
12. WARNING: KEEP ALL FLAME AND HEAT
SOURCES AWAY FROM THIS GAZEBO FABRIC.
This gazebo is made with fabric that meets CPAI-84
specifications for flame resistance. It is not fire proof.
The fabric will burn if left in continuous contact with
any flame source. The application of any foreign
substance to the gazebo fabric may render the
flame-resistant properties ineffective.
13. If product is not being used for long periods of time
(e.g. winter), it should be stored in a clean, dry
environment.
14. Do not put a LP or Wood Burning firepit tor fireplace
inside the product.
15. Do not climb or place heavy objects onto the gazebo
roof.
16. Retain the original packaging to store and protect the
gazebo during the winter months.
17. Do not use or enter the gazebo if the following
conditions exists:
a. Visible movement of supports, roofing panels or
a sagging roof.
b. Unusual noise from the gazebo.
c. Deformed roof panels.
d. Damaged or missing bolts/ fasteners.
(1). Please check your HOA, Local, and State
Governments prior to purchasing and assembling
this gazebo. These local organizations may require
permits and specific requirements for installation.
(2). Maintain your instruction manual for future
reference.
(3) Warranty: Please retain your receipt for proof of
purchase.

3 HAMPTONBAY.COM
Please contact 1-855-HD-HAMPTON for further assistance.
Warranty
THIS IS A RESIDENTIAL WARRANTY AND DOES NOT APPLY FOR
COMMERCIAL USE.
2 YEAR LIMITED WARRANTY
WHAT IS COVERED
Residential use of this furniture is warranted for a two (2) year limited warranty period for the frame construction. The
warranty is valid from the date of purchase and applies only to the original purchaser. If your Hampton Bay outdoor
furniture fails structurally during normal use (other than damage as a result of dropping or breaking a cast part) within two
(2) year of purchase, the manufacturer will repair or replace the frame at its discretion with the same or similar product if
the original product is discontinued, at no charge. Cushions are warranted for a one (1) year period against seams
separating or tearing. Fabric is covered under a two (2) year limited warranty. The finish is warranted against peeling,
cracking or blistering for a period of one (1) year provided the product has not been scratched or abraded. Scratches and
chips resulting from normal wear and tear are not covered. Straps and/or wicker weave are warranted for a period of one
(1) year against separation or tearing. Fading of the finish, straps and/or wicker weave resulting from exposure to
elements is not covered. Stains as a result of chemical spills and certain food items are not covered.
WHAT IS NOT COVERED
We do not compensate the individual or outside company for assembling or disassembling the product. The following are
expressly excluded from warranty coverage: failure caused by unreasonable or abusive use; furniture that was sold as
clearance items, display models, or items purchased in “as is” condition; freight damage; furniture damaged by acts of
nature, vandalism, fire, abuse, lack of proper care and maintenance, or improper assembly; normal fading of straps and
fabric; discoloration of frame or fabric from exposure to elements, oils, spills, fluids or chemicals; table top breakage;
hardware corrosion or rusting; buckling or splitting of tubing resulting from exposure to water and freezing temperatures;
glass table tops; purchased or replacement parts; and plastics. Also excluded from warranty coverage is lost time of use
and/or money, inconvenience, travel, packaging, or any other consequential or incidental damages. In no event shall the
manufacturer’s responsibility exceed the value of the replacement product. Warranty is to the original purchaser when
items are purchased from one of our authorized retailers, and is not transferable. All warranty claims must be submitted
with a dated register receipt within the warranty period. Should replacement of the warranted item be unavailable, the
manufacturer reserves the right to substitute items of its choice similar in style, color and quality. For quality control
purposes and verification, we reserve the right to request photographs of the damaged item(s). The terms of this warranty
are subject to change without notice. Shipping and handling charges are all times the responsibility to the claimant.
Contact the Customer Service Team at 1-800-841-1350 or visit www. Hamptonbay.com.
4
Pre-assembly
PLANNING ASSEMBLY
Before beginning assembly of this product, make sure all parts are present. Compare parts with the Hardware Included
and Package Contents list. If any part is missing or damage, do not attempt to assemble the product. Contact customer
service for replacement parts. Remove all protective materials and place the parts on a non-abrasive surface to avoid
scratching.
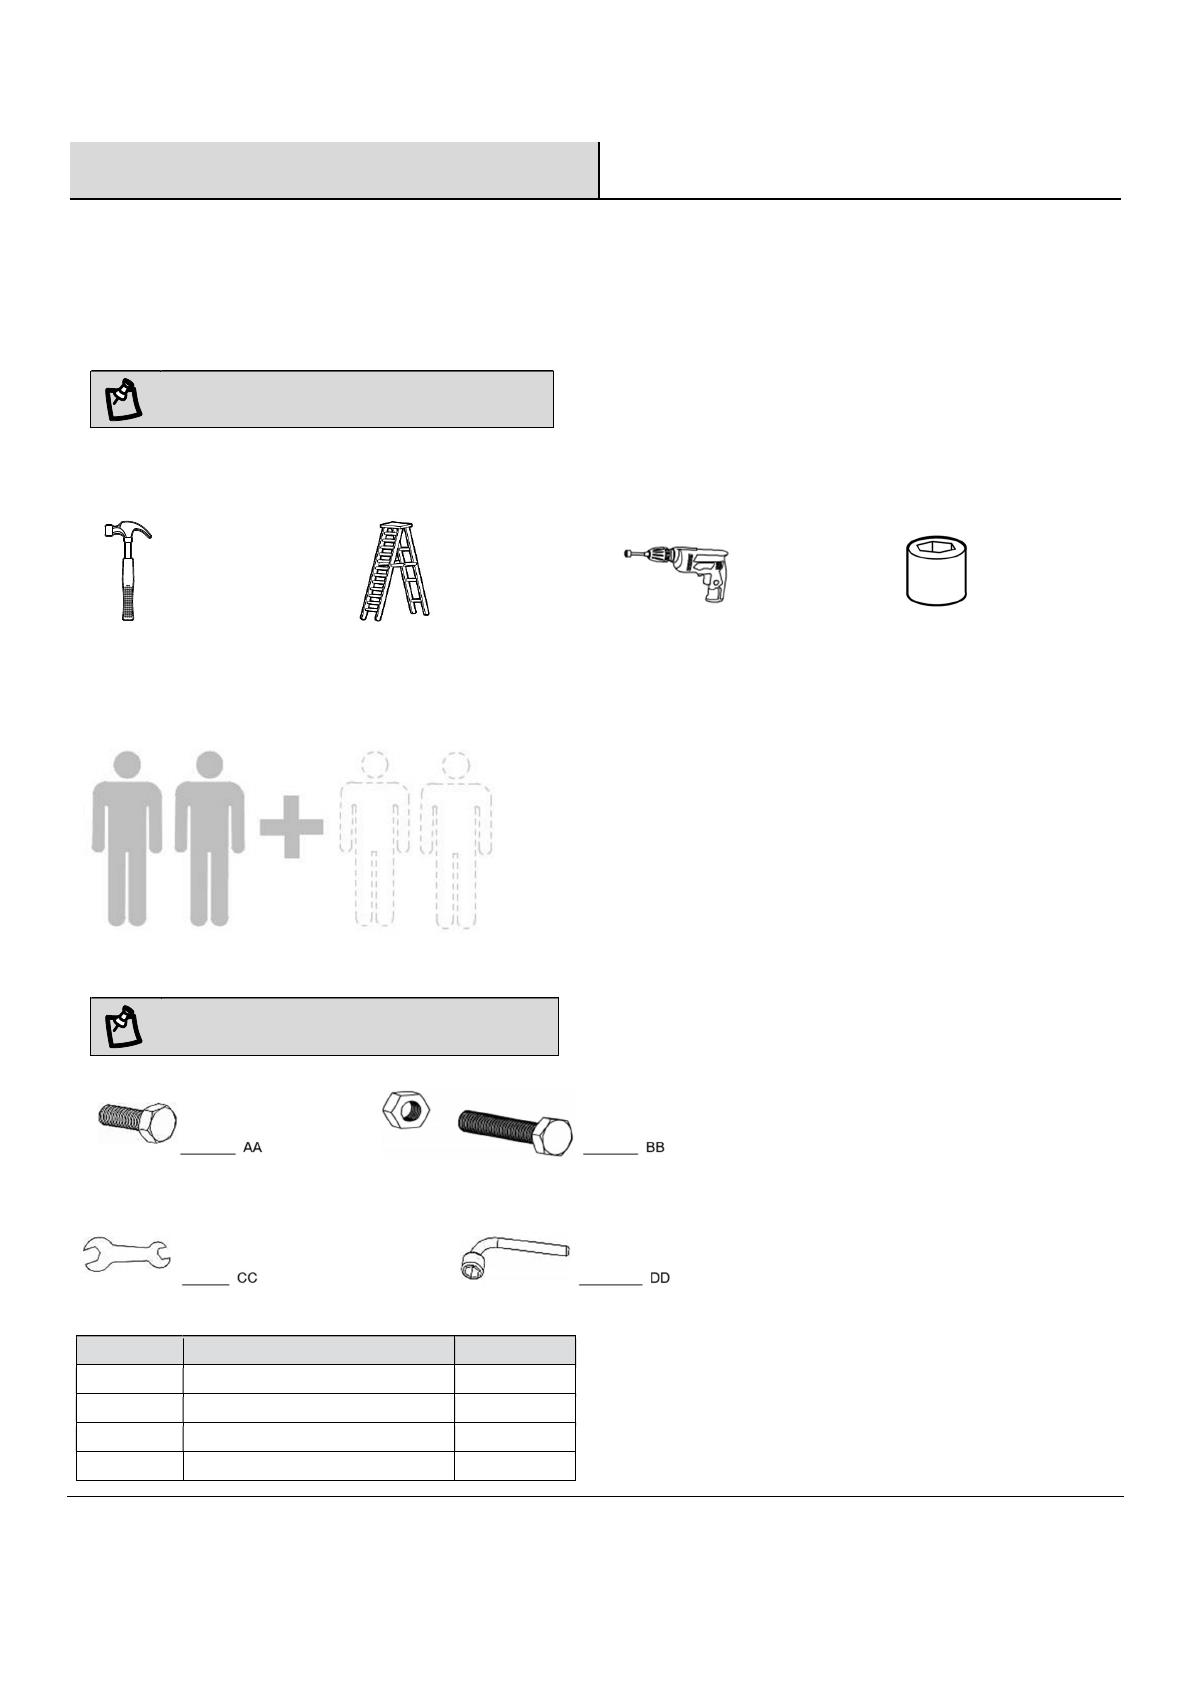
NOTE: Tools and protective articles below are
not provide.
OPTIONAL TOOLS TO AID ASSEMBLY (NOT INCLUDED)
Hammer
Ladder
Cordless
drill
10mm
Socket
wrench
IMPORTANT
This product requires at least two people for assembly. Approximate assembly time: 2 hours.
HARDWARE INCLUDED
NOTE: Hardware not shown to actual size.
Part
Description
Quantity
AA M6*15 Hex bolt 32+2
BB M6*30 Hex combination bolt
8+1
CC
Open end hex wrench
1
DD Socket wrench 1
5 HAMPTONBAY.COM
Please contact 1-855-HD-HAMPTON for further assistance.
Pre-assembly (continued)
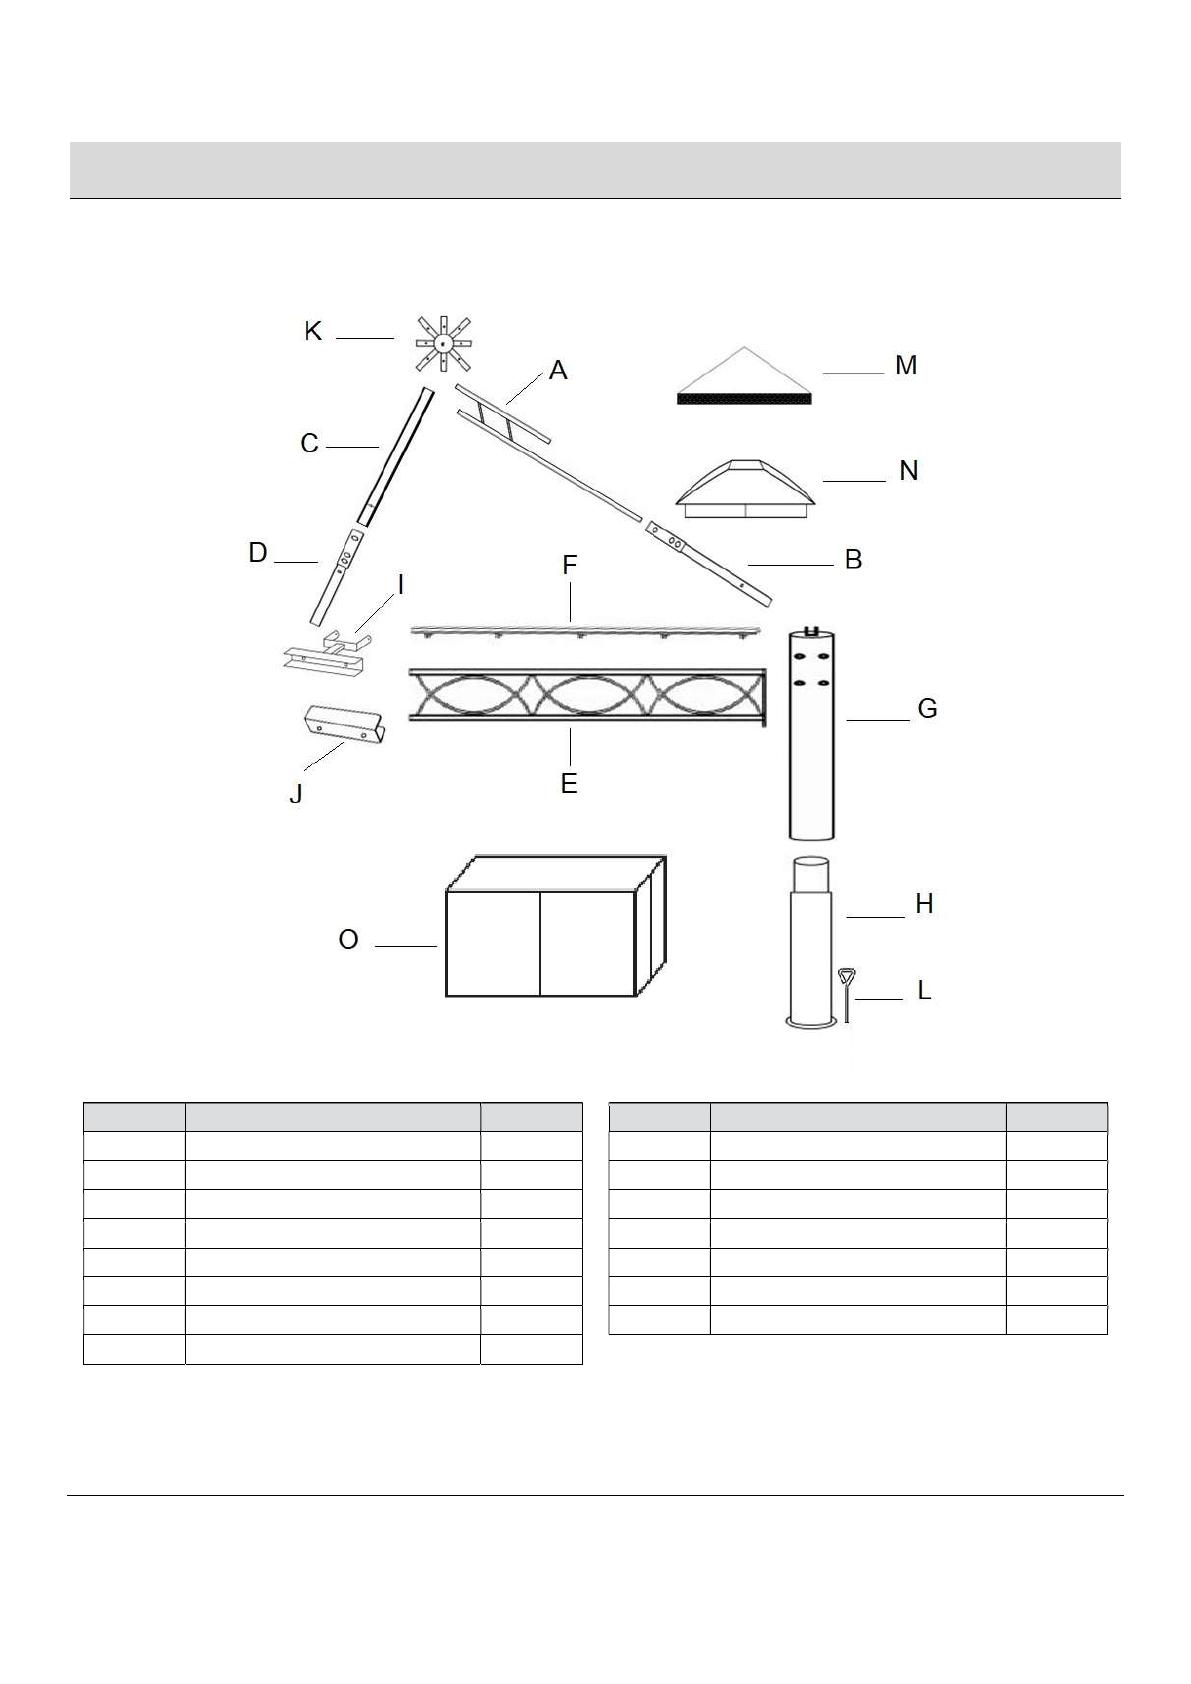
PACKAGE CONTENTS
Part
Description
Quantity
Part
Description
Quantity
A
Long top
bracing
4
I
B
racket
4
B Long top bracing extension 4
J U shaped connector 4
C
Short top bracing
4
K
Top c
onnector
1
D
Short top bracing
extension
4
L
S
take
8
E Crossbar 8
M Small canopy 1
F
Double
-
side
d
slideway
8
N
Big c
anopy
1
G
Upper
Post
4
O
C
urtain
4
H Lower Post 4
6
Assembly
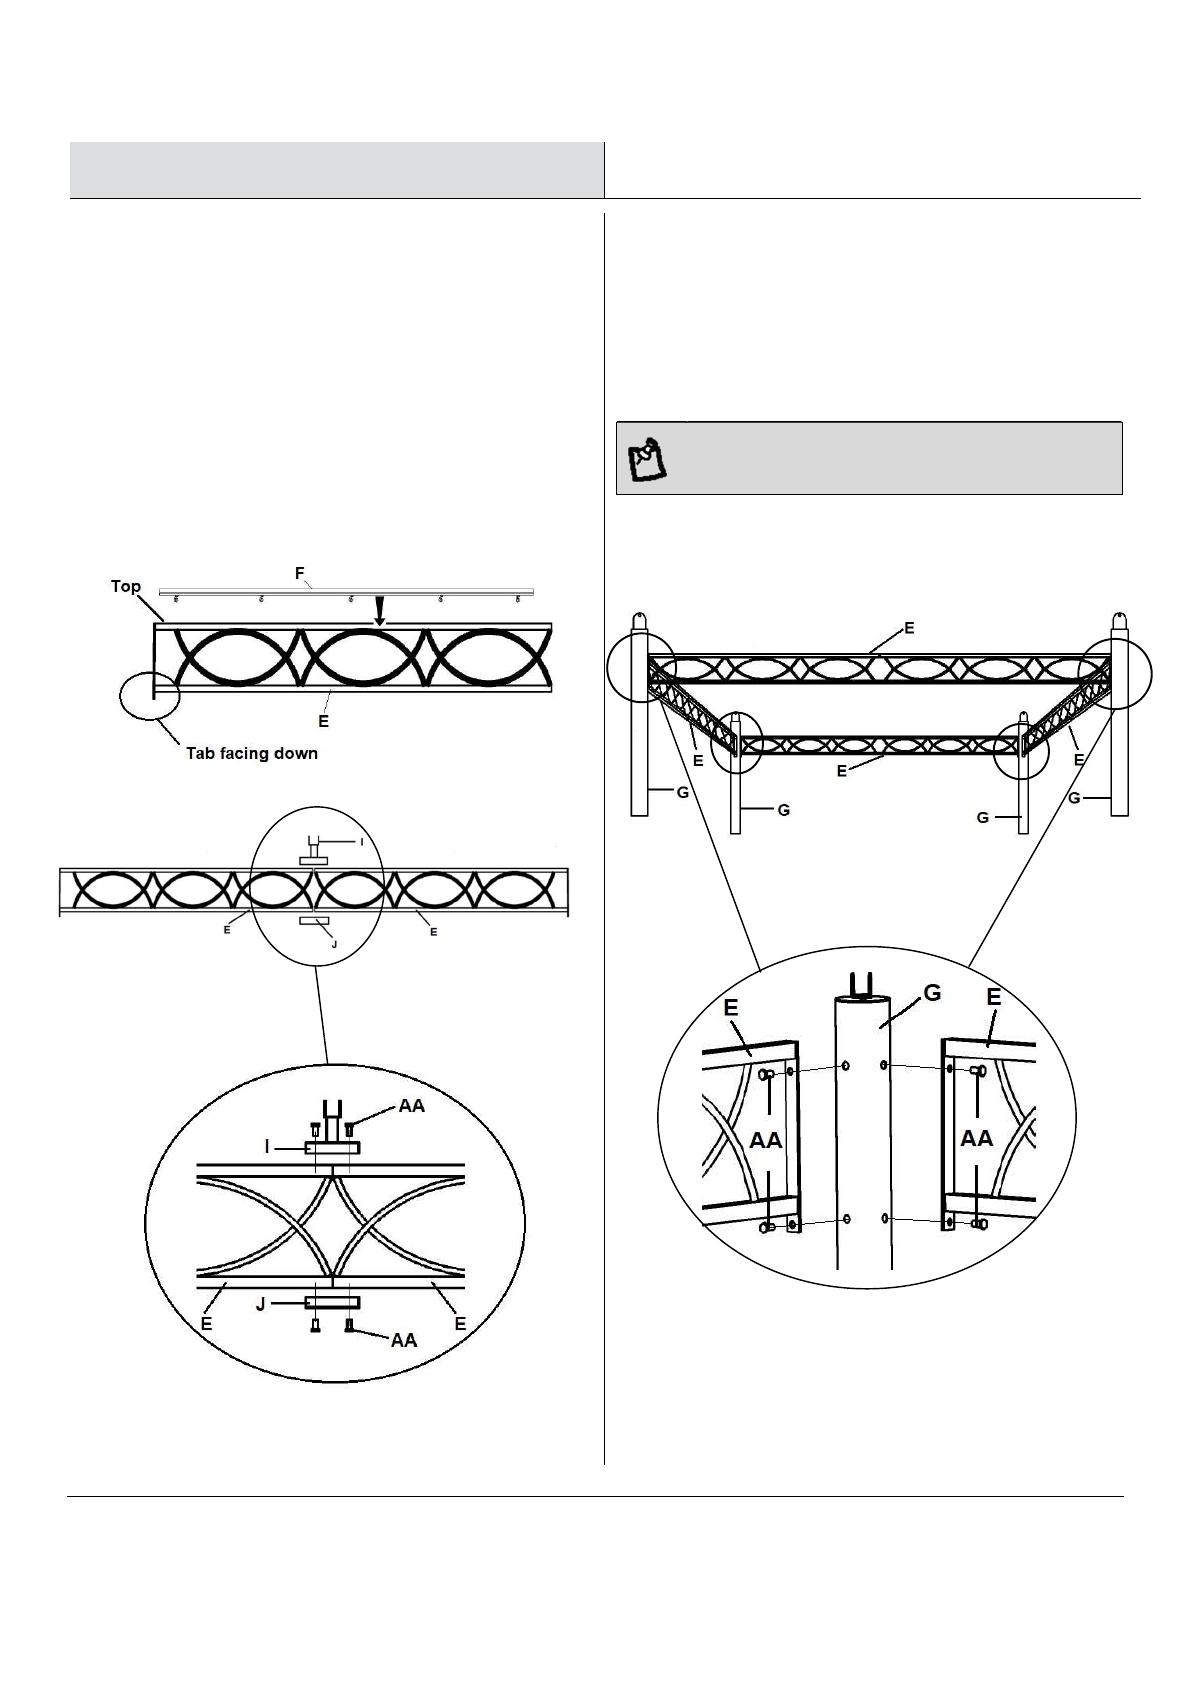
1
Assembling the Crossbar 2
Attaching the Upper Post
□ Clip the double-sided slideway (F) to top of the
crossbar (E). Repeat for the rest 7 crossbars.
□ Put two crossbars together using bracket (I), U
shaped connector (J), and M6*15 hex bolt (AA).
Tighten the hex bolt (AA) with the wrench (DD).
Repeat for the rest 6 crossbars.
□ Attach upper post (G) to the assembled crossbars
(E) using M6*15 hex bolt (AA).
□ Repeat the same process for the rest 3 posts to
make sure the square frame.
NOTE: Do not fully tighten the bolts, only hand
tighten until assembly is complete. Then fully tighten
with the provided wrench.
7 HAMPTONBAY.COM
Please contact 1-855-HD-HAMPTON for further assistance.
Assembly (continued)
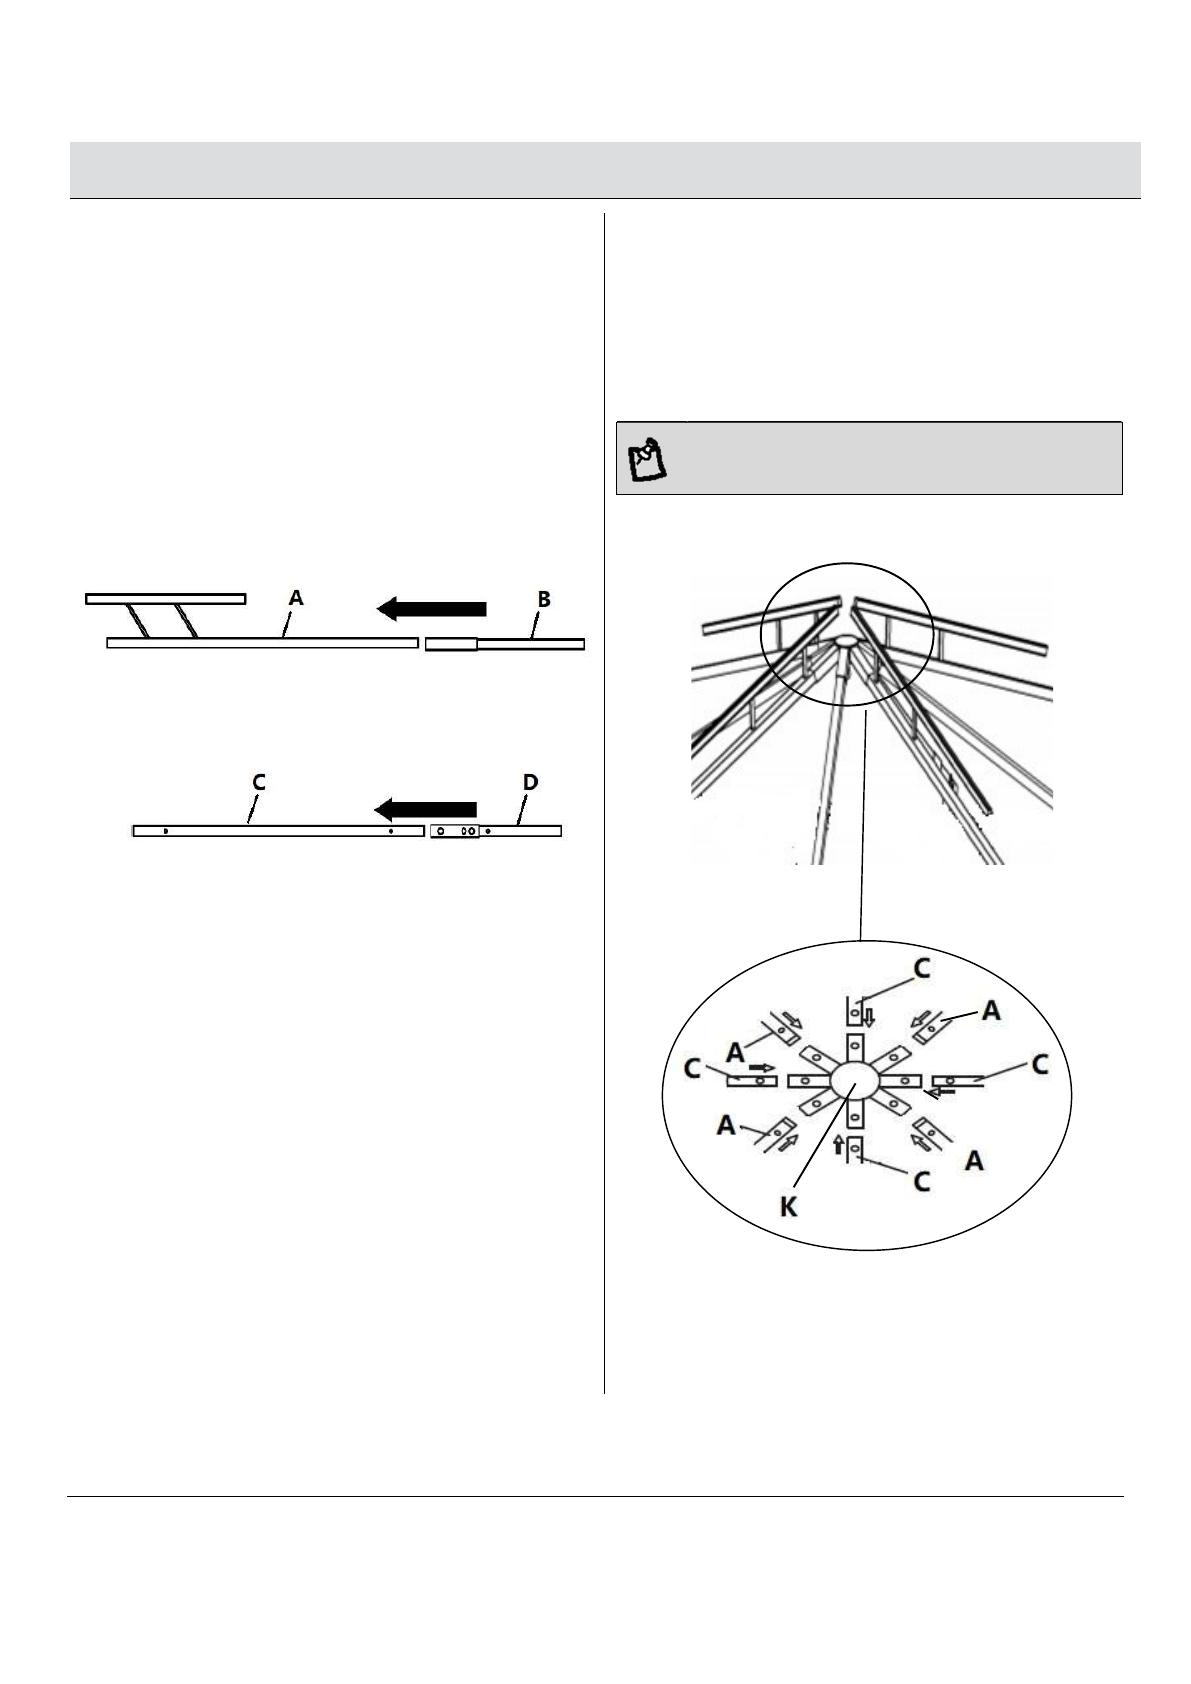
3
Assembling the Top Bracing 4
Attaching the Top Connector
□ Snap the long top bracing extension (B) to the long
top bracing (A) until you hear a click.
□ Snap the short top bracing extension (D) to the
short top bracing (C) until you hear a click.
□ Snap the long top bracing (A) to the top connector
(K) until you hear a click.
□ Snap the short top bracing (C) to the top connector
(K) until you hear a click.
NOTE: Do not fully tighten the bolts, only hand
tighten until assembly is complete. Then fully tighten
with the provided wrench.

8
Assembly (continued)
5
Attaching the Top Bracing 6
Attaching the Canopy
□ Attach the long top bracing extension (B) onto the
bracket at the top of upper post (G) using M6*30
hex bolt and nut (BB).
□ Attach the short top bracing extension (D) onto the
bracket (I) using M6*30 hex bolt and nut (BB).
□ Please ensure all the bolts are assembled
correctly. Tighten the hex bolts (AA) and (BB) with
the socket wrench (DD). Tighten the nut (BB) with
open end hex wrench (CC).
□ Attach the small canopy (M) to the long top bracing
(A).
□ Place the big canopy (N) on the top frame. Tighten
the canopy by pulling over the top bracing
extensions.
B

9 HAMPTONBAY.COM
Please contact 1-855-HD-HAMPTON for further assistance.
Assembly (continued)
7
Attaching the Lower Post 8
Hanging the Curtain
□ Insert the lower post (H) into the upper post (G) by
aligning the pin on the upper post (G) with the L-
shaped gap on the lower post (H). Turn the lower
post (H) anticlockwise to lock the posts.
□ Insert stakes (L) through the holes in the bottom
plate of lower post (H) and into the ground to
secure the gazebo.
NOTE: Need two to four people to attach the lower
post to the upper post together.
□ Hang the curtain (O) to the outside of slideway (F)
using the hooks preassembled on the slideway.
□ Take off the block at the end of slideway to easily
remove or re-attach the curtain.
NOTE: The inside of slideway is used to hang the
mosquito netting. To find the mosquito netting for
your gazebo, search using your product’s model
number on www.homedepot.com.
E
O
Block

10
Care and Cleaning
□ Check all screws and nut periodically for tightness, fastening then again as required.
□ Disassemble the gazebo in the reverse order of the assembly steps. Always disassemble the gazebo completely. A
partially disassembled gazebo is not stable enough to resist wind and bad weather, and therefore can be damaged
and/or cause damage.
□ Clean the gazebo with mild soap and water. Rinse thoroughly and wait until the product is dry before reassembling it.
□ Snow must be cleared off regularly during snowy days. Remove the snow at the roof top when it is thicker than 2
inches. In order to avoid damage, use a plastic snow rake to remove excessive snow and ice buildup from roof and
keep away from falling debris.
□ Do not use bleach, acid or other abrasive cleaners on the canopies or frame parts.
□ Steel components for this gazebo are treated with rust inhibiting paint to prevent from rusting. However, due to the
nature of steel, surface oxidation (rusting) will occur if these protective coatings are scratched. This is not a defect and
thus not covered by the warranty. To minimize this condition, it is recommended to use care when assembling and
handing the product to prevent scratching the paint. Should any scratching or damage occur, it is recommended to
cover the scratch immediately with rust inhibiting paint not included. Surface rust can also be easily removed with a
very light application of regular cooking oil or WD-40. If surface oxidation (rusting) occurs and if no measure is taken
to prevent his, the oxidation may start dripping onto deck or patio and cause damaging stains, which may be difficult
to remove. This can be prevented if the above-mentioned measures are taken to keep the product from oxidizing.
□ Remove canopy during harsh weather including high winds, rain, and snow.
□ Before storing, remove leaves and dirt, drain all water that may have accumulated in or around the frame. If not
drained properly, water can cause freeze damage including bursting or cracking of metal tubing.
□ Keep the original packaging to store the gazebo.
□ Keep instruction manual for future reference.

Questions, problems, missing parts? Before returning to the store,
call Hampton Bay Customer Service
8 a.m. – 7 p.m., EST, Monday – Friday, 9 a.m. – 6 p.m., EST, Saturday
1-800-841-1350
HAMPTONBAY.COM
Retain this manual for future use.
/