Page is loading ...

THANK YOU
Thank you for choosing Hampton Bay!
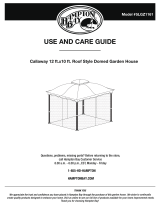
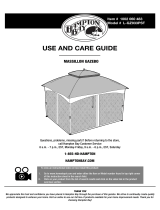
USE AND CARE GUIDE
13 FT. HEXAGON DOUBLE ROOF GARDEN HOUSE
1-855-HD-HAMPTON
HAMPTONBAY.COM
Model #5SGZ1402
to continually
create quality products designed to enhance your home. Visit us online to see our full line of products available for your home improvement needs.
garden house.
Questions, problems, missing parts? Before returning to the store,
call Hampton Bay Customer Service
8.00 a.m. - 7.00 p.m. E ST, Monday - Friday,
9.00 a.m. - 6.00 p.m. E ST, Saturday

2
Table of Contents
Safety Information
Warranty
Table of Contents........................................................2
Safety Information.......................................................2
Warranty ...................................................................... 2
One Year Frame and Fabric Limited Warranty............................ 2
Pre-Assembly ............................................................3
Planning Assembly... ................................................................3
Hardware Included.................................................................. 3
Package Contents ....................................................................4
Assembly ....................................................................5
................................................................ 2
What Is Covered
What Is Not Covered
................................................................ 2 ..
.... ..
ONE YEAR FRAME AND FABRIC LIMITED WARRANTY
WHAT IS COVERED
WHAT IS NOT COVERED
It remains the customer’s responsibility for freight and packaging charges to and from our service center. This warranty does not cover
We reserve the right to make substitutions with similar merchandise, if the model in question is no longer in production.
You may contact our customer service department with any questions by phone at 1-855-HD-HAMPTON or visit www.hamptonbay.com.
Care Instructions
Before using, wipe with a clean, dry cloth. Do not use bleach or solvents. Treat the frame with liquid wax for maximum protection against
UV light and salty, damp air. Wash the canopy with a mild solution of soap and water, rinse thoroughly, air dry completely.
Please properly tighten all hardware and perform periodic inspections during usage for cracked welds or loose nuts or bolts.
Care Instructions... ................................................................ 2..
WARNING: Keep all flame and heat sources away from this tent fabric. This tent is made with fabric that meets CPAI-84 specification for
flame resistance. It is not fire proof. The fabric will burn if left in continuous contact with any flame source. The application of any foreign
substance to the tent fabric may render the flame-resistance properties ineffective.
WARNING: This garden house Gazebo is NOT a permanent structure and is designed for sunshade and privacy and must be used under
normal weather conditions. We recommend removal of the fabric canopy in windy conditions as gazebos catch wind similar to umbrellas. You
must however completely disassemble the unit prior to any severe weather conditions such as thunderstorm, hurricane, and/or heavy wind and
rain. Failure to remove the fabric canopy or disassemble the unit will cause the gazebo to have structure damage or even structural collapse.
CAUTION: Always install on level ground utilizing tie down cords and ground stakes. Do not permanently anchor the garden house to
a wood deck or concrete surface.
CAUTION: Garden house fabrics are water resistant but not water proof and may leak during precipitation. Fabrics will fade from direct
exposure to sunlight.
CAUTION:
Keep all children and pets away from assembly area.
Begin assembly not less than 6 feet from any obstruction such as fence, garage, house, overhanging branches, clothes line or electrical wires.
Some parts may contain sharp edges, wear protective gloves if necessary. At least two or more people are recommended for safe assembly.
We warrant the frame and fabric to be free of manufacturing defects to the original purchaser for one year.

3 HAMPTONBAY.COM
Please contact 1-
855-HD-HAMPTON for further assistance.
Pre-Assembly
PLANNING ASSEMBLY
HARDWARE INCLUDED
NOTE: Hardware not shown to actual size.
Part Description Quantity
AA Bolt (M6x45)
Washer
6
BB
Self-tapping screw
30
CC
12
DD
12
1
CC
Wrench
FF
Wrench
EE
1
It will take two people about 30 minutes to complete the assembly process.
AA
BB
FF
Ground stake
TOOLS REQUIRED (not included)
Please have a free standing ladder ready before assembly.
GG
HH
Philips screwdriver
6
DD
EE
Nut
GG
HH
1

4
Pre-Assembly (continued)
PACKAGE CONTENTS
Part Description
Quantity
A
Cross beam
1
Roof hub
6
C
6
D
Middle roof tue
6
E
Netting rail
6
F
Upper roof tube
6
Lower roof tube
6
Vent cover
1
J
B
A
B
C
D
E
F
G
I
Part Description
Quantity
H
Netting panel
1
Main canopy
K
6
Tie-down cord
6
I
Corner post
H
G
J
K

5 HAMPTONBAY.COM
Please contact 1-855-HD-HAMPTON for further assistance.
Assembly
1
Attaching netting rails
□
Attach one netting rail (F) to each cross beam (E)
with five screws (DD) using Phiplis screw driver (HH).
E
F
DD
DD
2
Erecting the main frame
HH
DD
E
30
DD
DD
DD
DD
With another person’s assistance, standing at the top of the ladder insert the neighboring ends of every two cross beams (E) onto the top
of each corner post (G) and secure them with bolt (AA), washers (BB) and nut (CC) using wrenches (FF) and (GG).
Repeat this until the whole main frame is up.
AA
BB
FF
GG
CC
6
12
6
AA
BB
BB
CC
E
G
G
G
G
G
G
G
E
E
E
E
E
E

Assembly (continued)
6
3
Assembling the roof frame
□ Snap one roof tube (B) into each receiver of roof hub (A).
4
Attaching the roof frame
A
B
B
B
B
D
B
B
C
C
C
D
B
B
□ Snap one roof tube (C) into each roof tube (B).
□ Snap one roof tube (D) into each roof tube (C).
□
Place the roof frame on top of the main frame.
□ Plug one roof tube (D) into each corner post (G).
D
C
G
D
B
E
G

5
Attaching the main canopy and the vent cover
□ Cover the roof tubes (B) with vent cover (H).
□
Assembly (continued)
7
6
Hanging the netting panels
□
Pull each corner of the vent cover (H),
to cover the end of each roof tube (B) with
the corner pocket.
B
H
□ Place the main canopy (I) on the roof frame.
□
Cover cross beam with valance of the main canopy,
use the hook to secure each corner to corner post (G.)
H
I
G
G
J
J
J
J
G
Tie the middle of each netting panel onto each corner post (G)
with hook and loop strap.
□
Tie the top of each netting panel onto two adjacent cross beams (E)
with hook and loop straps.
□
Close all netting panels by sliding up zippers to keep insects out . Or tie each netting panel (J) around
each corner post (G) for a clean look.
HAMPTONBAY.COM
Please contact 1-855-HD-HAMPTON for further assistance.

1-855-HD-HAMPTON
HAMPTONBAY.COM
Retain this manual for future use.
Assembly (continued)
7
Anchoring the garden house
□
Adjust the location of each post (G) until all the posts are standing upright on level ground. Use tie-down cord (K) to tie the corner of main
canopy to ground with a ground stake into soft ground at 45 degrees.
Questions, problems, missing parts? Before returning to the store,
call Hampton Bay Customer Service
8.00 a.m. - 7.00 p.m. E ST, Monday - Friday,
9.00 a.m. - 6.00 p.m. E ST, Saturday
K
EE
EE
□
Hammer two ground stakes (EE) through the holes on each post base (A) into the soft ground.
/