Keyspan USA-49WG
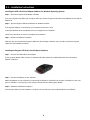
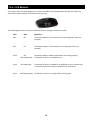
The Keyspan USA-49WG is a 4-port USB serial adapter that allows you to connect four serial devices to your computer through a single USB port. It is compatible with Windows 98 or later and supports data rates up to 230 Kbps.
The Keyspan USA-49WG is a versatile device that can be used with a variety of serial devices, including Palm organizers, Windows CE devices, Wacom tablets, and many others. It is also compatible with multiple adapters, so you can connect up to four Keyspan USA-49WGs to your computer to add even more serial ports.
Keyspan USA-49WG
The Keyspan USA-49WG is a 4-port USB serial adapter that allows you to connect four serial devices to your computer through a single USB port. It is compatible with Windows 98 or later and supports data rates up to 230 Kbps.
The Keyspan USA-49WG is a versatile device that can be used with a variety of serial devices, including Palm organizers, Windows CE devices, Wacom tablets, and many others. It is also compatible with multiple adapters, so you can connect up to four Keyspan USA-49WGs to your computer to add even more serial ports.


-
 1
1
-
 2
2
-
 3
3
-
 4
4
-
 5
5
-
 6
6
-
 7
7
-
 8
8
-
 9
9
-
 10
10
-
 11
11
-
 12
12
-
 13
13
-
 14
14
-
 15
15
-
 16
16
-
 17
17
-
 18
18
-
 19
19
-
 20
20
-
 21
21
-
 22
22
-
 23
23


Keyspan USA-49WG
The Keyspan USA-49WG is a 4-port USB serial adapter that allows you to connect four serial devices to your computer through a single USB port. It is compatible with Windows 98 or later and supports data rates up to 230 Kbps.
The Keyspan USA-49WG is a versatile device that can be used with a variety of serial devices, including Palm organizers, Windows CE devices, Wacom tablets, and many others. It is also compatible with multiple adapters, so you can connect up to four Keyspan USA-49WGs to your computer to add even more serial ports.
Ask a question and I''ll find the answer in the document
Finding information in a document is now easier with AI
Related papers
-
 Keyspan 1.9 User manual
-
 Keyspan USB Serial Adapter version 2.0 User manual
-
 Keyspan USA-19Qi User manual
-
 Keyspan URM-17A User manual
-
TopSeed Technology Corp. URM-15T Keyspan RF Remote User manual
-
Videx Alexadria DuraWand Portable Scanner User manual
-
 Keyspan USA-19H User manual
-
 Keyspan KY-USB/SERV Datasheet
-
 Keyspan USA-19HS User manual
-
 Keyspan PR-US2 Quick Start


Other documents
-
Tripp Lite Windows v3.4 USA-19HS USB Serial Adapter Owner's manual
-
Tripp Lite Keyspan 4-Port RS232 Serial to USB Adapter Hub Owner's manual
-
-
-
Tripp Lite URM-17A User manual
-
Escient Adapter Kit CH-1 User manual
-
Lenovo ThinkStation C30 Configuration Manuallines
-
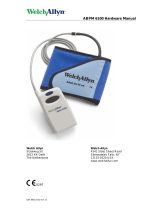 Welch Allyn ABPM 6100 User manual
-
Tripp Lite Mac OS X USA-19HS USB Serial Adapter Owner's manual
-
 Welch Allyn CARDIOPERFECT Quick start guide

