Levana BABYVIEW20 User manual

Category
Baby video monitors
Type
User manual

Levana BABYVIEW20 is a wireless video baby monitor that helps you keep an eye on your little one day and night with its crystal-clear video and audio transmission. Featuring a night light and lullaby function, it helps soothe your baby to sleep, while the long range and interference-free digital signal ensures you stay connected to your baby from anywhere in your home.

Levana BABYVIEW20 is a wireless video baby monitor that helps you keep an eye on your little one day and night with its crystal-clear video and audio transmission. Featuring a night light and lullaby function, it helps soothe your baby to sleep, while the long range and interference-free digital signal ensures you stay connected to your baby from anywhere in your home.

BABYVIEW_Manual.indd 1 31/08/2009 1:18:11 PM
PRODUCT WARRANTY INFORMATION
Please visit our web site at www.MyLevana.com
for information about your products warranty.
We take quality very seriously. This is why all of our products come with a one year warranty from the original
purchase date against defects in workmanship and materials. If you have warranty or support issues please
contact us using any of the following methods:
Phone: 1.866.946.7828 LEVANA Canada LEVANA USA
Fax: 1.888.771.1701 4080 Montrose Road 60 Industrial Parkway
Web site: www.MyLevana.com Niagara Falls, ON Cheektowaga NY 14227
Canada, L2H 1J9 USA 14305
Warranty Terms
1. LEVANA products are guaranteed for a period of one year from the date of purchase against defects in
workmanship and materials. This warranty is limited to the repair, replacement or refund of the purchase
price at LEVANAs option.
2. This warranty becomes void if the product shows evidence of having been misused, mishandled or
tampered with contrary to the applicable instruction manual.
3. Routine cleaning, normal cosmetic and mechanical wear and tear are not covered under the terms of this
warranty.
4. The warranty expressly provided for herein is the sole warranty provided in connection with the product
itself and no other warranty, expressed or implied is provided. LEVANA assumes no responsibilities for any
other claims not specically mentioned in this warranty.
5. This warranty does not cover the shipping cost, insurance or any other incidental charges.
6. You MUST call LEVANA before sending any product back for repair. You will be sent a Return Authorization
form with return instructions. When returning the product for warranty service, please pack it carefully
in the original box with all supplied accessories, and enclose your original receipt or copy, and a brief
explanation of the problem (include RA #).
7. This warranty is valid only in Canada and the continental U.S.
8. This warranty cannot be re-issued.
BABYVIEW_Manual.indd 2 31/08/2009 1:18:11 PM
Interference Free Digital
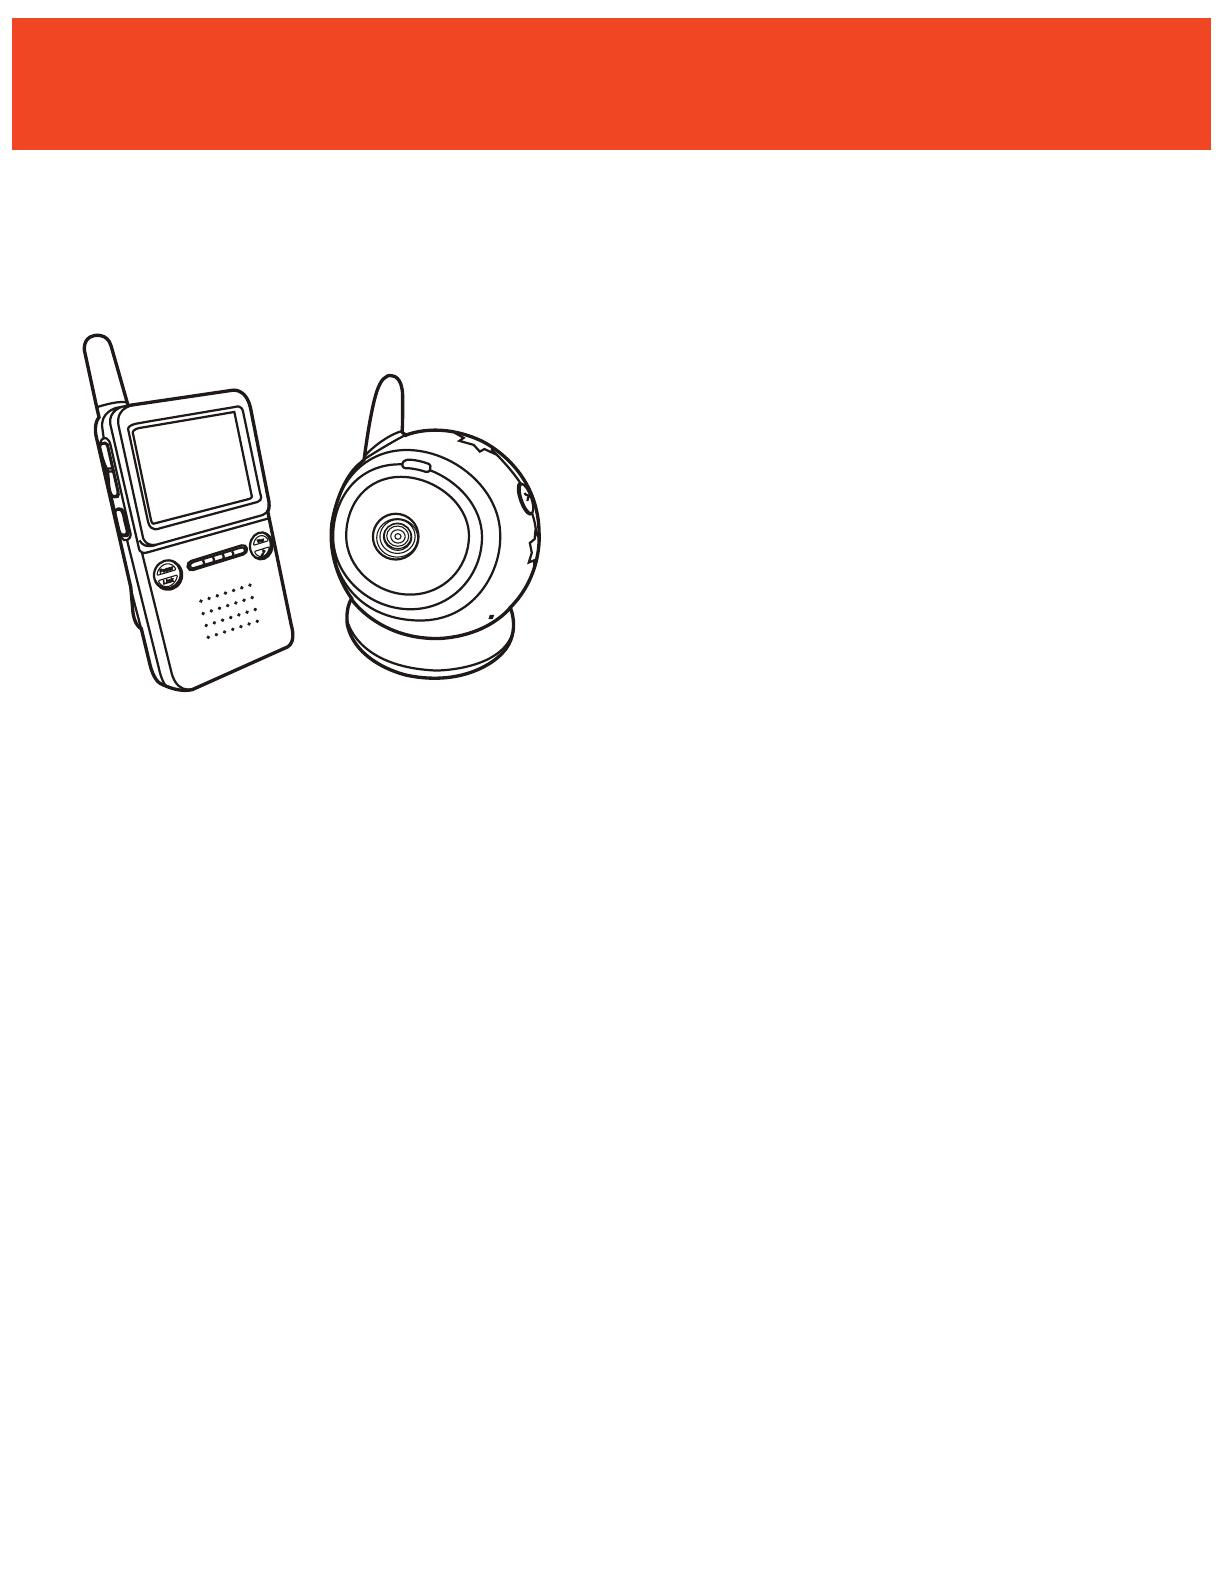
Wireless Video Baby Monitor
w/ Night Light Lullaby Camera
Congratulations! You’ve just taken a step to help
ensure your childs safety and enjoy more of your
child’s special moments. Please take a few minutes
to read this manual so you can use this monitor
to its full potential. If you have any questions on
your product, please visit www.MyLevana.com for
troubleshooting information.
Table Of Contents
TABLE OF CONTENTS .......................................................................................................................................... i
DISCLAIMERS .................................................................................................................................................. ii
GENERAL CARE AND MAINTENANCE .................................................................................................................. ii
FCC STATEMENT ................................................................................................................................................ iii
WHATS INCLUDED ............................................................................................................................................. iii
KNOWING YOUR BABY MONITOR .......................................................................................................................1
CAMERA SETUP .................................................................................................................................................2
Mounting The Camera .............................................................................................................................3
Using The Night Light .............................................................................................................................4
Night Vision ............................................................................................................................................5
MONITOR SETUP ................................................................................................................................................5
Adjusting The Monitor Brightness ...........................................................................................................6
Sound Activation (Vox) ..........................................................................................................................7
Lullaby Sounds .......................................................................................................................................8
RANGE............. ..................................................................................................................................................9
TROUBLE SHOOTING ..........................................................................................................................................10
ADDITIONAL INFORMATION ...............................................................................................................................10
LITHIUM BATTERY TIPS ......................................................................................................................................11
NATIONAL CENTER FOR MISSING AND EXPLOITED CHILDREN ..............................................................................11
(i)
INTRODUCTION
BABYVIEW_Manual.indd 3 31/08/2009 1:18:11 PM
Graphic Symbol Explanation
The lightning ash with arrowhead symbol, within an equilateral triangle, is intended to alert
the user to the presence of insinuated dangerous voltage within the products enclosure that
may be of sucient magnitude to constitute a risk of electric shock to persons.
The exclamation point within an equilateral triangle is intended to alert the user to the presence
of important operating maintenance (servicing) instructions in the literature accompanying the
appliance.
Never place this baby monitor near water. Placing any electronic near sinks, toilets, bath tubs, or
swimming pools is incredibly dangerous and can create shock hazards for yourself or your child.
This digital baby monitor does not take the place of adult supervision.
TO REDUCE THE RISK OF ELECTRIC SHOCK, DO NOT REMOVE THE COVER (BACK).
NO USER SERVICEABLE PARTS INSIDE. REFER SERVICING TO QUALIFIED SERVICE PERSONNEL.
CAUTION
RISK OF ELECTRIC SHOCK, DO NOT OPEN
(ii)
• Donotstoreinverycoldareas.Whenthesystemwarmsup(toitsnormaltemperature),moisturecan
form inside the case, which may damage electronic circuit boards
• Donotattempttoopenthecase.Non-experthandlingoftheinternalcomponentsmaydamage
the system
• Avoiddroppingorstrongshocks
• Operatethisproductusingonlythepowersupplyincludedorprovidedasanaccessory
• Donotoverloadelectricaloutletsorextensioncordsthiscanresultinreorelectricshocks
CAUTION AND WARNINGS
GENERAL CARE AND MAINTENANCE
BABYVIEW_Manual.indd 4 31/08/2009 1:18:14 PM
This equipment has been tested and found to comply with the limits for a Class B digital
device, pursuant to Part 15 of the FCC Rules. These limits are designed to provide reasonable
protection against harmful interference in a residential installation. This equipment
generates, uses and can radiate radio frequency energy and, if not installed and used in
accordance with the instructions, may cause harmful interference to radio communications. However, there is
no guarantee that interference will not occur in a particular installation. If this equipment does cause harmful
interference to radio or television reception, which can be determined by turning the equipment o and on,
the user is encouraged to try to correct the interference by one or more of the following measures:
• Reorientorrelocatethereceivingantenna
• Increasetheseparationbetweentheequipmentandreceiver
• Connecttheequipmentintoanoutletonacircuitdierentfromthattowhichthereceiverisconnected
• Consultthedealeroranexperiencedradio/TVtechnicianforhelp
• FCCLabelComplianceStatement:
• ThisdevicecomplieswithPart15oftheFCCRules.Operationissubjecttothefollowingtwoconditions:
(1) This device may not cause harmful interference
(2) This device must accept any interference received, including interference that may cause
undesired operation
The manufacturer is not responsible for any radio or TV interference caused by unauthorized modications to
this equipment. Such modications could void the user's authority to operate the equipment.
• CribCameraMount
• MountingHardware
• QuickStartGuide
• InstructionManual
• 1YearWarranty
• 24/7LifetimeCustomerSupport
(iii)
WHAT’S INCLUDED
• WirelessMonitor
• WirelessCamera
• RechargeableLithium-ionBattery
• PowerAdapterforMonitor
• PowerAdapterforCamera
• MagneticBaseforCamera
AVOIDING SIGNAL DISRUPTION
Your BABYVIEW20 uses digital transmission to ensure a clear and consistent picture. The signal also passes
easily through interior walls. However, buildings with metal frames or placing the camera near large metal
objects may cause signal degradation. If reception is poor, moving the camera or receiver may x this problem.
FCC APPROVED
BABYVIEW_Manual.indd 5 31/08/2009 1:18:14 PM
KNOWING YOUR BABY MONITOR
Monitor:
1. LCD screen
2. Antenna
3. Music selection buttons
4. VOX: Voice Operated
Transmission button
5. Power indicator LED
6. Link indicator LED
7. Volume indicator LED
8. Speaker
9. VOX (Voice Operated
Transmission) indicator LED
10. Music indicator LED
11. Brightness adjustment buttons
12. Power/Volumecontrol
13. Power adapter jack
14. Battery compartment
15. BeltClip/Stand
1
2
3
4
5
6
7
8
9
10
11
12
13
14
15
Camera:
1. Antenna
2. Power/LinkindicatorLED
3. Infrared LEDs
4. Lens
5. Magnetic Base
6. Night Light
7. Night Light button
8. Microphone
9. Speaker
10. Battery compartment (4 x AAA)
11.PowerON/OFFswitch
12. Power adapter jack
13. Crib Mount Hole
1
2
3
4
5
6
7
8
9
10
11
12
13
1
BABYVIEW_Manual.indd 6 31/08/2009 1:18:14 PM
CAMERA SETUP
You have the option to use either the supplied AC adapter or 4 AAA-batteries (not included) to power your
camera. BEFORE STARTING, make sure the power switch on the camera is in the OFF position.
If using batteries:
Note: Use new batteries. Do not mix old batteries with new ones. Remove the batteries from the camera if you do not
plan to use it for an extended period of time.
1. Using a at-head screwdriver, open the battery compartment cover on the back of the camera.
2. Insert 4 AAA batteries, make sure to insert the batteries according to the "+" and "-" signs.
3. Close the battery compartment cover and tighten the screw to hold it in place.
4. Slide the POWER switch (below the antenna) to the ON position. The LED on the front of the camera will
light up (red light).
a. The LED on the camera will remain red until the batteries lose power. Change the batteries
when the LEDs are red and blinking. Upon startup, the LED will be red.
NOTE: Batteries in the camera will last a maximum of 4.5 continuous hours. We recommend
using batteries only when necessary. For best results, use Lithium Ion AAA Batteries.
2
CAMERA SETUP
BABYVIEW_Manual.indd 7 31/08/2009 1:18:15 PM
1
2
3
If plugging into a wall outlet:
1. Plug one end of the provided power adapter into a wall outlet (both camera and monitor power
adapters are interchangeable).
2. Connect the other end of the power adapter into the power input on the camera. This is located under
theON/OFFswitch.
3. TurntheON/OFFswitchtotheONposition.TheLEDonthecamerashouldnowlightupred.
Mounting the Camera
Option 1: Using the Magnetic Base (for at surfaces outside
of your babys crib)
The camera has an innovative and convenient magnetic base that
magnetically holds the camera securely. This allows you to freely
rotate the camera left, right, up and down with ease:
1. Place the camera & magnetic base on a at surface.
2. Rotate the camera freely and aim it in the direction you would
like to monitor. Avoid placing at an angle over 30 degrees as
the camera may fall out. The magnetic strength is lower over
the battery compartment.
3
CAMERA SETUP
BABYVIEW_Manual.indd 8 31/08/2009 1:18:15 PM
Option 2: Using the Camera Mount (for mounting directly
on your babys crib)
1. Remove the camera from the magnetic desk mount. The
cameras mounting hole is located on the bottom of
the camera.
2. Place the camera on the top of the camera mount’s screw
and line up the cameras mounting hole to the screw.
Rotate the camera clockwise to screw the camera onto the
camera mount. Tighten the silver-colored plate knob by
turning it counter-clockwise.
3. Make sure the clamp on the mount is open by turning the
larger white knob counter-clockwise. Place the clamp over
the top of crib and tighten it rmly to the crib by turning the
knob clockwise.
4. Angle the camera to your desired location and tighten
the smaller white knob nearest to the camera to lock it
into position.
Using the Night Light
1. Press the button on the camera labeled LIGHT. This activates the night lights on the camera. The night
light will remain on until the button is pressed again.
NOTE: We do not recommend
using batteries with the
night light. The battery
life will be less than 2.5
hours with the night
light on.
4
CAMERA SETUP
BABYVIEW_Manual.indd 9 31/08/2009 1:18:15 PM
You have the option to use either the supplied AC adapter or the included rechargeable lithium-ion battery to
power the monitor.
If using the included rechargeable battery:
1. Ensure the monitor’s power switch is in the OFF position.
2. Rotate the clip on the back of the monitor to an upright position.
3. Slide open the battery compartment cover on the back of the monitor.
4. Insert the battery into the battery compartment with its connections matching the connections in
the monitor.
5. Close the battery compartment cover, and make sure it is locked securely.
6. Your battery will need to be charged for initial use. Plug the AC adapter into a wall outlet, and the other
end into the monitor (both camera and monitor power adapters are interchangeable).
7. If the monitor is o the power LED will turn BLUE to indicate that charging is in progress. If the monitor is
on and charging, the power LED will be purple.
8. The power LED will turn OFF when charging is complete. Charging time is approximately 3 hours.
9. When charging is complete (blue LED turns o), unplug the monitor from the AC adapter. Turn on the
monitor by turning the volume knob on the side of the unit. You will feel a slight click when it turns on.
10. When the monitor is on, the POWER LED on the monitor will light up RED. The POWER LED will blink
when the battery needs to be charged.
1
2
3
Using Night Vision
The camera has nine night vision LEDs so it can see in the dark. This night vision uses the power of infrared
light, which is 100% safe for babies. The camera has a light sensor and will activate the night vision only when
it gets dark. When you turn o the lights, you will notice a faint red glow in the front of the camera; these are
the LEDs lit up. Automatic night vision activation saves you time and energy costs.
5
MONITOR SETUP
CAMERA SETUP
BABYVIEW_Manual.indd 10 31/08/2009 1:18:15 PM
Note: The monitor will also charge if it is turned on. If the monitor is turned on while charging,
the power LED will turn purple while charging and RED when the charge is complete.
Note: The battery does not need to be inserted to operate the monitor from a wall outlet. However,
keeping the battery in the unit will ensure that it is charged when you need to unplug it
from the wall.
1. Plug one end of the provided power adapter into a wall outlet (both camera and monitor power
adapters are interchangeable).
2. Connect the other end of the power adapter into the power input on the monitor.
3. Turn on the monitor by turning the volume knob on the side of the unit. You will feel a slight click when
it turns on.
4. When the monitor is on, the POWER LED on the monitor will light up RED.
Note: It takes approximately 3 hours to fully charge your monitor battery.
6
3
1
2
MONITOR SETUP
BABYVIEW_Manual.indd 11 31/08/2009 1:18:15 PM
If using the included rechargeable battery:
If the signal appears poor, it
Note: The battery does not need to be inserted to operate the monitor from a wall outlet. However,
keeping the battery in the unit will ensure that it is charged when you need to unplug it from the wall.
1. Plug one end of the provided power adapter into a wall outlet (both camera
and monitor power adapters are interchangeable).
2. Connect the other end of the power adapter into the power input on
the monitor.
3. Turn on the monitor by turning the volume knob on the side of the unit. You
will feel a slight click when it turns on.
4. When the monitor is on, the POWER LED on the monitor will light up GREEN.
5. It takes approximately 3 hours to fully charge your monitor battery.
Adjusting Monitor Brightness
1. If the image on the LCD screen is too light, press the button (lower button) to darken
the screen.
2. If the image on the LCD screen is too dark, press the button (higher button) to lighten
the screen.
Sound Activation (VOX)
The BABYVIEW20 system lets you turn o the monitor while you are sleeping, and will automatically turn back
on if your child starts to cry or make noise.
1. Press the “VOX” button on the left side of the monitor. This will turn o the screen but the “VOX” LED on
the front of the monitor will glow blue.
2. When the sound from the camera reaches the set level, the screen will turn on automatically. It will turn
o again after 30 seconds.
NOTE: the preset noise level is preset to a level comparable to a casual conversation.
7
MONITOR SETUP
BABYVIEW_Manual.indd 12 31/08/2009 1:18:15 PM
Lullaby Sounds
The camera plays a selection of lullabies that you can control with the monitor. With a push of a button you
can start playing music, change the song, and stop the music remotely when your baby is asleep. There are 3
dierent chiming melodies that can sooth your baby to sleep.
1. Press the play button on the top left hand side of the monitor. This will activate the music on the
camera. If you turn up the volume on your monitor you will hear it. The music note LED on the front of
the monitor will glow RED when a lullaby is turned on.
2. Press the play button again and the music will stop.
3. Press the next button to skip to a dierent song.
• YoucanseethemusicyouchooseontheLCDscreen,themusicyouhavetochoosefromincludes:
1. Twinkle Twinkle little star
2. Hush a Bye
3. Rock-a-bye Baby
8
MONITOR SETUP
BABYVIEW_Manual.indd 13 31/08/2009 1:18:16 PM
SYNCING CAMERA AND MONITOR
The Monitor is capable of going approximately 450 feet (150 meters)
away from the camera and still be within range to communicate,
hear and view the camera. This will depend on environmental
factors that may increase or decrease the maximum wireless range.
The link LED will be green when the monitor and camera are paired
and red when they are not paired.
• IfthesignalislostbetweenthemonitorandtheCamerathe
message “OUT OF RANGE” will appear on the monitor. This
could be caused by the camera having no power or the distance
between the camera and monitor being too far. Try moving the
camera and monitor closer together, if this does not x the issue,
try syncing the monitor and camera. Syncing the monitor and
camera may also improve the audio quality.
• Tosyncthemonitorandcamera:
1. With both units powered on, press the VOX button on the
monitor and the night light button on the camera at the
same time. Hold both buttons down for approximately
5 seconds.
2. The words “Signal Searching will appear on the monitor”.
3. Once the night lights (stars) on the camera blink three
times the camera and monitor will been synced and you can
properly view your camera on your handheld monitor.
9
SIGNAL SEARCHING
RANGE
BABYVIEW_Manual.indd 14 31/08/2009 1:18:18 PM
Troubleshooting
If you are not getting any signal at all:
• Makesurethecameraandthemonitorareturnedon
• Makesurethepowerplugsarepushedallthewayin
• Ifthecamera/monitorispoweredbybatteries,replaceallbatterieswith
new ones
If the signal is poor, or there is interference:
• Ifthereisamicrowaveoveninuseinthepathbetweenthecameraandmonitor, turn o the microwave
• Makesurethecameraandthemonitorarewithinrangeofeachother (optimal range of approximately 100
ft; 150 ft in a clear line of sight)
• Keepallpartsandaccessoriesoutofyoungchildren’sreach
• Fingerprintsordirtonthelenssurfacecanadverselyaectcameraperformances.Avoidtouchingthelens
surface with your ngers
• Shouldthelensbecomedirty,useablowertoblowodirtanddust,orasoft,dryclothtowipeo
the lens
• Keepthecameradry.Precipitation,humidity,andotherliquidscontainmineralswhichwillcorrode
electronic circuits
• Donotuseorstoreindusty,dirtyareas
• Donotstoreinhotareas.Hightemperaturescanshortenthelifeofelectronicdevicesandwarpormelt
certain plastics
• IfthepowerLEDisonbutonlyvoicesignalinputisdetected,themonitorcanbeinvoice-activatedmode.
Press the VOX button to turn on the screen
• TheVOXLEDshouldbeotoindicatetheunitisinnormaloperationmode,Ifthisdoesnotworktrytosync
the camera and monitor again
10
TROUBLESHOOTING
ADDITIONAL INFORMATION
BABYVIEW_Manual.indd 15 31/08/2009 1:18:18 PM
Lithium Battery Tips
The rechargeable battery of the handheld monitor is a built-in lithium-polymer battery. Before using the monitor
with battery power, please read the following in order to use the battery properly.
1. Under normal temperatures the battery can be recharged at least 300 times.
2. If the battery is not already full, make sure that the battery is charged before use.
3. When the device is not in use, switch the unit o to maintain battery power.
4. Unplug the power adapter when not in use.
5. In colder environments, the unit will consume more power. Please keep this device at room temperature to
increase the usable power. In environments with low temperatures it will take longer to recharge than in
normal temperature environments.
6. To avoid danger, do not use the power adapter in high temperature and high humidity locations.
7. It is normal for the unit’s battery to feel slightly warm while the monitor is in use or is charging. Do not
leave the power adapter connected for an extended period of time.
8. For your own safety, the battery is set to stop charging when the battery temperature is higher than 45°C
or lower than 5°C. Charging will automatically resume once temperatures are back to normal.
9. In order to avoid damaging the battery, do not expose the monitor to high temperature environments
(45°C or above).
10. Even if the battery is fully charged, power will gradually be lost if the monitor is not used for an extended
period. Make sure to recharge if the unit has not been in use for a long period of time.
11. Always use the supplied power adapter only to recharge the monitor’s battery. Using any other power adapter
could ruin the monitor or cause extreme burns.
11
LITHIUM BATTERY TIPS
BABYVIEW_Manual.indd 16 31/08/2009 1:18:18 PM
HELP SUPPORT THE NATIONAL CENTER FOR MISSING & EXPLOITED CHILDREN
Levana is a proud supporter of the National Center for Missing & Exploited Children. This non-prot organiza-
tion was established in 1984 to help prevent child abduction and sexual exploitation; help nd missing
children; and assist victims of child abduction and sexual exploitation, their families, and the professionals
who serve them.
The NCMEC encourages everyone to utilize their services
in the event of child abduction or exploitation. Their
services include:
• National24-hourtollfreehotline,1-800-THE-LOST®,
to intake reports of missing children and receive
leads about ongoing cases
• Providesassistancetofamiliesandlaw
enforcement agencies in locating and recovering
missing and exploited children, both nationally and
internationally
• DeploysTeamAdam,arapidresponseandsupport
system comprised of retired law enforcement
ocers, to provide on-site technical assistance to
local law enforcement agencies investigating cases of
child abduction and sexual exploitation
• Andmuchmore…
Each year over 700,000 children are reported missing, and research indicates that 1 in 5 girls and 1 in 10 boys
will be sexually victimized before adulthood. These statistics show us how important organizations like the
National Center for Missing & Exploited Children are, and you can help support them. If you would like to
contribute to this worthwhile cause, place a direct donation by visiting www.missingkids.com or by clicking
the NCMEC widget on www.mylevana.com. Thank you for your generosity.
12
NATIONAL CENTER FOR MISSING & EXPLOITED CHILDREN
BABYVIEW_Manual.indd 17 31/08/2009 1:18:19 PM
BABYVIEW_Manual.indd 18 31/08/2009 1:18:22 PM
  • Page 1 1
  • Page 2 2
  • Page 3 3
  • Page 4 4
  • Page 5 5
  • Page 6 6
  • Page 7 7
  • Page 8 8
  • Page 9 9
  • Page 10 10
  • Page 11 11
  • Page 12 12
  • Page 13 13
  • Page 14 14
  • Page 15 15
  • Page 16 16
  • Page 17 17
  • Page 18 18

Levana BABYVIEW20 User manual

Category
Baby video monitors
Type
User manual

Levana BABYVIEW20 is a wireless video baby monitor that helps you keep an eye on your little one day and night with its crystal-clear video and audio transmission. Featuring a night light and lullaby function, it helps soothe your baby to sleep, while the long range and interference-free digital signal ensures you stay connected to your baby from anywhere in your home.

Ask a question and I''ll find the answer in the document

Finding information in a document is now easier with AI