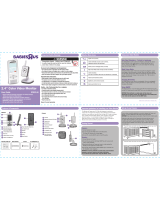
BRK DWB-740 User manual

Category
Baby video monitors
Type
User manual
2.5”Color LCD
Portable Wireless
Family Monitor
DWB-740
USER'S MANUAL
2
©2011 BRK Brands, Inc.
All rights reserved. Distributed by BRK Brands, Inc., 3901 Liberty Street Road, Aurora. IL
60504-8122. Due to continuing product development, the product inside the packaging may
look slightly different than the one on the package.
BRK Brands, Inc. is a subsidiary of Jarden Corporation (NYSE: JAH). To obtain warranty
service, contact the Consumer Affairs Division at 1-800-323-9005, Monday through Friday,
7:30 a.m. - 5 p.m., Central Standard Time.
Made in China
M08-0310-004
Table of Contents
3
Safety ................................................................................................................................ 4
Safety Precautions ............................................................................................................. 4
FCC Compliance ............................................................................................................... 4
Getting to Know Your DWB-740 Family Monitor .......................................................... 5
Check Package Contents .................................................................................................. 5
Digital Wireless Camera .................................................................................................... 6
Digital Wireless Receiver ................................................................................................... 7
Display Screen Icons ......................................................................................................... 8
Setting Up Your DWB-740 Family Monitor .................................................................... 9
General Precautions .......................................................................................................... 9
Powering the Camera ........................................................................................................ 9
Charging the Receiver ....................................................................................................... 9
Operating Menus ........................................................................................................... 10
Main Menu Operation ...................................................................................................... 10
System Setup .................................................................................................................. 11
Timing Setting ........................................................................................................... 11
Set to Factory Default ............................................................................................... 11
Camera Setup .................................................................................................................. 12
Camera ON/OFF ...................................................................................................... 12
Scan Period .............................................................................................................. 12
Pairing .............................................................................................................................. 13
Power Saving ................................................................................................................... 13
VOX Setting ..................................................................................................................... 14
VOX Sensitivity ......................................................................................................... 14
VOX Activate Recording ........................................................................................... 14
Brightness ........................................................................................................................ 15
Alarm Setup ..................................................................................................................... 15
Playback .......................................................................................................................... 16
Event List ......................................................................................................................... 16
SD Card Format ............................................................................................................... 17
Additional Functions ........................................................................................................ 18
Push to Speak .......................................................................................................... 18
Lullabies .................................................................................................................... 18
Night Vision ............................................................................................................... 18
Camera Placement & Installation ................................................................................. 19
Troubleshooting ............................................................................................................ 20
Technical Information ............................................................................................. 21-22
Maintenance ................................................................................................................... 22
Warranty ......................................................................................................................... 23
Product Limited Warranty ................................................................................................ 23
Warranty Exclusions ........................................................................................................ 23
Obtaining Service ............................................................................................................ 24
4
Safety
SAFETY PRECAUTIONS
Please read the following instructions and warnings carefully and keep this User’s
Manual for future reference.
! This product is not a substitute for responsible adult supervision.
! This product is not a toy. Do not allow children to play with it.
! Prevent cord entanglementdo not place camera in crib or within arm’s
reach of the child.
! This product contains small parts. Adult assembly is required. Keep small
parts out of children’s reach.
! Do not drop, puncture, or disassemble the camera.
! Never tug on the power adapter. Use the plug to remove it from the wall.
! Use the device with care. Avoid pressing hard on the camera or receiver
body.
! Do not expose the camera to high temperatures.
! Do not use power cable if it is crushed or damaged.
! For your own safety, avoid using the camera when there is a storm or
lightning.
! Do not use monitor near water.
FCC COMPLIANCE STATEMENTS
FCC COMPLIANCE CLASS B DIGITAL DEVICE
This equipment has been tested and found to comply with the limits for a Class B digital device,
pursuant to Part 15 of the FCC rules. These limits are designed to provide reasonable protection
against harmful interference in a residential installation. This equipment generates, uses and can
radiate radio frequency energy and, if not installed and used in accordance with the instructions,
may cause harmful interference to radio communications.
However, there is no guarantee that the interference will not occur in a particular installation. If this
equipment does cause harmful interference to radio or television reception, which can be
determined by turning the equipment off and on, the user is encouraged to try to correct the
interference by one or more of the following measures:
Reorient or relocate the receiving antenna.
Increase the separation between the equipment and receiver.
Connect the equipment into an outlet on a circuit different from that of the receiver.
Consult the dealer or an experienced radio or TV technician for help.
Notice: Only peripherals complying with FCC class B limits may be attached to this equipment.
Operation with non-compliant peripherals or peripherals not recommended by First Alert / BRK
Brands, Inc. is likely to result in interference to radio and TV reception. Changes or modifications
to the product, not expressly approved by First Alert / BRK Brands, Inc., could void the user’s
authority to operate the equipment.
We, First Alert / BRK Brands, Inc. declare under our sole responsibility that the device to which this
declaration relates: Complies with Part 15 of the FCC Rules. Operation is subject to the following
two conditions: (1) this device may not cause harmful interference, and (2) this device must accept
any interference received, including interference that may cause undesired operation.
FCC CERTIFICATION (IF APPLICABLE)
This device contains a radio transmitter. Accordingly, it has been certified as compliant with 47
CFR Part 15 of the FCC Rules for intentional radiators. Products that contain a radio transmitter
are labeled with an FCC ID.
5
Getting to Know Your
DWB- 740 Family Monitor
Congratulations on purchasing your First Alert Family Monitor. First Alert has been helping your
family stay safe for over 50 years. By having a First Alert Family Monitor, you are taking the first
step in monitoring activities that may affect your family.
CHECK PACKAGE CONTENTS
After unpacking the carton, check the contents for damage. Contact your supplier or dealer
immediately if any part is missing or damaged.
! Digital Wireless Baby Camera (1)
! 2.5” Color LCD Digital Wireless
Receiver (1)
! 5V 1A power adapters for camera and receiver (2)
! Camera Stand (1)
! Mounting Kit (1)
! User’s Manual (1)
! 2GB SD Card (1)
Getting to Know Your DWB-740 Family Monitor
Model DWB-740 User's Manual
6
DIGITAL W IRELESS C AMERA
1 Camera Lens
2 Night Vision IR LEDs - Allows you to see up to 16 ft. in complete darkness
3 EDS Light Sensor - Detects the absence of light and turns on night vision
4 Power/Battery Indicator - Green: Power on, Red: Battery low (when powered with batteries only)
5 Link indicator Flashing: Pairing is in process, Steady Blue: Linked with receiver
6 Microphone - Captures all sound in room
7 Power key/Lullaby play - Turns camera on and off
8 Pairing key - Press and hold to pair camera to receiver
9 Power Input (DC IN 5V 1A) - Plug the included adapter into this jack
10 Power adapter - Needed to power camera
11 Camera stand - Provides flexibility for table top use, or wall or ceiling mounting of camera
12 Camera Antenna - Transmits and receives signals
13 Battery Compartment (not shown) - Remove cover to install 3 AAA alkaline batteries (not included)
Getting to Know Your DWB-740 Family Monitor
Model DWB-740 User's Manual
7
DIGITAL WIRELESS RECEIVER
1 Power Indicator (PWR.) - Steady Green light when the receiver is charging
2 Low Battery Indicator (BATT.LOW) - Turns Red when the receiver battery is low
3 Battery Charging Indicator (CHARGING) - Steady Green light when the receiver is powered on
4 Up Cursor ( ) Move up in the Menu
Switch channel in View mode
Switch to CH1 from QUAD mode. Scan will turn off.
5 Left Cursor ( ) -- Move left in the Menu
Lower volume in View mode
Switch to CH3 from QUAD mode. Scan will turn off.
6 Down Cursor ( ) -- Move down in the Menu
Play lullabies in View mode
Switch to CH2 from QUAD mode
7 Right Cursor ( ) -- Move right in the Menu
Increase volume in View mode
Switch to CH4 from QUAD mode
8 Menu Button ( ) - Enter/exit Menu; or return to Main Menu.
9 Record ( ) - Start/stop recording in View mode; or delete video clip in Menu.
10 Microphone - Captures voice in intercom mode.
11 Talk Button ( ) - Push to speak through camera in View mode; or
confirm changes or setting in the Menu.
12 SD card slot - Holds 2GB SD card included with monitor. Can accept up to 32GB.
13 Reset - Disconnects all power to receiver.
14 USB Port - for firmware upgrade by manufacturer only.
15 Power Input ( ) - Plug the included power adapter into this jack.
16 Stand - Belt clip or stand located on back of monitor.
17 Power Adapter - Used to power receiver and charge receiver battery.
18 On/Off Switch - Turns the unit on and off.
Getting to Know Your DWB-740 Family Monitor
Model DWB-740 User's Manual
8
DISPLAY SCREEN ICONS
Setting Up Your DWB-740 Family Monitor
Model DWB-740 User's Manual
9
Setting Up Your
DWB- 740 Family Monitor
GENERAL PRECAUTIONS
! Do not place any of the equipment near a radiator, vent, or other place
where it might be exposed to heat, moisture, dust, vibrations, or strong
magnetic fields. If any liquid comes into contact with the monitor, turn off the
power immediately and have a qualified technician inspect the equipment
before using it again.
! Only use 5V/1A power adapter provided in this package
! When installing the camera, follow equipment manufacturer’s advice when
using power tools, steps, ladders, etc. and wear suitable protective
equipment (e.g., safety goggles) when drilling holes. Before drilling holes
through a ceiling, check for hidden electricity cables and water pipes.
POWERING THE CAMERA
DC Power Supply Mode
1 Connect the power cable to the DC IN of the camera.
2 Plug the power supply into the electrical outlet.
3 Press POWER button to turn on the camera.
Battery Power Supply Mode
1 Insert 3 AAA alkaline batteries making sure the
polarity is correct.
2 Press POWER button to turn on the camera.
CHARGING THE RECEIVER
1 Connect the power cable to the DC IN of the camera.
2 Plug the power supply into the electrical outlet.
3 Press POWER button to turn on the camera. A Green light on front panel indicates
the receiver is powered. Plug in power adapter to charge when [Battery Indicator]
lights up red.
10
Operating Menus
This chapter provides information about the menu screens. The screens are used to
control the various functions of the Family Monitor. The user selects options from a
series of menus and executes the actions by using the keypad on the receiver.
MAIN MENU OPERATION
The Main Menu is displayed when the menu button is pressed under view mode. Use
this menu to access:
" System Setup - Selection allows user to set the system time and reset
system to factory default.
" Camera Setup - Selection allows user to turn cameras on and off
individually and set the scan duration time or to set camera viewing to
Quad mode.
" Pairing - Selection allows user to pair (sync) each camera with the
receiver.
" Power Saving - Selection allows user to save power by powering down
system after 2 - minutes of non-activity.
" VOX Setting - Selection allows user to activate recording based on sound
that initiated near the camera location (s).
" Brightness - Selection allows user to increase or decrease the brightness
of camera and receiver screens.
" Alarm Setup - Selection allows user to set alarms at the receiver when
voice recording (VOX) is activated, camera battery is low or when receiver
and camera(s) are out of range.
" Playback - Selection allows user to play back selected recorded video.
" SD Card Format - Selection allows user to format the SD card.
Operating Menus
Model DWB-740 User's Manual
11
SYSTEM SETUP
Access the System Setup menu from the Main Menu. Use this menu to adjust system
time and factory default.
TIME SETTING
Press to enter time setting. Use to change setting. Press again to save.
The Time format order is Year / Month/ Hours (military) / Minute.
SET TO FACTORY DEFAULT
Use to select between Yes and No.
Operating Menus
Model DWB-740 User's Manual
12
CAMERA SETUP
Access the Camera Setup menu from the Main Menu. Use this menu to turn the camera
on/off and adjust scan time.
CAMERA ON/OFF
Use to select the camera (selected camera highlighted in black.) Press to change
ON/OFF status.
Set all cameras to ON for SCAN or QUAD mode.
SCAN PERIOD
Use to change Scan Time interval from OFF / 5 sec / 15 sec / Quad, press
to confirm the settings.
Note:
To leave QUAD display, simply press directional keys to enter single channel.
= CAM1; = CAM2; = CAM3; = CAM4
When system enters into power save mode from QUAD, press any key to resume
display.
Operating Menus
Model DWB-740 User's Manual
13
PAIRING
Access the Pairing menu from the Main Menu. Use this menu to pair each receiver with
camera.
PAIRING CAMERA
1. Use to select a channel.
2. Press to start pairing individual camera and receiver. The system will
countdown from 60 seconds.
3. Within 60-second countdown, press PAIR button on the bottom of the
camera. A confirmation image will display when pairing is complete.
4. Repeat for all cameras.
POWER SAVING
Access the Power saving menu from the Main Menu. Use this menu to turn power saving
on/off.
By setting {Power Setting} Mode to On, both receiver and camera will enter standby mode
after 2 minutes of idle time and speaker volume will be mute. Press power key on the
receiver to resume monitor and camera operations.
Use to turn [Power Saving] mode On/Off.
Operating Menus
Model DWB-740 User's Manual
14
VOX SETTING
VOX Setting allows voice activated recording.
VOX Sensitivity
Allows user to set the level of sensitivity for voice activated recording. Level 3 is the
highest sensitivity level. This system setting will be set and applies to all cameras
while recording.
Use to adjust VOX sensitivity level.
OFF: VOX function will be disabled
VOX Activated Recording
System will auto record for 30 sec once camera is triggered by voice when “VOX Activate
Recording” is set to ON.
Note:
VOX Sensitivity must be set to Level 1, 2, or 3 for VOX Activated Recording to work.
If the SD disk is full or if Lullabies are playing, the recording will not be activated.
Menu and other key panel functions cannot be selected while recording. Stop/Start,
Record and Volume adjustments still work.
Operating Menus
Model DWB-740 User's Manual
15
Recording files are set for 30 seconds long. If event exceeds 30 seconds it will be saved
as a new event.
CAUTION!
Some federal, state, and local laws prohibit certain surveillance activities and/or the use or
distribution of the information obtained from such activities. Prior to using this system,
you should become familiar with the pertinent laws to ensure compliance with those
applicable to surveillance activities.
BRIGHTNESS
Access the Brightness menu from the Main Menu. Use this menu to adjust image
brightness.
From the main display screen, select the camera to play the Lullabies. Press the Up Arrow
cursor to change camera selection 1, 2, 3, or 4.
Press to enter camera brightness adjustment bar, press to adjust brightness of
current channel.
ALARM SETUP
Access the Alarm Setup menu from the Main Menu. Use this menu to turn VOX Alarm,
Camera Battery Low Alarm and Out of Range Alarm ON/OFF. The setting selection
applies to all active cameras as a group.
Press to shift to ON/OFF. Press to move between items.
VOX Alarm ON: The receiver will give an alarm for 15 seconds when the camera is
triggered by voice.
Battery Low Alarm ON: The receiver will give an alarm for 15 seconds when the camera
battery is low.
Out of Range Alarm ON: The receiver will give an alarm for 15 seconds when the
receiver and camera(s) are out of wireless transmitting range.
Operating Menus
Model DWB-740 User's Manual
16
PLAYBACK
Access the Playback menu from the Main Menu. Use this menu to select a recording file
to playback.
To Select a recording:
Recordings are filed first by Year/Month/Day using YR MO DY.
Recordings are then selected by Hour/Minute/Second_ Camera number using
HRMNSD_#.
By processing keys you can speed through the recording at 2X, 4X, or 8X speed.
Audio does not play when in Speed mode.
EVENT LIST
Playback Mode
1. Press to Record Folder
2. Continue to press to Play/Pause file.
3. Press to Fast Forward video clip. Press to Reverse video clip. Press ESC
to Stop/Exit.
Event List
1. Use to select the record file you need to delete.
2. Press DEL to enter deletion mode
3. Press to select YES or NO.
4. Press to delete
Note:
Recording files are 30 seconds long. If event exceeds 30 seconds it will be saved as a
new event.
Make sure SD Disk has adequate space on disk prior to recording.
Volume can be turned on or off, but cannot be adjusted in Playback Mode.
Operating Menus
Model DWB-740 User's Manual
17
SD Card Format
Access the SD Card Format menu from the Main Menu. Use this menu to format SD card.
For first time use, it is strongly recommended to format the SD card.
Reformatting an SD Card will erase viewing the recording.
SD CARD FORMAT
Press to select YES or NO
Operating Menus
Model DWB-740 User's Manual
18
ADDITIONAL FUNCTIONS
Push To Speak Operations:
Push to speak allows the user to speak through the receiver back to the camera.
Push to speak works from the receiver directly to one camera. Push to speak
is activated by pressing and holding the center button while speaking into the
receiver. The camera in screen view will be able to hear the speaker.
Note:
In SCAN mode: When the receiver is in scan mode, the push to speak action is
between the receiver and the camera that is shown on the receiver’s screen.
In Quad mode (where there is a split screen of the four cameras): Push to speak is
disabled.
Lullabies Operation
Lullabies can be set to play on 1 or more cameras. 3 different Lullabies songs are
available. Each song lasts for 7 minutes. Lullabies can be initiated at the
receiver or at the camera.
Initiating Lullabies from Receiver:
1. From the main display screen, select the camera to play the Lullabies. Press
the Up Arrow cursor to change camera selection 1,2,3,or 4.
2. Press the down arrow cursor button (near the music note icon.) Press again to
scroll through the lullaby options.
Imitating Lullabies from the Camera:
1. To turn a lullaby on at the camera, press the on/off button, located on the
bottom of the camera.
2. To change lullabies, press the on/off button again.
3. To turn off lullabies, press and hold the on/off bottom from 2 seconds.
NIGHT VISION
The camera has built-in infrared LEDs to allow you to view up to a distance of 16 ft at
night for 24-hour surveillance. The LEDs automatically activate at night and the picture
viewed turns from color to a black and white image.
Operating Menus
Model DWB-740 User's Manual
19
Camera Placement
Note:
Be sure to place camera and monitor no less than 3 feet away from your baby’s crib.
Do not place camera where it can fall into the child’s crib.
Do not place the camera near open windows, direct sunlight or heat sources.
Table top or wall mounting:
Determine a location for the camera that will provide the best view of your baby in his/
her crib. Place the camera on a flat surface, such as a dresser, bureau, or shelf. Or
mount the camera on a wall.
To Wall or Ceiling Mount
Before drilling a hole, it is important to check the reception and camera/monitor
positioning in the place that you intend on hanging it to the wall or ceiling. Use
camera stand to mark position of screws.
1 Select the position for the camera and secure the camera stand.
a. Pre-drill holes using a 7/32 inch drill bit.
b. Insert wall anchors and gently tap with hammer
until the anchors are flush with the wall.
c. Secure stand with screws.
2 Screw the camera onto the bracket.
3 Adjust camera to the proper view angle. Make sure the lens is upright relative to
your subject. Tighten the nut. Adjust the antenna to an upright position.
Adding Additional Cameras
This product can accept up to four cameras (Model # DWB-700).
Repeat steps 1, 2 and 3 for additional cameras.
20
Troubleshooting
Problem
Possible Causes
Remedies
System message
shows “No Signal”
No power supply to
camera
Check power adapter and power cable
connection. If camera is running on
battery alone, you may need to replace
batteries.
Camera is not paired
with receiver
See pairing operation for detail.
Service out of range
Move the camera closer to the receiver.
Signal is blocked
If possible, remove major obstacles in
between the camera and the receiver. Or,
relocate the camera to another location.
Low or unstable
signal
Antenna direction is
limited
Adjust the camera antenna and receiver
position.
Signal has been
blocked
If possible, remove major obstacles in
between the camera and receiver. Or,
relocate the camera to another location.
Strong radio signal
nearby
Keep WIFI router away from the camera
and/or receiver.
Strong electromagnetic
interference nearby
Keep active appliances such as hair
dryers, heat fans, air conditioners, water
pumps, or microwave ovens away from
the camera and/or receiver.
Recording does not
work
No SD Card
Insert SD Card.
SD Card locked
Unlock the SD Card.
Black screen
& Buttons
no function
Power save mode on
Press power key to resume receiver
image; please refer to [Power Saving]
section on page 12 for details.
Audio feedback
Camera and receiver
are too close
The camera has a high sensitivity
microphone. Keep the camera at least 10
feet away from the receiver. If the camera
must be within 10 feet of the receiver,
keep the volume down.
VOX Record & Alarm
does not work
VOX Menu set to “OFF”
Set VOX Sensitivity/VOX Alarm/VOX Record to
ON.
  • Page 1 1
  • Page 2 2
  • Page 3 3
  • Page 4 4
  • Page 5 5
  • Page 6 6
  • Page 7 7
  • Page 8 8
  • Page 9 9
  • Page 10 10
  • Page 11 11
  • Page 12 12
  • Page 13 13
  • Page 14 14
  • Page 15 15
  • Page 16 16
  • Page 17 17
  • Page 18 18
  • Page 19 19
  • Page 20 20
  • Page 21 21
  • Page 22 22
  • Page 23 23
  • Page 24 24

BRK DWB-740 User manual

Category
Baby video monitors
Type
User manual

Ask a question and I''ll find the answer in the document

Finding information in a document is now easier with AI