Page is loading ...

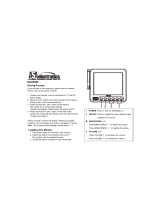
Setup
Camera Setup
Power Supply - Using AC Power
1.1
2
1
1. Plug one end of the provided power adapter into a wall outlet and the other
end into the back of the camera.
2. Press the ON/OFF button to turn on the camera. The LED (green light) on the camera
will light up.
Note : Press and hold the ON/OFF button for about 2 seconds to turn off
the camera.
1. Open the battery compartment cover on the rear of the monitor.
2. Insert the battery with the metal facing the battery compartment.
3. Close the battery compartment cover, and make sure it is locked securely.
4. Press the POWER button to turn on the monitor.
Monitor Setup
Power Supply
2.1
2
The monitor uses a Lithium-ion rechargeable battery, or the household power
adapter.
Loading the Battery
When Battery is in low level after loading the battery, the LED (greed light) will start
blinking and need to recharging.
1. Plug one end of the provided power adapter into a wall outlet and the other end
into the monitor.
2. The LED (red light) will light up when the battery is charging .
3. When battery is fully charged, the LED (red light) will turn off .
Battery Charging
Night Vision
1.2
The camera has eight high-intensity LEDs for picking up clear images in the dark.
When the light sensor detects low ambient light levels, the LEDs will be automatically
activated. Press the brightness up button and down button at the same time on
the monitor unit to enable/disable/auto the night vision function.
The on-screen-display (OSD) will notify you the night vision function is set to
ON/OFF/AUTO.
1. Plug one end of the provided power adapter into a wall outlet and the other end
into the monitor.
2. Press the POWER button and to turn on the monitor.
Note 1 : When power on the monitor, the LED (green light) will light up.
Note 2 : Press and hold the POWER button for about 2 seconds to turn off the
monitor.
Using AC Power

3
Monitor Remote Control Function
2.2
The monitor can control the movement of the camera. The camera head has the
ability to rotate up, down, right and left. Press the up or down buttons
on monitor to move the camera up or down. Press the left or right buttons
on monitor to move the camera left or to the right. See Fig. 3.
Fig. 3
Pan
Tilt
VOX ( Voice-Operated Transmission) function
2.3
1. Press the volume up button and down button at the same time on the monitor
unit to enable/disable the VOX function. The on-screen-display (OSD) will notify you
if the VOX function is enabled or disabled.
2. When VOX function is enabled, the camera will detect the sound level. If there is very low
sound in the vicinity of the camera for 180 seconds continuously, the screen and speaker
of monitor will turn OFF.
3. When the camera dectects sound, the screen and speaker of the monitor will turn ON.

4
Volume Setting
2.4
Press volume up or down buttons to adjust volume level.
Press to increase volume.
Press to decrease volume.
The system comes with a camera unit that has already been paired with the
monitor. The "Camera Paring" function gives each camera unit a separate
channel on the monitor unit. This is necessary for configuring additional
camera units.
If you want to add a new camera, please follow the below steps:
1. Make sure both the monitor unit and camera units are off.
2. Press and hold the “P” button on monitor unit and press button.
3. You will reach the below pairing screen:
4. Turn on the camera unit
5. Press pairing button on the camera unit, you will see the below screen when
pairing is successful.
6. Press button to start monitoring.
Brightness Setting (Brightness)
2.5
Press brightness up or down buttons to adjust the brightness.
Press to increase brightness.
Press to decrease brightness.
Press the “P” button on monitor unit to switch between different cameras.
The camera number (Cam #) will be shown on the top left corner of the screen.
Camera Paring
Camera Selection
3.1
3
Amcrest Camera Pairing System
Waiting signal from CAM1 ...
Press ‘PAIRING’ of Camera Unit to pair
Press ‘P‘ to skip and pair the next CAM ID
Press power button to abort and turn off
Amcrest Camera Pairing System
Waiting signal from CAM1 ...OK
Waiting signal from CAM2
Press ‘PAIRING’ of Camera Unit to pair
Press ‘P‘ to skip and pair the next CAM ID
Press power button to abort and turn off

5
Package Contents
- One Camera
- One Monitor
- Two Power Adapters
- Lithium-ion Battery for Monitor
- User Manual
Care and Maintenance
- Keep all parts and accessories out of children's reach.
- Fingerprints or dirt on the lens surface can adversely affect camera performances.
Avoid touching the lens surface with your fingers.
- Should the lens become dirty, use a soft, dry cloth to wipe off the lens.
- Keep the system dry. Precipitation, humidity, and other liquids contain minerals
that will corrode electronic circuits.
- Do not use or store in dusty, dirty areas.
- Do not use or store in hot areas. High temperatures can shorten the life of electronic
devices and warp or melt certain plastics.
- Do not user of store in very cold areas. When the system warms up (to its normal
temperature), moisture can form inside the case, which may damage electronic circuit
boards.
- Do not attempt to open the case. Non-expert handling of the device may damage the
system.
- Avoid dropping or strong shocks.
- Operate this product using only with the power supply included or provided accessory.
- Do not overload electrical outlets or extension cords. This can result in fire or
electric shocks.
- Do remember that you are using public airwaves when you use the system and that
sound and video may be broadcast to other 2.4 GHz receiving devices. Conversations,
even from rooms near the camera, may be broadcast.To protect the privacy of your home,
always turn the camera off when not in use.
- Keep the system in proper ventilation when it is operating. Do not use
the system in bed, and do not cover the system with cloth, pillow, bag, towel and blanket.
Troubleshooting
You don’t getting any signal
- Make sure the camera and the monitor are turned on.
- Make sure the power plugs are firmly installed and plugged in.
If the signal is poor, or if there is interference
- If there is a microwave oven use in the between the camera and monitor, remove
the microwave oven or turn it off, it may be causing interference.
- Try to put the camera and the monitor closer together if possible, or adjust the antenna
angle if residing in a multi-story building.

6
FCC Statement
WARNING : Modifications not authorized by the manufacturer may void users
authority to operate this device.
This device complies with part 15 of the FCC Rules. Operation is subject to the
following two conditions: (1) This device may not cause harmful interference,
and (2) this device must accept any interference received, including interference
that may cause undesired operation. Changes or modifications not expressly
approved by the party responsible for compliance could void the user’s authority
to operate the equipment.
This equipment has been tested and found to comply with the limits for a Class B
digital device, pursuant to Part 15 of FCC Rules. These limits are designed to
provide reasonable protection against harmful interference in a residential
installation. This equipment generates, uses, and can radiate radio frequency
energy and, if not installed and used in accordance with the instructions, may
cause harmful interference to radio communications.
However, there is no guarantee that interference will not occur in a particular
installation. If this equipment does cause harmful interference to radio or
television reception, which can be determined by turning the equipment off and
on, the user is encouraged to try to correct the interference by one or more of
following measures:
Reorient or relocate the receiving antenna.
- Increase the separation between the equipment and receiver.
- Connect the equipment into an outlet on a circuit different from that to which
the receiver is connected.
- Consult the dealer or an experienced radio / TV technician for help.
This device complies with part 15 of the FCC Rules. Operation is subject to the
following two conditions:
1. This device may not cause harmful interference, and
2. This device must accept any interference received, including interference
that may cause undesired operation.
Caution
- To comply with FCC RF exposure compliance requirements, a separation
distance of at least 20 cm must be maintained between the antenna of this
device and all persons.
- This Transmitter must not be co-located or operating in conjunction with
any other antenna or transmitter.
FCC ID : ZZ2BC911M14
FCC ID : ZZ2BC911C14

7
Following the safety tips
To prevent deaths and injuries associated with baby monitor cords :
- Make sure the camera unit and power adapter cable are always out of reach of the
baby at least 3 feet (1 meter) away.
Note : It's important even if your baby is not yet standing or mobile.
- Never use extension cords with power adapters. Only use the power adapters provided.
Specifications
Camera Unit
Specifications subject to change without notice
This item is in compliance with the essential requirements and other relevant provisions of Directive 1999/5/EC.
Camera
Frequency
Antenna
Transmission distance
Modulation
Image Sensor
Lens
IR LED
Dimensions
Weight
Power
Operating temperature
2.4 GHz
Dipole antenna
800 feet (Line of Sight)
FHSS
CMOS image sensor
f 2.95mm, F/1.8
8 pcs
10.8(W) x 9.0(H) x 11.8(D) cm
120g
DC 6V, 800mA
0 ~ 40 (32 ~ 104)
Monitor
Frequency
Antenna
Modulation
Display
Display colors
Brightness Control
VOX
Dimensions
Weight
Power
Operating temperature
2.4 GHz
Dipole antenna
FHSS
2.4" LCD panel
Full-color
6 levels
Voice activation
7.8(W) x 17.7(H) x 3.0(D) cm
90g
DC 6V, 800mA or Li battery
0 ~ 40 (32 ~ 104)

8
Power Adapter information
Battery information
Source 1
Model number
Input
Output
S08-006-0060-00800
100 ~240 , 50 ~60 Hz, 0.2A
6V 800mA
Source 2
Model number
Input
Output
CS6D060080
100 ~240 , 50 ~60 Hz, 0.2A
6V 800mA
Model number
Specification
PT603450
3.7V 1000mAh
CAUTION :Risk of explosion If battery is replaced by an incorrect type.
Dispose of used battery according to the instructions.
V4
/