Page is loading ...

Installation Guide

Known for its outstanding performance
qualities, vinyl siding is increasingly
the material of choice for homeowners,
remodeling contractors, architects, and
builders. Compared to other siding
products, vinyl is attractive, durable, easy
to maintain, and cost-effective. Siding is
available in a variety of textures, ranging
from matte surfaces to deeply embossed
wood grain surfaces, which simulate wood
clapboard siding.
For best results, it is recommended that
vinyl siding meet the requirements of
the Vinyl Siding Institute Sponsored
Certification Program. See www.vinyl-
siding.org for a current list of certified
products.
This manual sets forth the basic
guidelines for vinyl siding installation.
The instructions herein are based, in
part, on ASTM Specification D4756, the
standard method for installation of vinyl
siding and soffit. Updated information has
been added as necessary. Additionally, it is
recommended that installers review
applicable building codes for variations
that may apply to specific products or
geographic areas.
The method of applying vinyl siding
and soffit is essentially the same for new
construction and residing. However,
where required, special instructions
for new construction and residing are
included, as well as recommendations
for historic restoration. In all
applications, care should be exercised
to properly prepare the structure.
See the Basic Installation Rules and
additional details throughout this
document for proper installation
techniques.
This publication is not intended to
provide specific advice, legal or
otherwise, on particular products or
processes. Readers should consult with
their own legal and technical advisors,
building material suppliers, and other
appropriate sources (including but not
limited to product or package labels,
technical bulletins or sales literature) that
contain information about known and
reasonably foreseeable health and safety
risks of their proprietary products and
processes. As the manufacturer of the
vinyl siding we do not assume any
responsibility for the users’ compliance
with applicable laws and regulations, nor
for any persons relying on the information
contained in this guide.
1


contents
2
contents
Foreword/Inside cover ............................................1
Important Notes
Helpful Suggestions ....................................3
Fire Safety Information ...............................3
Storage and Transportation .........................3
Basic Installation Rules .........................................4
Cleanup
Helpful hints ...............................................5
Stains & Cleaners ........................................6
Terms to Know ................................................... 7-8
Basic Installation Tools &
Equipment
Accessories .................................................9
Tools .........................................................10
How to Measure
Estimating Required Materials .................11
Estimating Worksheet .........................................12
Fastener Choices
Nails, Screw Fasteners and Staples ...........13
Fastening Procedures ...........................................14
Cutting the Siding ................................................15
Preparing the Walls
New Construction ....................................16
Residing Existing Structures .....................17
Over Masonry Sub-Surface ......................18
Accessories Installation
Starter Strip ...............................................19
Alternative Methods of Starting
a Siding Panel ...........................................20
Outside and Inside Corner Post .......... 21-22
Decorative 3-piece Corner System ...........23
Windows and Door Trim .................... 24-34
Frieze, Rake, and Band Boards ........... 35-39
Gable Treatment .......................................40
Gable Vents ...............................................41
J-Channel ..................................................42
Horizontal Siding Installation
Installing Panels ........................................43
Fitting Siding around Fixtures ..................44
Fitting Under Windows ............................45
Finishing at the Top ..................................46
Eave Treatment .........................................47
Transition from Horizontal to Vertical ..............48
Vertical Siding Installation
(including Board & Batten)
Preparation ................................................49
Siding Accessories ....................................50
Soffit Installation
Preparation ................................................51
Over Open Eaves ................................ 51-52
Enclosed Eaves .........................................53
Fascia Installation
Aluminum Fascia ......................................54
Porch Ceilings
New Construction Projects .......................55
Residing Projects ......................................55
Replacing Damaged Panels ........................... 56-58
Shutter Installation ..............................................59
Cedar Dimensions - Shingle & Round Cut .. 60-70
Historic Restoration .............................................71
Leaf Relief ...................................................... 72-84
Notes ................................................................85-87

3
helpful suggestions
important notes
The manufacturer has provided these suggested instructions as installation guidelines. The manufacturer,
however, neither installs the panels nor has any control over the installation. It is the responsibility of the
contractor and/or the installer to ensure panels are installed in accordance with these instructions and any
applicable building codes. The manufacturer assumes no liability for either improper installation or personal
injury resulting from improper use or installation.
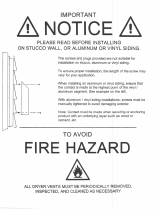
Fire Safety Information
Vinyl building materials require little maintenance for
many years. Nevertheless, common sense dictates that
builders and suppliers of vinyl products store, handle,
and install vinyl materials in a manner that avoids dam-
age to the product and/or the structure. Owners and
installers should take a few simple steps to protect vinyl
building materials from fire.
To Home and Building Owners:
Vinyl siding is made from organic materials and will
melt or burn when exposed to a significant source of
flame or heat. Building owners, occupants, and outside
maintenance personnel should always take normal
precautions to keep sources of fire, such as grills, and
combustible materials, such as dry leaves, mulch and
trash, away from vinyl siding.
To the Building Trades, Specifiers,
Professionals, and to Do-It Yourself
Installers:
When vinyl siding is exposed to significant heat or
flame, the vinyl will soften, sag, melt, or burn, and
may thereby expose materials underneath. Care must
be exercised when selecting underlayment materials
because many underlayment materials are made from
organic materials that are combustible.
It is important to ascertain the fire properties of under-
layment materials prior to installation. All building
materials should be installed in accordance with local,
state, and federal building code and fire regulations.
Storage and Transportation
When transporting vinyl siding and accessories to
the job site, make certain to keep the cartons flat and
supported along their entire length. At the job site, take
the following precautions when storing panels:
• Store the cartons on a flat surface and support
the entire length of the cartons.
• Keep the cartons dry.
• Store the cartons away from areas where falling
objects or other construction activity may cause
damage.
• Do not store the cartons in stacks more than 6
boxes high.
• Do not store the cartons in any locations where
temperatures may exceed 130º F (e.g., on blacktop
pavement or under tarps or plastic wraps without
air circulation).
Residing over Asbestos Siding
Asbestos siding is a regulated material and the appro-
priate environmental agency should be contacted before
residing over this product begins.

4
basic installation rules
basic installations
The manufacturer has provided these suggested instructions as installation guidelines. The manufacturer,
however, neither installs the panels nor has any control over the installation. It is the responsibility of the
contractor and/or the installer to ensure panels are installed in accordance with these instructions and any
applicable building codes. The manufacturer assumes no liability for either improper installation or personal
injury resulting from improper use or installation.
1. Installed panels must move
freely from side to side.
2. Do not stretch horizontal
siding panels upward when apply-
ing: instead, push upward on the
bottom of the panel you are install-
ing, until the locks fully engage.
Nail in place. Panels should
hang without strain after nailing.
Stretching the panel upward pulls
the natural radius out of the panel
and increases the friction of the
locks.
3. Always nail in the center of
the slot. WARNING: Do not nail
at the end of a slot! Doing so will
cause the siding panel to be perma-
nently damaged. If you must nail
near the end of a slot to hit a stud,
etc., extend the length of the slot
with a nail slot punch tool.
4. Do not nail tightly. Allow a
minimum of 1/32˝ between the
back of the nail head, screw or
staple crown and the nailing strip.
Nails or staples should be placed
approximately 12˝ to 16˝ apart.
Drive fasteners straight and level
to prevent distortion and buckling
of the panel. For fastening specs,
see page 13.
5. Leave a minimum of 1/4˝
clearance at all openings and stops
to allow for normal expansion and
contraction. When installing in
temperatures below 40º F, increase
minimum clearance to 3/8˝.
6. Do not caulk the panels where
they meet the receiver of inside
corners, outside corners, or
J-Channel Trim. Do not caulk the
overlap joints.
7. Do not face-nail or sta-
ple through siding. Vinyl sid-
ing expands and contracts with
outside temperature chang-
es. Face-nailing can result in
permanent ripples in the siding.
8. Panels should be overlapped
approximately 1˝. Fasten panels
approximately 8˝ or more from
the overlap seam for best lap
appearance.
9. Avoid the use of unstable or
uneven underlayment. Keep in
mind that siding can only be as
straight and stable as what lies
under it. See Section “Preparing
the Walls” for more information.
10. When installing shutters, cable
mounts, etc., make sure screw hole
in the siding is 1/4˝ larger than
the attachment screw diameter.
(Example: an 1/8˝ screw requires
a 3/8˝ hole in the siding.) This will
allow the panel to still expand and/
or contract.
11. Never attach fixtures directly
to panels. When attaching fixtures,
first drill a hole in the siding 1/4˝
larger than the diameter of the
fasteners, allowing for expansion
and contraction. Note: Fasteners
for fixtures must penetrate the solid
substrate.

5
helpful hints
cleanup
1. Use an ordinary, long-handled
car washing brush. This brush has
soft bristles, and the handle fastens
onto the end of the hose. It allows
the siding to be washed just like a
car. Avoid using stiff bristle brushes
or abrasive cleaners, which may
change the gloss of the cleaned
area and cause the siding to look
splotchy.
2. When washing down your entire
house, start at the bottom and work
up to the top in order to prevent
streaking. Rinse Cleaning Solution
with water before it dries. If your
house has brick facing, cover the
brick so that it is not affected by the
runoff.
3. Follow the precautionary label-
ing instructions on the cleaning
agent container. Protect shrubs
from direct contact with cleaning
agents.
4. To remove soot and grime found
in industrial areas, wipe down the
siding with a solution made up of
the following:
1/3 cup powdered detergent
[(e.g. Fab®, Tide®, or
equivalent powder detergent)]*
2/3 cup powdered household
cleaner [(e.g., Soilax®, Spic
& Span®, or equivalent)]*
1 gallon water
5. If mold and mildew are a prob-
lem, add one quart of liquid laun-
dry bleach to the cleaning solution
mentioned above.
6. For stubborn stains, use the chart
on the right. (page 6)
The beauty of vinyl siding is maintained with little effort. Although vinyl siding will get dirty, like anything
exposed to the atmosphere, a heavy rain will do wonders in cleaning it. Or, it’s possible to wash it down with a
garden hose. If neither rain nor hosing does a satisfactory job, follow these simple instructions:
• Cleaning materials are listed in alphabetical order. The manufacturer does not endorse proprietary products
or processes and makes no warranties for the products referenced herein. Reference to proprietary names is
for illustrative purposes only and is not intended to imply that there are not equally effective alternatives.

6
stains & cleaners
cleanup
CAUTION: Do not use or mix sodium hypochlorite with other household chemicals
or products containing ammonia. To do so will release hazardous gasses.
*Cleaning materials are listed in alphabetical order. The manufacturer does not endorse proprietary products or
processes and makes no warranties for the products referenced herein. Reference to proprietary names is for
illustrative purposes only and is not intended to imply that there are not equally effective alternatives.
STAIN CLEANERS
*
Bubble Gum Fantastik
®
, Murphy’s Oil Soap
®
,
or solution of vinegar [30 percent] and
water [70 percent]
Crayon Lestoil
®
DAP [Oil-based caulk] Fantastik
®
Felt-Tip Pen Fantastik
®
or water-based cleaners
Grass Fantastik
®
, Lysol
®
,
Murphy’s Oil Soap
®
, or Windex
®
Lipstick Fantastik
®
, or Murphy’s Oil Soap
®
Lithium Grease Fantastik
®
, Lysol
®
,
Murphy’s Oil Soap
®
, or Windex
®
Motor Oil Fantastik
®
, Lysol
®
,
Murphy’s Oil Soap
®
, or Windex
®
Paint Brillo
®
Pad or Soft Scrub
®
Pencil Soft Scrub
®
Rust Fantastik
®
, Murphy’s Oil Soap
®
,
or Windex
®
Tar Soft Scrub
®
Topsoil Fantastik
®
, Lysol
®
,
or Murphy’s Oil Soap
®

Backerboard/Underlayment—a flat mate-
rial used on the face of the house, between
the studs and the siding, to provide a flat
surface for the siding.
Bottom Lock—the bottom edge of a siding
or a soffit panel, or accessory piece, oppo-
site the nailing slots, which locks onto the
preceding panel.
Channel—the area of the accessory trim
or corner post where siding or soffit panel
is inserted. Channel also refers to the trim
itself, and are named for the letters of the
alphabet they resemble (e.g., J-Channel,
F-Channel, etc.).
Course—a row of panels, one panel wide,
running the length of the house. Or, in the
case of vertical siding, from top to bottom.
Drip Cap / Head Flashing—an accessory
installed to channel water away from siding
panels and sub-wall. Drip cap is often used
on the tops of windows/doors and when
transistioning from horizontal to vertical
siding.
Face—refers to the side of a siding or sof-
fit panel that is exposed once the panel has
been installed.
Fascia Board— (sometimes referenced as a
sub fascia) board attached to the ends of the
rafters between the roofing material and the
soffit overhang.
Fascia Cap—the covering installed on the
fascia board.
Flashing—a thin, flat material, usually
aluminum, positioned under or behind
J-Channels, Corner Posts, Windows,
etc., to keep draining water from
penetrating the home.
Furring/Furring Strip—a wooden framing
material, usually 1˝ x 3˝, used to provide an
even nailing base. To “fur” a surface means
to apply these strips.
H-Mold (Double Channel Lineal)—
a siding accessory that joins the ends of
vertical siding and soffit panels.
Housewrap—weather-resistant, breathable
film used to cover wood underlayment prior
to the installation of siding.
Lap—to overlap the ends of two
siding panels or accessory pieces to join the
panels/pieces and allow for expansion and
contraction of the vinyl product.
Lug/Crimp—the raised “ears” or
tabs on a siding panel, created by a snaplock
punch, which can be used to lock a siding
panel into undersill trim when the nailing
hem has been removed.
Miter—to make a diagonal cut, beveled to a
specific angle (usually 45º).
Nailing Hem (or Flange)—the section of
siding or accessories where the nailing slots
are located.
Plumb—a position or measurement that is
truly and exactly vertical, 90º from a level
surface.
Scoring—running a utility knife blade
across a soffit or siding panel face
without cutting all the way through
the panel. This weakens the vinyl
surface in a specific area and allows the
panel to be bent and broken off cleanly.
Soffit—material used to enclose
the horizontal underside of an eave,
cornice or overhang.
Starter Strip—an accessory applied directly
to the surface of the building and used to
secure the first course of siding to the home.
Weep Holes—openings cut into the siding
panel or accessories during the manufactur-
ing process to allow for water runoff.
Nailing Hem
Face
Center Butt
Bottom Lock
Top Lock
7
the basics
terms to know

8
the basics
terms to know
Outside and Inside Corner Post
Corner posts are used to provide a finished edge at an inside or outside corner.
The siding from adjoining walls fits neatly into the inside or outside corner post
channels.
NOTE: We produce various sizes of J-Channels and Corner Posts. Remember to order accessories
of the proper size to accommodate the siding panels.
Trim and Molding
A complete line of accessories is used to give every installation a
professional, weather-resistant appearance. Common accessories include Corner
Posts, Starter Strips, F-Channels, Undersill Trim, and J-Channels (left). Each of these
accessories will be addressed in more detail throughout this manual.
Inside Corner
Post
Outside Corner
Post
Undersill Trim
J-channel
Starter Strip
F-channel
Fascia
Gable
Window Head
Flashing
Eave
Dormer
Rake
Window &
Door Trim

9
basic tools and equipment
NOTE: A saw blade set up in reverse direction should be used only for cutting vinyl.
DO NOT attempt to use it on other materials such as wood, plywood, etc.
Fig. 1
Fig. 2
Fig. 3
Hand Tools
Common hand tools, such as a
hammer, saw, square, chalkline, level,
and tape measure are needed for
proper installation (Fig. 1). Safety
glasses are recommended for eye
protection. Other basic tools include:
Power Saw
A bench or radial-arm power saw
can speed the cutting of the siding.
A finetooth blade (12 to 16 teeth per
inch) should be used with the blade
installed in the reverse direction. Some
applicators prefer a hand-held power
saw and a field-built cutting table. In
extremely cold weather, move the saw
through the material slowly to prevent
chipping or cracking (Fig. 2).
Utility Knife
Vinyl is easy to cut, trim and score
with a utility knife or scoring tool
(Fig. 3).

10
basic tools and equipment
Fig. 7
Fig. 6
Fig. 5
Fig. 4
Tin Snips
Good quality tin snips and compound
aviation-type snips will speed the cut-
ting and shaping of the vinyl (Fig. 4).
Snaplock Punch
A snaplock punch is used to punch
lugs in the cut edges of siding to be
used for the top or finishing course at
the top of a wall, or underneath a
window (Fig. 5).
Nail Hole Punch
Occasionally, it may be necessary
to elongate a nail slot. The hole is
elongated to allow for expansion
and contraction (Fig. 6).
Unlocking Tool
(Zip-Lock Tool)
Remove or replace a siding panel
with the unlocking tool. Insert the
curved end of the tool under the end
of the panel and hook onto the back
lip of the buttlock. To disengage the
lock, pull down and slide the tool
along the length of the panel. Use
the same procedure to relock a panel
(Fig. 7).

11
estimating required material
how to measure
1. All houses can be broken down
into shapes of rectangles, triangles or
a combination of both.
2. The area to be sided can be deter-
mined by measuring the height and
width of the house, including win-
dows (below).
3. Total all of the measurements for
the areas to be sided. Windows and
doors are not usually deducted.
Including them will provide an allow-
ance factor for waste. If the windows
and doors are extremely large (such as
garage or sliding glass doors), some
deductions can be made. Dormers and
gables are prone to material waste due
to cutting and fitting.
4. To estimate the amount of starter
strip required, measure the linear feet
around the entire base of the house.
When measuring linear footage, add
a factor of 10 percent to allow for
waste.
width
height
Height____feet x width____feet=____square feet
width
height
(
1
/
2
height)____feet x width____feet=____square feet
A
D
C
B
1
/
2
( A + B ) x C +
1
/
2
B x D = ___total area of gable
(square feet)
width
width
height
(
1
/
2
height)____feet x width____feet =____total area of dormer
(square feet)

12
estimations worksheets
basic installations
Use the following worksheet to estimate the required materials:
Siding
Walls ____square feet
Gable ends ____square feet
Upper gambrel walls ____square feet
Total wall surface area ____square feet
Large areas not covered ____square feet
[A]
[garage doors/sliding doors] x
0.50
=
Uncovered area ____square feet
[B]
Subtract B from A for
Total net surface area ____ square feet
Soffit
____square feet
Porch Ceiling
____square feet
Accessories
Starter Strip ____linear feet
Utility trim ____linear feet
Receiving channel
J-Channel ____linear feet
Flexible J-Channel ____linear feet
F-trim ____linear feet
3 1/2˝ and 5˝ Window & Door Surround ____linear feet
Outside corners
Outside corner post ____linear feet
Fluted corner trim ____linear feet
Inside corners
Inside corner post ____linear feet
J-Channel ____linear feet
Other
Soffit cove trim ____linear feet
H-molding ____linear feet
Light blocks ____linear feet
Width of accessory recess opening:
[please circle one] 1/2˝ 5/8˝ 3/4˝ 1 1/8˝
Nails
Pounds required
Length [1 1/2˝minimum] ____pounds
Tools needed
___hammer ___tin snips ___chalkline
___utility knife ___square ___hacksaw
___nail hole punch ___tape measure ___level
___power saw ___unlocking tool
___snaplock punch ___finetooth saw blade

13
fastener choices
Use aluminum, galvanized steel or other corrosion-resistant nails,
staples or screws when installing vinyl siding. Aluminum trim pieces
require aluminum or stainless steel fasteners.
Nails
Nail heads should be 5/16˝ minimum
in diameter. Shank should be 1/8˝ in
diameter.
Minimum nail lengths are as
follows:
• 1 1/2˝ for general use
• 2˝ for residing
• 1˝ to 1 1/2˝ for trim
Screw Fasteners
Screw fasteners can be used if the
screws do not restrict the normal
expansion and contraction movement
of the vinyl siding panel on the wall.
Screws must be centered in the slot
with a minimum 1/32˝ space between
the screw head and the vinyl.
Screws should be:
• Size #8, truss head or
pan head.
• Corrosion-resistant, self-tapping
sheet metal type.
Staples
If staples are being used instead of
nails or screws, they must be:
• Not less than 16-gauge
semi-flattened to an elliptical
cross-section (Fig. 1).
• Wide enough in the crown to allow
free movement of the siding.
• 1/32˝ clearance between staple
crown and nailing hem of the
siding panel. Make sure to adjust
staple gap to allow for 1/32˝
clearance.
2"
1
1
/2"
1"
1/ 8"
5/ 16"minimum
1/32"
Fig. 1
* All fasteners must be long enough to penetrate into the framing
3/4 of an inch.

14
fastening procedures
Step 1
Make sure the bottom lock of the
panels are fully engaged along
the entire length of the panel.
WARNING: Push the panel up fully
but do not stretch the panel by pulling
it from the top.
Step 2
Do not drive the head of the fastener
tightly against the siding nail hem.
Leave a minimum of 1/32˝ (the
thickness of a nickel) between the
fastener head and the vinyl. Tight
nailing, screwing, or stapling will
cause the vinyl siding to buckle with
changes in temperature (Fig.1).
If the head or crown contacts the
vinyl panel it may “pimple” or distort
due to heat build-up.
Step 3
After locking the panel, fasten the
panel in the center, work in, to both
ends.This method helps keep panels
running straight.
Step 4
Nail 8˝ or more away from the end of
a panel that will be overlapped with
another panel. This will help the over-
lap appearance.
Center the fasteners in the slots to
permit expansion and contraction of
the siding (Fig. 2).
Step 5
Drive fasteners straight and level to
prevent distortion and buckling of
the panel (Fig. 3).
Step 6
Space the fasteners a maximum of
16˝ apart for horizontal siding panels,
12˝ apart for vertical siding panels,
and 8˝ to 10˝ apart for the accessories.
Step 7
Start fastening vertical siding and cor-
ner posts in the top of the upper-most
slots to hold them in position. Place
all other fasteners in the center of the
slots (Fig. 4).
Vinyl siding can expand and contract 1/2˝ or more over a 12´ 6˝ length
with changes in temperature. Whether using a nail, screw or staple to
fasten the siding, the following basic rules must be followed:
YES NO
YES
NO
Fig. 2
Fig. 3
Fig. 4
Fig. 1
YES
NO

15
basic guidelines
cutting the siding
Fig. 1
Fig. 2
Fig. 3
Fig. 4
Step 1
Safety goggles are always recom-
mended for all cutting and nailing
operations. As on any construction
job, use proper safety equipment and
follow safe construction
practices (Fig. 1).
Step 2
With a circular saw, install the
fine-toothed (plywood) blade back-
ward on the saw for a smoother, clean-
er cut. Cut slowly. Do not attempt to
cut materials other than vinyl with a
reversed direction saw blade (Fig. 2).
Step 3
With a utility knife or scoring
tool, score the vinyl face up with
medium pressure and snap it in half.
It is not necessary to cut all the way
through the vinyl (Fig. 3).
Step 4
With tin snips, avoid closing the
blades completely at the end of a
stroke for a neater, cleaner cut
(Fig. 4).
When cutting vinyl siding, follow these guidelines:

16
preparing the wall
Sheathing/Backerboard
Our vinyl siding should be applied
over a sheathing that provides a
smooth, flat, stable surface. Consult
local building codes for sheathing
requirements. Vinyl siding should
never be applied directly to studs
without sheathing. We recommend
that wood-based sheathings be
protected utilizing moisture-
resistant housewrap or building
paper prior to the installation of
the siding and accessories. Some
building codes now require this
protection.
Flashing
Flashing, such as aluminum coil,
roofing felt or house wrap, should
be applied around windows, doors,
other openings, inside and outside
corners, and the intersection of
walls and roofing to prevent water
infiltration.
New Construction
Step 1
Make sure all studs are straight and
true to avoid bulges or dips in the
finished wall. Correct any bowed
studs at this time.
Step 2
Make sure all sheathing is properly
fastened to the framing according
to building code requirements and/
or the sheathing manufacturer’s
recommendations.
NOTE: Sheathing behind vinyl
siding must be smooth, flat,
stable and appropriate for use
on the type of construction being
erected. Increasing requirements
in building codes, especially in the
areas of fire and wind resistance,
make the appropriate choice and
fastening of wall sheathing an
important area of consideration.
Check local building codes for the
allowable type and thickness of
sheathing that can be utilized on
the type of structure being sided.
Step 3
Make sure subwall assembly is
weathertight before applying
siding. Vinyl siding and vinyl
siding accessories alone do not
constitute a waterproof installation.
The combination of proper subwall
preparation and siding installation
result in the desired protection of
the structure.
Wall sheathing should be weather-
resistant, or covered with a weather-
resistant barrier such as fanfold
insulation, housewrap, or building
paper. Independent VSI studies
indicate that the combination
of a weather resistant barrier
plus a housewrap result in
improved weather performance
of the vinyl siding. Some
building code jurisdictions are
currently requiring this protection.
A weather-resistant covering should
be properly fastened according to
the manufacturer’s instructions, and
be smooth and even. Flashing and
caulking should be added as needed
in areas such as windows, doors,
and other openings to control
moisture and to protect the subwall
assembly.
WARNING: A smooth, flat, stable
wall surface is necessary for
the proper installation of vinyl
siding. Waviness in the finished
siding resulting from uneven or
inadequate backerboard sheathing
constitutes misapplication under
the terms of the warranty.
TIP: Place the drywall in the
house, on the floor of the room
where it is going to be applied,
prior to the installation of the
siding when possible. This will
help load the floor system and
the floor band prior to applying
siding. This can help reduce panel
bulging in the floor band areas
where compression and shrinkage
typically occur.

17
preparing the wall
Furring strips
Residing Existing
Structures
Step 1
Nail down any loose boards on
existing siding, and replace any rotten
wood as needed. DO NOT INSTALL
VINYL SIDING OVER ROTTEN
WOOD. (See Fig. 1)
Step 2
Scrape off loose caulk and any other
buildup that may interfere with the
siding installation. Remove all items
such as gutters, downspouts, and light
fixtures as needed.
Step 3
Install suitable sheathing, as needed,
to provide a smooth, flat, and stable
surface for the installation of the vinyl
siding. See information previously
given in this segment for additional
instructions on subwall protection and
flashing.
Step 4
Install furring in areas needing
straightening and leveling. Apply
rigid sheathing to cover and level the
furring strips. Do not apply vinyl
siding directly to furring strips with-
out sheathing, because the siding may
conform around the furred areas
causing an uneven appearance.
(See Fig 2)
Step 5
Window and door casings may need
additional attention or preparation.
Depending on vinyl siding moldings
being used, a window/door casing
generally needs to extend out from the
finished subwall sufficiently, to allow
a J-Channel or similar molding to butt
to it. In some situations, building out
the casings, or using special purpose
moldings such as Window and Door
Surround may be necessary.
Fig. 1
Fig. 2

18
preparing the wall
Over Masonry
Sub-surface
A minimum 1˝ x 3˝ wood strips are
installed with masonry nails over the
masonry area to be sided (Fig. 1). For
increased decay resistance, use pres-
sure treated furring strips.
Step 1
For horizontal siding, strips should
be installed vertically 16˝ on center.
They should be installed completely
around doors, windows and other
openings, at all corners, and at the top
and bottom of the area to be sided.
Step 2
For vertical siding, furring is essen-
tially the same as for horizontal sid-
ing. Strips should be nailed horizon-
tally 12˝ centers.
NOTE: Furring strips should be
covered with insulated sheathing or
the spaces between the furring strips
should be filled in with insulated
sheathing equal in thickness to the
furring strips. This will provide an
even wall surface for the siding and
help avoid any waviness.
Furring strips
Furring Strips, 1x3s
Starter
Strip
Insulated
Sheathing
Cinder
Blocks
Fig. 1
/