Helios – fixtures for wall mounting
Interiors, wall mounting
Outdoor spaces*, wall mounting
Ref. No. 9135351
Box for wall mounting with
frame for 1 module
Size: 125 x 235 x 46 mm
Wall cut: 110 x 220 x 50 ± 5 mm
Ref. No. 9135361
Box for wall mounting with cover
for 1 module
Cover size (width x height x depth): 129 x 240 x 41 mm
Wall cut: 110 x 220 x 50 ± 5 mm
Ref. No. 9135352
Box for wall mounting with
frame for 2 modules
Size: 225 x 235 x 46 mm
Wall cut: 210 x 220 x 50 ± 5 mm
Ref. No. 9135362
Box for wall mounting with cover
for 2 modules
Cover size (width x height x depth):
229 x 240 x 41
mm
Wall cut: 210 x 220 x 50 ± 5 mm
Wall
mounting
with cover
Notice:
• Do not fasten the boxes with plaster – they are designed for dry mounting
∗ Outdoor spaces = locations where the product is exposed to rain or to water running down the wall
(e.g. fence, outer wall). Mounting a cover is obligatory in outdoor spaces, unless the protection
against rain is provided for in another way. Besides the covers presented herein, it is possible to use
covers ref. no. 9135331 and 9135332
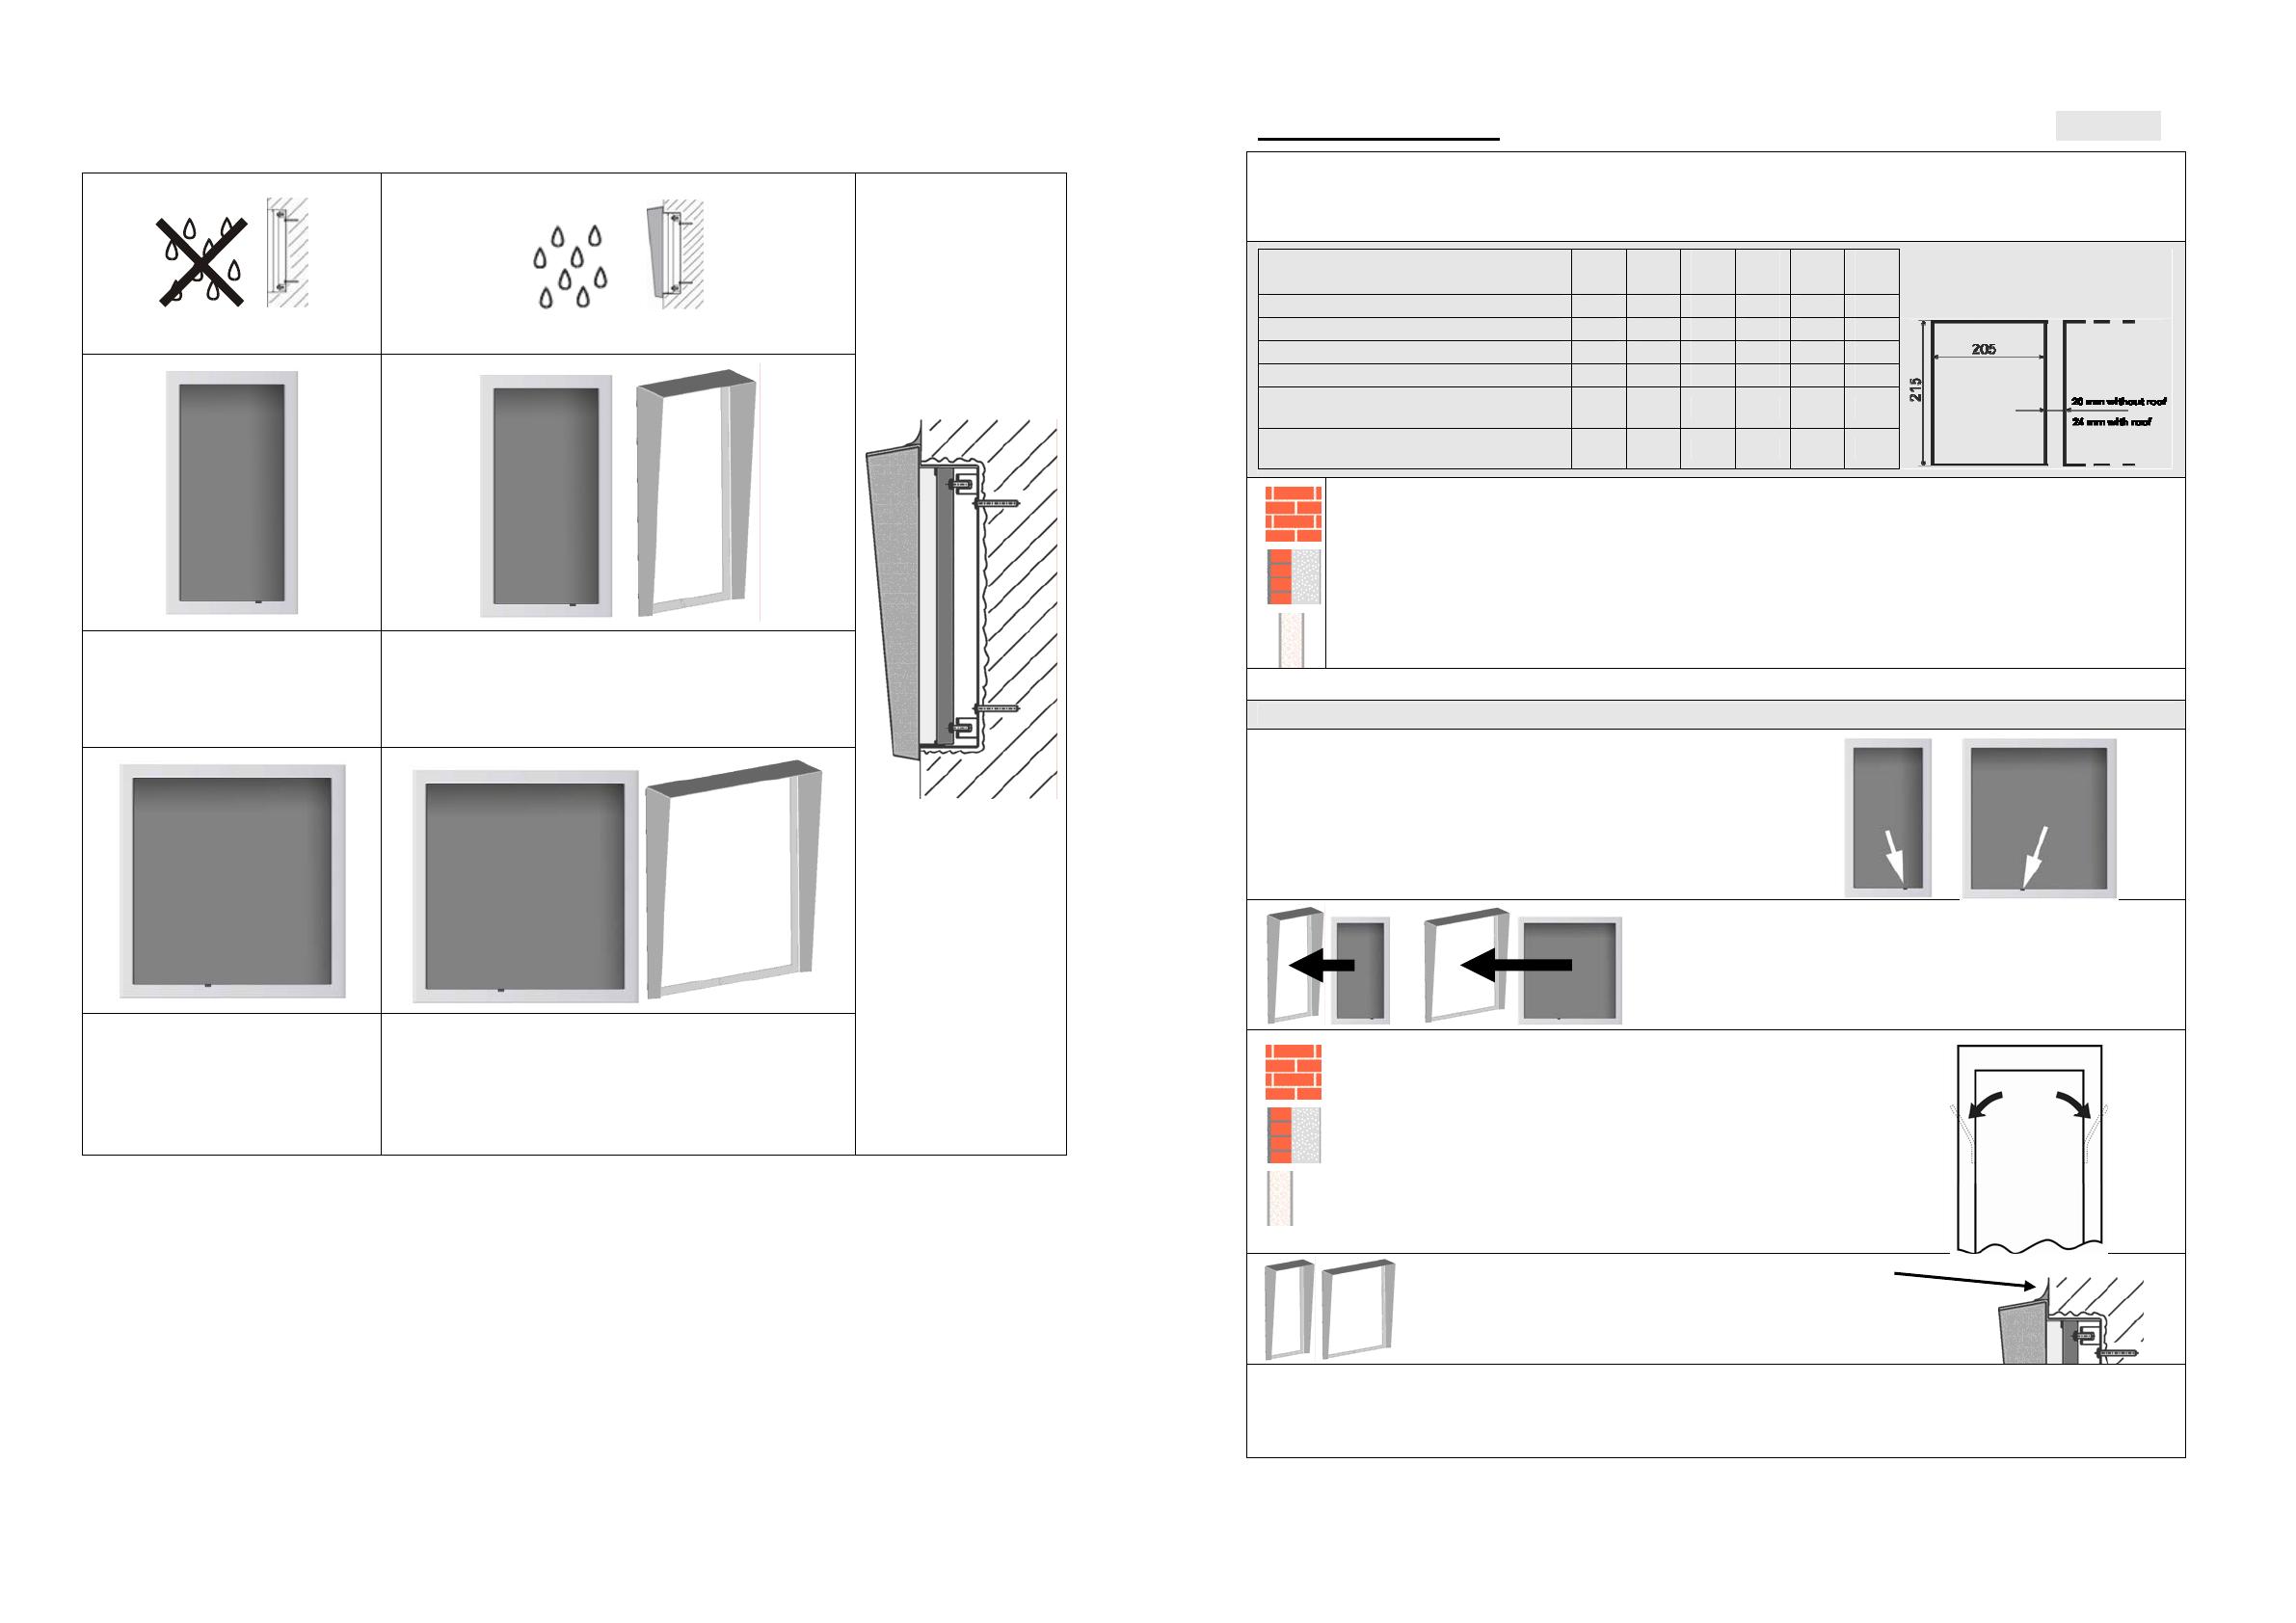
Mounting procedure (when mounting two modules as maximum, leave out grey fields)
Cut a hole using the template on the reverse side of this instruction. If you work carefully and do not exceed
the tolerance of 5 mm, the frame will fully cover the edges of the cut and there will be no need to fill it with
plaster. As it is possible to cut a more perfect hole in the plasterboard, it is advisable to make it 5 mm smaller:
105 (205) x 215 mm.
Cut sizes for sets of 3 – 8
modules
3
m.
4
m.
5
m.
6
m.
7
m.
8
m.
Box for 2 modules, number of pieces
1 2 2 3 3 4
As to the plasterboard,
it is advisable to cut the holes
for each box like this:
Box for 1 module, number of pieces
1 - 1 - 1 -
Wall, without cover, cut width, mm
335 435 560 660 785 885
Wall, with cover, cut width, mm
339 439 568 668 797 897
Gypsum plasterboard, without cover,
total width of cuts, mm
330 430 555 655 780 880
Gypsum plasterboard, with cover,
total width of cuts, mm
334 434 563 663 792 892
Conventional wall: drill holes for wall dowels (Ø 8 mm) – use the template or directly the box.
Insert the dowels in the holes.
External insulation: Proceed as above. The dowels have to be fitted right in the wall; if the
insulation layer is thicker than 50 mm, longer screws are necessary, however, these are not a
part of delivery. For example, use 4.5 x 90 mm screws for 100 mm thick insulation.
Gypsum plasterboard: Do not use screws; the sides of the box are equipped with flippers.
Make a hole in the box to pull wires through (telephone, power supply, electric lock etc.)
Make side holes in the box to pull connecting cables through.
WARNING!!!
This small cut (see the arrows) for the
microphone has to be on the LOWER side!!!
Only with cover:
Remove the protection sheet on the inner sides of the cover
and insert the countersink box. Then work with this unit.
Conventional wall, external insulation: insert the box (or box with
cover) in the cut in the wall and screw up. Before tightening the
screws, adjust the sides of the box vertically. We recommend to
fasten the big box, ref. no. 9135352, with four screws ( holes in the
corners of the box). Put attached washers under the screw heads.
Gypsum plasterboard: Secure the box by turning the flippers (see the
picture). We recommend to protect the box from displacement with
suitable glue (e.g. silicon sealant. For plasterboard thicker than 12.5 mm,
adjust the flippers or use only glue.
Only with cover:
If you also mount the cover, seal its
upper and side edges to the wall; use
silicon sealant (see the picture).
Silicone
• The box does not have to be built in / fastened with plaster, but in general this is possible. However,
this complicates possible dismounting.
• If the cut in the wall is not accurate and perfect, it is advisable to repair the edges with plaster.
• Screws M4x10 mm attached to the bottom of the box are devised to mount Helios in the box.
© 2006
2N TELEKOMUNIKACE a.s.. - Praha DR 1292v1


