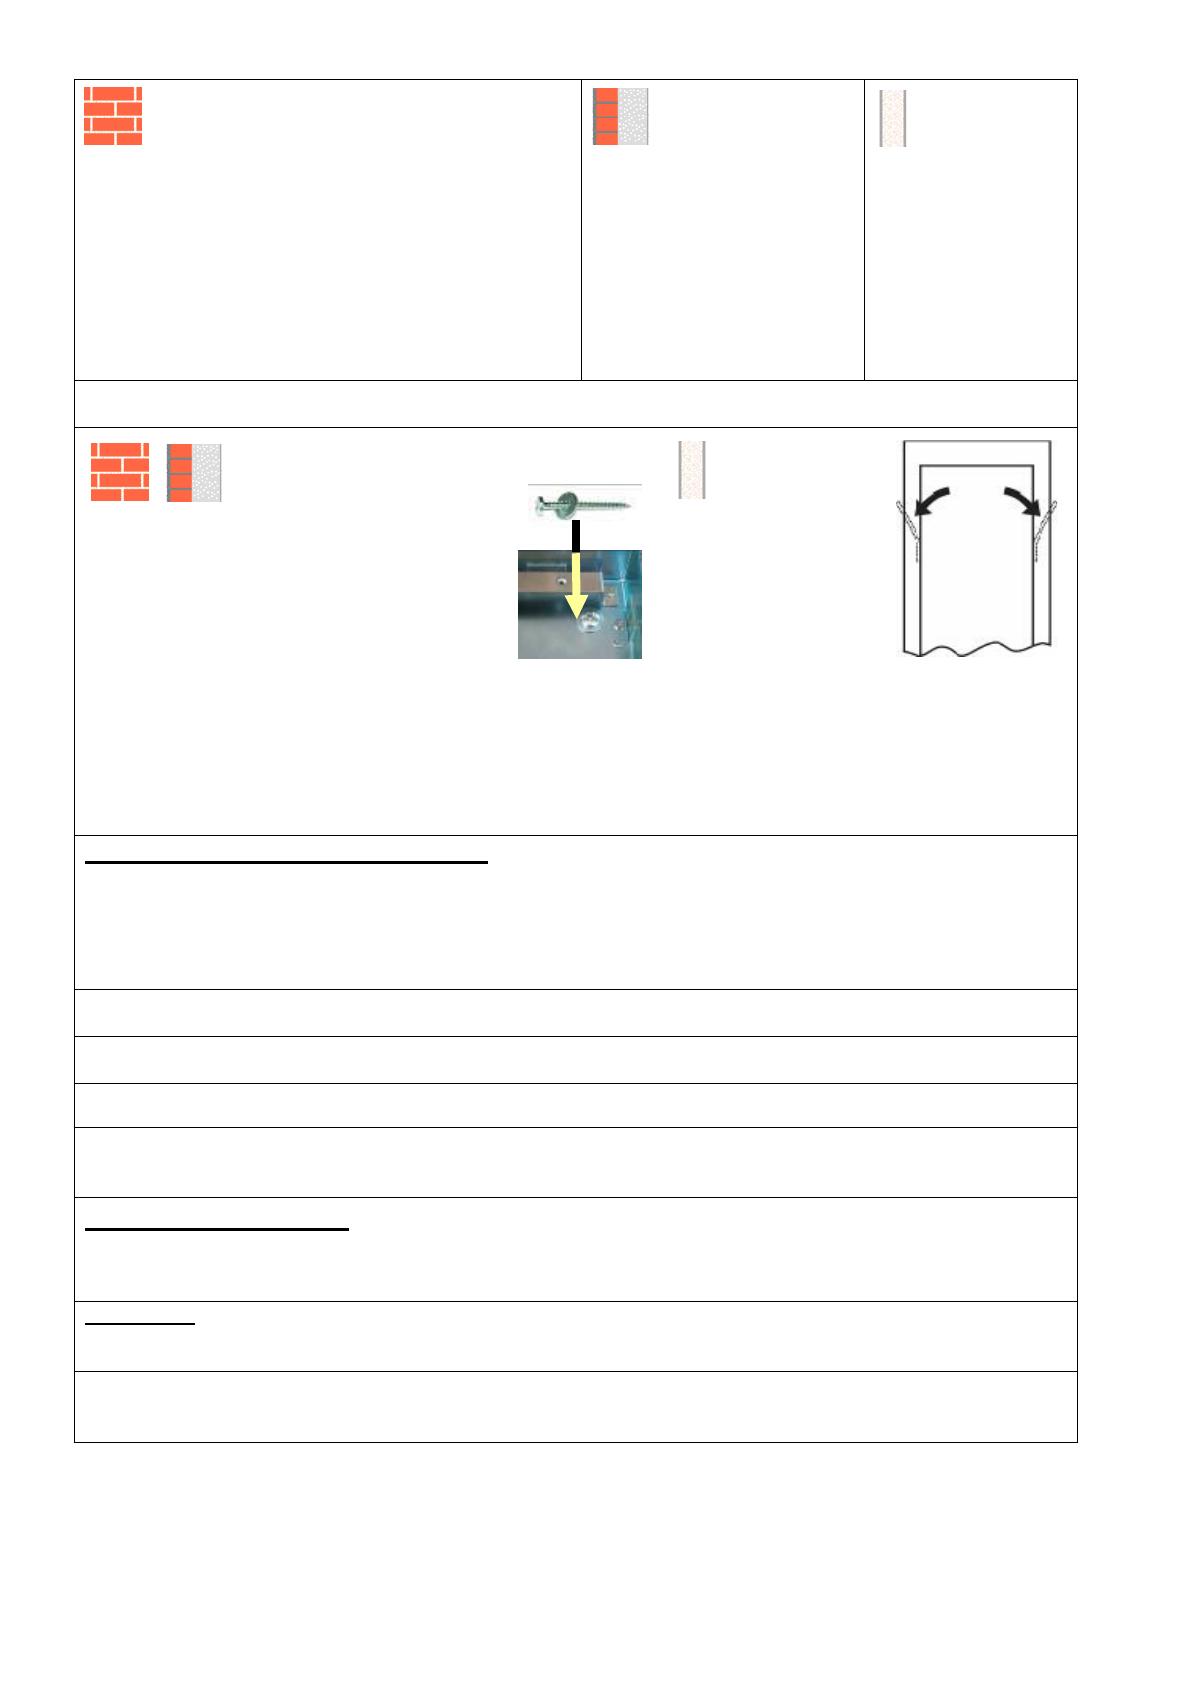
Classic brickwork: Please check first that
around the hole is wall is straight. Asperity
bigger then 1mm set straight! Insert the boxing
(or set of connected boxes) into the hole so that it is
vertical and so that its corners overlap the edges of the
hole as evenly as possible and mark 4 future holes for
dowels by the rounded holes in the corners of (each)
box. Remove the box. Then drill 4 holes for rawl plugs
(Φ 10 x 60 mm) directly according to the holes in the
corners of the boxing. Insert the rawl plugs provided into
the holes. These rawl plugs can also be used for porous
and lightweight brickwork.
Insulated facade:
Procedure as for the
classic brickwork.
The rawl plugs must be
positioned right into the
brickwork and in the
insulation layer is thicker
than 50 mm, longer screws
must be used, which are not
included in the delivery. E.g.
for an insulation thickness of
100 mm you should use 4.5 x
100 mm screws.
Plasterboard:
Rawl plugs and
screws are not
used. The sides of
the boxing are
equipped with flaps.
Make a hole in the boxing, which you will need for pulling through the cables (tel. lines, power supply, lead for the el.
lock and similar).
Ordinary walling, isolated facade:
Insert the box into hole in the wall –
orientation by the arrows.
On the screws insert supplied washer and
screw up into the dowels. Always use all 4
screws! Before tiding up the screws make
sure that box is correctly upright and all her
corners exceeded whole edges. In case that
hole is not straight or clearly cut it is better to
fix it or put underneath of the box appropriate
underpin to correctly adjust the height. The boxing need not
be bricked up but in principle this is possible. This will
however complicate possible dismantling of the unit. In case
of corrosion caused by contact with aggressive material it is
not possible to claim warranty. In the situation of masonry
fitted boxes it is necessary make sure to leave the space for
module interconnection!
Plasterboard:
Secure the
boxing by
bending the flats as
shown in the
illustration. We
recommend you
secure the position of
the boxing against
displacement with a
suitable adhesive (e.g. silicon putty). Adjust
the flaps for plasterboard thicker than 12.5
mm.
Warning: plasterboard is not very suitable
for use in locations where vandalism is
anticipated due to its low rigidity.
Mounting of Helios into the boxing:
Remove the front metal panel from the Helios unit (1 screw) and also the front plastic part (4 screws in the
corners). The M4 x 10 mm screws attached to the base of the boxing are intended for mounting the Helios unit
into the boxing.
When mounting multiple boxing, always mount the basic unit on the left and the
extension module on the right.
Perform electrical installation according to the instructions, which are supplied with the Helios basic unit. Never
forget to connect the backlighting when mounting the unit on an external environment.
Attach and screw on the front plastic part (parts). Be careful not to nip any cables when doing so. Carefully
tighten all screws. Insert names into the nameplates.
Insert the labels into name tags.
Do not remount the metal panel onto the Helios unit. If you have a basic unit with keypad, remove the mask
with buttons (4 screws). Keep these parts in case you want to remove the vandal resistant panel, or for the
event of any complaints and return of the product.
Mounting the mask: fit the vandal resistant mask and screw it in place with the safety screws
provided. A special key or attachment is provided without which the screws cannot be loosened. Keep this tool
safe! Do not throw this away even if it is superfluous to you as it could be misused.
At the configuration of multiple modules process from the left (base unit) right (extension modules).
WARNIING! There is an aperture of roughly 0.5 mm between the façade and the mask for evening out any
unevenness in the facade. If there is any greater unevenness in the façade where the mask is positioned, this
unevenness must be ground down. Otherwise the buttons may not work properly.
There is a flexible seal around the outside of the mask to guard against water. If you wish to fill in the aperture
between the mask and the façade even more in order to avoid the accumulation of dirt, you must then count on
greater difficulty when changing the nameplates. Always leave the lower edge free to allow any water to drain off.
© 2007, 2N TELEKOMUNIKACE a.s.. - Praha DR 1294v3.02