Page is loading ...

User Manual
External WiFi Data Logger for
Remote System Monitoring
Version 1.3 Release Date: 01/12/2023
Model Number: S3-WIFI-ST

● This device should only be installed by professional personnel who are qualified to
operate Solis equipment.
● Product specifications are subject to change without notice. Every attempt has been
made to make this document complete, accurate and up-to-date. Individuals reviewing
this document and installers or service personnel are cautioned, however, that Solis
reserves the right to make changes without notice and shall not be responsible for any
damages, including indirect, incidental or consequential damages caused by reliance
on the material presented including, but not limited to, omissions, typographical errors,
arithmetical errors or listing errors in the material provided in this document.
● Solis accepts no liability for customers' failure to comply with the
instructions for correct installation and will not be held responsible for upstream or
downstream systems Solis equipment has supplied.
● The customer is fully liable for any modifications made to the system; therefore,
any hardware or software modification, manipulation, or alteration not expressly
approved by the manufacturer shall result in the immediate cancellation of the warranty.
● Solis will not be held liable for defects or malfunctions arising from:
● Improper use of the equipment.
● Deterioration resulting from transportation or particular environmental conditions.
● Performing maintenance incorrectly or not at all.
● Tampering or unsafe repairs.
● Use or installation by unqualified persons.
● This manual is to be used for the S3-WIFI-ST data logger only. It should not be used for
any other Solis device.
● For additional assistance with SolisCloud, please go to the Ginlong US website and
download the SolisCloud user manual: www.ginlong.com/us
Important Notes
Solis Support can be reached by calling +1(866)438-8408 or by
sending an email direclty to usservice@solisinverters.com
Please provide the support team with the data logger serial number,
inverter serial number, and a detailed description of the issue that
you are having. The support team will assist you in a timely manner.
.
Contacting Solis Technical Support

This device complies with part 15 of the FCC rules. Operation is subject to the following
two conditions:
(1) This device may not cause harmful interference
(2) This device must accept any interference received, including interference that may
cause undesired operation
FCC Warning:
Any changes or modifications not expressly approved by the party responsible for
compliance could void the user’s authority to operate the equipment.
Note:
This equipment has been tested and found to comply with the limits for a class B digital
device, pursuant to part 15 of the FCC rules. These limits are designed to provide
reasonable protection against harmful interference in a residential installation. This
equipment generates, uses, and can radiate radio frequency energy and, if not installed
and used in accordance with the instructions, may cause harmful interference to radio
communications. However, there is no guarantee that interference will not occur in a
particular installation. If this equipment does cause harmful interference to radio or
television reception, which can be determined by turning the equipment off and on, the
user is encouraged to try to correct the interference by one or more of the following
measures: (1) reorient or relocate the receiving antenna (2) increase the separation
between the equipment and the receiver (3) connect the equipment into an outlet on a
circuit different from that to which the receiver is connected or (4) consult the dealer or an
experienced radio/TV technician for help
This equipment complies with FCC radiation exposure limits set forth for an uncontrolled
environment. This equipment should be installed and operated with a minimum distance
of 20 centimeters (7.87 inches) between the radiator and your body.
FCC Certification

6 Technical Specs
5 Decommissioning
4 Commissioning
3 Configuration
2 Installation
1 Introduction
Table of Contents

1
1
1
1.1 Data Logger Description ...................................................................
1. Introduction .........................................................................................
1.2 Compatible Solis US Inverter Models .................................................
2. Installation ...........................................................................................
3. Configuration ......................................................................................
Table of Contents
1.3 LED Indicator Lights .........................................................................
2.1 Pre-Installation Steps .......................................................................
2.2 Installation Steps ........ .....................................................................
2.3 Connecting Multiple Inverters to One Data Logger ...............................
4. Commissioning ...................................................................................
4.1 Download SolisCloud and Register an Account ...................................
4.2 Create a New Plant for the System .....................................................
4.3 Add the Data Logger to the Plant .......................................................
5. Decommissioning ...............................................................................
6. Technical Specifications .....................................................................
2
3
3
3
4
5
8
8
9
9
10
11

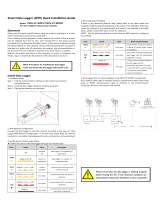
1.1 Data Logger Description
The Solis WiFi Data Logger is an external device which plugs directly into to a port on
the bottom of a Solis inverter. The logger relays information from the inverter to the
Solis monitoring platform, called SolisCloud. This logger connects to a local 2.4GHz
WiFi network, it is incompatible with 5GHz networks. Up to ten Solis inverters can be
daisy-chained together with RS485 to communicate through one WiFi logger. This
logger works with any Solis inverter that has a 4-pin COM port, please reference the
list below for all compatible Solis US inverter models.
Figure 1.1
Logger Parts
1
1. Introduction
Lock Ring
Antennae
LED Indicator Lights
4-pin Connector
Solis-1P(2.5-6)K2-4G-US
Solis-1P(6-10)K-4G-US
RHI-1P(5-10)K-HVES-5G-US
Solis-(25-40)K-US
Solis-(50-66)K-US
Solis-(75-100)K-5G-US
S5-GC(75-100)K-US
Solis-(125-255)K-EHV-5G-US-PLUS
1.2 Compatible Solis US Inverter Models
The S6-EH1P(3.8-11.4)K-H-US hybrid
inverter series does not support the
Solis S3-WIFI-ST WiFi data logger.
Note
Reset Button
Lock Ring

1.3 LED Indicator Lights
The Solis S3-WIFI-ST data logger has three LED indicator lights. These lights depict
the status of the logger. There are three lights: NET, COM, and PWR. The chart below
explains what the lights mean when they are flashing, solid, or off. lf the LED lights are
all off when the inverter is getting proper voltages, please contact Solis Support.
Figure 1.2 LED indicator lights and normal logger behavior
2
1. Introduction
LED Indicator
Description
LED
Status
Meaning
Internet
Connection
NET
Connection status
between the data
logger and the local
WiFI network
Flashing
Attempting to connect to the WiFi network
Solid
Successfully connected to the WiFi network
Off
Not connected to the WiFi network
Inverter
Communication
COM
Communication
status between the
logger and the
inverter
Flashing
Attempting to communicate with the inverter
Solid
Communicating with the inverter normally
Off
Not communicating with the inverter
Logger Power
PWR
Power from the
inverter to the
logger
Solid
Data logger is powered up normally
Off
Data logger is not getting enough power
Normal Operation:
Once the logger has been configured
properly, all three LED indicator lights should be solid.
Every Five Minutes:
The logger will transmit a data package to SolisCloud.
When this happens, the COM light will flash for a few
seconds. This is normal behavior and should not cause
any concern.

2.1 Pre-Installation Steps
Prior to installing the S3-WIFI-ST logger, the following steps must first be taken to
ensure that the logger will function properly once it has been installed.
1. The Solis inverter is completely installed and commissioned
2. The inverter address is 1: Go to Settings, then to Address, verify the number is 1,
if the number is not one, use the down button to change it to 1 and then press enter
3. Turn the inverter on with both AC and DC power
4. Ensure the WiFi network is 2.4 GHz, the logger does not support 5 GHz
5. Verify that WiFi network password is correct - check it by connecting with your phone
6. Check the signal strength of the WiFi network you plan to connect the logger to by
performing a network speed test.
See section 2.3 for instructions on how to connect multiple inverters to one logger
3
2. Installation
2.2 Installation Steps
Figure 2.1
COM Port
The data logger plugs into the 4-pin COM port on the bottom of the inverter wire box.
This port is protected by a black cap that screws on. The first step is to unscrew the cap.
Figure 2.1 shows the Solis-1P10K-4G-US inverter wire box as an example.
Other Solis inverters will have a similar green COM port on the bottom of the wire box.
Step 1: Locate the COM port and remove the protective cap
The minimum WiFi signal strength for the
logger is -90 dBm (20% RSSI) which equates
to approximately 11 Mbps upload speed.
Distance from the router to the logger should
be no more than 300 feet with no obstructions.
If there are obstructions, this distance is
significantly less. Please install a WiFi range
extender if the upload speed is under 11 Mbps.
Note

4
2. Installation
Step 2: Attach the antenna and plug the logger into the COM port
A.Screw the antenna onto the logger. Then plug the logger into the COM port. Be sure
the LED indicator lights are facing forward. The logger will only plug in if the joint matches.
B.Twist the black lock ring at the top the logger clockwise until it feels snug against the
bottom of the inverter. Be careful not to rotate the silver casing during this step.
match the joint
2.3 Connecting Multiple Inverters to One Data Logger
First, the inverters must first be daisy-chained together with RS485. The logger can
support a maximum of ten inverters. If there are more than ten inverters on the same
system, then additional loggers must be installed. Please see the inverter manual for
instructions on how to complete the daisy chaining.
Step 1: Daisy chain the inverters together with RS485 communication cable.
Step 2: Plug the data logger into the first inverter in the daisy chain.
Step 3: Adjust the address for each inverter.
Note: The first inverter should be set to 01. Each of the other inverters in the chain must
be set to a number other than 1.To do this,follow the steps:
A. Go to the Settings menu of each inverter and then to the Address submenu.
B. Use the up/down buttons to change the address number
C. Press enter to save the new address of the inverter
For example:
Inverter 2 = address of 2, Inverter 3 = address of 3... Inverter 10 = address of 10
Step 4: Commission the logger like normal. Each inverter in the daisy chain will populate
into SolisCloud once the logger transmits the first data packet.
The logger will collect and transmit information from all of the inverters in the daisy chain
to SolisCloud. Only the logger gets added to the new plant on SolisCloud. The inverters
will automatically populate into the plant once the logger starts to report to SolisCloud.

5
Step 1: Connect your phone to the data logger’s access point network
3. Configuration
Open your phone WiFi settings and look for the WiFi network that starts with “Solis_”
followed by the data logger serial number. Tap that network to connect to it. Enter the
password and then tap Join. This is the logger access point (AP) network.123456789
If you get a message stating that the password is incorrect or if the logger WiFi network
does not appear in the list of nearby networks, press and hold the Reset button on the
back of the data logger for 15 seconds.
If the AP network still does not appear or if the password fails again, contact Solis Support.
Configuration and Commissioning Overview
Connect phone to logger
access point network
Go to logger configuration
page on a browser app
Select the desired WiFi
network & enter password
Wait ten seconds for the
logger to communicate
Download SolisCloud and then
register a new account
Create a new plant for
the system on SolisCloud
On the new plant, go to
add a device
Scan the sticker
on the logger
Wait five to ten minutes
for the logger to report
Once the logger reports, the inverter(s)
will auto-populate into the new plant The system has now been commissioned
Solis Support can be reached by calling +1(866)438-8408 or by
sending an email direclty to usservice@solisinverters.com
Please provide the support team with the data logger serial number,
inverter serial number, and a detailed description of the issue that
you are having. The support team will assist you in a timely manner.
.
Contacting Solis Technical Support

6
3. Configuration
Step 2: Open a browser app and then go to the data logger configuration page
Open a browser app such as Safari, Google Chrome, Mozilla Firefox, etc., then enter
into the address bar and tap go. For the user name enter and for 10.10.100.254 admin
the password enter , then tap Log In. You should now be at the configuration123456789
page on the Status tab. If you get a message stating that the login information is incorrect,
please try holding the Reset button down for 15 seconds. Then go through the configuration
steps once more. If the message occurs again, please contact Solis Technical Support.
Step 3: Connect the data logger to the WiFi network
Tap Quick Set on the left side of the page. Then tap the orange Search button to view the
nearby WiFi networks. Tap the circle to the left of the network that you want to connect the
logger to. Finally, tap OK. If you do not see any nearby networks, tap Refresh.

7
3. Configuration
Enter the WiFi network password. To view the password as you are entering it, tap on the
semicircle that is in the password field. Once the password has been entered, tap Save.
A message stating that the set up is finished will appear. If the logger is able to connect to
the WiFi network, your phone will automatically be disconnected from the logger access
point network and the green light should go solid. If the green light continues to flash and
the access point network is still available, re-enter the WiFi password.
Hint
Hint
If the logger AP network disappears but the green light flashes for longer than ten
seconds, it is likely the network that you connected the logger to is 5 GHz and not
2.4 GHz. The logger only supports 2.4 GHz networks, so you will need to select a
different WiFi network to connect the logger to. If there are two nearby networks with
the same name, try connecting to the other network.
If the logger AP network does not disappear and the green light flashes for longer
than ten seconds, you likely entered the wrong password for the WiFi network.
Try connecting your phone to the same network to verify that the password is correct.
Some passwords are long and complex, which increases the chances that the
password was entered improperly. Sometimes the password for the WiFi network
is printed on the router specification label.

4.1 Download SolisCloud and Register an Account
8
4. Commissioning
SolisCloud is the monitoring platform for Solis inverters. SolisCloud is a mobile-app that
can be accessed with a smart-phone and also a website that can be accessed through a
web browser. This guide is for the mobile-app, but the commissioning process can also
be done on the website if that is preferable .
Step 1: Download the SolisCloud application or go to the SolisCloud website
Search “SolisCloud” in the app store and download the app. If you search “Solis” many
apps will appear, please see figure 4.1 for the correct app SolisCloud.
Website: www.soliscloud.com/#/homepage
Figure 4.1 Solis Apps found in the App Store
Step 2: Register a new account with SolisCloud
Skip this step if you already have a SolisCloud account. If you do not yet have an account,
follow these steps to create one:
1. Tap Register in the top right corner
2. Select Organization if you are an installer, select Owner if you are a homeowner
3. Enter in the organization information, be sure to set the time zone correctly
4. Tap Send and then enter the verification code or complete the puzzle verification
5. Go to your email and retrieve the code that was sent there
6. Return to the app and enter the code into the “Input Verification Code” field
7. Tap Register at the bottom to complete the registration process - you can now log in

4.2 Create a New Plant for the System
9
4. Commissioning
Once you are logged in you will need to create a new plant for your system. After that,
you will be able to add the data logger to the plant. The inverter will automatically populate
into the plant as soon as the logger reports to SolisCloud.
For Tariff Management, enter in the average rate at which the utility charges for power.
Linked Accounts allows you to add guests to the plant so they can view it. This is when
you would add in the homeowner’s email address.
At the new plant main page, tap the three dots in the top right corner. Then tap Add Device
to bring up the scanner. You can either scan the bar code on the logger or tap Manual Input
to manually enter the logger serial number. Placing a hand behind the logger makes the
scanning process easier. Once the serial number has been entered, tap OK in the top right
corner. You will given the message “Bound Successfully”, tap View Plant to go back to
the plant main page. The inverter(s) will auto-populate into the plant after a few minutes. .
1. Tap Plant in the bottom
left corner
2. Tap the + symbol in the
top right corner
3. Tap Add Plant
4. Enter in the plant info
5. Set the location
6. Set the time zone
7. Fill in the Organization
Code if your company
already has a SolisCloud
account
8. Tap Next at the bottom
once you have finished
4.3 Add the Data Logger to the Plant

10
5. Decommissioning
Decommissioning of the logger must be done if one of the following situations occurs:
1. The logger is being replaced under RMA or being swapped for another reason
2. The inverter is being replaced or upgraded
3. The logger is being relocated to another inverter
4. The logger is being removed altogether
First, the logger must be disassociated from the plant on SolisCloud. From the plant main
screen, tap Device, then tap Datalogger. Swipe left on the logger that you wish to unpair
from the system. A small trash can icon will appear on the right side of the screen, tap this.
When the message “Disassociate SN:XXXXXXXXX datalogger” appears, tap Delete.
Finally, tap Delete again and not Reserved, this will remove the logger from the plant.
Step 1: Remove the logger from the plant on SolisCloud
Step 2: Remove the logger from the inverter
Once the logger has been disassociated, you can physically remove it from the inverter.
Do this by twisting the black lock ring counter-clockwise until it is loose. Then gently pull
down on the logger until it comes out of the COM port.
Step 3: Store or ship the logger
Now that the logger has been removed, it can now be installed on another inverter or
shipped back to Solis.
To pair the logger with a different inverter, please follow the same steps that have been
outlined in this manual. If the logger will not be immediately reinstalled or shipped, please
store the logger in a moisture-proof environment. It is recommended to keep a desiccant
packet stored with the longer to ensure the internal components of the logger are not
exposed to moisture.
What to do if there is a new WiFi network or WiFi password
You will need to reconfigure the data logger. First press and hold the Reset button located
on the back of the data logger for 15 seconds. Doing this will reset the logger and enable
the logger access point.
Use your phone to connect to the logger access point network and then go to the browser
configuration page by entering the address 10.10.100.254. See page 6 for the complete
instructions on how to configure the data logger to the WiFi network.

11
6. Technical Specifications
Supported device type Solis inverter (all models except S6-EH1P(3.8-11.4)K-H-US)
Number of connected inverters ¡Ü10
Data collection intervals 5 minutes
Status indicator LED × 3
Communication interface 4 Pin
Wireless communication 802.11b/g/n (2.4G—2.483G)
Configuration method Mobile App/Website
Electrical
Operating voltage DC 5V(+/-5%)
Operating power consumption ¡Ü5 W
Environment
Operating temperature -22°F to 149°F (-30 ~ +65°C)
Operating humidity 5%-95%, relative humidity, no condensation
Storage temperature -40°F to 158°F (-40 ~ +70°C)
Storage humidity < 40%
Operating altitude ¡Ü4000 m
Protection degree NEMA 4X
Mechanical
Dimensions (L x W x H) 5 x 2 x 1.3 in (128 x 50 x 34 mm)
Installation method Plug-in to external port
Weight 0.18 lb (80 g)
Others
Certification CE, FCC
Models S3-WiFi-ST

If you encounter any problems with the logger, please take note of the logger
serial number and then contact us using the phone number or email listed above.
Ginlong Technologies Co., Ltd.
No. 57 Jintong Road, Binhai Industrial Park, Xiangshan,Ningbo,
Zhejiang, 315712, P.R. China.
Telephone: +1(866)438-8408
Email: usservice@solisinverters.com
Website: www.ginlong.com/us
/