Page is loading ...

1
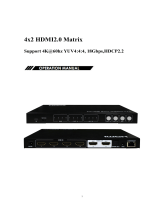
8x8 HDMI2.0 Matrix
Support 4K@60hz YUV4:4:4, 18Gbps, HDR

2
Operating Instruction
Thank you for purchasing this product. For optimum performance and safety, please read
these instructions carefully before connecting, operating or adjusting this product. Please
keep this manual for future reference.
SAFETY PRECAUTIONS
Please read all instructions before attempting to unpack, install or operate this equipment
and before connecting the power supply.
Please keep the following in mind as you unpack and install this equipment:
Always follow basic safety precautions to reduce the risk of fire, electrical
shock and injury to persons.
To prevent fire or shock hazard, do not expose the unit to rain, moisture or
install this product near water.
Never spill liquid of any kind on or into this product.
Never push an object of any kind into this product through any openings or
empty slots in the unit, as you may damage parts inside the unit.
Do not attach the power supply cabling to building surfaces.
Use only the supplied power supply unit (PSU). Do not use the PSU if it is
damaged.
Do not allow anything to rest on the power cabling or allow any weight to be
placed upon it or any person walk on it.
To protect the unit from overheating, do not block any vents or openings in the
unit housing that provide ventilation and allow for sufficient space for air to
circulate around the unit.

3
Operating Instruction
CONTENTS
1. INTRODUCTION......................................................................................................... 4
2. APPLICATIONS........................................................................................................... 4
3. PACKAGE CONTENTS.............................................................................................. 4
4. SYSTEM REQUIREMENTS.......................................................................................4
5. FEATURES....................................................................................................................5
6. SPECIFACATIONS......................................................................................................5
7. OPERATION CONTROLS AND FUNCTIONS....................................................... 6
7.1 Front Panel..............................................................................................................6
7.2 Rear Panel...............................................................................................................7
7. 3 Remote Control Description..................................................................................8
7.4. RS232 Control....................................................................................................... 9
8. Command Control.......................................................................................................13
9. Web Control.................................................................................................................16
9.1. Address Information............................................................................................ 16
9.2. DHCP Setting...................................................................................................... 17
9.3. Page of Port Setting & EDID & IP & Firmware Upgrade.................................. 18
10. Telnet Control............................................................................................................ 20
10.1. Login Telnet...................................................................................................... 20
10.2. How to get commands....................................................................................... 21
11. Micro USB to update firmware................................................................................21
12. CONNECTION DIAGRAM.....................................................................................22
13. MAINTENANCE.......................................................................................................23

4
Operating Instruction
1. INTRODUCTION
This 8x8 4k HDMI Matrix supports the transmission of video (resolutions up to
4K2K@60Hz, HDCP 2.2, HDMI2.0) and multi- channel digital audio from 8 HDMI
sources to 8 HDMI outputs and 8 SPDIF Output. This matrix supports high resolution
digital audio formats such as Dolby TrueHD and DTS-HD Master Audio as well as 3D
video content.
Controllable via Panel buttons, local IR, RS-232, IP or Web GUI. We can provide control
drivers for all the major control systems. This unit also supports HDR10 to bring ultimate
visual experience. It is designed to save end users’ time and energy for they are able to
update the system by the creative micro USB interface. In addition, this matrix also allow
additional options for integration of third-party control systems, we could provide control
drivers for control systems such as Control 4.
2. APPLICATIONS
•Video/TV wall display and control
•Security surveillance and control
•Commercial advertising, display and control
•University lecture hall, display and control
•Retail sales and demonstration
3. PACKAGE CONTENTS
•1x HDMI Matrix
•1x 12V DC power supply
•1x Remote control
•1x IR Ext RX Cable
•1x mounting kit
•1x CD for control software & user manual
4. SYSTEM REQUIREMENTS
•HDMI source equipment such as media players, game consoles or set-top boxes.
•HDMI receiving equipment such as HDTV, monitors or audio amplifiers.
•The use of “Premium High Speed HDMI” cables is highly recommended

5
Operating Instruction
5. FEATURES
•HDMI 2.0 version (Support 4K@60Hz YUV4:4:4)
•Support 3D
•Bandwidth upto 18Gbps
•HDCP2.2 input ,HDCP2.2 output
•HDCP1.4 input, HDCP1.4 output
•Support HDR10
•8xHDMI Input, 8xHDMI output with 8xSPDIF Audio
•Any one of the 8 Ultra HD sources to any one of the 8 Ultra HD displays
•Support Dolby True HD and DTS-HD master audio
•Micro USB interface for user to upgrade firmware
•Controllable via front-panel buttons, IR remote, RS232, IP , Web GUI, Android App
Control
•1U rack design, easy installment
•Unit size: L440XW220XH44.5mm
6. SPECIFACATIONS
Bandwidth 18 Gbps
Resolution
480p@60hz,576P@50hz,720P@60hz,
1080P@24hz,1080P@50hz,1080P@60hz,4K@24hz,4K@30hz,
4K@60hz YUV4:2:0, 4K@ 60hz YUV4:4:4
Video Input Connectors 8xHDMI Type A, 19-pin, female
Video Output Connectors 8xHDMI Type A, 19-pin, female
RS-232 serial port DB9, female
Ethernet port (IP control) RJ45, female
IR Ext port 1x3.5mm stereo jack
Rack-Mountable Rack ears included
Dimensions(WxHxD) L440XW220XH44.5mm
Net Weight 2.8kg
Operating Temperature 32°F to 104°F (0°C to 40°C)
Storage Temperature 14°F to 140°F (-10°C to 60°C)
Power consumption 23W(Max)

6
Operating Instruction
7. OPERATION CONTROLS AND FUNCTIONS
7.1 Front Panel
1IR WINDOW: Accepts IR signals from the included IR remote for control of
this unit only.
2OUTPUT 1~8 & INPUT 1~8: Press output keys (1~8) to select output source;
then press input buttons to select input source (1~8). And also could press and hold Input
& Output buttons for 3 second to set up below functions:
Locking & Unlocking: Press and hold the Input8 for 3 seconds to lock all button
functions on the front panel. Press and hold Input8 for 3 seconds again to release the
lock function.
Checking & Setting IP Address / DHCP: Press and hold the Input7 for 3 seconds to
enter into the mode of checking IP address and DHCP. Press and hold Input5 for 3
seconds to Exit. Press below buttons shortly to revise the IP address and DHCP
accordingly.
Press Input1 button to let cursor move LEFT
Press Input2 and/or Output2 button to revise the data
Press Input3 button to let cursor move RIGHT
Press Output1 button to confirm revising
Checking & Setting EDID: Press and hold the Input6 for 3 seconds to enter into the
mode of checking EDID. Press and hold Input5 for 3 seconds to Exit. Press below
buttons shortly to revise the EDID accordingly.
Press Input2 and/or Output2 button to revise the data
Press Output1 button to confirm revising

7
Operating Instruction
7.2 Rear Panel
1IP CONTROL: Connect directly, or through a network switch, to your PC
or laptop to control the unit via telnet/WebGUI.
2RS232: Connect directly to a PC, laptop or other serial control device to send
RS-232 commands to control the unit
3MICRO USB: This slot is reserved for firmware update use only
4IR IN: Connect to the provided IR Extender to extend the IR control range of
the unit. Ensure that the remote being used is within direct line-of-sight of the IR
Extender.
5SPDIF Audio Output: Audio output is from the selected HDMI source
6DC POWER: Plug the 12V DC power adapter into the unit and connect it to an
AC wall outlet for power.
7INPUT 1~8: Connect to HDMI source equipment such as media players, game
consoles or set-top boxes. DVI sources are supported with the use of an HDMI to DVI
adapter.
8OUTPUT 1~8: Connect to HDMI TVs, monitors or amplifiers for digital video
and audio output.

8
Operating Instruction
7. 3 Remote Control Description
1Standby Mode.
2OUTPUT-X select INPUT-Y:
Press OUTPUT-X (X means 1 to 8 of outputs)
Press INPUT-Y (Y means 1 to 8 of inputs)
3All outputs select INPUT-Y:
Press ALL button in zone OUTPUT
Press INPUT-Y button (Y means 1 to 8 of inputs),
then INPUT-Y switched to ALL OUTPUTS.
4Cancel Button: Cancel the switching operation
5PTP button: Mirror all inputs and outputs
(Ex. Input 1 to output 1, input 2 to output 2, etc):
Press PTP button in Zone OUTPUT.
RS232 Pin Assignment
Matrix Remote Control Console
PIN Assignment PIN Assignment
1 NC 1 NC
2 Tx 2 Rx
3 Rx 3 Tx
4 NC 4 NC
5 GND 5 GND
6 NC 6 NC
7 NC 7 NC
8 NC 8 NC
9 NC 9 NC

9
Operating Instruction
7.4. RS232 Control
Software control
Connect the 8x8 Matrix to PC with a RS232 cable, open the software on your PC.
On the COM Setting session, select the COM port according to your PC and click
“Connect” to get connected.
On this COM setting session, you can also change the Device name, Device name
support up to 16 characters. Save or edit your status by clicking the Edit button.
Come to Port Set session to select or switch your input sources for each output, We
can read the current status by clicking the “Status” button, or Clear our historical
operating record by clicking “Clear” button. The right down blank shows the
operating history.
Picture 1

10
Operating Instruction
The EDID session helps us to Read and Configure EDID for each input, such as
HDR, 3D, Data rates and Audio channel.
Picture 2
The IP configure session helps to read and configure the IP address and MAC of the
Matrix. Check DHCP if you want the router to assign an IP for the Matrix
automatically .
Picture 3

11
Operating Instruction
The Net Config session allows us to configure the PC and Matrix in the same LAN
with the IP Address and connection.
Click “Net config” → “Connect” → “Search Device” → “Sel Device Number”
→“Connect” then you can see the device name, it means successful connection .
Picture 4
You can also click “IE”, easy and click to enter into web.
Picture 5

12
Operating Instruction
The last session is System Config, which allows power ON/OFF or reset, default the
Matrix.
Picture 6

13
Operating Instruction
8. Command Control
1). Open CommUart Assistant.
2). Comport setting:
Baud Rate: 115200 bps
Parity: None
Data Bits: 8 bit
Stop Bits: 1 bit
3). Enter Port Command in Send options.
Picture 7

14
Operating Instruction
4). Command
Command Function Note
@W 04 00 01 02 03
···································································································
PTP Function
Mirror all inputs and outputs
(Ex. Input 1 to output 1, input 2 to
output 2, etc)
@W 50 # Reboot
@W 51 # Restore Factory
Setting
@W 0F 00 # Standby 00: Standby Mode
01: Cancel “Standby Mode”
5). Select HDMI input for HDMI output
Command Description
00 Output1
01 Output2
02 Output3
03 Output4
11 Output5
12 Output6
13 Output7
14 Output8
04 All Output
00 Input1
01 Input2
02 Input3
03 Input4
04 Input5
05 Input6
06 Input7
07 Input8
E.g: @W 00 00 #: Ouput 1 display Input1
Ouput 1 Input1

15
Operating Instruction
6). EDID Setting
@W XX AA BB #:
Parameter Description:
XX for configuration of “INPUT EDID”
Command 05 06 07 08 15 16 17 18
Description Input1 Input2 Input3 Input4 Input5 Input6 Input7 Input8
AA for selecting “Video EDID Mode”
Command 00 01 02 03
Description 1080P 4K2K_30 4K2K_60(YC420) 4K2K_60(YC444)
Note: If current EDID is AA=00 {1080P}, then use AA=04 to COPY Output 1's EDID, but if TV1
isn’t connected to the TV, then it will automatically return to the mode AA=00 {1080P} before COPY.
BB for selecting belowing function
Bit7 Bit6 Bit5 Bit4 Bit3 Bit2 Bit1 Bit0
HDR 48Bit 36Bit 30Bit 7.1CH 5.1CH 2CH 3D
1 1 1 1 1 1 1 1
0 0 0 0 0 0 0 0
“1” : select the function, “0” : not select the function.
E.g: 11001001: HDR, 48Bit, 7.1CH, 3D
Chang Binary code “11001001” to hexadecimal format “C9”.
E.g: @W 05 03 C9 #
The EDID of input 1 is: 4K2K_60(YC444)、HDR、48Bit、7.1CH、3D.
Command 04 05 06 07
Description Copy Output 1 Copy Output 2 Copy Output 3 Copy Output 4
Command 08 09 0A 0B
Description Copy Output 5 Copy Output 6 Copy Output 7 Copy Output 8

16
Operating Instruction
9. Web Control
9.1. Address Information
Static IP Add:192.168.1.168
Sub-Mask:255.255.255.0
Gateway:192.168.1.1
Dynamic IP OFF
TCP/IP/UDP Port 5000
Telnet
Account and Password:Admin
Note:Capitalize the first letter
Port: 23
9.1.1 Change the IP address of your PC.
1). Connect the HDMI Matrix and PC to the LAN.
2). Configure your PC as follows:
1Click Start >Control Panel >Network and Sharing Center.
2Click Change Adapter Settings.
3Highlight the network adapter you want to use to connect to the device and click
Change settings of this connection.
3). Connect to the device and click change settings of this connection:
4). Highlight Internet Protocol Version 4 (TCP/IPv4) by clicking on the item.
5). Click Properties.
Picture 8 & 9

17
Operating Instruction
6). Select Use the following IP Address for static IP addressing and fill in the details.
For TCP/IPv4 you can use any IP address in the range 192.168.1.2 to 192.168.1.254 (excluding
192.168.1.168).
Picture 10
7). Click OK.
8). Click Close.
9.2. DHCP Setting
1) . Connect the HDMI Matrix and PC to the LAN under the Matrix DHCP Mode.
2) . Open the PC tool (included in the CD).
3). Search the IP address of HDMI Matrix, please refer to picture 4 & picture 5.
4). Open the web browser and enter the IP address you searched, then you can set the
function as below pictures:

18
Operating Instruction
9.3. Page of Port Setting & EDID & IP & Firmware Upgrade
Picture 8: Port Setting Page
Picture 11: Port Setting Page

19
Operating Instruction
Picture 9: EDID Setting Page
Picture 12: EDID Setting Page
Picture 13: IP Configuration Page

20
Operating Instruction
Picture 14: Firmware Upgrade Page
10. Telnet Control
10.1. Login Telnet
Press “Windows” + “R” to enter Operation page and type “cmd”
Typing “telnet 192.168.1.168” to enter login page
/