Page is loading ...

Phylink Bullet Outdoor Network Camera
PLC-325PW / PLC-335PW
V2.0
Please read this manual carefully before attempting to install or operate this product.
This User Manual is a work-in-progress and is constantly being updated.
You are invited to check the website regularly for updated versions.
This manual applies to the following Phylink products.
User Manual - English

Table of Contents
3.0 Hardware Installation ..............................................................................................................
3.1 Pre-requisites and Initial Connection ..............................................................................................................
3.2 Connecting the Camera ..................................................................................................................................
3.3 Connection Camera with PoE (Optional) .........................................................................................................
3.4 MicroSD card installation ................................................................................................................................
3.5 Mount the Wi-Fi antenna ................................................................................................................................
3.6 Mount the weatherproof junction box ............................................................................................................
3.7 Positioning and Mounting ...............................................................................................................................
3.8 Installation and placement tips .......................................................................................................................
3.9 Adjust the Sunshade (Optional) .......................................................................................................................
2.0 Product Overview ....................................................................................................................
2.1 Package Contents .............................................................................................................................................
2.2 Hardware Overview .........................................................................................................................................
1.0 Introduction ..............................................................................................................................
1.1 Main Features ...................................................................................................................................................
1.2 Approval Information .......................................................................................................................................
1.3 Restrictions .......................................................................................................................................................
1.4 Maintenance ....................................................................................................................................................
1.5 Minimum System Requirements ......................................................................................................................
1.6 Read Before Use ..............................................................................................................................................
1.6.1 Precaution ............................................................................................................................................
1.6.2 Change and protect your password ......................................................................................................
4.0 Software Installation ................................................................................................................
4.1 Installation for iOS device ...............................................................................................................................
4.2 Setting up Wi-Fi via iOS device ........................................................................................................................
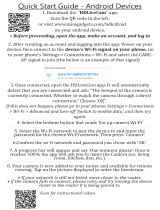
4.3 Installation for Android device ........................................................................................................................
4.4 Setting up Wi-Fi via Android device .................................................................................................................
4.5 Camera Setup on PC/Mac ...............................................................................................................................
4.5.1 Camera Live software installation .........................................................................................................
4.5.2 Accessing the camera using Camera Live (P2P method) .......................................................................
4.5.3 Accessing the camera via Web Browser (TCP/HTTP method) ..............................................................
4.5.4 Wireless Setup via Web Browser ...........................................................................................................
5.0 Camera Settings .......................................................................................................................
5.1 Login Password Modification ..........................................................................................................................
5.2 Top Menu of Camera Settings Page ................................................................................................................
5.2.1 Live View ...............................................................................................................................................
5.2.2 Quick Setup with the Wizard ................................................................................................................
5.2.3 System Page ..........................................................................................................................................
5.2.4 Reboot ..................................................................................................................................................
5.3 Camera ............................................................................................................................................................
5.3.1 Camera Setup ........................................................................................................................................
5.3.2 Stream Setup ........................................................................................................................................
5.3.3 Image Setup ..........................................................................................................................................
5.3.4 OSD Setup .............................................................................................................................................
5.3.5 Night Vision Setup ....................................................................................................................,............
| Copyright 2014- 2016 Phylink Solutions LLC. All rights reserved.
Phylink Network Camera User Manual
4
4
6
7
8
9
10
10
10
14
14
15
15
16
17
17
20
21
22
11
11
12
23
23
26
28
31
33
33
34
36
38
40
40
41
41
42
43
44
45
45
46
48
48
49

5.4 Network ...........................................................................................................................................................
5.4.1 Wireless Setup .......................................................................................................................................
5.4.2 TCP/IP Setup .........................................................................................................................................
5.4.3 DDNS Setup ..........................................................................................................................................
5.4.4 UPnP Setup ...........................................................................................................................................
5.4.5 P2P Setup ..............................................................................................................................................
5.5 Storage .............................................................................................................................................................
5.5.1 Storage Setup ........................................................................................................................................
5.5.2 Browse Storage ......................................................................................................................................
5.5.3 Format SD Card .....................................................................................................................................
5.6 Task ..................................................................................................................................................................
5.6.1 Global On/Off ........................................................................................................................................
5.6.2 Motion Detection ..................................................................................................................................
5.6.3 Schedule Setup .......................................................................................................................................
5.6.4 Task Management .................................................................................................................................
5.6.4.1 E-mail alarm sending ..................................................................................................................
5.6.4.2 Email periodic sending ...............................................................................................................
5.6.4.3 FTP Alarm Sending .....................................................................................................................
5.6.4.4 FTP Periodic Sending ..................................................................................................................
5.6.4.5 HTTP Alarm Sending ...................................................................................................................
5.6.4.6 HTTP Periodic Sending ...............................................................................................................
5.6.4.7 Snapshot to storage on alarm .....................................................................................................
5.6.4.8 Snapshot to storage periodically .................................................................................................
5.6.4.9 Record to storage on alarm ........................................................................................................
5.6.4.10 Record to Storage Continuously ...............................................................................................
5.6.4.11 Send files in Storage to FTP Server ..........................................................................................
5.6.4.12 Push Notification ......................................................................................................................
5.7 Tools ................................................................................................................................................................
5.7.1 System Identity ......................................................................................................................................
5.7.2 User Management .................................................................................................................................
5.7.3 Date & Time ...........................................................................................................................................
5.7.4 Backup and Reset ..................................................................................................................................
5.7.5 Watchdog Setup ...................................................................................................................................
5.7.6 Firmware Upgrade ................................................................................................................................
6.0 Troubleshooting .......................................................................................................................
7.0 Glossary of Terms .....................................................................................................................
8.0 Appendix .................................................................................................................................
Appendix A: A Quick Review of Networking Terminology ......................................................................................
Appendix B: Resetting the Camera back to Factory Settings ..................................................................................
Appendix C: Connecting your Camera directly to a Computer ...............................................................................
Appendix D: Recovering from a failed Firmware update using Windows ..............................................................
Appendix E: Manually entering TCP/IP Settings for a Camera ...............................................................................
Appendix F: Wireless Installation Considerations ..................................................................................................
Appendix G: Setting up the Camera over WiFi using WPS .....................................................................................
9.0 Contact Us ................................................................................................................................
| Copyright 2014- 2016 Phylink Solutions LLC. All rights reserved.
Phylink Network Camera User Manual
51
51
53
55
56
57
58
58
60
61
62
62
62
65
66
67
68
69
70
71
71
72
72
73
74
75
76
77
77
77
78
79
79
80
82
84
96
86
86
87
89
90
92
94
95

1.0 Introduction
Thank you for purchasing a Phylink network video camera
The Phylink Bullet Network Camera can be accessed remotely and also controlled from any PC/laptop over an
Intranet/Internet via a web browser. The user friendly installation procedure and intuitive web-based interface allow
easy integration with your home or business network or Wi-Fi. The camera also comes with motion detection
software which can generate alarm triggers via e-mail and upload images straightly to a website. From our
experience, we find that our customers get comfortable with these advanced features quickly and then start using the
camera on a daily basis to keep in touch with their home or loved ones.
You can view very high quality live streaming video directly from the camera by using a Mac or PC. It works excellently
as a baby monitor, nanny cam, pet cam, party cam, security & surveillance, remote observation, elder and patient
care as well as limited video conferencing or event broadcasting.
An exciting new feature is the ability to turn your iPhone, iPad iOS device and Android OS smartphone, Tablet into a
baby monitor without any professional installer, Extra wires, IP address setting, DDNS address setting or router
setting. It is simply just plug and play.
1.1 Main Features
Easy Installation
The camera comes with built-in Wireless (IEEE802.11b/g/n) capability and a Web Server, therefore there is no need
to install a driver. The setup includes the Camera Setup software, User Manual and Quick Installation Guide. With
industry standard automatic configuration -UPnP (Universal Plug and Play), your PC will discover and connect to your
camera automatically. Once successfully connected, you can see what the camera sees from anywhere in the world
using a simple web browser. The camera can either be wall-mounted or ceiling-mounted using the supplied stand,
thus providing a flexible installation solution.
802.11b/g/n Wireless LAN Connection Available
The camera is designed to not only work with your existing wired network but also with standard 802.11b/g/n
wireless devices, allowing the flexibility to operate the camera wirelessly. The camera utilizes SSID filtering, powerful
64/128 bit WEP and new security standard WPA encryption to protect you from illegal intrusion.
Simultaneous High-Speed MPEG-4 and Motion JPEG
The camera allows live MPEG-4 and Motion JPEG streams simultaneously. The camera features H.264/MPEG4
compression which compresses the video to make transmission faster and more efficient. The H.264/MPEG4 and
MJPEG image can be transmitted at 30 frames per second.
Simultaneous HTTP and RTSP streaming
The camera supports HTTP and RTSP/RTP/RTCP protocol as well as provides multiple HTTP and RTSP streams
simultaneously.
Audio Transmission
The camera comes with a built-in microphone for audio monitoring as well as video monitoring. Sound captured by
the camera can be transmitted to the client’s PC.
This 2.4GHz wireless camera meets wireless frequency security standards and recommended indexes during operation.
These standards and indexes are certificated by the academic organization as illustrated in the following paragraphs.
Product Assurance
| Copyright 2014- 2016 Phylink Solutions LLC. All rights reserved.
Phylink Network Camera User Manual
4

Motion Detection Function
The camera can detect changes in the image being monitored. Once a change occurs, it will send an email to up to 3
e-mail addresses with a snapshot attached. The video file or snapshot can also be uploaded to an FTP server. In
addition the camera can be configured to send images at regular intervals.
OSD Function
OSD (On Screen Display) function can display system name, date and time and user-defined on screen.
Authentication
An authentication window requires you to enter the user ID and password. Password security can prevent
unregistered users from accessing your camera. Users can select Basic Authentication method or Digest Access
Authentication method.
Multi-Client Access
The camera allows up to 16 users to view the video simultaneously. Please note that it is possible that as the number
of simultaneously connected users to camera increases, the overall motion performance will decrease.
Infra-red Night Vision
The camera utilizes 24 infra-red LEDs to provide high light in dark environment. When the environment is dark, the
infra-red LEDs will be turned on automatically with a photosensitive component, and the moving images will be
changed to Black and White. Users can monitor objects clearly within 15 meters distance. Users also can choose to
open or close the infra-red LED manually, and whether to change the images to black and white or color
automatically.
Snapshot and Recording
You can capture a still image of the camera view on your PC and save the image as JPG or BMP format file. You also
can record the video and audio captured by the camera on your PC and save as an ASF format file.
| Copyright 2014- 2016 Phylink Solutions LLC. All rights reserved.
Phylink Network Camera User Manual
5

1.2 Approval Information
All our products meet the requirements for approval by FCC and CE, and are authorized to bear the FCC and CE mark.
FCC Statement
This equipment has been tested and found to comply with the limits for a Class B digital device, pursuant to Part 15 of
the FCC rules. These limits are designed to provide reasonable protection against harmful interference in a residential
installation. This equipment generates, uses and radiates radio frequency energy and if not installed and used in
accordance with the instructions, may cause harmful interference to radio communications. However, there is no
guarantee that interference will not occur in a particular installation. If this equipment does cause harmful
interference to radio or television reception, which can be determined by turning the equipment off and on, the user
is encouraged to try to correct the interference by one or more of the following measures: -Reorient or relocate the
receiving antenna. -Increase the separation between the equipment and the receiver. -Connect the equipment into
an outlet on a circuit different from that to which the receiver is connected. -Consult the dealer or an experienced
radio/TV technician for help.
This device complies with Part 15 of the FCC Rules. Operation is subject to the following two conditions:
(1) This device may not cause harmful interference, and
(2) This device must accept any interference received, including interference that may cause undesired operation
Changes and modification not expressly approved by the manufacturer or registrant of this equipment can void your
authority to operate this equipment under Federal Communications Commissions rules.
CE Statement
This product complies with standards including Low Voltage Device Directive 73/23/EEC; EMC Directive 89/336/EEC
and R&TTE Directive 1999/5/EC. It passed the subject tests by the authority concerned and is authorized to bear CE
mark.
CE Mark Warning
This is a Class A product. In a domestic environment, this product may cause radio interference, in which case the
user may be required to take adequate measures.
| Copyright 2014- 2016 Phylink Solutions LLC. All rights reserved.
Phylink Network Camera User Manual
6

1.3 Restrictions
1. DO NOT use this product to violate one's privacy. Monitoring one's activities without consent is illegal and this
product is not designed and manufactured for such purpose.
2. DO NOT put this product near any medical equipment. Radio waves might potentially cause breakdown of
electrical medical equipment.
3. This product should be placed at least one foot away from any heart pacemaker. Radio waves might potentially
influence a heart pacemaker.
4. DO NOT use this product for any illegal activities. User’s are responsible for ensuring that the usage of this
camera does not violate any legality concerns.
5. Do NOT install near any heat sources such as radiators, heat registers, stoves, or other apparatus that produce
heat.
6. Do NOT expose this apparatus to rain or moisture in order to reduce the risk of fire or electric shock. The apparatus
shall not be exposed to dripping or splashing. Also, objects filled with liquids, such as vases, shall not be placed on the
apparatus.
The Power Adaptor supplied is not interchangeable.
It should not be used with other product, and may
cause product failure for other products.
| Copyright 2014- 2016 Phylink Solutions LLC. All rights reserved.
Phylink Network Camera User Manual
7

1.4 Maintenance
Notice
This product may cause interference with other wireless equipment that operate at 2.4GHz ISM band. In the event of
interference please turn off one of the devices or move it to a safe distance.
1. Ensure that the camera and its power source have sufficient ventilation.
2. Do not shake, strike or drop the product.
3. Keep the camera dry and dustless and avoid exposing it to direct sunlight.
4. Do not place the product near any magnetic objects.
5. Avoid putting the product in places where there is constant change in temperature and humidity
6. Keep the product away from heat sources.
7. Do not use the camera near aggressive chemicals.
8. Do not use this camera near water (unless the camera is specified as waterproof).
9. Do not use the camera in the places which are enclosed by metal. The surrounding metal may shield the
electromagnetic waves, and result in failure of signal reception.
10. Please follow your local government environment protection policies.
11. Please turn off the power when left unused.
12. Do not disassemble or attempt to repair the camera; doing so might cause damage to the product and will
invalidate warranty.
| Copyright 2014- 2016 Phylink Solutions LLC. All rights reserved.
Phylink Network Camera User Manual
8

1.5 Minimum System Requirements
A PC or Mac is required for the initial setup of camera only and once the camera is configured, it can be used
independently without being connected to a computer.
• Network Connection: 10/100 Mbps Ethernet
• Wireless router (if wireless connectivity required)
• Broadband Connection: Minimum 128kb/s upload speed (if internet access to your camera is required)
Network requirements:
PC Requirements:
• Processor: Intel Pentium III, 800MHz or Higher (Pentium IV, 2GHz or higher recommended)
• Memory (RAM): 128Mb (256Mb or higher recommended).
• Operating System: Windows 2000, XP, Vista, Windows 7
• Web Browser: Internet Explorer Version 5.5 or above, Mozilla Firefox, Google Chrome.
• Plug-ins: Adobe flash (for non-IE browsers)
Mac Requirements:
• Processor: 800MHz - PowerPC G4 or Intel.
• Memory (RAM): 128Mb (256Mb or higher recommended).
• Operating System: Mac OSX 10.4 Tiger.
• Web Browser: Safari, Mozilla Firefox, Google Chrome and most other browsers
• Plug-ins: Adobe flash
Web Browser Compatibility:
You can access the camera via various web browser. Phylink cameras work on most web browsers such as Firefox,
Internet Explorer, Microsoft Edge (Windows 10), Chrome and Safari.
Tips:
Please note that browser itself does not support video decoding and playback, it needs to install plug-ins player.
To play the live video of camera, the web browser needs to install the flash player plug-ins for Chrome and Safari or
ActiveX Control for Internet Explorer.
If you are trying to view the camera for the first time using Internet Explorer, your browser may prompt you to install
or allow an "ActiveX Control".
If you are trying to view the camera for the first time using Chrome or Firefox, your browser will prompt you to install
or allow the “Adobe Flash Plug-in”.
| Copyright 2014- 2016 Phylink Solutions LLC. All rights reserved.
Phylink Network Camera User Manual
9

1.6 Read Before Use
All Phylink camera secured with the top secure AES(Advanced Encryption Standard) encryption, 128 bit secret key
(AES) are used for digital video encryption, ensuring that all data sent between the user and the camera is encrypted,
which prevents someone from accessing the information while it is in transit.
The camera comes with a default login and password. Please setup the camera using those defaults. You can then
login and change the admin login/password to something more secure once it has been installed.
If you are installing the camera for the first time or after a reset to factory defaults, you are advised to change the
cameras default password as per the message displayed. Changing the cameras default password is highly
recommended to avoid unauthorized access to your camera.
Also please protect your camera's login password, just like your bank password or email password.
1. The use of surveillance devices may be prohibited by law in your country. The Network Camera is not only a high-
performance web-ready camera but can also be part of a flexible surveillance system. It is the user’s responsibility to
ensure that the operation of such devices is legal before installing this unit for its intended use.
1.6.1 Precaution
1.6.2 Change and protect your password
2. Do not disassemble or attempt to repair the camera; doing so might cause damage to the product and will
invalidate warranty.
3. Do not install the product on unstable brackets, unstable or vibrating surfaces since this could cause damage to the
product.
4. Please read the hardware installation instructions in this manual carefully before attempting to install or use the
camera.
| Copyright 2014- 2016 Phylink Solutions LLC. All rights reserved.
Phylink Network Camera User Manual
To learn how to change the login password, please go to ” chapter in this manual.“Login Password Modification
10

2.0 Product Overview
2.1 Package Contents
It is important to verify first that all contents received are complete according to the Package Contents listed below.
Take note of the warnings in the Quick Installation Guide before the Network Camera is installed; then carefully read
and follow the instructions in the Installation chapter to avoid damage due to faulty assembly and installation. This
also ensures the product is used properly as intended.
Waterproof
Junction box
Camera
& Bracket
External
Antenna
AC/DC
Power adaptor
Setup CD
& Guide
Ethernet
Cable
- PLC-325PW/PLC-335PW Camera
- Camera Bracket
- External Wi-Fi Antenna
- Manual and Software on CD-ROM
- CAT5 Ethernet Cable for initial Setup
- Power Adapter
- Quick Install Guide
- Waterproof Junction box
- Screw and plastic wall plug for wall mount
| Copyright 2014- 2016 Phylink Solutions LLC. All rights reserved.
Phylink Network Camera User Manual
11

| Copyright 2014- 2016 Phylink Solutions LLC. All rights reserved.
Phylink Network Camera User Manual
2.2 Hardware Overview
2
Wi-Fi Antenna
Status indicator LED
Infrared LEDs
Light Sensor
Power Connector
Ethernet Connector
Reset/WPS Button
Camera Cable
UID Sticker
Sunshade
Front Shell
Microphone
Bracket
Wrench
Bracket
Micro SD Card Slot
Sunshade
Front Shell
Power connector
Connect to the included DC 12V power adapter.
Light Sensor
The light sensor monitors ambient lighting conditions and switches between color
and infrared accordingly.
UID Sticker on Camera Cable
The UID is the unique identifier for the camera. You can scan the QR code on the sticker using the iOS or Android app
to add a camera.
UID:VNW5V15K6RY7J4VWC7W1
Password: admin
Infrared LEDs
Used to illuminate the camera's field of view at night.
12

Reset / WPS Button
Status Indicator LED
When the camera is powered up, the indicator LED shows a green light then quickly turns off which confirms the
camera has started up correctly. When the indicator LED shows a green light again, it means the system has started
successfully. The indicator LED flashes green during data transfer and shows red for the WPS connection status.
This button is used for both the WPS and Reset function.
To use the Reset function, push and hold the button for more than five seconds. Note that all settings will be restored
to factory default.
To use the WPS function, ensure the camera has started. ( The status Indicator LED will show a constant green )
Press the WPS button located on your router and then press the WPS button on the camera for one second within 60
seconds. While connecting, the Status Indicator LED will flash red. Please wait until the camera reboot, then the Wi-Fi
connection will be established.
| Copyright 2014- 2016 Phylink Solutions LLC. All rights reserved.
Phylink Network Camera User Manual
MicroSD Card Slot
Local storage for storing recorded images and videos. Adding a Micro SD to your camera will allow you to record
footage and motion alerts directly to memory card for future review.
Wrench on Mount Bracket
You can use the wrench on the mount bracket to lock it. The design of wrench allows effective use, without need for
tools.
Tip: To learn how to set up the camera over Wi-Fi using WPS, please read “Appendix G: Setting up the Camera over
Wi-Fi using WPS” towards the end of this manual.
13

3.0 Hardware Installation
| Copyright 2014- 2016 Phylink Solutions LLC. All rights reserved.
Phylink Network Camera User Manual
3.1 Pre-requisites and Initial Connection
Besides the camera itself, and power adapter for the camera, you only need:
1. An iOS or Android mobile phone.
You can setup the camera easily without computer.
2. PC, Mac, or Linux computer with internet browser. (This is optional)
The computer is only required for initial setup. Later the camera can work by itself without any computer present
at the camera location.
3. A wired or wireless router with an available Cat5 wired network jack. For wireless cameras, your router’s wired
network connection is only needed for initial setup.
4. For standalone recording without a computer, you need a MicroSD or MicroSDHC memory card.
5. Phylink outdoor cameras have the PoE feature. For powering the camera you can choose to use the included AC
adapter or PoE injector/switch (Not included).
All cameras come with a Cat5e network cable for initial connection of the camera to one of the LAN jacks of your
router. Should you wish to set up wireless operation, this initial wired connection is required to tell the camera what
your wireless network name and password is.
IMPORTANT: Make sure the Cat5 network cable is plugged into your router, not the computer, even
if your computer has a network jack. If you don’t have a router you’d need to get one, as this is one
of the few prerequisites.
You can start using the camera on your own network immediately after powering the camera up and connecting the
Cat5 cable to your router.
14

| Copyright 2014- 2016 Phylink Solutions LLC. All rights reserved.
Phylink Network Camera User Manual
3.2 Connecting the Camera
Connect the camera to your router using the network cable. Using the included power adaptor, plug one end into the
Power Connector and plug the other end into a power outlet.
Once connected and powered, the status indicator LED should illuminate a constant green.
Camera cable
DC power adaptor
Network cable Router
NOTICE
Please note that for initial setup, you need to connect the camera directly to your router with a network cable. You
cannot connect wirelessly to the camera without first setting it up via a network cable.
You can set up the wireless via the App or web browser quickly. Instructions for wireless setup are included later,
inside this manual.
3.3 Connection Camera with PoE (Optional)
The PLC-325PW/PLC-335PW camera can be either connected with the included power adapter and network cable,
or optionally with an Ethernet cable that is connected to an 802.3af compatible PoE Switch or PoE Injector. With a
PoE setup, the Ethernet cable will transmit both power and data over a single cable eliminating the need for the
power adapter. It is very suitable for the installation locations where there is no power outlet and Wi-Fi signal.
PoE Injector
PoE injector connection diagram
Power adaptor
Camera cable
If you need more than 10 ft length of the power cable on the AC adapter, you could skip the AC adapter and instead
power the camera with PoE. That would allow you to use inexpensive Cat5e network cable to supply power from up
to 300 ft away. Cat5e network cable with the required connectors is available at Home Depot in convenient rolls of 15
ft, 25 ft, 50 ft and 100 ft.
Router
Power adaptor
15

| Copyright 2014- 2016 Phylink Solutions LLC. All rights reserved.
Phylink Network Camera User Manual
3.4 MicroSD card installation
The Micro SD card is not included in packages. Adding a Micro SD card to your camera will allow you to record
footage and motion alerts directly to the MicroSD card for future review. The recorded files may be reviewed
remotely on your phone / computer when using Phylink app / software.
For a new SD card which has never been used or formatted, you can use the camera’s format tool to format it. To
learn how to format the SD card, please refer to the related technical articles on the Phylink support website.
The camera only supports the FAT32 file system; other formats will not be recognized. It is recommended to format
the Micro SD card via the format tools. You can download the format tools for FAT32 via the follows links:
http://www.phylink.com/downloads/download_file/tools/guiformat.zip
Or http://www.sdcard.org/downloads/index.html
NOTICE
The camera must be powered off before inserting the Micro SD card. The camera will only recognize the card if
inserted before startup. Every time the card is re-inserted, you will need to turn the power off and then turn the
power on again to recognize the SD card.
To insert the micro SD card, follow these steps:
1. Power off the camera as applicable.
2. Remove the Sunshade
3. Unscrew the Front Shell from the camera’s main body , turning anti-clockwise.
This must be done in clean and dry environment – before exposing internal electronics.
4. Hold the MicroSD card with the printed side facing upward and the golden pins facing toward the MicroSD slot.
Press the MicroSD card into the slot until you hear a click. Be careful not to touch the lens.
5. Take care to avoid catching internal wires and tighten the front shell by hand only.
Micro SD Card Slot
Sunshade
Front Shell
Tip:
To learn more about MicroSD card installation and formatting, please refer to "How to setup recording to MicroSD
card Support - Technical Articles" in section from our technical support website.
16

| Copyright 2014- 2016 Phylink Solutions LLC. All rights reserved.
Phylink Network Camera User Manual
Protective cap
RP-SMA connector
3.5 Mount the Wi-Fi antenna
If using a Wi-Fi Network connection, the provided external antenna must be mounted to the RP-SMA connector at
the rear of camera main body.
Remove the protective cap on the RP-SMA connector and screw on the
Wi-Fi antenna in its place (clockwise), make sure it is finger tight.
Please keep the antenna vertical for better signal strength. Minimum signal strength of 3 bars is required for HD video
transmission. Please ensure the required signal strength is available at the point of installation, prior to installing the
camera.
3.6 Mount the weatherproof junction box
Before physical installation, please ensure wireless settings are completed and operational – to set wireless up, you
need to connect the camera directly to your router with an Ethernet cable.
The included Weatherproof Junction Box provides a neat and waterproof termination of connections to the Phylink
Bullet HD outdoor camera.
When connecting outdoors, the use of this junction box will ensure weather protection and prevent power and signal
faults due to water ingress at the connections.
When you use this junction box, you only need to drill a small hole in the wall to run the extension cabling to an
indoor power outlet and network.
Power adapter cord
Building wall
Outdoor Indoor
Network cable
Weatherproof
Junction Box
Figure 1
A roughly 1/4 inch diameter hole will be required for either a network cable or the DC plug at the end of the power
adapter cord to pass through.
17

| Copyright 2014- 2016 Phylink Solutions LLC. All rights reserved.
Phylink Network Camera User Manual
Front Cover
Camera Cable
Silicone Sealing Strip
Rear Cover
Gasket
Screw
Rubber Stopper
Figure 3
Figure 2
Groove
for camera cable
(network)
Groove
for camera cable
(power)
Silicone sealing strip Front cover
Stopper
Groove for power
adapter cord
Stopper
Groove for
network cable
Before physical installation, please ensure wireless settings are completed and
operational – to set wireless up, you need to connect the camera directly to your
router with an Ethernet cable.
If you plan to use Wi-Fi transmission, the Wi-Fi must be setup before the camera is disconnected from the Ethernet
cable of the local network. Minimum signal strength of 3 bars is required for HD video transmission. Please ensure
the required signal strength is available at the point of installation, prior to installing the camera.
Please note that the wireless signal travels easily through common building materials such as wood, glass, sheet rock,
and vinyl siding, but does not go through metal.
STEP1
STEP2
Connect the power cord and Ethernet cable to the camera. Please refer to Figure 2.
Insert the RJ45 connector and DC plug connector into the rear cover of the Weatherproof Junction Box. Ensure the
power and network cables align with their respective grooves at both sides of the sealing strip.
Please refer to Figure 2.
18

| Copyright 2014- 2016 Phylink Solutions LLC. All rights reserved.
Phylink Network Camera User Manual
STEP3
Attach the front cover; ensuring that the groove on the sealing strip presses tightly against the cable. The bigger
groove is for network cable and the smaller one is for the power adapter cable (Please refer to Figure 2 and Figure 3).
Please make sure there is no gap between the front and rear cover sealing strips, as this clean contact provides the
waterproof seal.
Secure the front and rear covers using the included screws and gaskets.
Once secured, the rubber stoppers should be inserted so as to protect the screws
from the weather and allow ease of maintenance in the future.
Please refer to Figure 2.
STEP4
Screw hole
Rear cover
Mounting hole
If the camera is using a PoE connection, you don’t need to connect the power adapter. You must use the attached
stopper to block the power cable entry point so as to maintain the waterproofing seal. Please refer to Figure 3.
If the camera only uses the Wi-Fi connection, you don’t need to connect the network cable. You must use the
attached stopper on the sealing strip to block the network cable groove so as to maintain the waterproofing seal.
Front cover
Stopper
Groove for power adapter cord
Stopper
Groove for network cable
NOTICE
19

| Copyright 2014- 2016 Phylink Solutions LLC. All rights reserved.
Phylink Network Camera User Manual
3.7 Positioning and Mounting
Before mounting, you should first become familiar with the camera indoors. Once installed. Cameras cannot be
returned for a refund.
In a typical scenario the camera is mounted to a wall with the supplied adjustable mounting bracket.
The easiest way to mount the outdoor camera to the wall is to mount the bracket all by itself to the wall first, using
the 3 included Philips screws and plastic wall plugs.
Then if you have the threaded mounting post facing forward and the wing nut slightly tightened, the camera can be
rotated onto the mounting post without the cables getting in the way. Then you’d loosen the wing nut and position
the slot in the ball joint upwards so that the camera can be directed to the desired viewing angle, and the wing nut
and the white plastic disk can then be tightened to lock this position into place.
Do not try to remove the silver colored disks at the bottom of the camera. One is the microphone and the other is the
reset button. Attempts to remove those could cause damage to the camera.
NOTICE
Wall plug
Mounting nut
Sunshade mounting screw
Mount bracket
All our cameras have the industry standard mounting hole with ¼“–20 thread. This is compatible with a wide variety
of security camera mounts or tripods. If you want to use a mount other than the one we supply, please be careful that
the new mount does not push the white reset button near the camera mounting hole at the bottom of the camera.
Alternatively you can replace one of the camera’s Sunshade
mounting screws with the special silver colored hex mounting
nut that is supplied in the hardware bag. This allows
attachment of the mounting bracket from above if you are
planning to install the camera under an eave or to a ceiling.
Philips screws
Mounting bracket
Wing nut
Ball joint
20
/