Page is loading ...

SmartCube 300W
Intelligent 3MP Wireless Cube IPCAM
with Temperature and Humidity Sensor
Quick Installation Guide
Support
You can download the
complete guides and
supporting programs from
<http://www.airlive.com/pro
duct/smartcube-300w/downl
oad>, or scan the QR code
here.
Please consult with the FAQs
<http://www.airlive.com/pro
duct/smartcube-300w/faq>
before writing to OvisLink
Tech Support Team for further
assistance
For any other question, please read the user
manual in the CD or mail to [email protected]
for technical support.

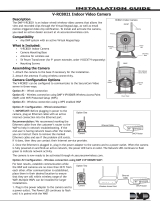
SmartCube 300W Package Contents
Please check the package contents and contact
your distributor if any part is missing.
1
2
3
SmartCube 300W
5V AC Power Adapter
4 Quick Installation Guide
5 User Manual CD
6 Label
Mounting Accessories
(Screws / Plastic Anchors)
I/O Interface
802.11n Wi-Fi
Micro SD Slot

I/O Interface
Power Input
Ethernet Port
WPS and Reset Button
DC
Remove Cover box
01 Remove Cover box

Remove Cover box01
Assemble the bracket and the stand
02
Assemble the bracket and the stand

Assemble the bracket and the stand02
Assemble the bracket and the stand
02

Assemble the bracket and the stand
02 Assemble the bracket and the stand
02

Assemble the bracket and the stand
02
Plug the power cable into the camera.
Plug the adapter
03

When SmartCube 300W is powered on, the
green led will be on first. After SmartCube
300W is ready, the red len will be on and the
green led will be off.
Power on SmartCube 300W
04
Please use three screws to fix the camera.
Mount the camera05

Adjust the View of the Camera
06
There are two ways to connect to WiFi
1. WPS connection.(WPS function only
supports that the router is in WPA2 AES
security protocols or no protected password.)
2. Connect wire to setup wireless connection.
WiFi Connection
07

Click WPS button on the router first.
WPS Wireless connection
08
Ant. Ant.Reset/WPSLAN4 LAN3 LAN2 LAN1
12V DC
WAN
Internet
on
Click Reset/WPS button on SmartCube 300W
then the green led will be on for 2 minutes.
When SmartCube 300W connects to the router
sucessfully, the green led will be flashing.
WPS Wireless connection08

After inserting a micro SD card, the blue led will
be on. Please use empty microSDHC Class 10
8GB or better.
Insert a Micro SD09
micro
SD
This step is not needed during the setup. But if
the camera is not responding and you want to
restore the camera to default settings. Please
press and hold the Reset/WPS button for 10
seconds,then release the button. The red led
will be off and green led will be on. After
SmartCube 300W is ready, the red led will be
on and the green led will be off.
Reset the Camera to default settings
10
10 seconds
Reseting Reset OK

Please skip this step if your camera has made
successful wireless connection to your router.
However, if your wireless router does not have
a WPS button. You can configure the camera
by connecting the SmartCube's LAN port to
your router's LAN port by Ethernet cable. Then
use your PC or Notebook to setup the camera's
WiFi setting.
Set up the camera by Ethernet port
11
Camera
PC or
Notebook
Wireless Router
LAN Port
a
Note: If you want to connect your PC directly to
the camera by Ethernet cable, the IP camera's
default LAN port IP address is 192.168.1.100.
LAN Port
Setup Wifi connection by PC
12
If user wants to setup wireless connection by PC
or Notebook. Please download IP wizard II from
AirLive SmartCube 300W support page
http://www.airlive.com/product/SmartCube-300W

Find the Camera using IP Wizard
13
Install and start the AirLive Wizard. The
program will automatically search for all
cameras on your network. Double click on the
camera you want to configure and the program
will open your web browser to configure the
camera.
Important Note: Please make sure you have
made Internet Explorer as your default browser
first.
Smartcube 300W
Access Camera on Web UI14
Please use IE to log in the camera. The default
username and password is admin/airlive.
You need to install the ActiveX on your PC
when you first access to the camera web UI.

Configure the camera's wireless setting15
On the camera's web UI, please click on the
"Configuration" icon to go into the configuration
page. Then click on "Network"->"Wireless"
page. Select your wireless router's SSID and
key in the security key. Then click on "Apply"
button.
Check wireless connection
16
Important! After the wireless is established, if user
needs to remove the Ethernet cable, please click
on the "reboot" button first, then unplug the
Ethernet cable immediately. This step must be
performed for the camera to operate properly.
Please open the AirLive IP Wizard program and
click on search icon. You should see 2
"SmartCube 300W" on the list if the camera has
made successful wireless connection to your
router. Now, please disconnect the Ethernet
cable between the camera and the router. You
should be able to access the camera using
wireless connection from now on.
Smartcube 300W
Smartcube 300W
Smartcube 300W

17
When user unplugs the Ethernet cable, please
replug the power cable at the same time.
Wireless connection will be rebuilt in three
minutes.
Mobile Wizard Wifi Setup
Please select setup page, click "Wizard" button.
SmartCube 300W Setup18

Adjust the time and date of the camera and
click "Next" button.
Time Adjustment19
It requires E-mail information to send the
counting report.
E-mail Settings20

You can adjust the sound volume on this page
Sounds21
There are three scenarios. 1. Normal Mode 2.
Door Cam Mode. 3. Store Entrance Mode.
Please select the scenario to fit your
environment and click "Arrow" button.
Scenarios Setup22

You can adjust resolution,frame rate and PIR
motion detection in normal mode.
Normal Mode23
In door cam mode, SmartCube 300W will detect
people, send the notification to the smartphone
and record video to SD card.
Door Cam Mode24

You can choose between face detection or
object counting to count the number of
customers.
Store Entrance Mode25 26 Face Detection
The face detection method detect faces as the
customers walk into the store

26 Face Detection
Face View
Installaon
Orientaon
Ceiling Height
Requirement
Advantage
Disadvantage
Recommend
Environments
Yes
Face Detecon
Facing the Entrance
Less than 3.2 meter
Get face shots, easy-to-
setup
Voice greeng for
entry only
For store and shop
entrance
You can adjust the settings to fit the
environment.
Face Detection26
/