Page is loading ...

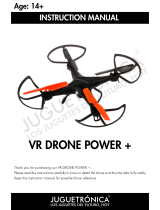
Age: 14+
VR DRONE FULL HD
Attention:
1. This quadricoptero is suitable for indoor flight and outdoor, even in moderate wind
conditions.
2. It uses the 2.4GHz frequency. This allows a wide range and allows the flight of
several devices in the same place without interference. In addition, pilots can control
the flying forward / backward, turn left / right, fly left / right.
3. Read this manual carefully before using the VR Drone FullHD and it for future
reference.
INSTRUCTION MANUAL

INDEX OF CONTENTS
ADVICES AND RESPONSIBILITIES
Advices and responsibilities ..........................................................................................
Check before flying ......................................................................................................
Advices about replacement parts ..................................................................................
Maintenance of equipment ...........................................................................................
Flight and height restrictions ........................................................................................
Drone parts and accessories .........................................................................................
Control functions ..........................................................................................................
Control adjustments .....................................................................................................
Capturing photos and videos ........................................................................................
Warnings .....................................................................................................................
Acrobatic flight .............................................................................................................
Emergency stop ............................................................................................................
Protection Function .......................................................................................................
Automatic take-off and landing ....................................................................................
Manual landing ............................................................................................................
Auto return ..................................................................................................................
Absolute Control Mode ................................................................................................
Battery change in the coltrol .........................................................................................
Advice for battery charging ...........................................................................................
Flight environment .......................................................................................................
Flight controls ..............................................................................................................
Setting drone ...............................................................................................................
Practice flight ...............................................................................................................
Resolution problems .....................................................................................................
Precautions ..................................................................................................................
Application functions ....................................................................................................
Display photos and videos ............................................................................................
How to download files and videos ................................................................................
Dimensions drone ........................................................................................................
1
2
2
2
2
2
3
3
3
4
4
5
5
5
5
6
6
7
7
8
8
9
10
10-11
11
11-14
14-15
15
15
Before flying the drone, read the following instructions in detail, as well as information on legal
issues, liaresponsabilities and security. Otherwise, it may cause damage to yourselves and to
others, as well as serious accidents. By using the drone, you confirm have read and understood
all terms and conditions, thereby accepting responsibility for their behavior and its consequen-
ces.
ATTENTION: When you finish fly with the drone, follow the steps below:
1. Land the drone and stop the engine.
2. Turn off the drone.
3. Turn off the control.
It is very important that you follow the previous steps because it has been found that if you
turn off the control before the drone, the engines of this are activated after a few seconds and
it may cause some damage in the hands when try to turn off it with the engines on.

3
INDEX OF CONTENTS
CHECK BEFORE YOU FLY
ADVICE ABOUT REPLACEMENT PARTS
MAINTENANCE OF EQUIPMENT
FLIGHT AND HEIGHT RESTRICTIONS
DRONE PARTS AND ACCESSORIES
1. Use only new original spare parts, or which are in good condition.
2. Make sure, before flying, the control, drone and mobile device has a fully charged battery,
and also that the surroundings and the conditions are good for flying.
3. Do not drink alcohol or use drugs if you will pilot the drone.
4. Ensure that the drone is properly mounted (and fixed propellers).
5. Before flying, you need to calibrate the drone barometer. For this, lower the two levers to
the inside (diagonal) simultaneously. Please note that each flight environment requires its
corresponding calibration.
Para evitar possíveis danos e/ou perdas, leia os seguintes conselhos:
1. Always use original spare parts. Not doing so could be dangerous for the drone and unsafe
to the environment.
2. Ensure that the drone and all its internal components do not come into contact with dan-
gerous objects such as water, oil, sand, etc .
To avoid any possible damage and / or loss, follow the instructions below:
1. This drone has small parts which are dangerous for children between 0-3 years, as can be
ingested. Always handle the drone away from children of this age.
2. Store the battery in a dry, ventilated place where there is no incidence of sunlight to avoid
overheating. If you will not use the battery within three months, we recommend that you
keep charged and that the storage location is between 22 and 28ºC. Never store batteries
at a temperature below 20 ° C.
3. Ensure that all drone components are attached correctly.
4. Regularly test the battery charge.
Flight restrictions:
Keep all flying the drone in your field of vision.
Always fly safely in appropriate areas, as authorized flight fields or unpopulated areas.
Height restrictions:
The drone can not overcome flight 120 meters high.
When piloting the drone through the application (iOS / Android), you can transmit images wi-
thin 40-50 meters, if there is no interference in the area. In case of interference, the maximum
transmission distance and control is reduced to 30m.
Camera
LEDs
Charger
LiPo battery
de 7,4v
Propellers
2 x A e 2 x B
Top
cover
Propellers
Battery
Cover

Stop
emergency
Capture photos /
video
Photos and vi-
deos capture
Lights
Auto return
Absolute control mode
CONTROL FUCTIONS
CONTROL ADJUSTMENTS
CAPTURING PHOTOS AND VIDEOS
The control can be adjusted to fit the size of your smar-
tphone or tablet, as shown in image 1.
To adjust the control, pull the left of the lock / unlock
button on the back of the control (Image 2).
Press the button once to “photo capture / video”
from the control to perform a photo and press in
a prolonged way to start recording a video.
If you are using the application (iOS / An-
droid) to control the drone, press the camera
icon to take a photo or video camera icon to
take a video.
Set your smartphone or tablet to the desired size,
both control side (picture 3). Finally, re-lock
the lateral position
left (Image 4)
Aerobatics button
Speed setting (low /
medium / high)
Automatic takeoff
Automatic landing
On / off button
Left turn adjustment
Set to move forward
Backward adjustment
Image 1
Image 2
Image
Image 4
Direction adjustment
to the left
Direction adjustment
to the right
Right turn adjustment
Power lever and
turn right / left
Lever forward / ba-
ckward and left / right
ATENTION:
The WiFi camera turns into blue when it is turned on. When you connect the application to the ca-
mera, it flashes slowly. While recording a video (by the application or the control) it flashes quickly

5
WARNINGS
ACROBATIC FLIGHT
THIS DRONE INTEGRATES GYROSCOPE. CAREFULLY READ THE FOLLOWING INSTRUCTIONS
BEFORE YOU START TO FLY.
1. Place the drone on a horizontal surface and press the power button. The LEDs flash slowly.
The LEDs shine rapidly during calibration or when the drone is not on a horizontal surface
when it will be turned on.
2. Turn on the control. It lights up a red light and sounds 3 beeps. The LEDs of the drone at
this time, blink rapidly. Then it lights a green light on the control and the LEDs illuminate
the drone steadily.
3. To turn on the engines, push both levers simultaneously down and out (diagonally to the
outside of the control). The drone start the engines and the propellers start spinning slowly.
Now you can push the power lever to start flying normally.
4. If the battery has been disconnected, you must restart the control to synchronize it with the
drone again (steps 1 and 2). After that, the drone will be ready to fly.
5. Basic concepts: The drone operates at a frequency of 2.4 Ghz and can be controlled over
long distances. This frequency allows the drone to fly close to other electronic equipment
without risk of interference. The drone can: move upward, downward, forward, backward,
move right or left and rotate on its axis in both directions.
6. To run an aerobatic see “aerobatic flight” section. You can run loops forward or backward
and rolls to the right or left.
7. To fly in the absolute control mode read the “ABSOLUTE CONTROL MODE” section. This lets
you fly the drone in any direction without a certain position to determine the orientation
of the drone.
8. To make the return of the drone automatically, see the “AUTO RETURN” section. When the
drone is at a certain distance, you can press this button to bring it back to the starting point.
To do exit this mode, press the button again.
9. Height measurement function: When you take off, accelerate slowly to prevent the drone
takes off with jumps. By accelerating too fast, it can cause a slow response from the drone
due to air pressure, causing an incorrect reading of the barometer.
10. To land safely, read “LANDING MANUAL".
11. If the drone crashes into an object during the flight and you need to stop quickly, press the
“emergency stop” button. Use this function careful to avoid accidents.
12. Low Battery Warning: When the drone’s battery is exhausted, the LED lights start flashing
quickly. Note: In our tests, the flash started 7 minutes of flight, but the battery life reached
12 minutes. When the battery runs out, the drone lands automatically.
To perform aerobatic is required to fly at an altitude of at least 2 meters. Press the stunt button
(see page 3) and the control will emit an intermittent beep continuously until you move the right
lever in the chosen direction (forward or backward to perform loops, right or left to perform
rolls).
Looping forward
Roll left
Looping backward
Roll right

EMERGENCY STOP
PROTECTION FUNCTION
AUTOMATIC TAKE-OFF AND LANDING
MANUAL LANDING
“Emergency stop”
button
ATTENTION
If the drone during flight, collides with an object, or if you
need to stop quickly, press the “emergency stop” button.
See image on the left. If you are in flight and the engines
stop, the drone will fall on the ground, so do not use it if
it is not strictly necessary.
If the drone crashes into an obstacle and falls, the current is cut off automatically to protect
motors. To reset the control, lower the power lever to maximum (center image) and then lower
both levers and out (right image) to unlock the drone and return to fly normally.
Automatic takeoff: After pressing the button, the drone rises to reach 1 meter reference height.
While rises, the drone´s lights flash slowly and remain on when it reaches the height informed.
Automatic landing: After pressing the button, the drone slowly goes down to land on the grou-
nd. While going down, the drone`s lights flash slowly and remain on for 3-5 seconds after
complete landing.
During the manual landing, lower the left lever slowly to
the drone lands slowly and gently.
Automatic takeoff
Automatic landing
In automatic takeoff the drone
always rises to up to 1 meter high,
regardless of the altitude at which
we are at.
1 meter
1 meter

7
AUTO RETURN
ABSOLUTE CONTROL MODE
By pressing the “auto return”, the drone flies back in a straight line to the starting position: the
one that started the flight. To exit this mode, press the button again. When this function is ac-
tivated, the front lights remains fixed and the rear lights (blue) start flashing quickly. When you
switch the function, all the lights remains fixed.
During the standard flight, pressing the right lever to move the drone, identifies the direction
you should move with the direction of the front (left image). But when activated the absolute
control mode, pressing the corresponding button (center image), the drone flies ahead, regar-
dless of the orientation of the front (right image). For complete control, LED lights flash rapidly.
To make sure that the drone flies in a straight line, perform previously the calibration horizonta-
lity (read “Warnings” on page 4). Press the indicated button to exit this flight mode.
Auto return
Auto Return
Start
End
Absolute
control
ATTENTION: If the drone crashes
into an obstacle during the flight, it
is possible to stop flying in a strai-
ght line and start flying laterally.
Land the drone and then reset the
calibration. For this, simultaneously
push both levers down and inside
diagonally of the control, as shown
in the picture on the right.
WARNING: Please note that the drone takes as reference the place that is was put during
taking off. If you fly the drone till it be places behind you, when you run the “auto return”, the
drone will move away, since it records the total displacement and return the distance recorded
according to the initial place.

BATTERY CHANGE IN THE CONTROL
ADVICE FOR BATTERY CHARGING
The battery compartments are hou-
sed in the back of the control (see
left image). Remove the covers and
insert two alkaline “AAA” batteries
in each compartment. Pay special
attention to the polarity indicated in
each compartment.
Remove the battery compartment that is in the back of the drone.
Connect the USB charger to the port of a PC and the red light on the charger lights up. Now
connect the other end to the battery connector. The light will remain on throughout the load,
turning off when the load has been completed. The estimated load time is 120 minutes.
Re-insert the battery into the drone compartment and close the lid.
ATENÇÃO: Do not use microSD port at the side of the drone to charge the battery.
Please note the following advice:
1. If you will not use the drone for a long time, disconnect the battery.
2. During charging, ensure that the charger supports the voltage of the country.
3. The charging connector may overheat if there is overload of the battery.
4. In case of battery overload, stop charging immediately.
5. Do not charge the battery without removing it from the drone.
6. Charge the battery only with USB charging equipment.
7. Before charging the battery, wait 30 minutes to cooldown. Recharge a hot battery might
generate irreparable damage.
8. Do not expose the battery to fire or to sunlight.
9. Do not cause a short circuit in the battery.
10. For child safety, avoid letting your battery near the metal parts.
Battery compartment lids
4 “AAA” alkaline 1.5V batteries
ATTENTION: 1.Make sure you put the batteries in the correct position considering the polarity
indicated. 2. Do not put the batteries in reverse. 3. Do not mix new and old batteries. 4. Do
not mix batteries of different types.
3
1
USB charger
2

9
FLIGHT AMBIENT
FLIGHT CONTROLS
Fly always in good weather conditions. We re-
commend choosing sunny days without wind and
following advices below:
1. Not fly ever with extreme temperatures, not too
cold, not too hot.
2. Do not fly on windy days. The control and the
performance of drone are influenced by the
wind as the drone shall compensate for wind
gusts to remain stable. This could end up cau-
sing damage to the drone.
3. Choose an open area to fly free of objects, ani-
mals and people.
By moving the left lever up to increase
the power of the propellers, the drone
starts to rise.
By moving the left stick down to reduce
the power of the propellers, the drone
starts to go down.
By moving the left stick to the left, the
drone starts to spin on its axis to the
left.
By moving the left lever to the right, the
drone starts to spin on its axis to the
right.
By moving the right lever up the drone
moves forward.
By moving the left lever down, the dro-
ne moves backward.
By moving the left lever to the left, the
drone moves laterally to the left.
By moving the left lever to the right, the
drone moves laterally to the right.
Left turn
Right turn
Forward
Backward
Left displacement
Right displacement

SETTING DRONE
When the drone starts flying uncontrollably or perform involuntary displacement, it is because
it is out of adjustment. To adjust (to trim) the drone and keep it with stable flight, you must per-
form the corresponding adjustment. Below, we detail the different settings available.
ATTENTION: It is important that the drone take off tand rises at least more than 30cm. At this
distance the drone suffers the “ground effect”, which makes it unstable. This aerodynamic
effect occurs when a body, with a difference in pressure between the zone above it and one
below it, is very close to the ground, causing changes in air flow, and thus destabilizing the
drone.
If the drone tends to turn left,
press the right turning adjust-
ment button until the drone
stops turning.
If the drone tends to turn to the
right, press the left turning ad-
justment button until the drone
stops turning.
If the drone tends to move ba-
ckward, press the advance adjust-
ment button until the drone stops
moving backward.
If the drone tends to move
forward, press the backward ad-
justment button until the drone
stops to move forward.
If the drone tends to move to the
left, press the displacement but-
ton to the right for the drone stops
going in the left direction.
If the drone tends to move to the
right, press the displacement bu-
tton to the left so that the drone
stop going in the right direction.

11
PRACTICE FLIGHT
RESOLUTION PROBLEMS
Practice until have drone control, follow the flight instruction below:
Take off the drone and try to keep it as steady as possible at a certain height (remember that
must be greater than 30cm to avoid ground effect). This type of flight is called stationary flight.
Now turn the drone on itself (image 1) in both directions, avoiding as much as possible that
the drone to destabilize. Start with gentle movements. This type of flight is called rotary flight.
Next, try to move forward, backward (image 2) and move laterally to both directions (image 3),
while avoiding the drone to destabilize. Start with gentle movements. This type of flight is known
as displacement flight.
Finally, landing (image 4). Lower the power lever smoothly and accurately so that the drone
move downward slowly. When you’re close to reaching the 30m, lower the lever more quickly
so that the landing is stable.
Image 1 Image 2 Image 3 Image 4
PROBLEM CAUSE SOLUTIONS
The control does
not work
The control is off Connect the control
Incorrect installation of the bat-
teries
Put the batteries according to the
correct polarity
Completely exhausted batteries Replace with new batteries
Failure control
The control is off Connect the control
The drone’s battery is disconnec-
ted
Connect the battery connector
correctly
There is a lot of wind
Do not fly on days of strong winds,
it can affect the performance and
stability of the drone, and it may
lose control
Failure rise
The propellers spin slowly Move up the power lever
The drone of the battery is half-
-loaded.
Recharge the battery of the drone
Abrupt landing Lower power lever very fast
Lower the power lever more slowly
to achieve a softly landing
Drone out of con-
trol
After synchronization, even
though the power lever is not at
maximum, the drone rises very
quickly
The power lever must be raised to
the maximum during calibration
Control coverage exceeded
Optimum control coverage is esti-
mated at 100 meters

RESOLUTION PROBLEMS (continued)
APPLICATION FUNCTIONS
PRECAUTIONS
1. The coverage range can be affected and / or shortened when the energy level is insufficient
(batteries in the control or low load drone battery).
2. Taking off or fly at high altitude is more complicated when the drone does not have enough
power.
3. When the drone is damaged, repair it before use it. A defective surface such as a broken
propeller can cause an accident.
4. If you do not use the control for a long time, remove the batteries to prevent the batteries
leak and damage the control.
5. Hitting or dropping the drone from a great height shortens the life of the drone.
6. If your drone is damaged, do not keep it in a drawer. You can purchase replacement parts
on our technical service in Madrid or over the internet in www.juguetonica.com
7. You can find interesting tutorials to learn how to fly or repair your drone in: www.apren-
deavolartudrone.com
PROBLEM CAUSE SOLUTION
Air pressure In-
fluence
The drone moves with jumps
Move the power lever gently, avoi-
ding abrupt moves
The drone spins
out of control,
although it has
been adjusted
correctly
The propeller is damaged Change propeller
There are engines that rotate
more slowly than others
Change the motor
1. Connecting your drone.
2. Access to the settings of your mobile
device and active WiFi connection.
3. Search the WiFi network your drone
and connect to it.
4. Click the icon to access the control
interface. At this point you will see
the video that the drone capture in
real time.
1. After running the application, you can ac-
cess the settings of some parameters by cli-
cking on the gear icon.
2. In “Interface Settings” you can change the
preview 0,3Mpx videos (default) 720p for
cases where it is necessary clarity. Note:
Receive real-time video at 720p may affect
the transmission speed.

13
MODE ACCELERATION To
the right
APPLICATION FUNCTIONS (continued)
ACCELERATION MODE TO THE LEFT
ACCELERATION MODE TO THE RIGHT
3D VIEW
1. Home | 2. Take photo | 3. Record Video
| 4. Gallery | 5. speed (low / medium /
high) | 6. height control |
7. G-sensor mode | 8. Show / hide interfa-
ce | 9. Show / Hide Settings | 10. Absolute
control | 11. Calibrate gyroscope | 12. Flip
camera |
13. 3D visualization | 14. Automatic Takeo-
ff | 15. Automatic Landing |
16. Emergency Stop | 17. Tracing the route
| Acrobatics 18 360
19. Power control (up / down)
20-21. Turn (left / right)
22-23. Lateral displacement (left / right)
24-25. Displacement (forward / backward)
26-27. Displacement adjustment
28-29. Turning setting
30-31. Lateral displacement adjustment
19. Power control (up / down)
20-21. Lateral Displacement (left / right)
22-23. Turn (left / right)
24-25. Displacement (forward / backward)
26-27. Displacement adjustment
28-29. Turning setting
30-31. Lateral displacement adjustment
1 2 3 4 5
14
10
12
11
13
15
16
17
18
6 7 8 9
19
19
20
20
21
21
22
22
23
23
24
24
25
25
26
26
27
27
28
28
30
30
29
29
31
31
FPV experience with VR Drone Glasses
Tap “adjustments” of the App
and select the icon
in the mobile menu. You will see that the camera
image is divided into two to fit the vision of glasses.
Then place your phone into glasses. So get yourself
the glasses and adjust the distance and focus of the
lens using the upper buttons (to obtain an optimal
visualization. Now you can start to fly!

APPLICATION FUNCTIONS (continued)
ACCELERATION MODE CONTROL TO THE LEFT (standard mode)
Power (up / down): Touch and move up the “lever” of power, indicated at the top capture so the
drone start rise and move down to the drone start go down.
Rotation (turn left / turn right): Touch and move left or right the “lever” of rotation, shown at
the top capture so the drone start a rotational movement about its axis in the chosen direction.
Lateral displacement (left / right): Touch and move left or right the “lever” of displacement,
shown at the top capture so the drone begins to move laterally in the chosen direction.
Direction (forward / backward): Touch and move up the “lever” direction, shown at the top
capture so the drone starts to move, and move downward to the drone start backward.

15
DISPLAY PHOTOS AND VIDEOS IN THE APPLICATION
When in the drone there is not installed microSD card, images / videos are recorded on the
mobile device. To display the recordings, follow these steps:
1. After running the application, tap the icon “Gallery” (upper left image).
2. The window selection of photos or videos opens (top right image).
3. If you select pictures, it shows the relevant screen with the photos taken (bottom left image)
and, if you select videos, it shows the relevant screen with the captured videos (lower right
image).
When the drone has installed microSD card, pictu-
res / videos are recorded on this memory (by de-
fault). In this case, after running the application
and enter the gallery following the steps of pre-
vious points, it will show in the gallery a third icon
(right image). Do not turn off the drone to view
photos / videos from the microSD. You can import
files to smartphone / tablet (use wifi).
APPLICATION FUNCTIONS (continued)
DEFINITION OF TRAJECTORY
Please indicate on the screen the trajectory you want the drone to perform.
Photos Videos
Photo 1
Photo2 Photo 3
Photos
Videos
Video 1 Video 2 Video 3

HOW TO DOWNLOAD FILES AND VIDEOS
DIMENSIONS
1. Remove the microSD card drone as shown in image 1.
2. Insert the micro SD into the player (supplied) as shown in image 2 to be able to transfer to
the PC recorded files.
3. Connect the USB player with micro SD into the PC’s USB port as demonstrated in the ima-
ge 3. The direction to get to the files is: this equipment> MICROSD> Folder “Photo” and
“Video”.
Length: 270mm.
Width: 193 mm.
Height: 80mm.
Tail Rotor Diameter: 153 mm.
Weight: 168 g.
Flight Time: 6 to 8 minutes
270mm
193mm
153mm
80mm
DOMESTIC WARRANTY AND TECHNICAL SUPPORT
Shop: C/ Alberto Aguilera, 1 - 28015 Madrid - Espanha
After-sales service: C/ Acuerdo, 36 - 28015 Madrid - Espanha
JUGUETRÓNICA, SL - NIF: B83788414
Thank you for purchasing this product.
All information and updates in:
www.juguetronica.com/extras/vr-drone-fullhd
The cross bin symbol indicates that the products and the batteries must not be dispo-
sed of as household waste, since they contain substances harmful to the environment.
Please use the ecopoints to eliminate.
/