Page is loading ...

User’s GUide
6001434
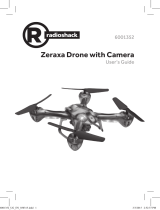
ZERAXA 2.0
AUTO-HOVERING CAMERA DRONE
BC
Age 12+

2
Contents
Features ...............................................................................................................3
Package Contents ..............................................................................................3
Specications .....................................................................................................3
Fly Safely ..............................................................................................................3
Charge the Drone Battery .................................................................................4
Lithium Battery Notes ................................................................................................... 4
Install Batteries in the Remote Control ...........................................................5
Battery Notes ................................................................................................................... 5
Pairing ..................................................................................................................5
Fly Your Drone .....................................................................................................5
Drone Control and Design Overview ...............................................................6
Remote Control Overview ................................................................................8
Land Your Drone ...............................................................................................10
Trim Your Drone ................................................................................................10
Fly "Headless" in Special Mode .......................................................................10
Perform Stunts .................................................................................................11
Using the Camera ............................................................................................11
Setting up the Camera ................................................................................................12
Taking Photos and Videos on board the Drone ..................................................12
Detaching and Mounting the Camera ...................................................................12
Using as Standalone Camera ....................................................................................12
Replace Damaged Propellers ..........................................................................13
Troubleshooting ...............................................................................................13
Drone does not respond ............................................................................................13
Drone dicult to control ............................................................................................13
Drone swerves or moves erratically before taking o .....................................14
FCC Information ...............................................................................................14
Limited Warranty ..............................................................................................14

3
We hope you enjoy your Zeraxa 2.0 Auto-Hovering Camera Drone from
RadioShack. Congratulations! No FAA Registration is required for this drone.
Please read this user’s guide before setting up and using your drone.
Features
• Detachable camera • Digital proportional control
• USB charging • 6-axis gyro stablilization
• 2.0 system upgrade with air pressure sensor for enhanced hovering
Package Contents
• Zeraxa 2.0 Camera Drone • Remote Control
• USB Charging Cable • Spare Propeller with screw (4)
• 3.7V Drone Battery • User’s Guide
Specifications
Power ...............................................................................................................................................
Drone ........................................................... 3.7V, 530mAh lithium polymer battery
Remote Control ....................................................................................4 × AA batteries
Control Distance .........................................................................................200 ft. (60.96m)
Camera ...........................................................................................................................................
Lens Resolution (video) ...................................................................................640 × 480
Photo Resolution ............................................................................. 1280 × 1024 JPEG
Micro SD card support .....................................................................32GB (maximum)
Specications are subject to change and improvement without notice. Actual
product may vary from the images found in this document.
Fly Safely
• Do not y the drone near or at other people or animals.
• Do not y your drone where emergency responders are working, or
emergency aircraft are operating.
• When ying outdoors, keep the drone away from power lines, trees, weeds,
and water.
• Do not y your drone over private property where you are not welcomed.
• When ying indoors, keep the drone away from walls, air conditioning, air
vents, fans, breakable objects, and other obstacles.
• Keep eyes, hands, hair, and loose clothing away from moving propellers.
• Fly safely. If the drone crashes, the Micro SD card may fall out.
• Adult supervision is recommended at all times.
CHOKING HAZARD! Small parts. Not for children under 3 years.

4
Charge the Drone Battery
Make sure you use the supplied battery and battery charging cable, or one
of the same type: 3.7 V, 530mAH lithium polymer.
1. Use the USB charging cable to connect the battery to a USB power
source. The LED on the USB connector lights red during charging, and
turns o when charging is complete.
A full charge takes about 100 minutes. A fully charged battery provides up
to 7 minutes of ight and camera time.
2. After charging, unplug the USB charging cable. Do not attempt to
overcharge the battery.
3. To install the battery, use a
screwdriver to open the drone
battery compartment door.
4. Match and plug the two ends of the
white battery connectors. They
only t one way, so do not use force.
Neatly slot the battery and cables into
the compartment.
5. Screw the compartment door close.
Note: To recharge the battery, you can
leave the battery inside the drone. Simply unplug the battery connectors, then
follow steps 1-2 to charge using the supplied USB cable.
Lithium Battery Notes
• Do not charge longer than recommended. Unplug the charging cable when
the battery is charged.
• Do not attempt to charge or operate damaged toys.
• Do not puncture or crush. Do not disassemble.
• Do not dispose of lithium batteries in the trash.
• If the electrolyte in the cells should get on your skin, thoroughly wash with soap
and water. If in the eyes, rinse thoroughly with cool water. Immediately seek
medical attention.
2
1
Screw
LED

5
Install Batteries in the Remote Control
1. Make sure the remote control is turned o.
2. Use a screwdriver to open
the battery compartment.
Then insert four AA batteries
(not included), matching the
polarities (+ and –) marked
inside. Use alkaline batteries
for optimal performance.
Replace the cover.
Note: If the remote control’s LED
ashes during use, the batteries
are low and should be replaced.
Battery Notes
• Dispose of old batteries promptly and properly. Do not burn or bury them.
Use only fresh batteries of the required size and recommended type.
• Do not mix old and new batteries, dierent types of batteries (standard,
alkaline, or rechargeable), or rechargeable batteries of dierent capacities.
• Remove batteries during longer storage periods. Batteries can leak
chemicals that can damage electronic parts.
Pairing
1. Turn on the drone. The LEDs on the drone ash.
2. Place the drone on level ground.
3. Turn on the remote control. The remote control's LED ashes.
4. Move the throttle all the way up and then down to pair the remote control
with the drone. The drone’s propellers remain still during pairing. When
paired, all LEDs on both the remote control and drone light steadily.
Note: If pairing fails, turn o the drone and remote control and repeat the steps
above, or change locations to avoid electrical interference.
Fly Your Drone
There are 3 ways to take o:
For beginners: With the drone on the ground, press the button
. The
drone will automatically take o, ascending about 5 ft (150cm) and then hover.
Intermediate users: With the drone on the ground, move the throttle forward
to ascend. To avoid ground air turbulence, y the drone at least 1 ft. (30cm) o
the ground.
Advanced users: Hold the remote control with one hand, resting your thumb
on the throttle. Throw the drone about 9 ft. (3m) away from you, and move the
throttle forward to y. The drone adjusts itself automatically and ies smoothly.

6
ON/OFF
Back LEDs (green)
Drone Control and Design Overview

7
Camera Lens
Adjustable. Rotate 90� to point down for
lming or snapping aerial views
Front LEDs (white)
Propeller
Red LED eyes

8
Photo
HI/ LOW
Switch between high
speed (double beep) and
low speed (single beep).
Forward/Reverse
Movement Trim
Throttle
Ascend
Descend
Turn rightTurn left
LED
One-touch takeo/ landing
Remote Control Overview

9
Left/Right Slide Trim
Steering
Forward
Backward
Slide rightSlide left
ON/OFF/Special
FLIP
Turn stunt
mode on/o.
Video

10
Land Your Drone
There are 2 ways to land:
Beginners: Press
and the drone will steadily descend and land.
Intermediate/ Advanced users: Slowly move the throttle backward to descend.
Avoid moving the throttle too quickly, as it can stop the propellers instantly and
cause the drone to crash.
• When you nish ying the drone, turn o the remote control and drone.
Trim Your Drone
Push the throttle forward and observe how the drone reacts.
Forward/Reverse Movement Trim: If the drone tends to move forward, press
6
; if it tends to move backward, press
5
.
Left/Right Slide Trim: If the drone tends to slide right, press
3
; if it tends to
slide left, press
4
.
Note: The remote control beeps when you press a trim control but stops
beeping when you reach maximum trim adjustment.
Fly "Headless" in Special Mode
Featuring an integrated true-north compass, the drone can automatically align
to y "headless" in Special mode. This simplies steering, when you do the
following:
1. Select an open location without strong magnetic interference and place
the drone facing forward on level ground.
2. Turn on the drone. Point your remote
control forward in the same direction as
the drone, then switch the remote control
to Special. Move the throttle all the way up,
then down to pair the remote control with
the drone.
3. After pairing, the drone will y forward in any
direction based on steering, regardless which way the drone's head faces
during takeo and ight.

11
Perform Stunts
1. Press FLIP. The remote control beeps.
2. Move the steering lever to perform stunts:
• Front ip: Move steering forward
• Back ip: Move
steering backward
• Barrel roll: Move
steering right or left
3. To exit stunt mode, press FLIP again before moving the steering.
IMPORTANT: Make sure there is enough space for the drone to perform stunts
without crashing into objects or people.
Using the Camera
The drone's VGA camera is detachable, so you can use it with your drone or
as a standalone USB camera. For good pictures, use the camera in daylight or
well-lit environments.
A red LED inside the camera indicates the camera's various modes:
• lights up when connected to the drone or an independent power source
• blinks when a Micro USB cable is connected for photo/ video le download
to a computer; during standalone camera video recording; or if you have
forgotten to insert a Micro SD card.
Video
Prong
Lock
Photo
Micro USB Port
connects to a power source or
computer via a micro USB cable
Adjustable lens
Camera Cable
Connector
Red LED
(inside
camera)

12
Setting up the Camera
1. You can adjust the angle of the lens. Rotate the lens down
90° for lming or snapping aerial views. Or keep it pointed
forwards to capture views straight on.
2. Insert a Micro SD card (not included) into the card slot.
Push the card in until it clicks.
3. To remove the card, press it to eject.
Taking Photos and Videos on board the Drone
When the drone ies stably, on the remote control:
• Press
once to take a photo. The remote control beeps and the
drone's back LEDs ash once.
• Or, press
to record a video. The remote control beeps and the
drone's back LEDs ash repeatedly during recording. Press
again
to stop recording and save your le recording.
Note:
• Cards over 32GB memory size, such as SDXC, do not function on the drone.
• The video recorded may fail to play in some video applications if (1) the
Micro SD card falls out due to a crash; (2) you remove the card before
stopping recording; (3) battery power was too low during recording.
Detaching and Mounting the Camera
• To detach the camera, unplug the camera cable connector from the drone.
Then gently pinch the prongs to unlock and slide o.
• To remount the camera, align and push onto the groove mount. Make sure
you hear a click indicating the camera is securely locked on.
Using as Standalone Camera
1. Detach the camera from the drone completely.
2. To power the camera, connect a micro USB cable (not included) to the
camera's micro USB port and an independent USB power source such as a
charged power bank. The red LED inside the camera lights steadily.
3. Use the
and buttons on the camera in the same way as
described in the remote control operation above:
• The camera's LED blinks once when you take a photo.
• The camera's LED blinks repeatedly during recording.
Note: The video and photo functions are automatically disabled when
connected to a USB port on a computer, as the camera will be detected as a
mass storage device. Use a micro USB cable that is for charging only, if you
want to operate the camera functions.
90°

13
Replace Damaged Propellers
The left and right propellers of the drone
are dierent (see R/L orientation marking
on propeller underside and on the rotor
axles). You must use the correct propeller
in the correct location, otherwise the
drone will fail to take o.
WARNING:
• To avoid injury and damage, inspect the propellers for nicks and breaks and
make sure they are securely attached before and after each ight. Replace
nicked, chipped, cracked or broken propellers.
• Use only the supplied propellers. Do not alter, modify, or customize.
Troubleshooting
Drone does not respond
• Make sure the drone and remote control are switched on and paired.
• The drone battery may be low. Fully charge the battery. See “Charge the
Drone Battery.“
• Remote control battery may be low. Replace the batteries.
• Make sure the drone is within the control range (200 ft./60.96m) and in line
of sight.
Drone difficult to control
• The propellers may be deformed due to a crash. Adjust deformed propellers
by hand. If you cannot adjust them, replace with the spare propellers.
• The throttle control is very sensitive. Use small, ne movements to control.
• If you are a beginner, set to low speed mode, use the takeo and landing
button
, and Special mode. See “Fly Headless in Special Mode.“
R
R
L
L
To replace a damaged propeller,
use a screwdriver to remove the
old propeller. Insert a new matching
propeller onto the propeller axle, then
screw securely, but do not overtighten
otherwise the propeller won't turn.

14
Drone swerves or moves erratically before taking off
• The gyroscope inside your drone needs calibrating: Do the following:
1. Switch on and pair your drone with the remote control set to
ON position.
2. Move the throttle all the way down and the steering forward
at the same time. Hold this position until the drone LED eyes
start to blink rapidly. Then release the controls.
3. The drone LED eyes light steadily. Calibration is successfully
completed, and you are now ready for takeo.
• See “Trim Your Drone" to further ne tune and improve control of your drone
after calibration, if necessary.
FCC Information
This equipment has been tested and found to comply with the limits for a Class B digital
device, pursuant to Part 15 of the FCC Rules. These limits are designed to provide
reasonable protection against harmful interference in a residential installation. This
equipment generates, uses and can radiate radio frequency energy and, if not installed
and used in accordance with the instructions, may cause harmful interference to radio
communications. However, there is no guarantee that interference will not occur in a
particular installation. If this equipment does cause harmful interference to radio or
television reception, which can be determined by turning the equipment o and on, the user
is encouraged to try to correct the interference by one or more of the following measures:
• Reorient or relocate the receiving antenna.
• Increase the separation between the equipment and receiver.
• Connect the equipment into an outlet on a circuit dierent from that to which the
receiver is connected.
• Consult your dealer or an experienced radio/TV technician for help.
If you cannot eliminate the interference, the FCC requires that you stop using your
equipment. Changes or modications not expressly approved by the party responsible for
compliance could void the user’s authority to operate the equipment.
This device complies with Part 15 of the FCC Rules. Operation is subject to the following
two conditions: (1) this device may not cause harmful interference, and (2) this device
must accept any interference received, including interference that may cause undesired
operation.
Limited Warranty
Go to www.radioshack.com/help for details.
RadioShack Customer Relations
300 RadioShack Circle, Fort Worth, TX 76102
© 2016 General Wireless Operations Inc.
All rights reserved. RadioShack is a registered trademark
used by General Wireless Operations Inc. dba RadioShack
Printed
in China
12A16
6001434
Complies with the European Union’s “Restriction of
Hazardous Substances Directive,” which protects
the environment by restricting specic hazardous
materials and products.
www.radioshack.com
/