Page is loading ...

User’s Manual
7FS04/20
#FGPSFJOTUBMMJOHBOEVTJOHUIFDBNFSBQMFBTFSFBEUIJTNBOVBMDBSFGVMMZ
#FTVSFUPLFFQJUIBOEZGPSGVUVSFSFGFSFODF
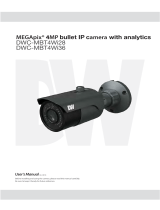
.&("QJY
¥
3MP PTZ IP Camera
%8$.PTZ336XW

4BGFUZ*OGPSNBUJPO
5IJTTZNCPMJOEJDBUFTUIBUEBOHFSPVTWPMUBHF
DPOTJTUJOHBSJTLPGFMFDUSJDTIPDLJTQSFTFOUXJUIJO
UIJTVOJU
8BSOJOH 1SFDBVUJPO
5IJTFYDMBNBUJPOQPJOUTZNCPMJTJOUFOEFEUPBMFSUUIF
VTFSUPUIFQSFTFODFPGJNQPSUBOUPQFSBUJOHBOE
NBJOUFOBODFTFSWJDJOHJOTUSVDUJPOTJOUIFMJUFSBUVSF
BDDPNQBOZJOHUIFBQQMJBODF
503&%6$&5)&3*4,0'&-&$53*$4)0$,%0/053&.07&$07&303#"$,/064&34&37*$&"#-&
1"354*/4*%&3&'&34&37*$*/(5026"-*'*&%4&37*$&1&340//&-
$"65*0/
$"65*0/
3*4,0'&-&$53*$4)0$,
%0/0501&/
5PQSFWFOUEBNBHFXIJDINBZSFTVMUJOGJSFPSFMFDUSJDTIPD
IB[BSEEPOPUFYQPTFUIJTBQQMJBODFUPSBJOPSNPJTUVSF
8"3/*/(
#FTVSFUPVTFPOMZUIFTUBOEBSEBEBQUFSUIBUJTTQFDJGJFEJ
UIFTQFDJGJDBUJPOTIFFU6TJOHBOZPUIFSBEBQUFSDPVMEDBVT
GJSFFMFDUSJDBMTIPDLPSEBNBHFUPUIFQSPEVDU
*ODPSSFDUMZDPOOFDUJOHUIFQPXFSTVQQMZPSSFQMBDJOHCBUUFSZ
NBZDBVTFFYQMPTJPOGJSFFMFDUSJDTIPDLPSEBNBHFUPUI
QSPEVDU
%POPUDPOOFDUNVMUJQMFDBNFSBTUPBTJOHMFBEBQUFS
&YDFFEJOHUIFDBQBDJUZNBZDBVTFFYDFTTJWFIFBUHFOFSBUJPO
PSGJSF
4FDVSFMZQMVHUIFQPXFSDPSEJOUPUIFQPXFSSFDFQUBDMF
*OTFDVSFDPOOFDUJPONBZDBVTFGJSF
8IFOJOTUBMMJOHUIFDBNFSBGBTUFOJUTFDVSFMZBOEGJSNMZ
"GBMMJOHDBNFSBNBZDBVTFQFSTPOBMJOKVSZ
%POPUQMBDFDPOEVDUJWFPCKFDUTFHTDSFXESJWFSTDPJOT
NFUBMJUFNTFUDPSDPOUBJOFSTGJMMFEXJUIXBUFSPOUPQP
UIFDBNFSB%PJOHTPNBZDBVTFQFSTPOBMJOKVSZEVFUPGJSF
FMFDUSJDTIPDLPSGBMMJOHPCKFDUT
%POPUJOTUBMMUIFVOJUJOIVNJEEVTUZPSTPPUZMPDBUJPOT
%PJOHTPNBZDBVTFGJSFPSFMFDUSJDTIPDL
*GBOZVOVTVBMTNFMMTPSTNPLFDPNFGSPNUIFVOJUTUPQ
VTJOHUIFQSPEVDU*NNFEJBUFMZEJTDPOOFDUUIFQPXFSTPSDF
BOEDPOUBDUUIFTFSWJDFDFOUFS$POUJOVFEVTFJOTVDIB
DPOEJUJPONBZDBVTFGJSFPSFMFDUSJDTIPDL
*GUIJTQSPEVDUGBJMTUPPQFSBUFOPSNBMMZDPOUBDUUIFOFBSFTU
TFSWJDFDFOUFS/FWFSEJTBTTFNCMFPSNPEJGZUIJTQSPEVDUJO
BOZXBZ
8IFODMFBOJOHEPOPUTQSBZXBUFSEJSFDUMZPOUPQBSUTPGUIF
QSPEVDU%PJOHTPNBZDBVTFGJSFPSFMFDUSJDTIPDL
8"3/*/(
1.
2.
3.
4.
5.
6.
7.
8.
9.
10.
1SFDBVUJPO
0QFSBUJOH
t#FGPSFVTJOHNBLFTVSFQPXFSTVQQMZBOEBMMPUIFSQBSUTBSF
QSPQFSMZDPOOFDUFE
t8IJMFPQFSBUJOHJGBOZBCOPSNBMDPOEJUJPOPSNBMGVODUJPO
JTPCTFSWFETUPQVTJOHUIFDBNFSBJNNFEJBUFMZBOEDPOUBDU
ZPVSEFBMFS
)BOEMJOH
t%POPUEJTBTTFNCMFPSUBNQFSXJUIQBSUTJOTJEFUIFDBNFSB
t%POPUESPQUIFDBNFSBPSTVCKFDUJUUPTIPDLPSWJCSBUJPOBT
UIJTDBOEBNBHFUIFDBNFSB
t$MFBOUIFDMFBSEPNFDPWFSXJUIFYUSBDBSF4DSBUDIFTBOE
EVTUDBOSVJOUIFRVBMJUZPGUIFDBNFSBJNBHF
*OTUBMMBUJPOBOE4UPSBHF
t%POPUJOTUBMMUIFDBNFSBJOBSFBTPGFYUSFNFUFNQFSBUVSF
FYDFFEJOHUIFBMMPXFESBOHF
t "WPJEJOTUBMMJOHJOIVNJEPSEVTUZFOWJSPONFOUT
t "WPJEJOTUBMMJOHJOQMBDFTXIFSFSBEJBUJPOJTQSFTFOU
t "WPJEJOTUBMMJOHJOQMBDFTXIFSFUIFSFBSFTUSPOHNBHOFUJD
GJFMETBOEFMFDUSJDTJHOBMT
t "WPJEJOTUBMMJOHJOQMBDFTXIFSFUIFDBNFSBXPVMECFTVCKFDU
UPTUSPOHWJCSBUJPOT
t /FWFSFYQPTFUIFDBNFSBUPSBJOPSXBUFS

*NQPSUBOU4BGFUZ*OTUSVDUJPOT
%JTQPTBMPG0ME"QQMJBODFT
8IFOUIJTDSPTTFEPVUXIFFMCJOTZNCPMJTBUUBDIFEUPBQSPEVDUJUNFBOTUIFQSPEVDUJTDPWFSFECZUIF
&VSPQFBO%JSFDUJWF&$
"MMFMFDUSJDBMBOEFMFDUSPOJDQSPEVDUTTIPVMECFEJTQPTFEPGTFQBSBUFMZGPSNUIFNVOJDJQBMXBTUFTUSFBN
iOBDDPSEBODFUPMBXTEFTJHOBUFECZUIFHPWFSONFOUPSUIFMPDBMBVUIPSJUJFT
5IFDPSSFDUEJTQPTBMPGZPVSPMEBQQMJBODFXJMMIFMQQSFWFOUQPUFOUJBMOFHBUJWFDPOTFRVFODFTGPSUIF
FOWJSPONFOUBOEIVNBOIFBMUI
'PSNPSFEFUBJMFEJOGPSNBUJPOBCPVUEJTQPTBMPGZPVSPMEBQQMJBODFQMFBTFDPOUBDUZPVSDJUZPGGJDF
XBTUFEJTQPTBMTFSWJDFPSUIFTIPQXIFSFZPVQVSDIBTFEUIFQSPEVDU
5IJTFRVJQNFOUIBTCFFOUFTUFEBOEGPVOEUPDPNQMZXJUIUIFMJNJUTGPSB$MBTT"EJHJUBMEFWJDFQVSTVBOUUPQBSUPGUIF'$$3VMFT
5IFTFMJNJUTBSFEFTJHOFEUPQSPWJEFSFBTPOBCMFQSPUFDUJPOBHBJOTUIBSNGVMJOUFSGFSFODFXIFOUIFFRVJQNFOUJTPQFSBUFEJOBDPNNFSDJBMFOWJSPONFOU
5IJTFRVJQNFOUHFOFSBUFTVTFTBOEDBOSBEJBUFSBEJPGSFRVFODZFOFSHZBOEJGOPUJOTUBMMFEBOEVTFEJOBDDPSEBODFXJUIUIFJOTUSVDUJPONBOVBMNBZDBVTF
IBSNGVMJOUFSGFSFODFUPSBEJPDPNNVOJDBUJPOT0QFSBUJPOPGUIJTFRVJQNFOUJOBSFTJEFOUJBMBSFBJTMJLFMZUPDBVTFIBSNGVMJOUFSGFSFODFJOXIJDIDBTFUIFVTFS
XJMMCFSFRVJSFEUPDPSSFDUUIFJOUFSGFSFOFDFBUIJTPXOFYQFOTF
3FBEUIFTFJOTUSVDUJPOT"MMTBGFUZBOEPQFSBUJOHJOTUSVDUJPOTTIPVMECFSFBECFGPSFJOTUBMMBUJPOPSPQFSBUJPO
,FFQUIFTFJOTUSVDUJPOT5IFTBGFUZPQFSBUJOHBOEVTFJOTUSVDUJPOTTIPVMECFSFUBJOFEGPSGVUVSFSFGFSFODF
)FFEBMMXBSOJOHT"MMXBSOJOHTPOUIFQSPEVDUBOEJOUIFPQFSBUJOHJOTUSVDUJPOTTIPVMECFBEIFSFEUP
'PMMPXBMMJOTUSVDUJPOT"MMPQFSBUJOHBOEVTFJOTUSVDUJPOTTIPVMECFGPMMPXFE
%POPUVTFUIJTEFWJDFOFBSXBUFS'PSFYBNQMFOFBSBCBUIUVCXBTICPXMLJUDIFOTJOLMBVOESZUVCJOBXFU
CBTFNFOUOFBSBTXJNNJOHQPPMFUD
$MFBOPOMZXJUIESZDMPUI6OQMVHUIJTQSPEVDUGSPNUIFXBMMPVUMFUCFGPSFDMFBOJOH%POPUVTFMJRVJEDMFBOFST
%POPUCMPDLBOZWFOUJMBUJPOPQFOJOHT*OTUBMMJOBDDPSEBODFXJUIUIFNBOVGBDUVSFSTJOTUSVDUJPOT4MPUTBOE
PQFOJOHTJOUIFDBCJOFUBSFQSPWJEFEGPSWFOUJMBUJPOUPFOTVSFSFMJBCMFPQFSBUJPOPGUIFQSPEVDUBOEUPQSPUFDUJU
GSPNPWFSIFBUJOH5IFPQFOJOHTTIPVMEOFWFSCFCMPDLFECZQMBDJOHUIFQSPEVDUPOCFETPGBSVHPSPUIFSTJNJMBS
TVSGBDFT5IJTQSPEVDUTIPVMEOPUCFQMBDFEJOBCVJMUJOJOTUBMMBUJPOTVDIBTBCPPLDBTFPSSBDLVOMFTTQSPQFS
WFOUJMBUJPOJTQSPWJEFEBOEUIFNBOVGBDUVSFSTJOTUSVDUJPOTIBWFCFFOBEIFSFUP
%POPUJOTUBMMOFBSBOZIFBUTPVSDFTTVDIBTSBEJBUPSTIFBUSFHJTUFSTPSPUIFSBQQBSBUVTJODMVEJOHBNQMJGJFST
UIBUQSPEVDFIFBU
%POPUEFGFBUUIFTBGFUZQVSQPTFPGUIFQPMBSJ[FEPSHSPVOEJOHUZQFQMVH"QPMBSJ[FEQMVHIBTUXPCMBEFTXJUI
POFXJEFSUIBOUIFPUIFS"HSPVOEJOHUZQFQMVHIBTUXPCMBEFTBOEBUIJSEHSPVOEJOHQSPOH5IFXJEFCMBEF
PSUIFUIJSEQSPOHBSFQSPWJEFEGPSZPVSTBGFUZ*GUIFQSPWJEFEQMVHEPFTOPUGJUJOUPZPVSPVUMFUDPOTVMUBO
FMFDUSJDJBOGPSSFQMBDFNFOU
1SPUFDUUIFQPXFSDPSEGSPNCFJOHXBMLFEPOPSQJODIFEQBSUJDVMBSMZBUQMVHTDPOWFOJFODFSFDFQUBDMFTBOE
UIFQPJOUXIFSFUIFZFYJUGSPNUIFBQQBSBUVT
0OMZVTFBUUBDINFOUTBDDFTTPSJFTTQFDJGJFECZUIFNBOVGBDUVSFS
6TFPOMZXJUIDBSUTUBOEUSJQPECSBDLFUPSUBCMFTQFDJGJFECZUIFNBOVGBDUVSFS
PSTPMEXJUIUIFBQQBSBUVT8IFOBDBSUJTVTFEVTFDBVUJPOXIFONPWJOHUIFDBSUBQQBSBUVT
DPNCJOBUJPOUPBWPJEJOKVSZGSPNUJQPWFS
6OQMVHUIFBQQBSBUVTEVSJOHMJHIUOJOHTUPSNTPSXIFOVOVTFEGPSMPOHQFSJPETPGUJNF
3FGFSBMMTFSWJDJOHUPRVBMJGJFETFSWJDFQFSTPOOFM4FSWJDJOHJTSFRVJSFEXIFOUIFBQQBSBUVTIBTCFFOEBNBHFE
JOBOZXBZTVDIBTQPXFSTVQQMZDPSEPSQMVHJTEBNBHFEMJRVJEIBTCFFOTQJMMFEPSPCKFDUTIBWFGBMMFOJOUPUIF
BQQBSBUVTUIFBQQBSBUVTIBTCFFOFYQPTFEUPSBJOPSNPJTUVSFEPFTOPUPQFSBUFOPSNBMMZPSIBTCFFO
ESPQQFE

4
Contents
1 Introduction ................................................................................................................................. 5
1.1 Components ...................................................................................................................................... 5
2 Installation .............................................................................................................................................. 6
2.1 Preparing the camera ........................................................................................................ ............ 6
2.1.1 Mounting the camera ............................................................................................................... 7
2.2 Cabling the camera ....................................................................................................................... . 8
2.3 Connections ................................................................................................................................. 10
2.4 Resetting the camera to default settings.................................................................. ............10
3 Web viewer .............................................................................................................................................. 12
3.1 Access from a browser ................................................................................................................... 12
3.2 Access from the Internet ............................................................................................................. 13
3.3 Setting the admin password over a secure connection ................................................... 13
3.4 Live View Page ............................................................................................................................... 14
3.5 Playback ........................................................................................................................................... 16
3.6 Camera Setup................................................................................................................................. 18
3.6.1 Basic Configuration ................................................................................................................ 18
3.6.2 Video and Image ................................................................................................................... 23
3.6.3 Audio ......................................................................................................................................... 34
3.6.4 Event ......................................................................................................................................... 35
3.6.5 Dome Configuration ........................................................................................................... 51
3.6.6 System .................................................................................................................................... 58
3.7 Help .................................................................................................................................................. 76
Appendix .................................................................................................................................................... 77
A.1 Troubleshooting ......................................................................................................................... 77
A.2 Alarm Connection ..................................................................................................................... 78
A.3 Preventive Maintenance ......................................................................................................... 78
A.4 System Requirement for Web Browser ............................................................................. 78
A.5 General Performance Considerations ............................................................................... 78
A.6 Product Specification ............................................................................................................. 79
Warranty .................................................................................................................................................. 81
Limits and Exclusions ............................................................................................................................ 82

1 Introduction
The camera supports the network service for a sensor image with a progressive scan, which
can be monitored on a real-time screen regardless of distances and locations. By using its
dedicated program, many users can have access to the camera at once or a single user can
monitor various cameras at the same time. It also enables users to play, store and retrieve a
monitoring image by using a PC. All the settings and real-time monitoring screens are also
provided through access to the web.
The camera is fully featured for security surveillance and remote monitoring needs. It is based
on the DSP compression chip and makes it available on the network as real-time, full frame
rate Motion H.265, H.264 and JPEG video streams.
The alarm input and alarm output can be used to connect various third-party devices, such
as door sensors and alarm bells.
1.1 Components
This system comes with the following components;
•
PTZ dome camera 1
•
Quick setup and download guides 1
•
2P screw type connector 1
•
5P screw type connector 1
•
12VDC adaptor 1
•
PoE injector 1
•
RJ-45 waterproof cover 1
•
Installation adaptor 1
NOTE: Check your package to make sure that you received the complete system,
including all components listed above.
5

2 Installation
2.1 Preparing the camera
A mounting accessory is required to complete the installation and is sold separately.
The wall or ceiling mount must be attached to a structural object such as hardwood, concrete
that will support the weight of the mount and dome camera.
1. The use of a solid backboard is recommended when attaching to gypsum walls. The
mounting surface must withstand five times the camera weight.
2. Do not let the cables get caught in improper places or the electric line cover can be
damaged. This may cause a short or fire.
3. For the installation process, remove the protection film and the tape from attached the
dome camera.
4. A silicone rubber sealant must be applied to seal the housing to secure waterproofing.
CAUTION 1: A silicone rubber sealant must be applied to seal the housing to secure
waterproofing.
CAUTION 2: When installing the camera in an environment colder than 14°F (-10°C), reset
the camera 30 ~ 60 minutes after the installation.
6

2.1.1 Mounting the camera
The wall mounting plate must be attached to a structural object such as concrete that will
support the weight of the mount and dome camera.
1. Using the mounting template or the mounting accessory
itself, mark and drill the necessary holes in the mounting
surface.
2. Pull all cables through the mounting accessory. See 2.2
Cabling the cam
era for more information.
3. Attach the wall mounting bracket to the mounting surface using plastic anchors and M8x35
screws. For a ceiling mounting bracket installation, use the plastic anchors to secure it to
the mounting surface.
4. Wind both of the pipe ends thread with Teflon tape about 20 times for sealing. Use a
silicone rubber sealant to seal the area where the mounting bracket and the pipe meet.
5. Place a bead of silicone sealant around the mounting bracket’s mounting flange, press it to
the surface and line up the flange hole with drilled holes.
6. Open the access plate on the mounting accessory and pull out the cables through
the rectangular access hole.
7. Attach the 1.5” adapter to the mounting bracket and fix it using the set screw.
8. Attach the camera’s safety wire to the mounting bracket and organize the cables.
9. Connect all the cables to the camera. See 2.2 Cabling the camera. Close the access plate
off the mounting bracket.
10. Connect the camera to the mounting bracket by turning it clockwise into the adapter, and
fix it using the set screw of the adapter.
7

2.2 Cabling the camera
Follow the table and diagram below to connect your camera to all external devices.
No.
Connector
Wire Color
Description
1
Power jack Black
Camera power
(12vdc)
2
RJ-45 Black Ethernet
3
RCA jack Black Audio input
4
RCA jack Gray Audio output
5
5-pin cable
Yellow Alarm input 1
White Alarm input 2
Violet Alarm input 3
Brown Alarm input 4
Gray GND
6
2-pin cable
Red Alarm output
Black GND
The
camera must be installed by qualified service personnel following all local and federal
electrical and building codes.
•
Connecting to the RJ-45
Connect a standard RJ-45 cable to the network port of the camera. Generally, a
crossover cable is used for direct connection to PC, while a direct cable is used for
connection to a hub.
•
Connecting alarms A1, A2, A3, A4 (alarm input 1, 2, 3, 4)
8

You can use external devices to signal the camera to react to events. Mechanical or
electrical switches can be wired to the A1, A2, A3, A4 (Alarm Input 1, 2, 3, 4) and G
(Ground) connectors.
NOTE: All the connectors marked G or GND is common.
Connect the ground side of the alarm input and/or alarm output to the G (Ground)
connector.
•
AO (alarm output)
The camera can activate external devices such as buzzers or lights. Connect the device
to the AO (alarm output) and G (ground) connectors.
•
Connecting audio
Connect the speaker to the audio output line and external mic to the audio input line.
•
Connecting the power
o 12VDC
Connect the power of 12VDC for the camera. Connect the positive (+) pole to
the ‘+’ position and the negative (-) pole to the ‘-’ position.
NOTE: Be careful not to reverse the polarity when you connect the power cable.
o PoE and 12VDC
Connect the power of 12VDC for the camera. Connect the positive (+) pole to
the ‘+’ position and the negative (-) pole to the ‘-’ position.
NOTE: Be careful not to reverse the polarity when you connect the power cable.
NOTE: If you use PoE to supply power to the camera, you must use a PoE
injector or switch greater than 30W.
9

2.3
Connections
SD card insertion
Users can insert and remove an SD card as shown in the following picture.
1. Open the SD card cover under the camera’s lens.
2. Insert or remove the SD card as needed.
3. Tightly close the SD card cover to ensure it is waterproof.
2.4 Resetting the camera to default settings
To reset the camera to its original factory settings, open the camera’s web viewer and go to
the Setup > System > Maintenance. You can also use the
Reset
button on the camera, as
described below:
10

Using the reset button:
Follow the instructions below to reset the camera to the factory default settings using the
Reset button.
1. Switch off the camera by disconnecting the power adapter.
2. Open the SD card cover.
3. Press and hold the reset button on the board with your finger while reconnecting the
power.
4. Hold the reset button down for about 2 seconds.
5. Release the reset button.
6. The camera resets to factory defaults and restarts after completing the factory reset.
7. Close the SD card cover tightly to ensure waterproofing.
CAUTION:
When performing a factory reset, you will lose all settings (Default IP
192.168.30.220)
11

3 Web viewer
The camera can be used with the Windows® operating system and browsers. The
recommended browsers are Internet Explorer, Safari, Firefox, Opera and Google Chrome with
Windows.
NOTE:
To view streaming video in Microsoft Internet Explorer, set your browser to allow
ActiveX controls.
3.1 Access from a browser
1. Start a browser (Internet Explorer).
2. Enter the IP address or hostname of the camera in the Location/Address field of your
browser.
3. You can see a starting page. Click Live View, Playback, or Setup to enter the web page.
4. The c
ameras Live View page appears in your browser.
12

3.2 Access from the Internet
Once connected, the camera is accessible on your local network (LAN). To access the camera
from the Internet you must configure your broadband router to allow incoming data traffic to
the camera. To do this, enable the NAT traversal feature, which will attempt to automatically
configure the router to allow access to the camera. This is enabled from Setup > System >
Network > NAT. For more information, please see “System > Network > NAT” of User Manual.
3.3 Setting the admin password over a secure connection
To gain access to the product, the password for the default administrator user must be set.
This is done in the Admin Password dialog, which is displayed when the camera is accessed
for the setup for the first time. Enter your admin name and password, set by the administrator.
NOTE:
The default administrator user name and password is “admin”. If the password is lost,
the camera must be reset to the factory default settings. Please see “Resetting to the
factory default settings”.
To prevent network eavesdropping when setting the admin password, this can be done via an
encrypted HTTPS connection, which requires an HTTPS certificate (see NOTE below). To set
the password via a standard HTTP connection, enter it directly in the first dialog shown above.
To set the password via an encrypted HTTPS connection, please see “System > Security >
HTTPS” of User Manual.
NOTE:
HTTPS (Hypertext Transfer Protocol over SSL) is a protocol used to encrypt the traffic
between web browsers and servers. The HTTPS certificate controls the encrypted
exchange of information.
13

3.4 Live View Page
The Live View page comes in several screen modes. Users are allowed to select the most
suitable one out of those modes. Adjust the mode following your PC specifications and
monitoring purposes.
1. Gener
al controls
Live View Page Playback Page Setup Page Help Page
The video drop-down-list allows you to select a customized or
preprogrammed video stream on the Live View page. Stream profiles are
configured under Setup > Basic Configuration > Video and Image. For more
information, please see “Basic Configuration > Video and Image” of the User
Manual.
The resolution drop-down-list allows you to select the most suitable one
out of video resolutions to be displayed on the Live View page.
The protocol drop-down-list allows you to select which combination of
protocols and methods to use depending on your viewing requirements,
and the properties of your network.
The preset drop-down-list allows you to select the preset number for the
PTZ camera being used. This icon is inactivated if the PTZ settings are not
set.
14

2. Control toolbar
The live viewer toolbar is available in the web browser page only. It displays the following
buttons:
The
Stop
button stops the video stream being played. Pressing the key again toggles
the play and stop.
The
Play
button connects to the camera or starts playing a video stream.
The
Pause
button pauses the video stream being played.
The
Snapshot
button takes a snapshot of the current image. The location where the
image is saved can be specified.
The
Digital
Zoom
button activates a zoom-in or zoom-out function for a video image
on the live screen.
The
Full
-
Screen
button causes the video image to fill the entire screen area. No other
windows will be visible. Press the ’Esc’ button on the computer keyboard to cancel the
full-screen view.
The
Manual
Trigger
button activates a pop-up window to manually start or stop the
event.
The
PTZ
button activates a pop-up window for Pan, Tilt and Zoom control.
The
Screen Move
button moves to the desired position on the screen. Move the
clicked point to the center of the screen. When dragging, it moves to the center of the
box and zooms in.
The
Relay Output
button manually triggers relay out. (This icon appears only if
“Enable alarm out” is selected in “Event > Event Out > Alarm Out”.)
The
Speaker
button activates/deactivates external speakers.
The
Mic
button activates/deactivates microphone input.
Use this scale to control the volume of the speakers and microphones.
3. Vid
eo Streams
The camera provides several images and video stream formats. Your requirements and
the properties of your network will determine the type you use.
The Live View page in the camera provides access to H.264, H.265 and Motion JPEG
video streams, and to the list of available video streams. Other applications and clients
can also access these video streams/images directly, without going via the Live View
page.
15

3.5 Playback
The
Playback window contains a list of recordings made to the memory card. It shows each
recording’s start time, length, the event type used to start the recording, calendar and time-
slice bar indicates if the recording exists or not.
The description of the playback window follows.
1. Video Screen
You can see the video screen when playing the video clip in the SD memory.
2. Playback Buttons
To view a recording data in the SD local storage, select it from the list and click the
Playback buttons.
Go to the first: go to the beginning of the video clip.
Fast backward play: fast play backward of the video clip.
Backward play: play backward of the video clip.
Step backward play: go back one frame of the video clip.
Pause: pause playback of the video clip.
Step forward play: go forward one frame of the video clip.
Forward Play: play forward the video clip.
Fast forward play: play fast forward of the video clip.
Go to the last: go to the end of the video clip.
Clip copy: copy the video clip.
Zoom In: zoom in the video clip.
Full Screen: display a full screen of the video.
3. Time Chart
16

Display an hour-based search screen for the chosen date. If there is recording data, a
blue section will be displayed on a 24-hour basis. If you select a specific hour in the
chart, a yellow square on the hour will be displayed.
4. Speaker Control Bar
Use this scale to control the volum
e of the speakers.
5. Search Calendar
Search results from the SD local storage in the camera connected are displayed monthly.
If there is a recorded data for a specific date, a blue square on the date will be displayed. If
you select a specific date in the calendar, a yellow square on the date will be displayed.
6. Play Time
Displays the time of the video playing.
7. Event Search Window
Select a search option in the drop-down list and click the GO button. You can also enter
the period for searching. If you click Start Date or End Date zone, displays Search
Calendar.
8. Event List Window
Event List displays the event(s) that were recorded in the SD local storage. Select a list
and click the play button. The video clip will be played.
17

3.6 Camera Setup
This section describes how to configure the camera.
The administrator has unrestricted access to all the Setup tools, whereas Operators have
access to the settings of Basic Configuration, which are Live View, Video and Image, Audio,
Event, Dome Configuration, and System.
You can configure the camera by clicking Setup either in the first connection page or the top
second-right button of the Live View page. Accessing the camera from a computer for the
first time opens the Admin Password dialog box. Enter your administrator or operator id and
password to get into the setup page.
NOTE:
If the password is lost, the camera must be reset to the factory default settings. Please
see “Resetting to the factory default setting”.
3.6.1 Basic Configuration
You can see the device information on this information page.
18

Users
User access control is enabled by default. The administrator can set up other users, by giving
user names and passwords. It is also possible to allow anonymous viewer login, which means
that anybody may access the Live View page, as described below:
The
user
list
displays the authorized users and user groups (levels):
User Group
Authority
Guest
The lowest level of access, which only allows access to the Live
View page.
Operator
View the Live View page, create and modify events, and adjust
certain other settings. Operators
have no access to System
Options.
Administrato
r
An administrator has unrestricted access to the Setup tools
and can determine the registration of all other users.
Enable anonymous viewer login:
Check the box to use the webcasting features. Refer to
“Video and Image > Webcasting” for more details.
Please refer to “System > Security > Users” for more details about User setup.
19

Network
The camera supports both IP version 4 and IP version 6. Both versions may be enabled
simultaneously, and at least one version must always be enabled. When using IPv4, the IP
address for the camera can be set automatically via DHCP, or a static IP address can be set
manually. If IPv6 is enabled, the camera receives an IP address according to the configuration
in the network router. There is also an option of using the Internet Dynamic DNS Service. For
more information on setting the network, please see “System > Network > Basic”.
• Obtain IP address via DHCP: Dynamic Host Configuration Protocol (DHCP) is a protocol
that lets network administrators centrally manage and automate the assignment of IP
addresses on a network. DHCP is enabled by default. Although a DHCP server is mostly
used to set an IP address dynamically, it is also possible to use it to set a static, known
IP address for a specific MAC address.
o Use the following IP address: To use a static IP address for the camera, check
the radio button and then make the following settings:
o IP address: Specify a unique IP address for your camera.
o Subnet mask: Specify the mask for the subnet the camera is located on.
• Default router: Specify the IP address of the default router (gateway) used for
connecting devices attached to different networks and network segments.
NOTES:
1. DHCP should only be enabled if using dynamic IP address notification, or if your DHCP
server can update a DNS server, which then allows you to access the camera by name
(hostname). If DHCP is enabled and you cannot access the unit, you may have to reset it
to the factory default settings and then perform the installation again.
2. The ARP/Ping service is automatically disabled two minutes after the unit is started, or as
soon as an IP address is set.
3. Pinging the unit is still possible when this service is disabled.
4. Please refer to “System > Network > Basic” for more details about the Network setup.
20
/